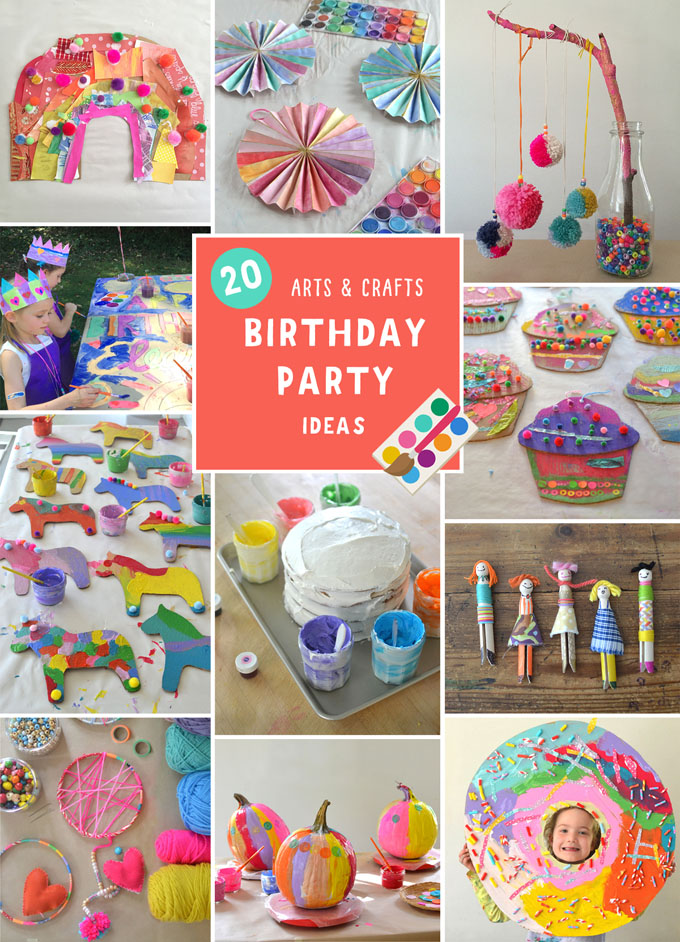
Have you been wanting to plan an arts and crafts birthday party for your child, but don’t really know how to organize it and what crafts to choose? Well, let me help you! I have done lots of parties and I thought it was time I share my 20 best ideas with you. Plus my tips and tricks on how to keep kids focused and happy.
[ I am a participant in the Amazon Services LLC Associates Program, an affiliate advertising program designed to provide a means for us to earn small fees at no cost to you by linking to Amazon.com and affiliated sites. ]
I’ll group the arts and crafts into categories. But just know that there is lots of crossover, and you can really choose anything and adapt it to your child’s age.
First I will share all of the art projects, then I will share my tips and tricks and talk about how to set yourself up for success!
Arts and Crafts for ages 4-8
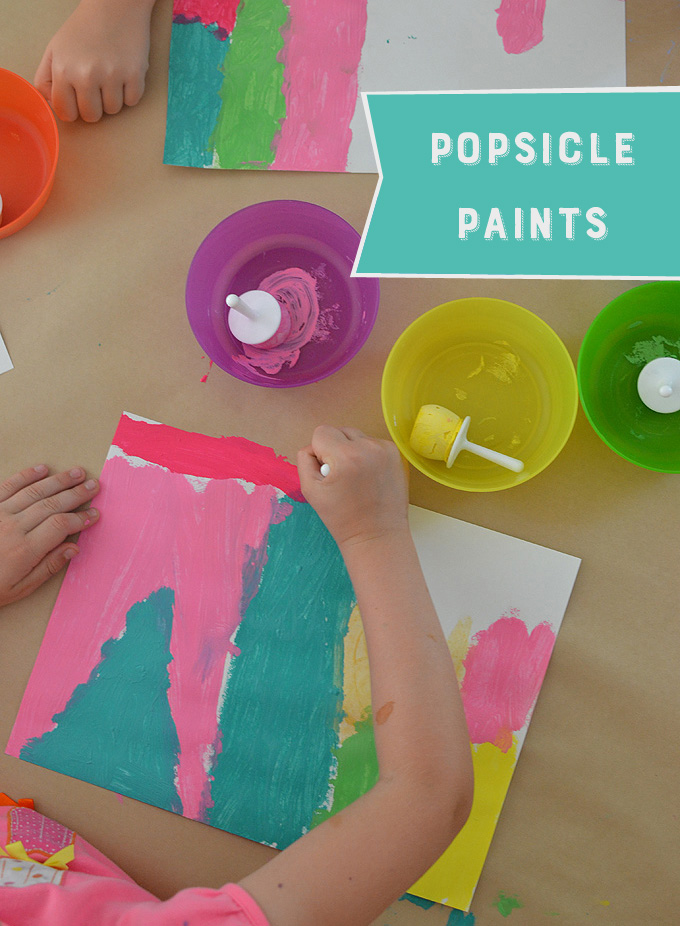
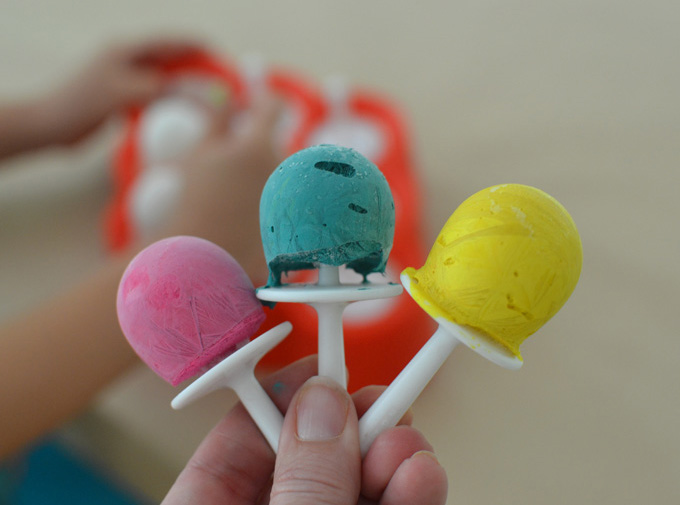
1. Popsicle Paints
I used a silicone popsicle mold, and I like making smaller popsicles because there is less chance of them breaking as they melt. Buy several molds so you can bring out new ones as the first batch is used up. I use sulphite paper, which is the perfect weight – not too thin, not too heavy. Paintings should dry within about 30 minutes. Kids will LOVE this fun way to paint!
Here’s what you’ll need:
~ Tempera paint (you can mix colors, but don’t add water)
~ Small bowls or plates for each color
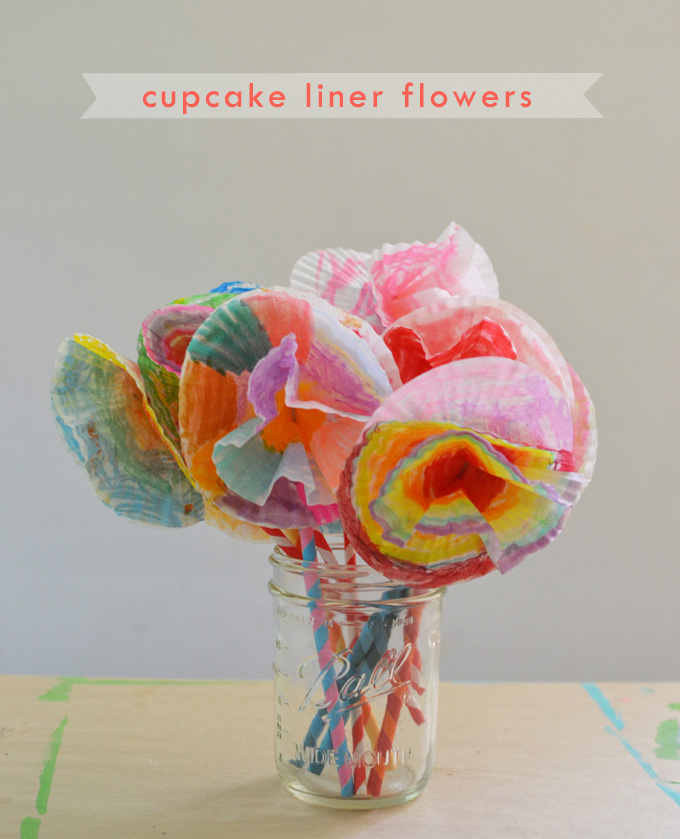
2. Cupcake Liner Flowers
This art activity is one that the kids can keep coming back to, it’s perfect for little ones who are feeling wiggly and can’t sit for too long. I would suggest getting a few different sets of cool and unusual markers to keep the kids engaged. Read more here for supply list and instructions.
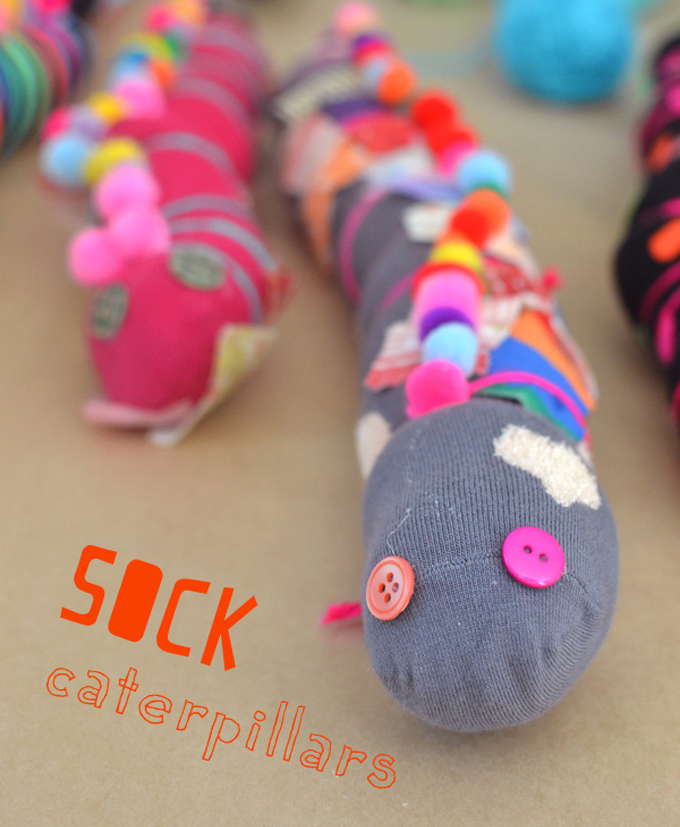
3. Sock Caterpillars
I did this art project once at a library event with 100 kids coming through. It was epic! Little ones will need some adult help, but they love “feeding” the caterpillar and watching it grow! A wonderful take-home handmade toy. I got the idea from the ever-creative Purple Twig. Read more here for supply list and instructions.
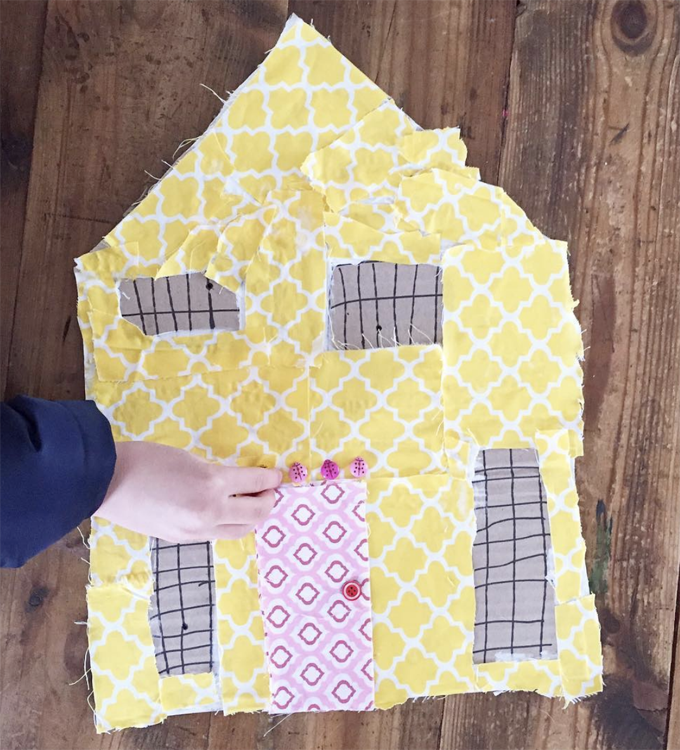
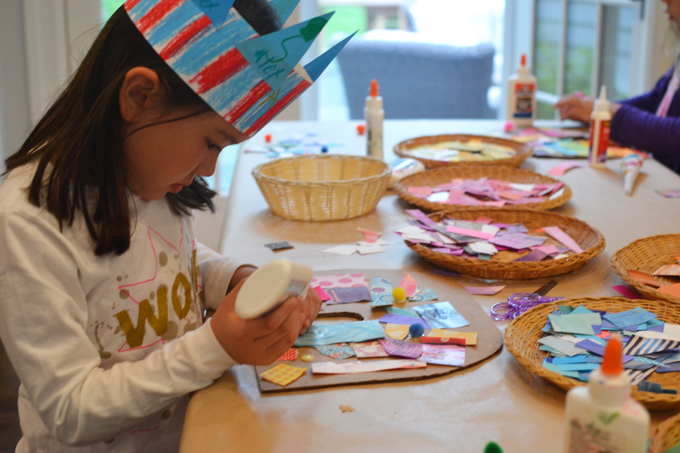
4. Patchwork Houses
I’ve done these with fabric scraps, paper collage scraps, stickers, washi tape, and all sorts of different paints and markers. That’s what I love about flat cardboard shapes, you really can put out anything to decorate! Read more here for supply list and instructions.
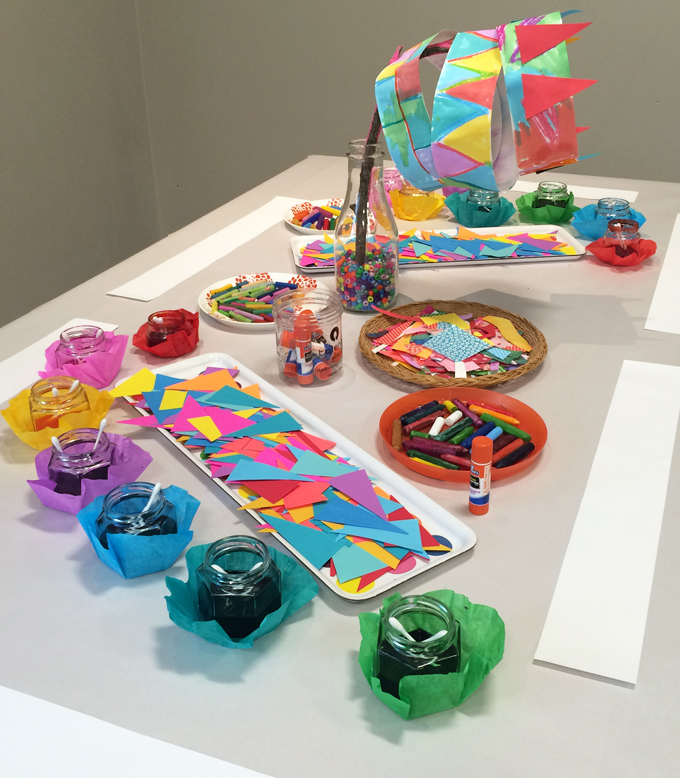


5. Paper Crowns
Crowns are always a huge hit because they are wearable and instantly festive. I’ve done them many different ways. You really need to start with paper that is about 20 inches long (this would accommodate all sorts of child head sizes). This is why I often use brown paper grocery bags like in this post, because they can be cut into long crowns. But if you want white crowns, then here’s what you will need:
~ Long paper cut into 4″ strips
~ Colored paper cut into triangles
~ Q-tips or paint brushes
~ Other collage material
~ A stapler to make the crown round (using the child’s head to measure)
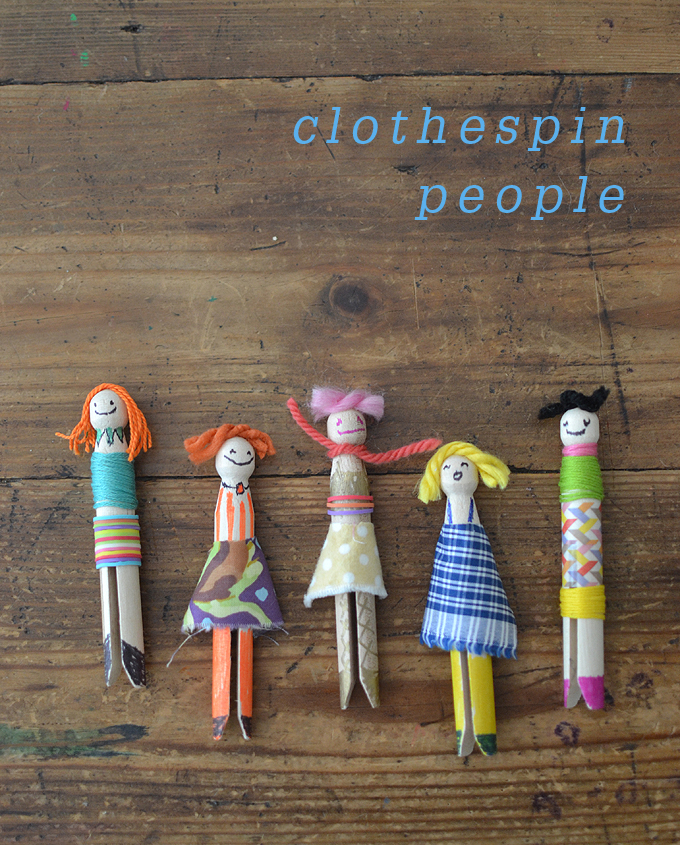
6. Clothespin People
I often set out a clothespin people station during my art camp weeks in the summer. When left out all day, the kids keep returning and they become super creative. I once did these at a huge, 2-day event in Brooklyn called ShopUp. Children from ages 3 up to tweens were making clothespin people all day. They LOVED it!! Click here for supply list, and here to see the kids in action at ShopUp.
Arts and Crafts for ages 6-12
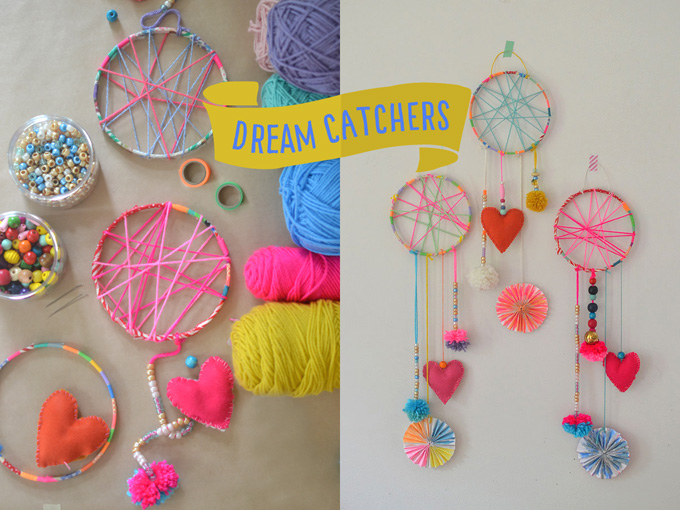
7. Dreamcatchers
These will take about an hour and a half at a birthday party. And depending on how many kids, you will need some parent helpers. I have done these with 5-yr olds and I cut out some paper feathers for them to paint instead of sewing a puffy heart. And you can do one pom-pom instead of two if you run out of time. Read more here for supplies and instructions.
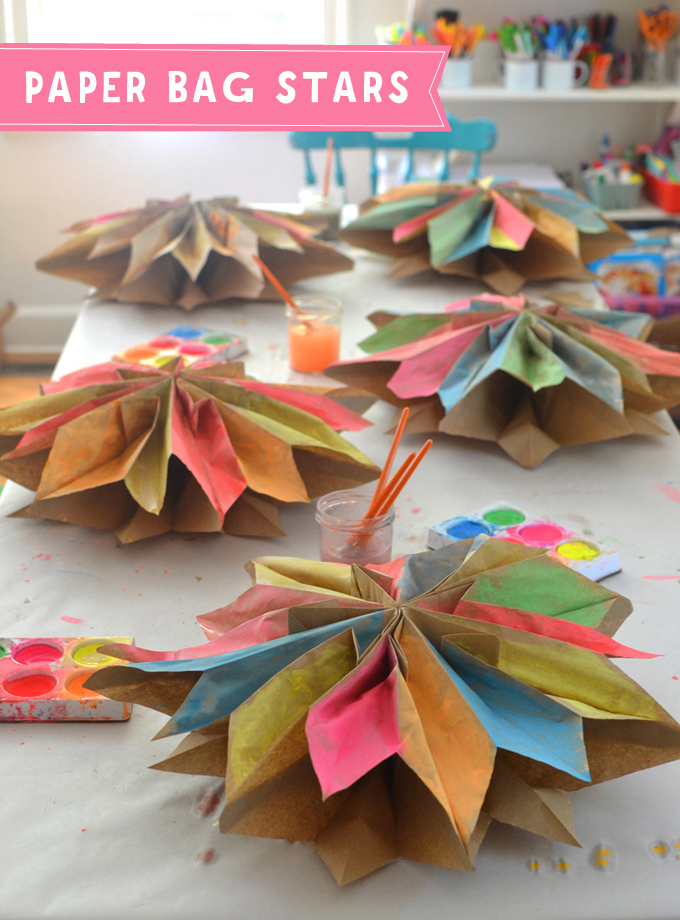
8. Paper Bag Stars
Kids just love making these stars! Over the years, we’ve embellished them several different ways. We have painted them, we have used chalk markers, and sometimes we’ve even used a hole punch do add a luminary quality. Read this tutorial on how to turn ordinary lunch bags into these beautiful paper stars.
Here’s what you’ll need:
~ Brown lunch bags or white lunch bags
~ Scissors
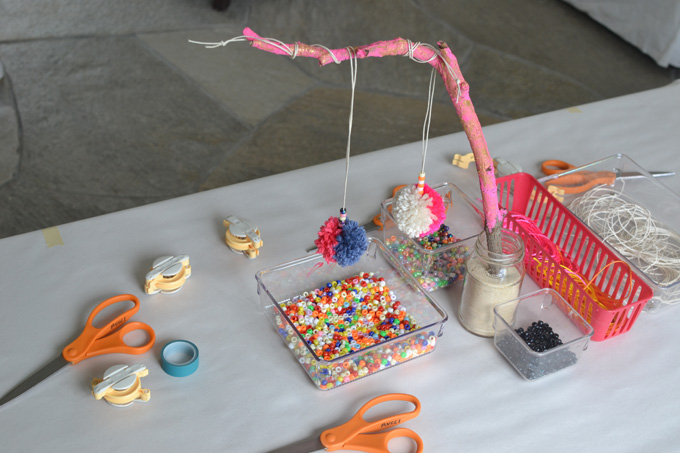
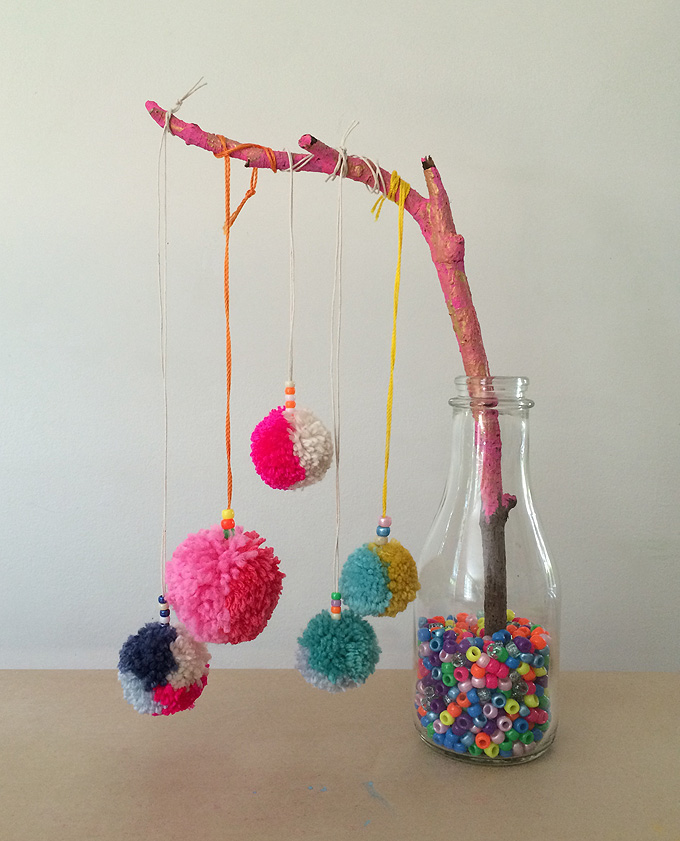
9. Pom-pom Necklaces
This is another favorite smash hit at birthday parties. I find that at about age 5 or 6, the kids really have the hand-eye coordination to use the pom-pom makers. I don’t have a good tutorial, but they are fairly straightforward, so I’ll tell you what I do.
Pre-cut the yarn or string that you will use as the necklace. After making the pom-pom (follow instructions on the pom-pom maker), use one of the pre-cut lengths to tie around the pom-pom. I cut long pieces, like about 28″ because you can always cut it down. Let the kids trim their pom-pom while holding the long string so as not to cut it. I then tape the ends of the strings together to make it like a shoelace. This makes it easier to bead. The kids can then add beads – or not – and then I tie it around their necks.
Here’s what you’ll need:
~ Yarn (I get mine from Michaels mostly)
~ Pre-cut yarn or string, about 28″ pieces
~ Tape, to tape the ends together like a shoelace for beading
~ Beads, pony beads are great as well as these wooden beads
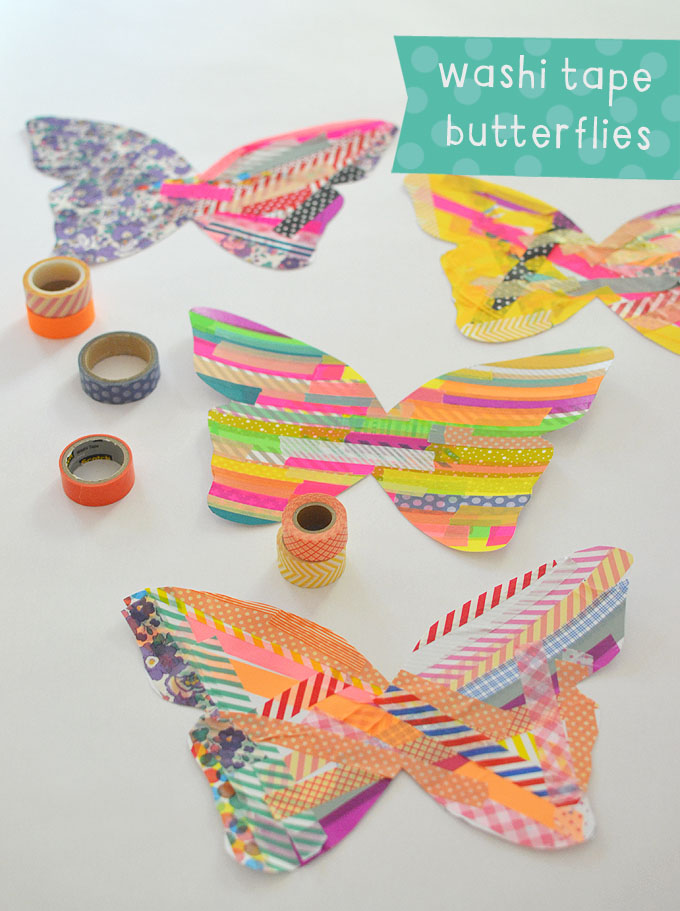
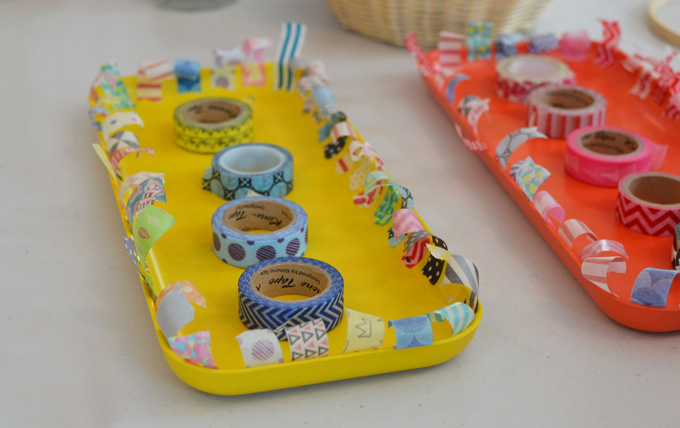
10. Washi Tape Butterflies
These are super easy to prep. For littler kids, I sometimes pre-cut the tape pieces and stick them around a plate. They would have to be smaller pieces for this method. But I’ve had determined 4-year olds peel and cut the tape all by themselves. Older kids really spend time making patterns. Remind all kids to continue the tape outside the lines, so when they cut out their butterfly the pattern will go right to the edges. Read here for supply list, template, and instructions.
Arts and Crafts for All Ages
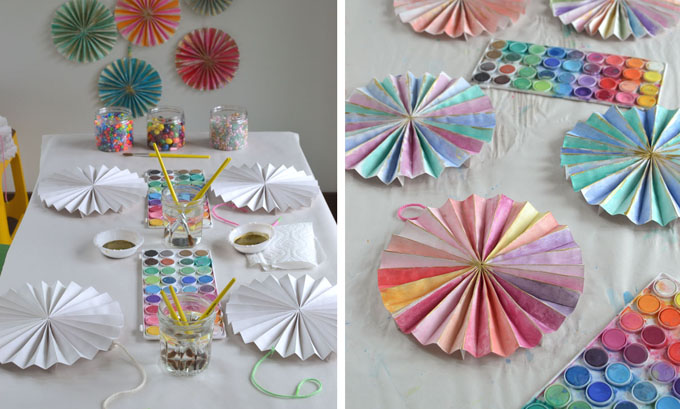
11. Paper Pinwheels
I make these from sulphite paper. I usually make one per child, and then a couple extra. They are labor intensive to make, but I do it at night when I’m watching a show with my family. These are always such a huge hit and turn out so gorgeous! Read here for supply list and instructions.
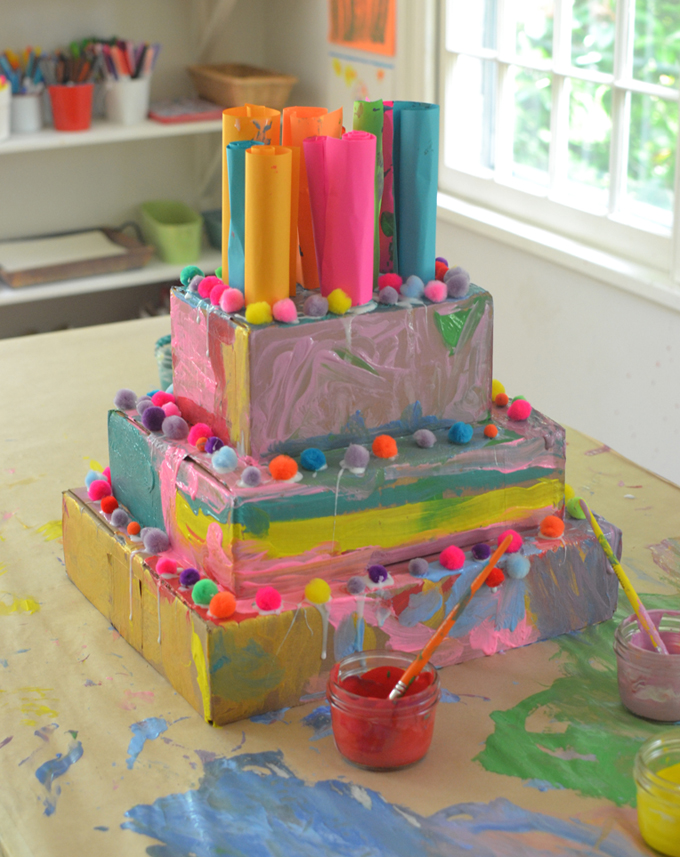
12. Cardboard Box Cake
This one is from my book, Art Workshop for Children. I’ve been tagged on Instagram more than 100 times by people who have used this idea for their child’s birthday party. Here are a few…
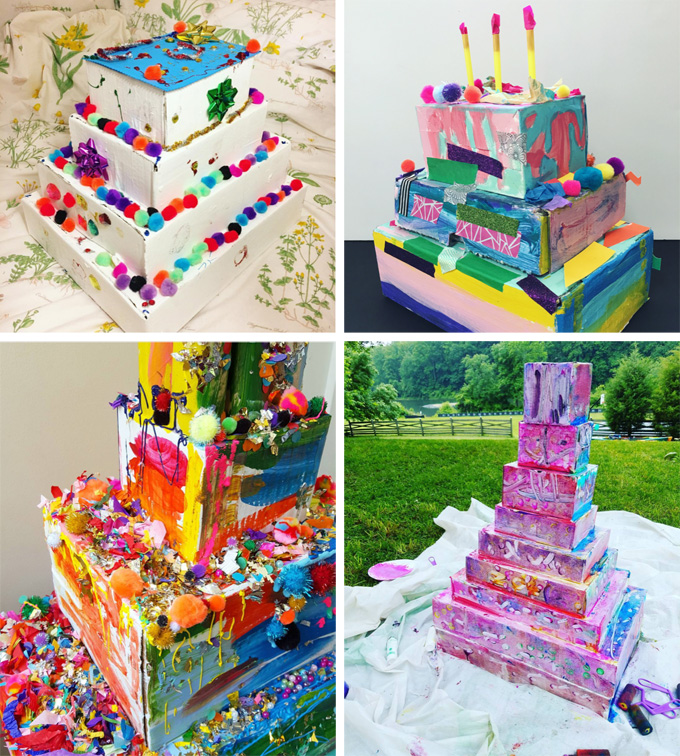
From top left, going clockwise: @creatingcreatives, @theartgardenblog, @scarletterosefairy, @zionchik
Here’s what you’ll need for Cardboard Cakes:
~ Three or more boxes in graduated sizing
~ Glue
~ Tempera paint
~ Pom-poms
~ Any other collage material you might want to add
~ Colored paper to roll into candles
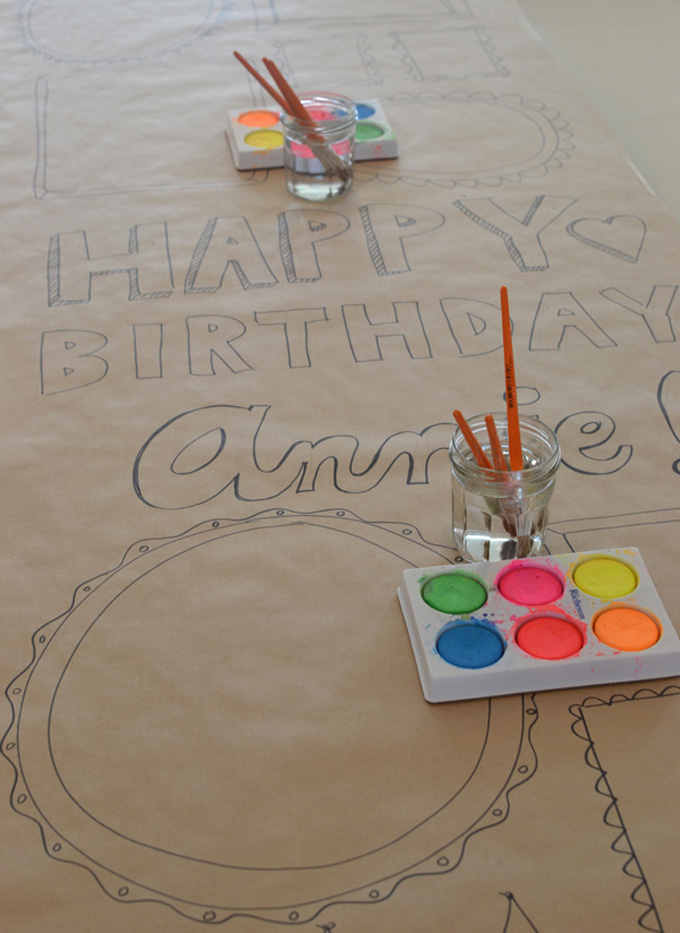
13. Birthday Child Name Banner
I always do a birthday banner station at every party (read my about stations below). And I always decorate the paper with frames (I got this idea from The Artful Parent years ago). Read more here about supplies and process.

14. Cardboard Animals
The hardest part about this project is cutting the animals. But after that, cardboard animals are always a HUGE hit! I would suggest cutting extras, and make them even bigger than these if you can so that the kids have more surface to cover and take more time. You can also add lots more collage material to keep it going. Read more here about supplies, instructions, and a horse template. You can also used templates from this post.
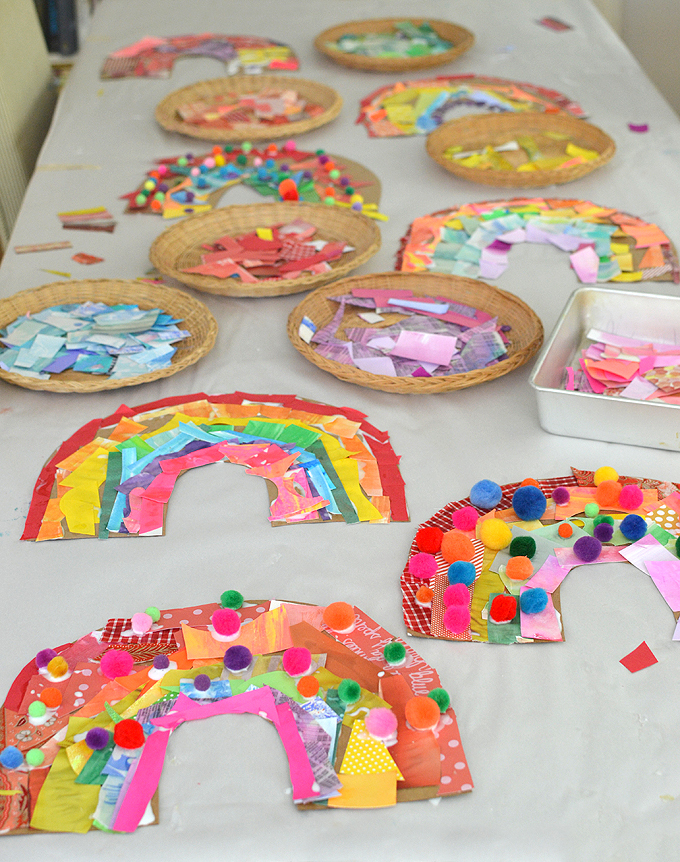
15. Rainbow Collage
Another favorite and very popular birthday party craft. This one takes a bit of time collecting and cutting up different rainbow colored collage materials. But… once that is done, this is one of my easiest activities to prep. You can also add in tempera paint in rainbow colors if you have less collage materials. Maybe paint first, then collage. Read here about materials and instructions.
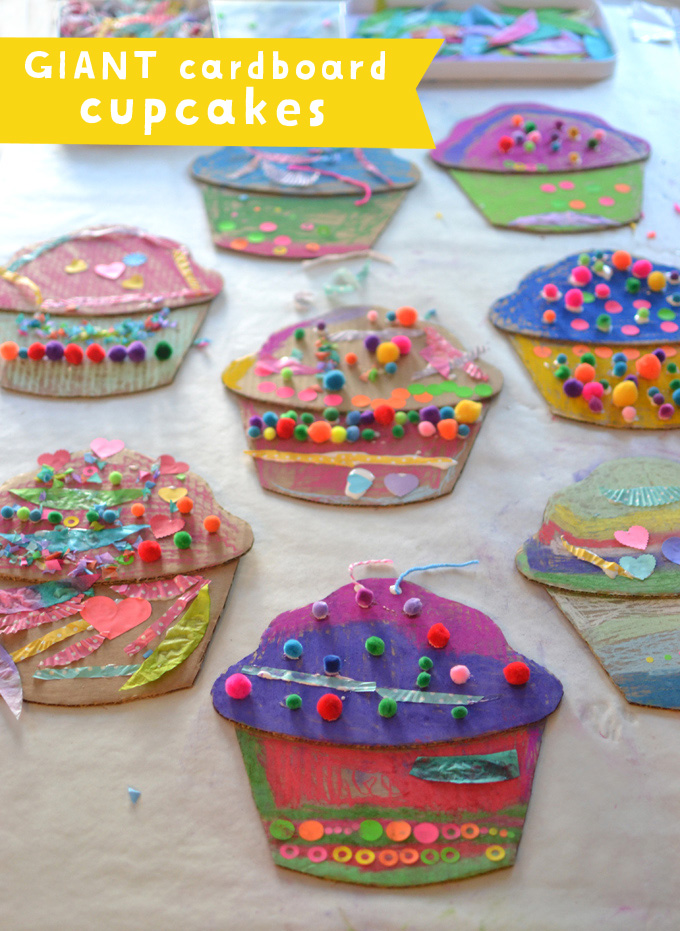
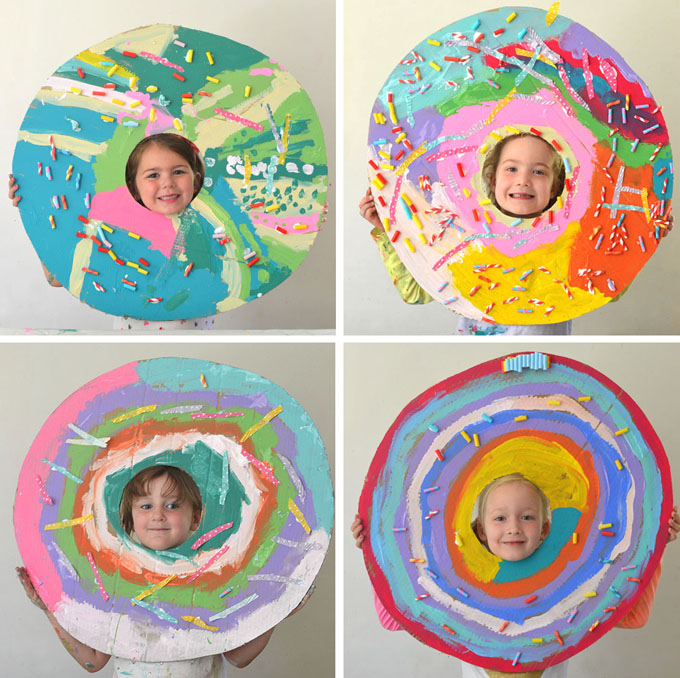
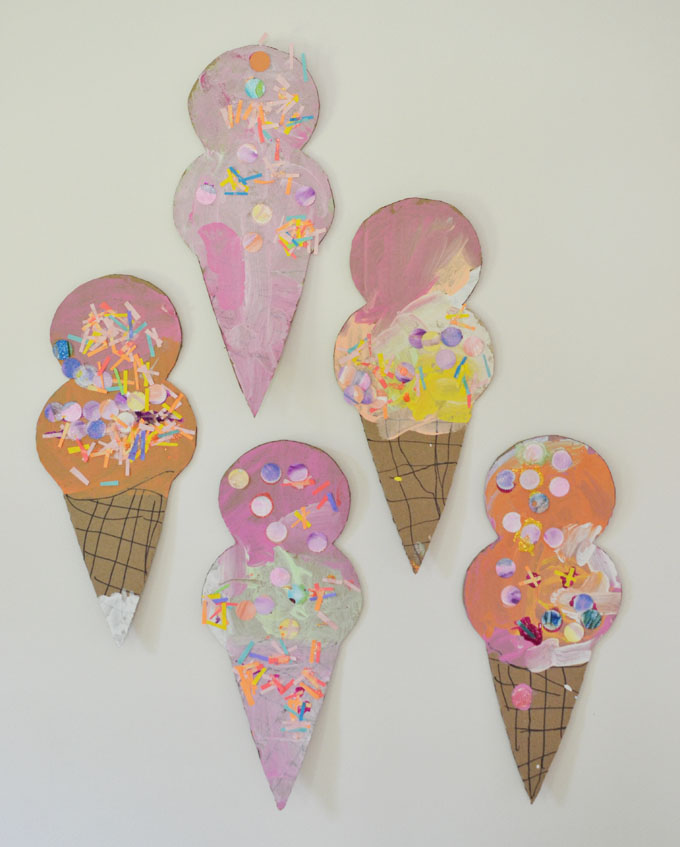
16. Cardboard Sweets
Sweets are ALWAYS popular, no matter what time of year. We have done cupcakes, donuts, and ice cream cones. You can use any collage materials mixed with paint or oil pastels (I don’t usually mix tempera with oil pastels, pick just one). Also, the bigger the better! But do keep your space in mind when cutting. If you only have a small table, maybe stay smaller. But if you have all of outside and lots of table and floor space, cut bigger!
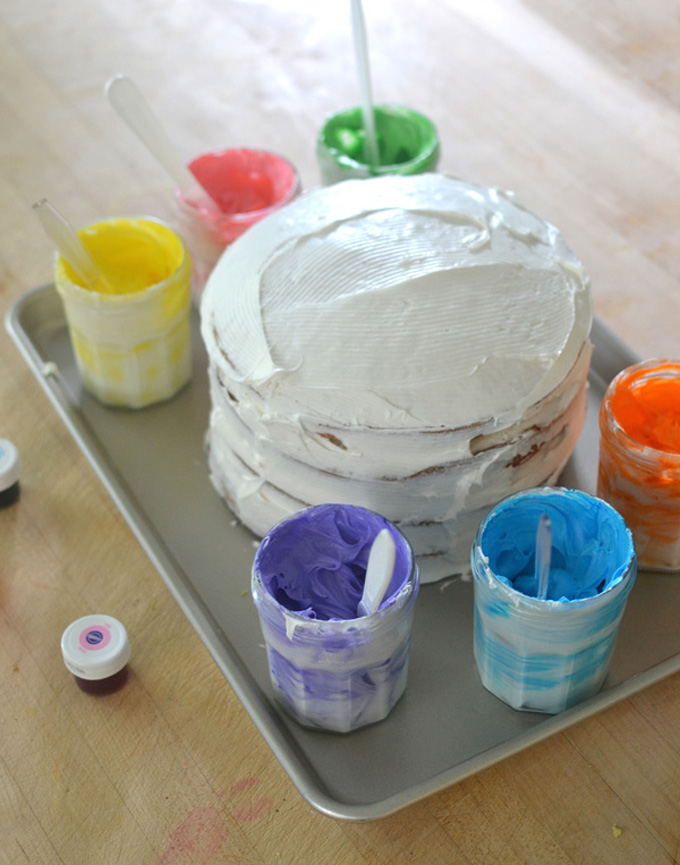
17. Painted Cake
This is just a fun idea for cake time, and works really well with a small group. You can also make individual cupcakes for a bigger group. Read more here.
Holiday Arts and Crafts
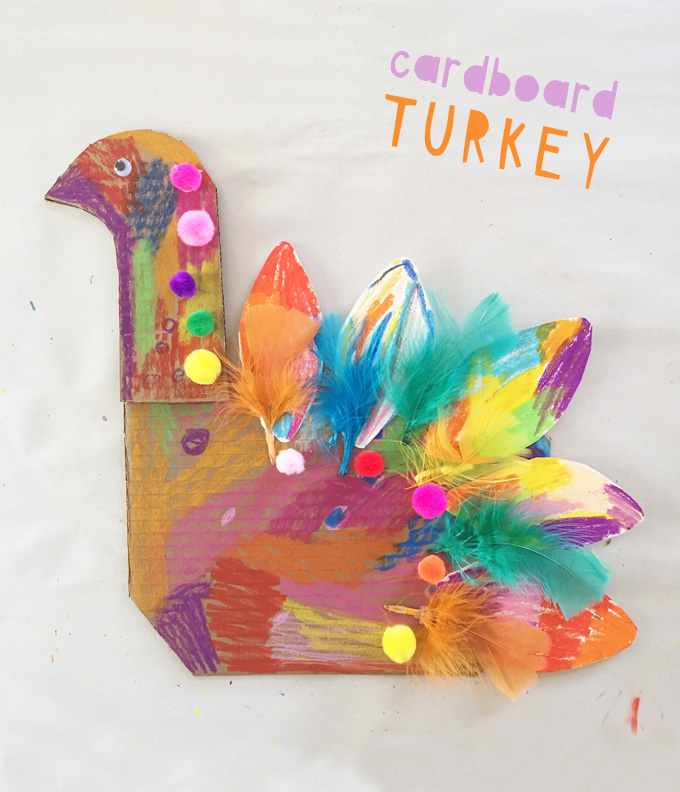
18. Cardboard Turkey
This idea came from a student. Her birthday was in November and she really wanted a Thanksgiving themed birthday party, which I thought was awesome. I searched the internet and found an art teacher who had made cardboard turkeys. I showed my art student, and she jumped for joy! This was a multi-age party and everyone was so into making these birds. Read here about supply list and instructions.

19. Painted Pumpkins
I have a trick to getting really bright colors when painting pumpkins. Read all about it here! For this project, make sure to have some flat cardboard pieces for parents to place down in their car when going home. The pumpkins may not be fully dry.
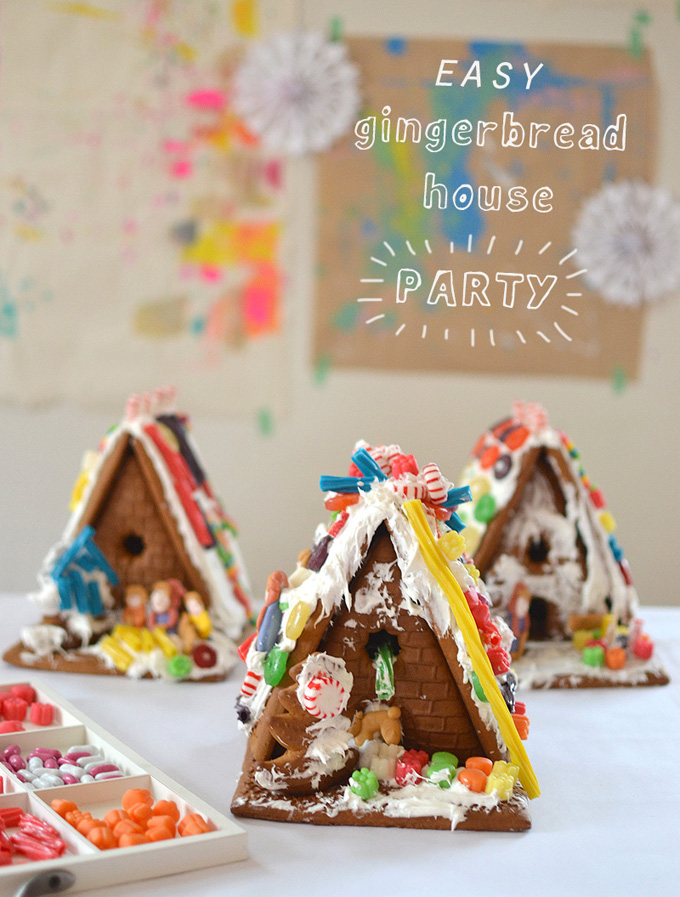
20. Gingerbread Houses
My daughter’s birthday is in December so I’ve done my fair share of gingerbread house parties. I have it down to a science, and am sharing two really good tricks to making this process easy. Read more here.
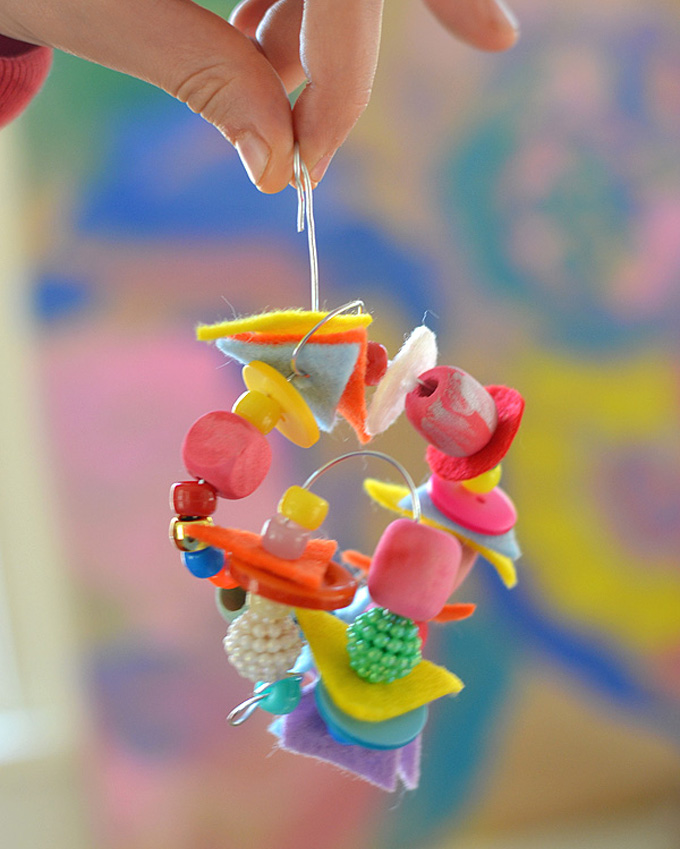
21. Wire & Beaded Ornaments
This is a wonderful, mess-free idea for the holidays! These ornaments can never ever go wrong, so they are perfect for all ages. The key is in the prep (as it always is) and getting a good mixture of textures for the beading. We added some felt pieces which made them so whimsical. Read more here and get the supplies and instructions.
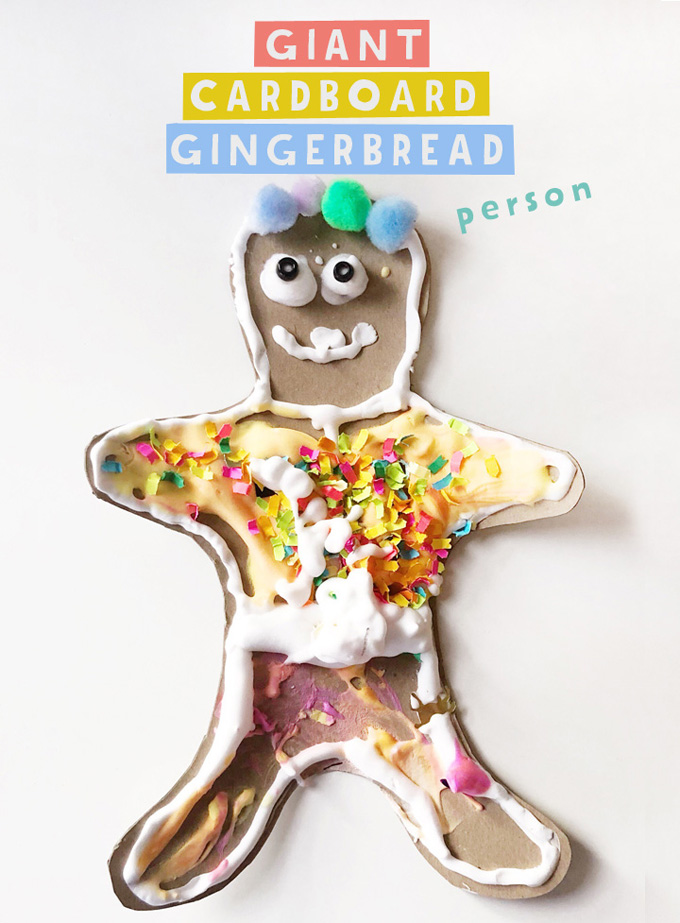
22. Cardboard Gingerbread Person
This idea comes from @MAKEartstudios who was kind enough to share it on my blog! How cute are these guys? She also has a really cool homemade puffy paint recipe which you’re going to want to try. The kids will go nuts for this! Read more here.

Tips & Tricks for a Successful Birthday Party
Arts and Crafts Party Planning
The key to any great party is in the prep. This is especially true for kid parties, and even more true for kid ART parties. My goal is to hold their attention for an hour. That is my guarantee for parents. With little ones, ages 3 and 4, it’s more like 45 minutes. The way I achieve this is different for different ages. Let me break it down.
Planning for Littles (ages 4-6):
1. I always have three stations for the younger ages. One is always a birthday banner because it’s a great place to send them to if they are done with the other two tables. The banner is never done, you can always add to it 🙂
2. Choose very open-ended arts and crafts for this age, where there is no right or wrong way to do something. You don’t want to have to teach them something new, they should already have all the skills they need so that there is a low frustration level and they essentially just playing. It’s a birthday party, after all, and they really just want to play.
3. Let them come and go as they please. Little ones like to circle back to things, so let them. If you want them to stay a little longer, you can say “add two more colors” or “add five more collage pieces”, something to entice them to continue. But sometimes a child is just done.
4. I don’t have chairs at the table for this age, unless they are really petite or a toddler sibling wants to join and then then can kneel on a stool. But younger kids really want to move around, and standing allows more room at the table and gives the hour of arts and crafts more energy. Children can move from table to table with ease.
5. Make sure that whatever you cut out from cardboard (cupcakes, animals, etc.) is the right size for your space. I once cut out donuts that were really big, but the space I went to was small and it was raining outside so the kids had to work in pairs. It was not ideal.

Planning for Older Kids (ages 6-12)
1. With older children, you have the opportunity to teach something new, like dream catchers or pom-pom necklaces or paper bag stars. They like something more instructional. I will still do three stations with the older kids, but if one is instructional then the other two should be open-ended. The only exception is dreamcatchers. Those take about an hour and a half, and usually you don’t need a third station because there isn’t time. So I would just do the dreamcatchers and a birthday banner.
2. This age group loves a little autonomy and are thrilled to make something for their rooms, or something with their names on it. You don’t have to choose from the projects above, I also have lots of ideas on my “Crafternoon” Pinterest board.
Arts and Crafts Party Prep
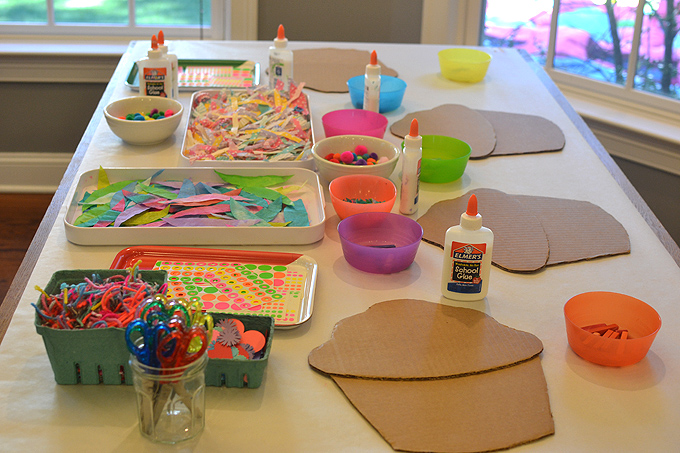
1. The key to any well-run party is in the prep. First you plan (see above), then you prep. Choose your three stations, then make lists. Make your list of supplies, then see what you have in the house before you buy. Otherwise, order from Amazon for convenience, or go to your local craft store.
2. Once you have all your supplies, it’s time to prep all the materials. Whether its cutting cardboard, cutting collage material, making pinwheels, or mixing paint colors, it’s time to get it all ready. When you have finished one prep item, cross it off the list.
3. Now you have all of your supplies, and all of materials. It’s time to make a “day of” checklist. Mine looks like this (just one example of a party):
~ Brown paper for tables
~ Draw banner, bring masking tape and sharpie, tempera cakes, brushes, glasses for water
~ Paper pinwheels (plus 3 extra), watercolors, gold tempera, brushes, glasses for water, hole punch, yarn pieces (pre-cut), beads, bowls for beads and yarn
~ Pop-pom makers, basket of yarn, longer yarn pieces pre-cut, scissors, beads, bowls or trays for beads and yarn pieces, necklace display
4. I am a traveling art lady, so I fit everything into one big plastic box. But if you are doing this at home, I would suggest having a staging area in another room. Maybe you can even put up a table in there, or use a table that’s already in there. You can lay out everything you need for each station, and have it ready to go on party day.
5. I do mentally visualize the day. This helps me with any unexpected hiccups. I literally close my eyes and go through each station. The birthday banner station is easy, that is just about getting it drawn out before the guests arrive and laying out the paints and water. You may have to change the water halfway through. I then think about siblings, their age and what they might need that is different from the other kids, or a child who doesn’t yet have a skill, or a child who is not interested. I also think ahead to pick-up, and how parents are going to transport wet, painted items. If I have a tempera paint table, I always bring extra pieces of cardboard that parents can put down in the car. Or newspaper.
6. Lastly, have something else planned for after the arts and crafts. This can be very basic, like playing outside or decorating cupcakes or playing a game. For the children who just definitely don’t want to do arts and crafts, you have a back-up idea for them. Birthday parties are different than art classes because not everyone there likes to do art.
And that’s basically the way I do parties! I hope this is helpful. Feel free to ask me any questions at all.
Have fun!!
xo, Bar
– – – – – – – – – – – – – – – – – – – –
Did you like this post? Here are more ideas you might like:


Birthday is a very special day of our life. arts and crafts birthday party is very creative idea for kids. you have given very good tips. children will be able to enjoy a lot and learn something new. Thank you so much…
I love the idea of providing pumpkins to paint for all of the party-goers. My youngest daughter really loves painting and wants that to be the main activity for her next birthday party. I’ll have to see what options are available nearby or try to plan it on my own!
Thank you for explaining that you can make an art party as simple or elaborate as you wish. To me, this is great to know because you could then tailor the party to the kids and what they want. I’ll have to look more into kids art parties.
We love birthdays, one round around the sun celebrated with crafts is an awesome idea! Love the post.
This is the most amazing, helpful article. My daughter LOVES arts and crafts, but I wanted to throw her an art birthday party, but have been having a very difficult time putting together want I want to do for her in my head. I love that you addressed all of my concerns with different ages and if they don’t want to do art. Thank you so much for putting this together!!