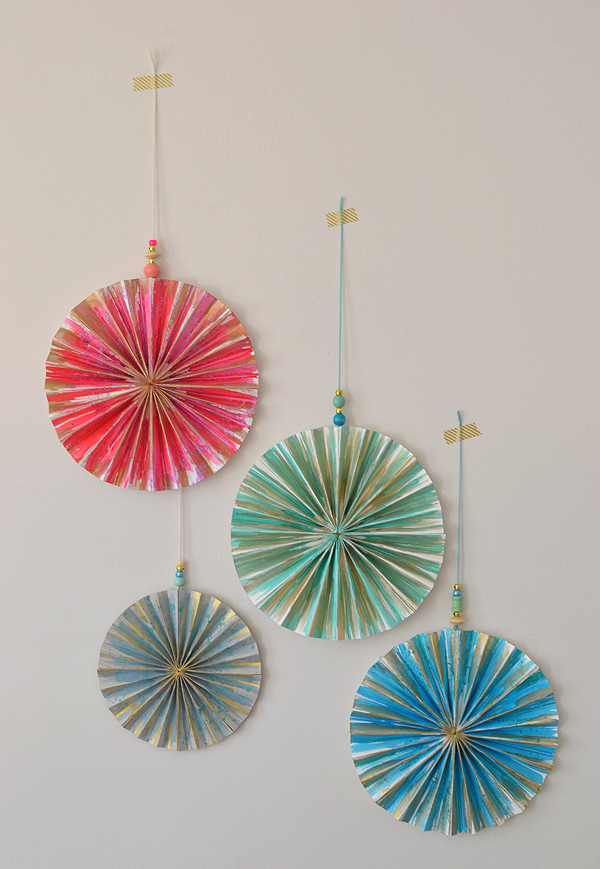
I am in love with this new technique.
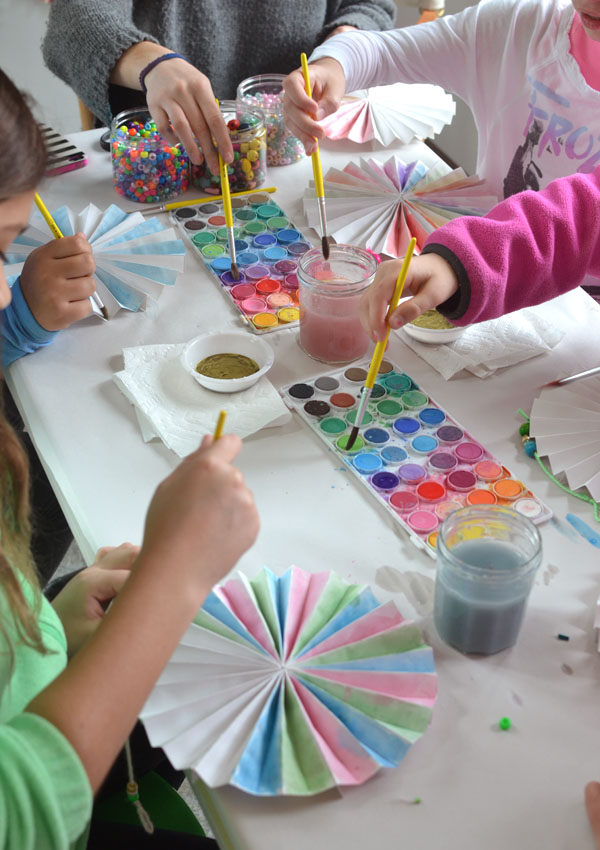
As I was playing around with making these beautiful pinwheels, I was trying to think of a way to make the craft a little bit more enticing for my tween and teen. And then it hit me: make them out of watercolor paper, and let my girls paint them!
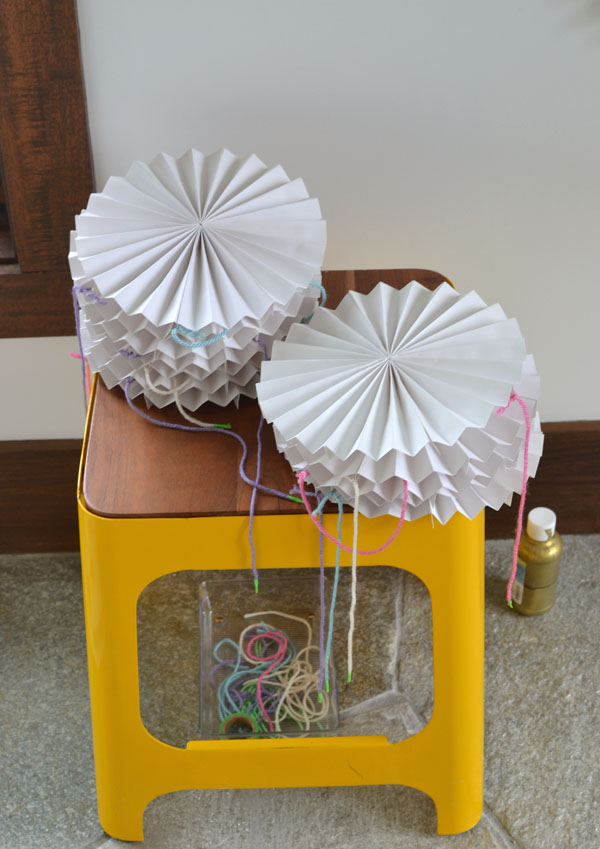
We added a few beads and, voila.
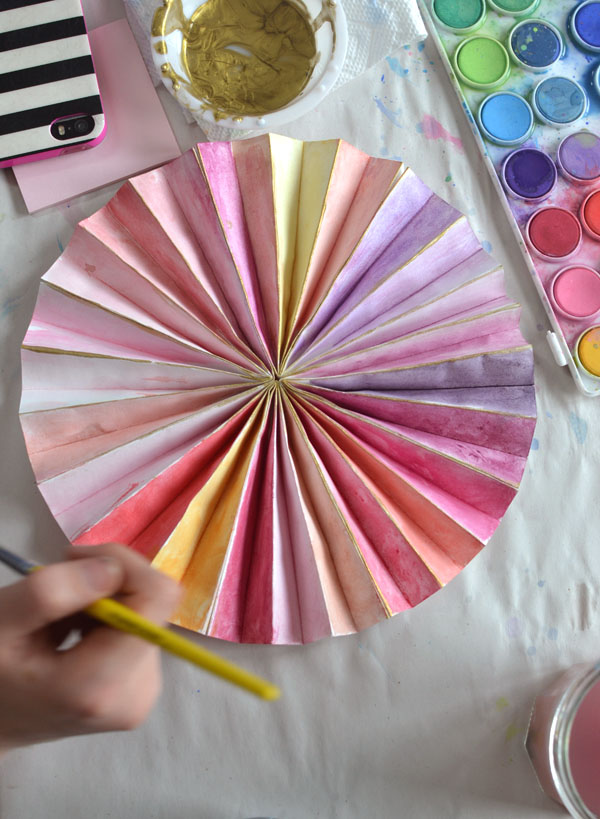
I will admit that folding these takes some practice and time, and my kids did not enjoy this part as much as I did. But the painting part was a huge success, and kind of addicting. When do kids ever get to paint on folded paper? It became somewhat of a process-art experience for them, which was cool because crafts don’t usually lend themselves well to process art.
This post contains affiliate links. Thank you for your support!
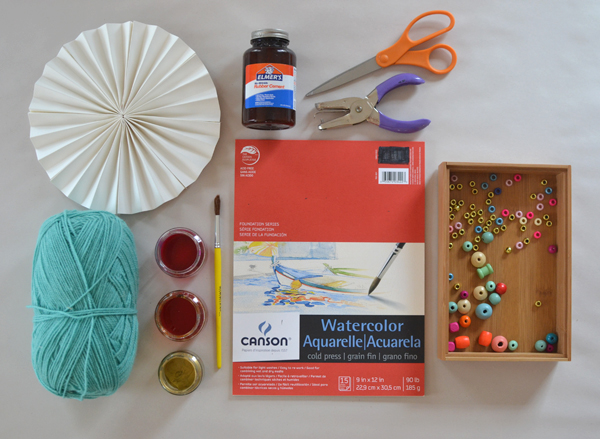
Supply list for making painted paper pinwheels:
~ Watercolor paper
~ Rubber cement
~ Scissors and a hole punch
~ Liquid watercolors (I used turquoise
~ Beads (we used wooden
~ Yarn
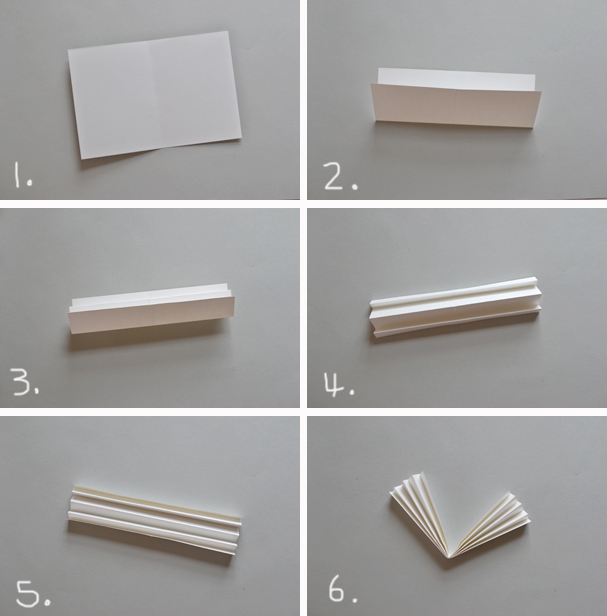
Step-by-step instructions for making the paper pinwheels:
1. Cut paper so that you have four 9″ X 6″ pieces (paper can be any size, but in sets of four and it needs to be a rectangle). Fold in half, widthwise.
2. Fold in half again, lengthwise.
3. Fold the halves in half, folding up to the middle.
4 + 5. Fold in half again, and then again, creating evenly sized accordion folds.
6. Now use the very first fold as a guide to fold the accordion in half. This gets tricky when the paper is thick, you may have to adjust the folds slightly. They might look a little off, but that’s ok. It won’t matter in the end.
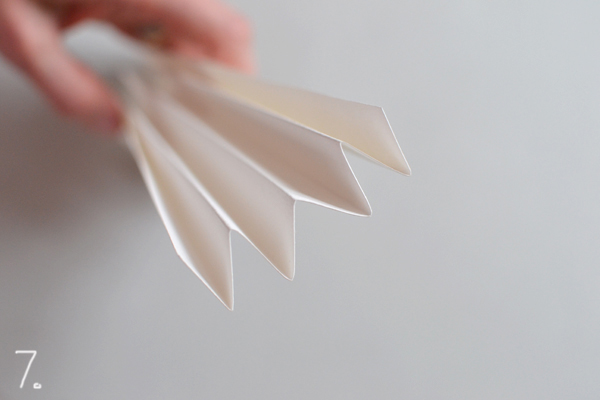
7. This is what your accordion folds should look like.
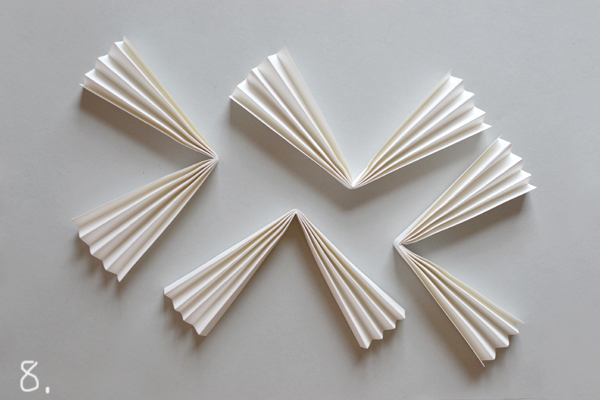
8. Do this four times so that you have identical parts.
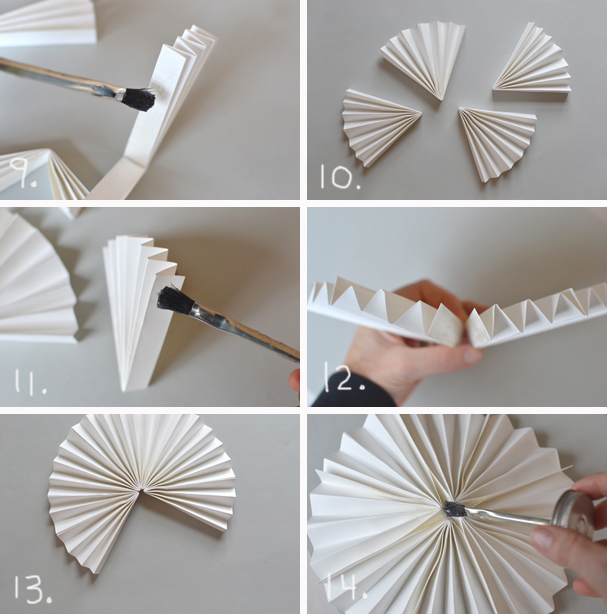
9. Spread rubber cement on both inner folds. Wait for glue to dry, then press together.
10. Do this four times so that you have four fans.
11. Now use the same rubber cement technique for the outer folds. Put glue on all side and wait for it to dry.
12 + 13. Press all sides of the fans together, one by one. Make sure that the ends match up so that they are both going in the same direction (making a “W”).
14. When all four fans have been glue together to form a pinwheel, turn it over and just put some extra glue in the middle so that it doesn’t pop out. You’ll know what I’m talking about if you make one.
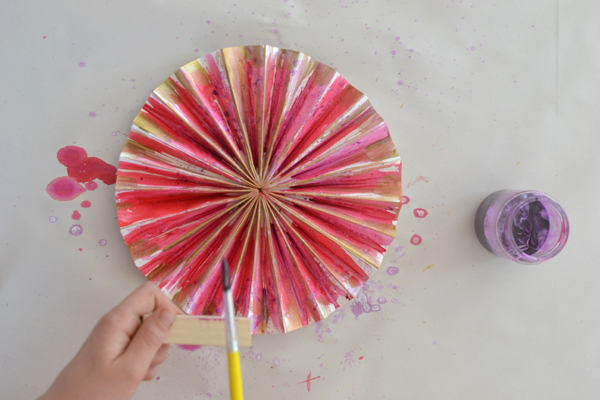
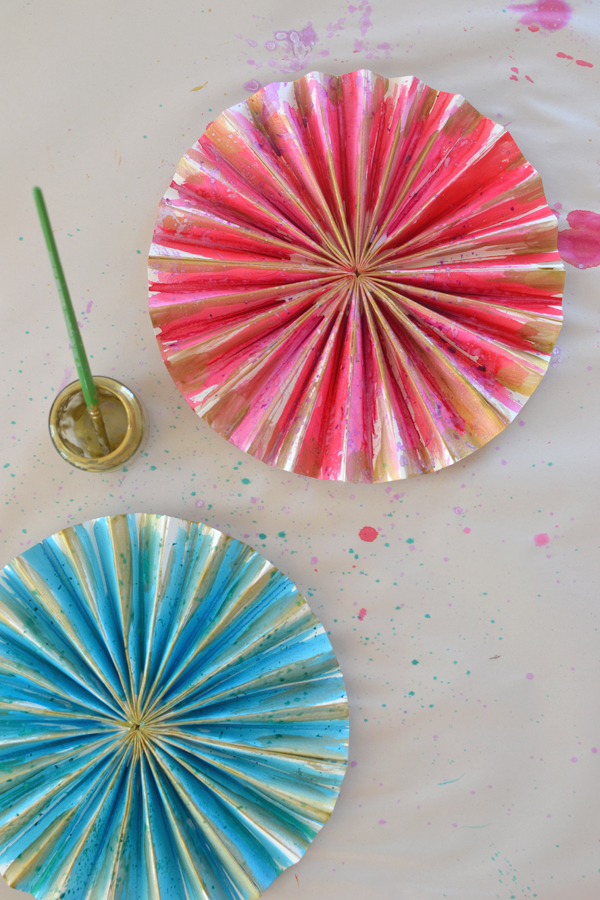
I missed taking photos of the whole painting process because I had flipped the switch on my camera to “record”. But you can watch this short video to see how my twelve-year old painted her pinwheel!
Pretty cool, right? Don’t you want to make, like, hundreds of these and cover a whole wall?
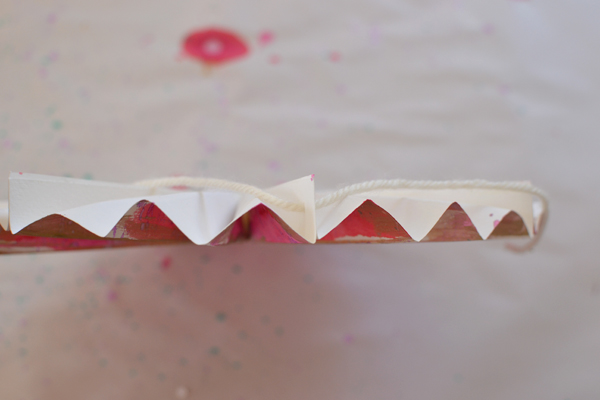
Oh, one more thing. I punched a hole in the back to add the string and beads!
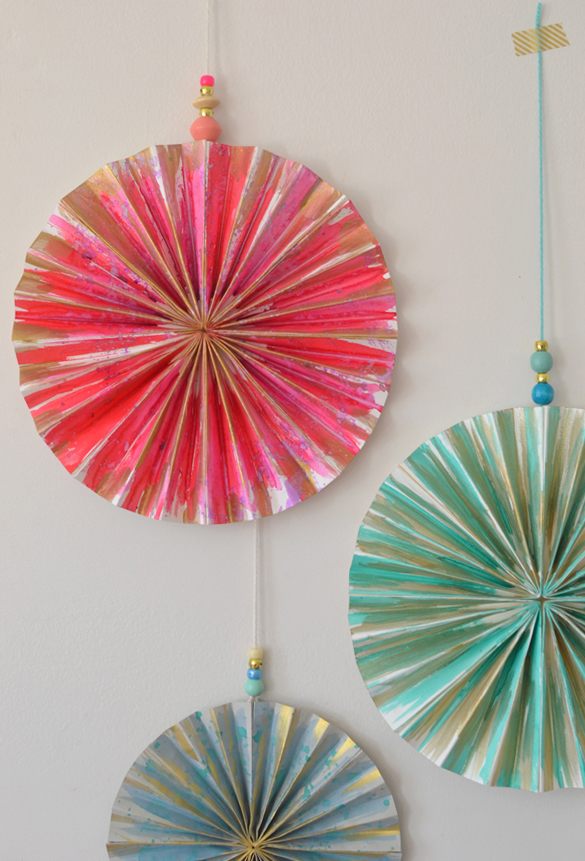
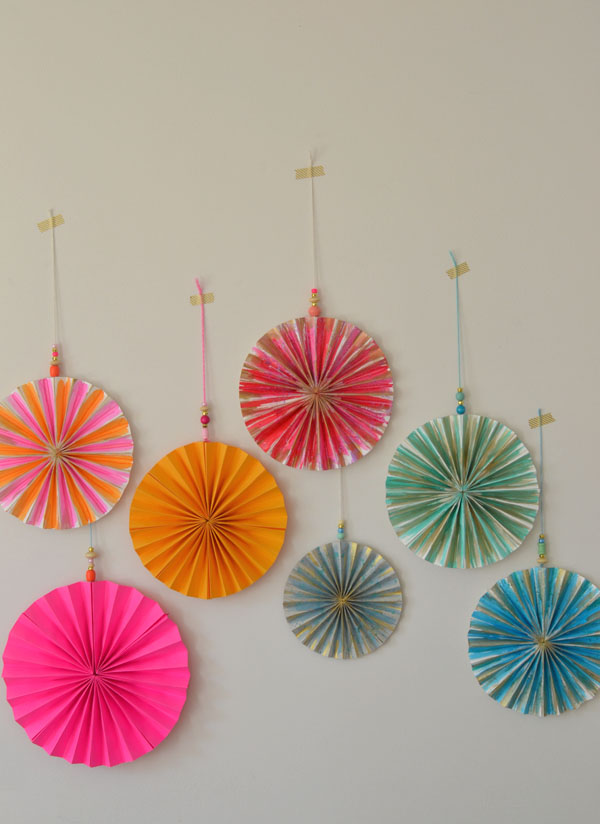
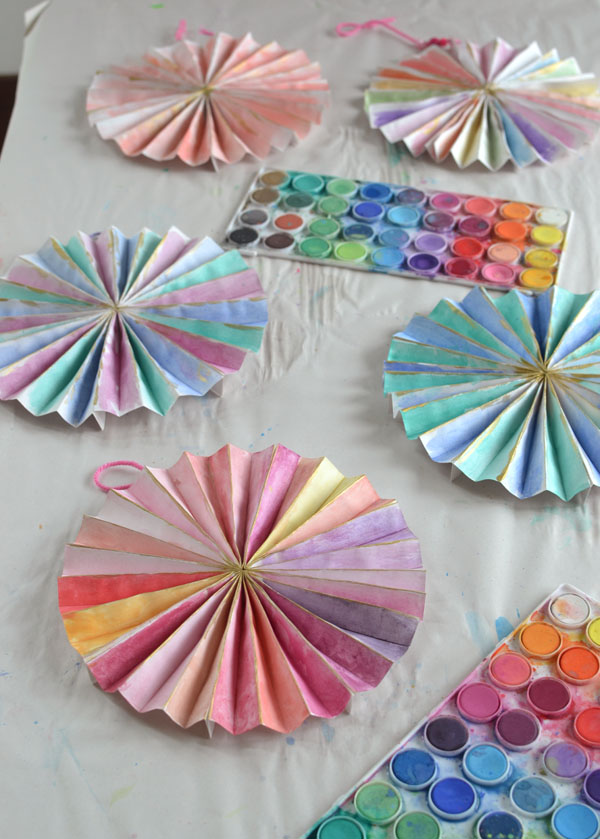
I added some solid color ones in there just to make the wall display perfect.
After the success of these painted pinwheels at home, I brought the show on the road and tried them out at an 8-ry old’s birthday party.
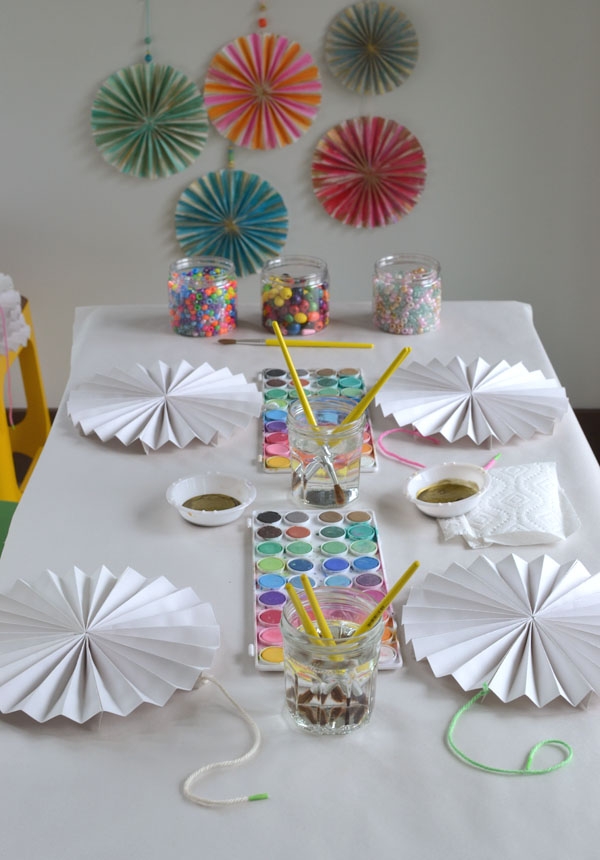
I made 20 paper pinwheels from sulphite paper
I would love to see YOUR paper pinwheels! Tag me on Instagram if you make any.
xo, Bar
– – – – – – – – – – – – – – – – – – –


These are gorgeous! I could see how they would be addictive to make. 🙂 I would want to make them in all different sizes–I have a certain empty wall in my home that just might get decorated with these. Thanks for the tutorial! Sharing with my creative friends. 🙂
These are beautiful…thank you for sharing!
These would be so fun for handmade party decor!
que monada! Queda ideal!
I’m interested in your projects because I hold free art lessons for the neighborhood kids during June. There aren’t very many, less than a dozen, and they must be at least six years old. Any suggestions you can provide and from other viewers would be appreciated.
how lucky for your neighborhood kids!!! you can find all of my ideas for kids under the tab “create”. i have plenty to keep them busy all summer!!
I love this project. And the real beauty when they are hanging IS in doing more than one! Just one question — how and where do you attach the strings?
yes, so true! you have to make more than one 🙂 to get the string in I punched a hole. i just added a photo of that step towards the end of the post. thanks for reminding me! hope this helps, barbara!! xo bar
My daughter LOVES Poka Dots……this will look Great on her wall!!!
Thanks for posting this nice project, which I will be using today in my art program for developmentally disabled adults. I prepared the pinwheels in advance, using a glue gun, which made the process much faster. They enjoy painting very much, especially projects that can be used to decorate their rooms or given as gifts.
thank you for leaving a comment, maria. i’m so glad you were able to use the pinwheels for your students. and what a great idea to use a glue gun! i’m sure they turned out beautiful. xo bar
Hi,
these watercolour wheels are just beautiful! Love them lot’s 😉 I’m often making paper wheels with my girls for decoration, using different paper but have never painted them, so we’ll have to make these for their party this Saturday. Thank you for your fab inspiration 🙂
Renata x
hi Renata, thank you for leaving a comment! I’m so happy my post inspired you to try painting your paper wheels. Let me know how it goes…and have fun!! xo Bar
What I’m wondering Bar, is if I can use any other glue because we’re moving, the rubber cement has been packed ;( It’s not one we use often for our art projects ….Thanks!
yes, you can use a glue stick! especially if you use a lighter-weight paper. good luck with your move, jeanine. let me know how the pinwheels go! xo Bar
Hi Barbara
I fell in love with these the moment I saw them.
I don’t know any of the types of paper you mentioned.
But I have 2 old invoices (normal A4 printing paper) whose backside is plain white. I cut them into half and made my 4 parts and stuck them together.
My nearly 5 year old going on 50 is having her afternoon nap and I will paint it before she wakes up. She will be delighted.
Thanks for the wonderful idea.
Warm Regards, Rachana
Hi Rachana, thank you for leaving a comment! I LOVE that you used old paper, you are a woman after my own heart. I always use just whatever I have that is lying around. maybe your 5yr old can paint with you! the children love to paint in between the creases. I a so happy that this post inspired you to maker pinwheels, yay! Send me a photo if you can! xo Bar
Sorry, it has taken me long to take a pic and reply.
I made one with the old invoices and used very diluted acrylic colours.
The other 2 made it with normal paper and just glittered up…
I don’t think I can send a pic using this portal 🙁
Rachana are you on Instagram? You can tag me @artbarblog. Or you can go to my Facebook page, Art Bar Blog, and post the photos to my wall. Let me know if you do!! xx Bar
Brilliant, must try these with my art students!
Lovely project.
I’ve got to try this. My daughter’s would love it! Thanks for all the inspiration!
Daughters*
♡
Can I use regular copier paper and hot glue? Or even colored construction paper?
yes you can!! good luck! xx Bar
Very colorful art works love💖💖❤️💗❤️ it
Very creative ideas
Love It❤️💓💖💝💞❣️💟✨
Barbara, thank you for this fantastic idea! I just made them with my daughters and their friends. They loved the pinwheels and had fun creating them. Your photos and step by step instructions were so helpful. Thanks for helping me provide a great experience for my girls.🙂
That’s great news! Thanks for letting me know! xx Bar
I got sulphite paper to make these for an activity at my daughter’s bday. I noticed that once I got the hang of the folding, a whole pinwheel took me about 20 min or so. We tried using a water color pallet like in the photo to test it out and the pinwheel began to rip and fall apart. I think perhaps I I use liquid water colors it might be easier to apply the color before it begins to rip. I’m also wondering if perhaps the sulphite paper from Michaels is just too thin.
Hi Rachael… hmmm, I’ve never had sulfite paper rip. I’m not sure why that would happen. I’ve made and painted hundreds! Maybe use the link in the post to buy the paper on Amazon. I’m so sorry! It does sound like the paper was not the right weight. ~ Bar
These are beautiful! I can’t find the video mentioned that shows the painting technique or any directions. Thanks for sharing.
Thank you! The video is embedded, about halfway down the post! ~ Bar
Hi Bar,
I love these and have been making them and having my kids paint them, but I’m unable to do it in 4 fans, it’s been taking 6 to make them connect, not sure what I’m doing wrong. I suspect I’m not following the folding directions correctly! And I’m going to try rubber cement bc with the glue gun some glu overflows and makes it difficult to paint.
Hi Swaicha, It’s ok that you use 6 fans, I think it depends on the length of each piece of paper. It can vary, but it’s all good! ~ Bar