• Skip to primary navigation
  • Skip to main content
  • Skip to primary sidebar
  • Skip to footer

ARTBAR

raising creative thinkers

  • MY BOOKS
    • Art Workshop for Children
    • Cardboard Creations
  • ART SUPPLIES
  • SHOP
    • Art Bar on Etsy
    • Art Class Poster
  • ABOUT
  • Nav Social Menu

    • Facebook
    • Instagram
    • Pinterest

Paper Lanterns // Made by Kids

November 6, 2014 by Barbara Rucci 6 Comments

369 shares
  • Facebook5

paper made with splattered liquid watercolor

Maybe it’s me, but I felt like I needed a little departure from Holiday and leaves and fall colors. These lanterns were made by my art campers, ages four to six. Aren’t they so pretty?

paper made with splattered liquid watercolor

This post contains affiliate links. Thank you for your support!

Materials for splatter paper:

Gray sulphite paper (12 x 18)

Liquid watercolor (I used two colors)

Paint brushes

Wooden block or stick

Technique:

It’s a tapping thing. Just dip the brush into the paint, and then tap it on the wood block. At first it will be big drips, then it will become little splatters. Try and have them not fill up the page too much or else the splatters all blend together. I just handed them more paper when I felt like their page looked good enough to stop. I know this sounds a bit controlling, but as long as we got one that was “pretty”, the other pages I didn’t care, and they went to town!

paper made with splattered liquid watercolor

paper made with splattered liquid watercolor

Extra materials to make lanterns:

Colored washi tape

Colored paper for handles and bottom

Scissors

Glue stick

paper made with splattered liquid watercolor

Step one: Put colored tape on the top and bottom of the paper (after it has dried).

paper made with splattered liquid watercolor

Step two: Fold the paper in half. Draw a straight line with a pencil across the top, just below the tape. Make it at least an inch from the top. Now mark off the inches across the folded edges. Have the kids start at the folded edge where the mark is and cut up to the taped edge, but no further than the straight pencil line. This is an excellent cutting exercise. Their little hands will be tired!

paper made with splattered liquid watercolor

Step three: Unfold the paper and roll it up, glueing the edges together with a glue stick. Watch as the cut paper unfolds into a lantern shape. Super cool! You can tape the glued edge, too.

Step four: Cut a handle from colored paper, and cut a circle for the bottom. This is optional, but we did it so that they could put an actual little light inside.

paper made with splattered liquid watercolor

I can’t believe how well the kids did! They really did almost all of it by themselves. I am one proud teacher.

xo, Bar


Filed Under: Open-ended Crafts for Kids, Art for Toddlers, Teen Crafts Tagged With: paper lanterns, splatter paint, tap painting

Previous Post: « Thanksgiving Day Craft Table
Next Post: Sensory Art Play with Easy Dough »

Reader Interactions

Comments

  1. katepickle

    November 12, 2014 at 6:23 pm

    Oooh my kids would LOVE this… especially the splattering part!!!

    Reply
    • Barbara Rucci

      November 14, 2014 at 4:05 pm

      thank you kate!! and yes, they sure do love splattering!! if there is potential to get paint on their hands, in their hair and maybe on the walls then they are 100% committed to art 😉 xo bar

      Reply
  2. Agyemang Opoku

    July 22, 2017 at 2:48 pm

    Very interesting. My students would love to experience this. Thanks

    Reply
  3. Frances Pizzino

    March 3, 2019 at 12:15 pm

    I’m 83 and never quite understand how such wonderful web sites find me….yours is a winner! After so many many years of trying to do painting right and perfect, I’m drawn to kids’ projects now, simply because they’re fun and bring great joy. I don’t call this regression but huge progression and am very grateful. thank you so much for sharing!!!!!!!! frances pizzino in abq. nm

    Reply
    • Barbara Rucci

      March 13, 2019 at 7:27 am

      I’m glad you found me, Frances! There is no room for perfection in art, it should always be free and open-ended and more of an exploration. That’s when you will truly connect with your inner creativity. Thank you for leaving a comment! xx Bar

      Reply
  4. Robin

    February 27, 2022 at 12:32 pm

    Great ideas for my preschool kids – thanks for the inspiration!
    Robin,SLO, CA

    Reply

Leave a Reply Cancel reply

Your email address will not be published. Required fields are marked *

Primary Sidebar

The Creativity Project
RESOURCE FOR TEACHERS
Start Here!
Your subscription could not be saved. Please try again.
Your subscription has been successful.

Yes! I want to raise thoughtful and creative children. Send me more inspiration, please!

Follow on Instagram

Categories

Archives

Copyright and Reposting

All content on this blog is copyright and owned by Art Bar Blog unless otherise stated. I would be flattered if you wanted to use an image from one of my posts! But please, ask me first. I would also ask that if it involves DIY instructions with a list of supplies that you don't repost any of that stuff because then nobody would have a reason to click back to my original post!

Footer

  • Facebook
  • Instagram
  • Pinterest

About Me

There are two things that I'm passionate about: Children + Art. As an art teacher, author, graphic designer, and mom to 3 creative thinkers, I get to explore my passions every day! Learn more...

I am dedicated to keeping your information safe. Please review my Privacy Policy.

Recent Posts

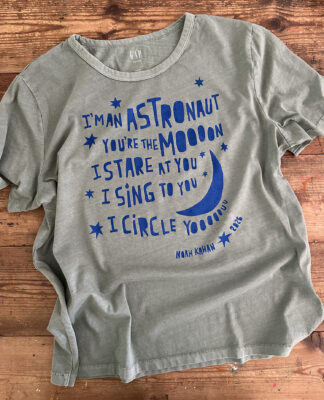
A newly printed t-shirt lies on a table showing off the freezer paper stencil technique using bright blue ink on a muted green shirt with a Noah Kahan quote from his song Orbiter.

Copyright © 2026 · Foodie Pro & The Genesis Framework