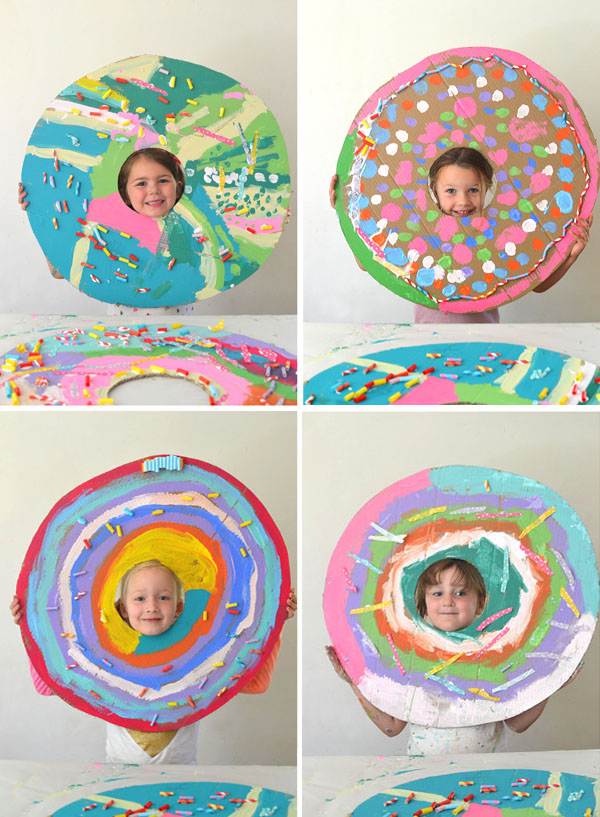
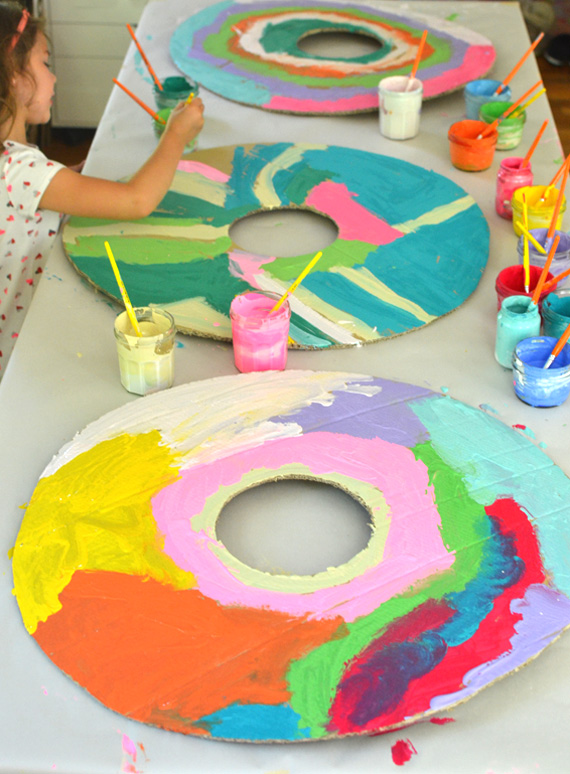
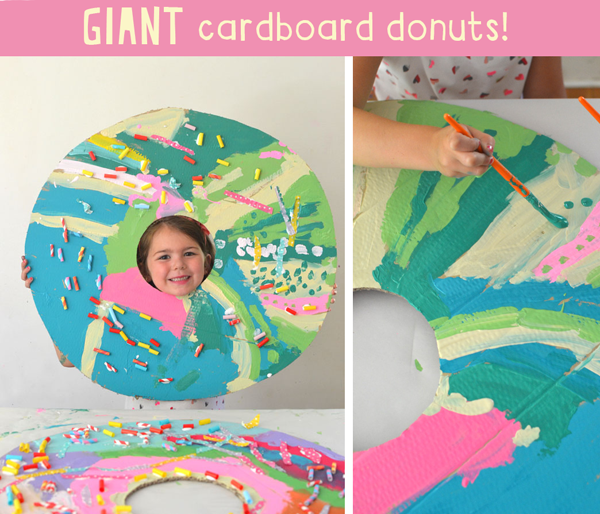
Oh my goodness!! It’s been a very long time since I’ve gotten a post up this quickly after doing an art project with the kids, but I just couldn’t wait to share this one from art camp last week. How amazing are these donuts? I just stood back and watched them paint and collage and create these masterpieces (while snapping a thousand photos). I so badly wanted to keep them for myself. Do I say that every time? I do, I think. Well, it’s true. These four and five year olds have such freedom of expression. It is so fun to witness.
Read on for supplies and more photos…

This post contains affiliate links. Thank you for your support!
Supplies needed:
~ Large scale cardboard (I have been saving ours from our ping-pong table purchase two years ago)
~ Exacto knife or box cutter or good scissors
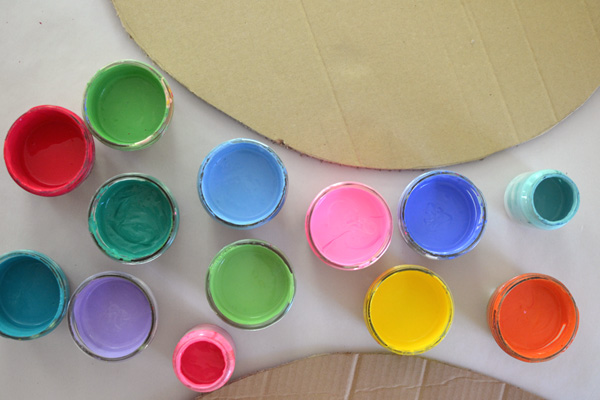
~ Tempera paints (I mix my own colors. I buy my primary colors and white from Crayola, and other colors plus neon pink and gold from Sargent)
~ Brushes and glass half-pint jars with lids
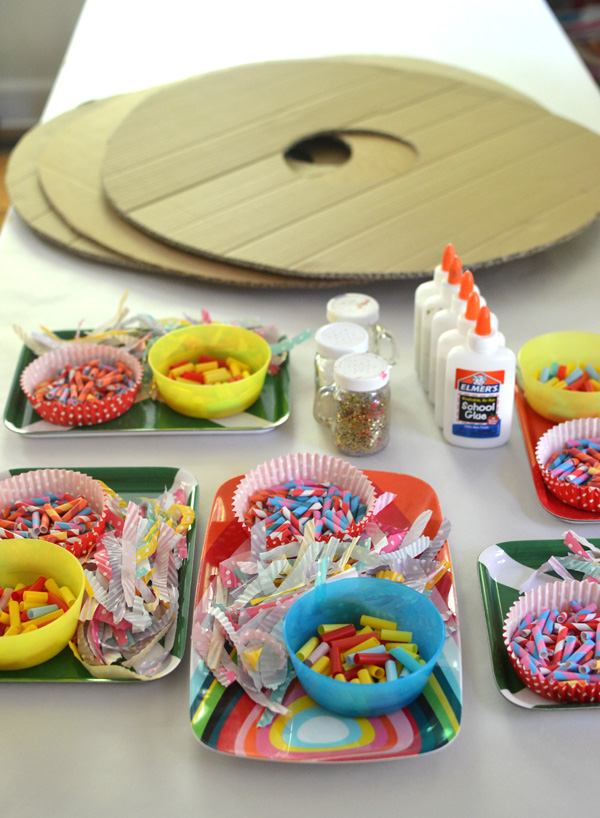
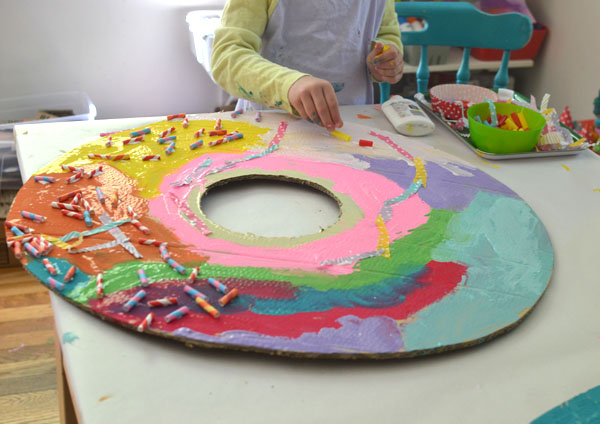
~ Collage material (I used cut-up straws and cut-up cupcake wrappers)
~ Glue
The process:
~ First, draw a big circle on your cardboard and then a little circle in the middle (I purposely didn’t want to make the circles too even so I hand drew them.) Then use the first donut as a template for the rest. Next, cut the donuts. This is not easy or fun. I used an exacto knife. I have this awesome board that I put under it when I cut but you could also just put another piece of cardboard underneath.
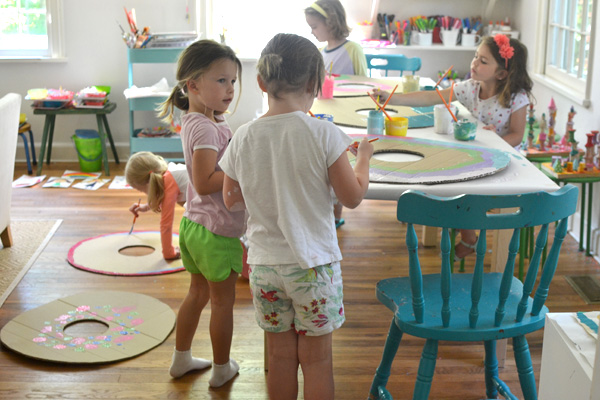
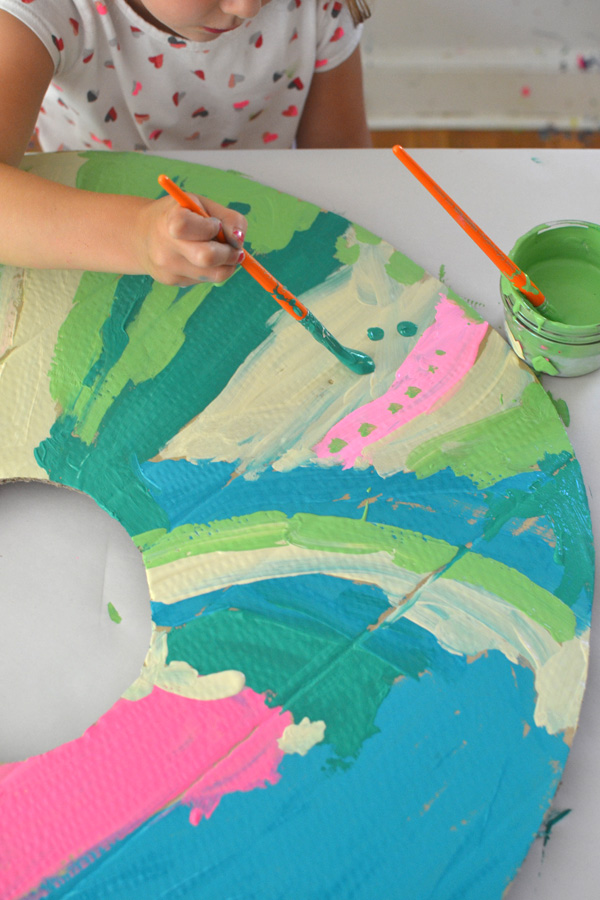
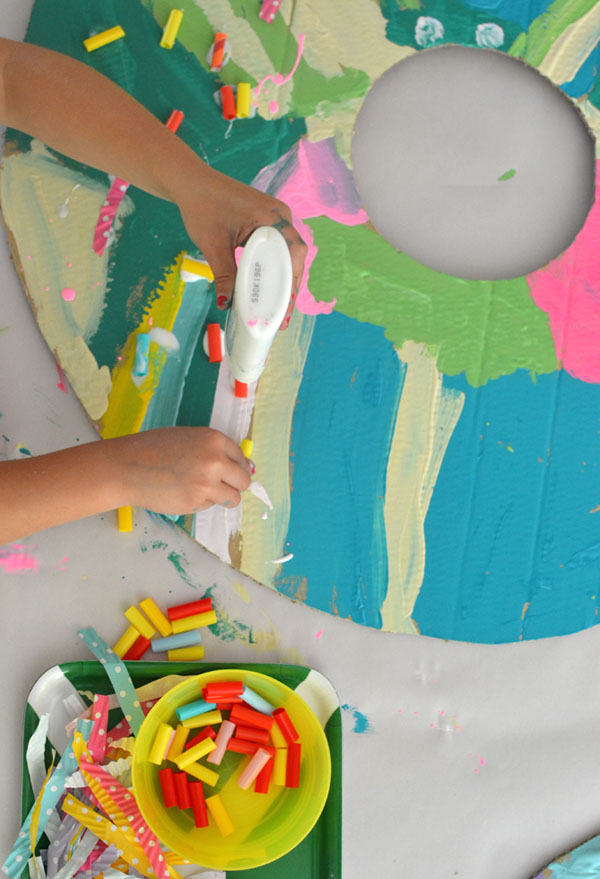
~ Next I set out the donuts on the table and floor (I didn’t have room for all five kids at the table) and scattered the paint jars around. They painted and shared paint and moved around if they needed too.
~ After they were done painting, I gave them each a tray with collage material and some glue. I told them that rather than sprinkle the sprinkles on top, it might be better to place them more carefully and make sure that each piece had a dot of glue. This works better for two reasons: 1 – it will ensure that the sprinkles will not fall off after the paint dries, and 2 – it extends the time spent on the project 🙂
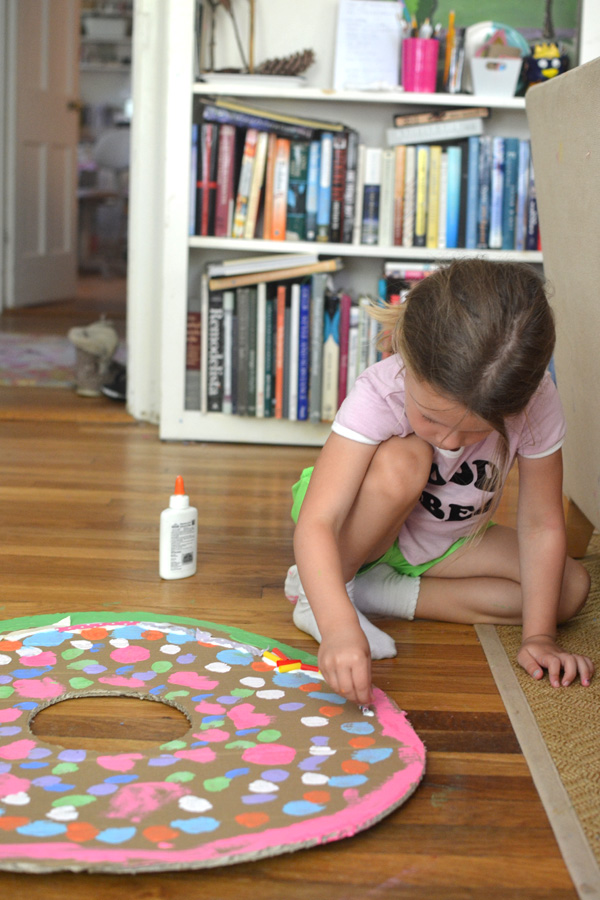
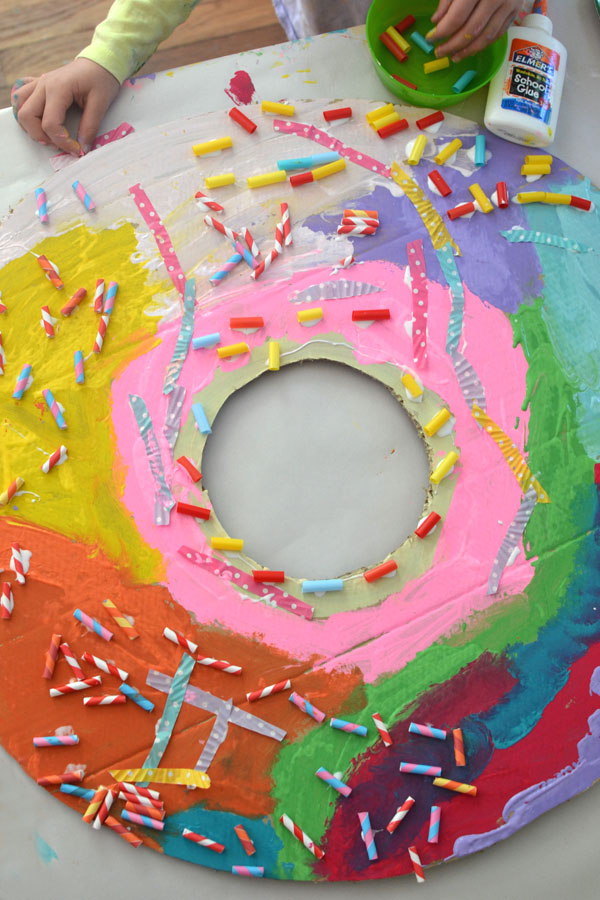
(I love how this little artist carefully placed her sprinkles all the way around the edge.)

~ That’s basically it! The process is really simple…anything goes! The prep is pretty simple, too – it’s just the cutting of the donuts that’s kind of a hassle. But the collage materials are easy to prepare.
This one above reminds me of something my dad would paint. He has spent decades working on making his abstracts look as effortless as this. The colors, the design, the little polka dots… it’s all just so delicious!
I would love to see your versions of this! Tag me on Instagram if you make them!
xo, Bar
PS: Here are some Instagram fans who did this project. Don’t forget to tag me @artbarblog and I will share!!
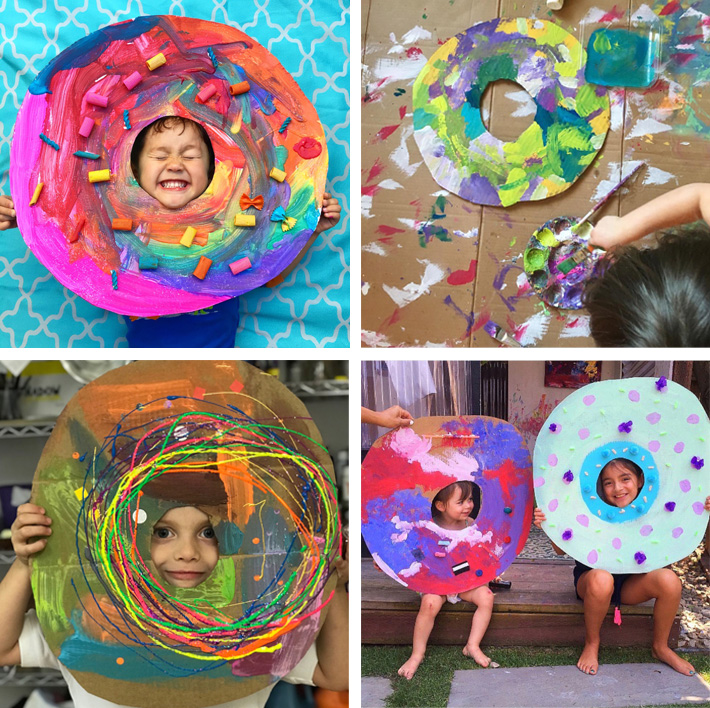
From the top left, going clockwise: @creatingcreatives, @ellachattanooga, @momma_teaching, @redvioletstudio


Can you give me a approximate size for the donut and cutout?
hi Candi, the approximate diameter of the donuts was about 30 inches. I hope this helps! xo Bar
I’m about to have a party with a bunch of girls to make these donuts. After they paint the main part, did you let the donuts dry a little bit, or did you go straight to the glue? I feel like the base probably needs a little time to dry? I could be wrong though!
hi Sarah, sorry I didn’t get back to you fast enough! no we went straight from paint to collage, no need to wait for the paint to dry! hope your party was a success!! xo Bar
I just tried making this- they were fun, as all your projects! But I was having a hard time getting the acrylic paint I had to not show the cardboard underneath. Tips?
yes, the brown cardboard can show through, which is part of the charm. if you have very watery tempera this happens more. you can add white to your paints to make them more opaque. or you can always pre-paint it with some white paint, or even spray paint. reminder that it may curl the cardboard a little, to counter this paint both sides. hope this helps! xx Bar