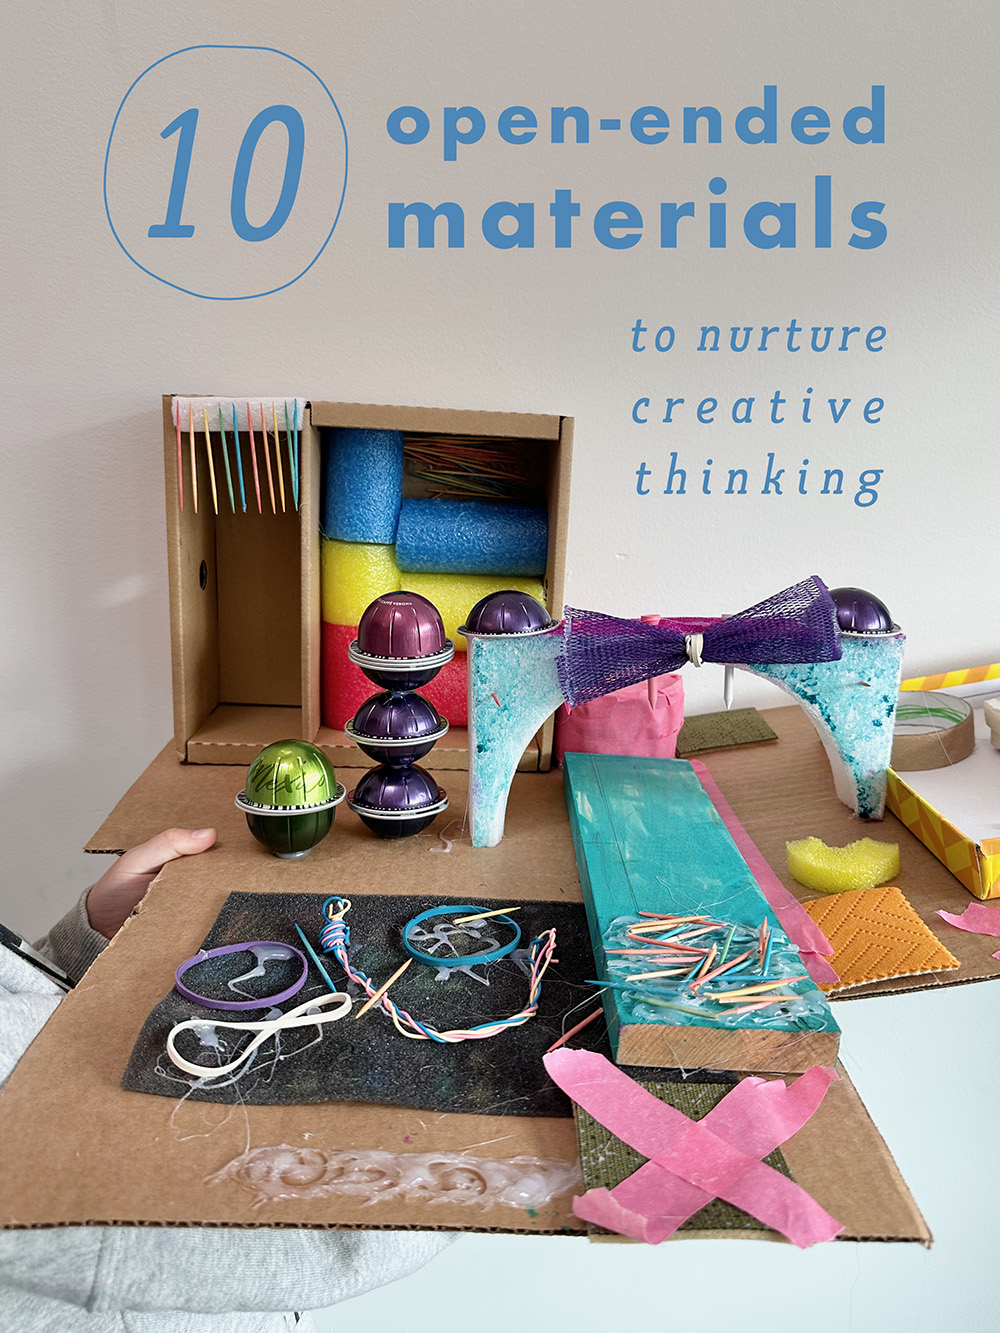
As I was gathering content for this post, I realized that in the 13+ years I have been writing this blog, I have never written a post about a collection of my favorite materials! I’ve written about liquid watercolor so many times. I’ve written endlessly about recyclables (and in my book!), and many times about textiles. But not a singular post about all my fave things in one place. What have I even been doing? These recommendations come with two decades of experience curating materials for groups of children. I’ve honed the skill of pairing materials even more intensely in the past five years of growing The Creativity Project with Shannon, and offering my open studio events at the library for the past three years. With that in mind, here are my 10 favorite open-ended art materials to facilitate process art experiences that nurture self-expression, inventiveness, and creative thinking, in no particular order. And remember, you can play with these materials too!
[ I am a participant in affiliate programs designed to provide a means for bloggers to earn small fees at no cost to you by linking to Amazon.com and affiliated sites. ]
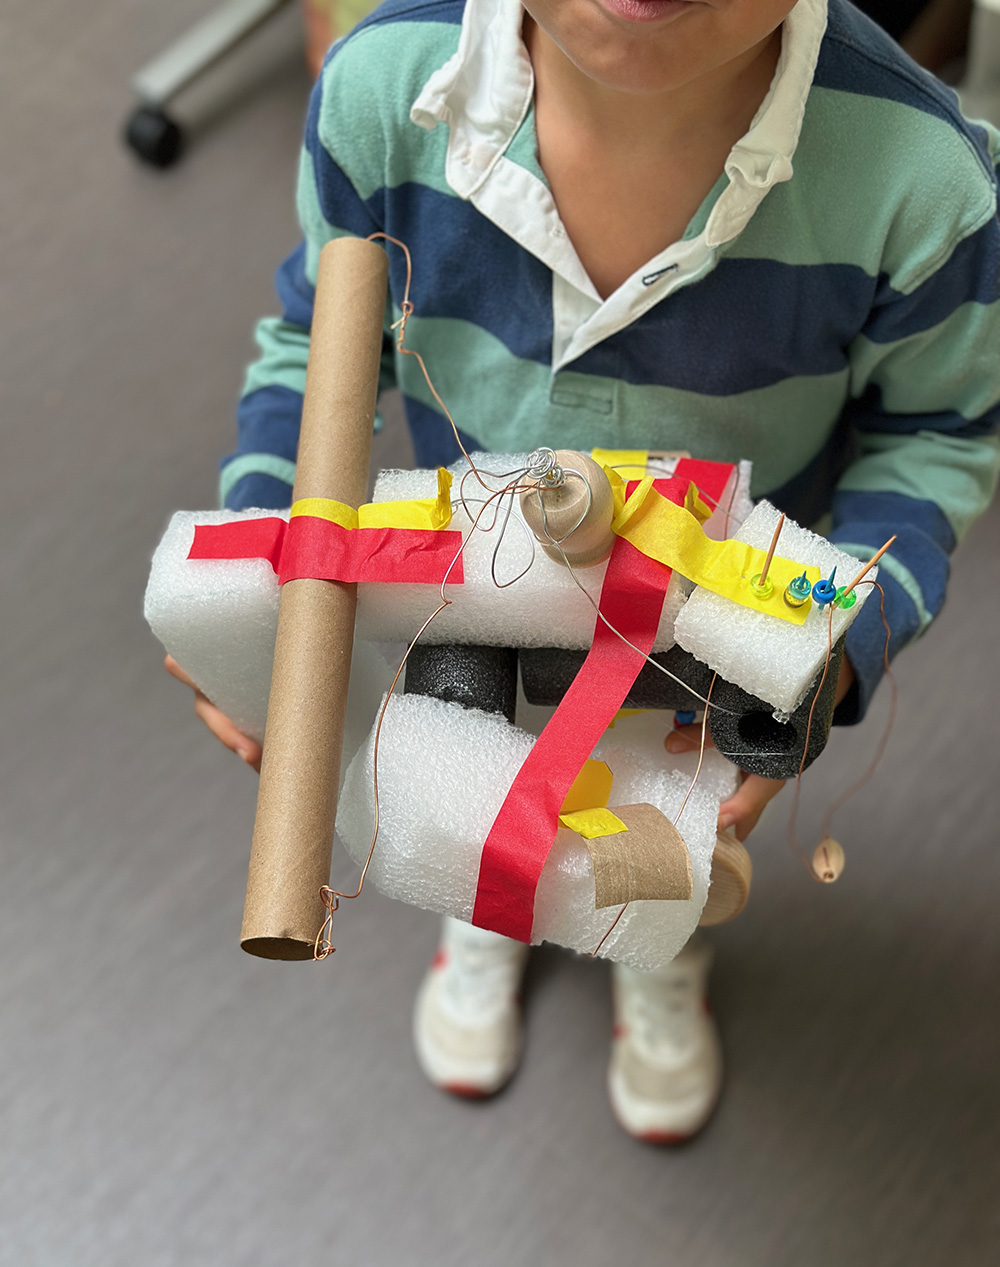
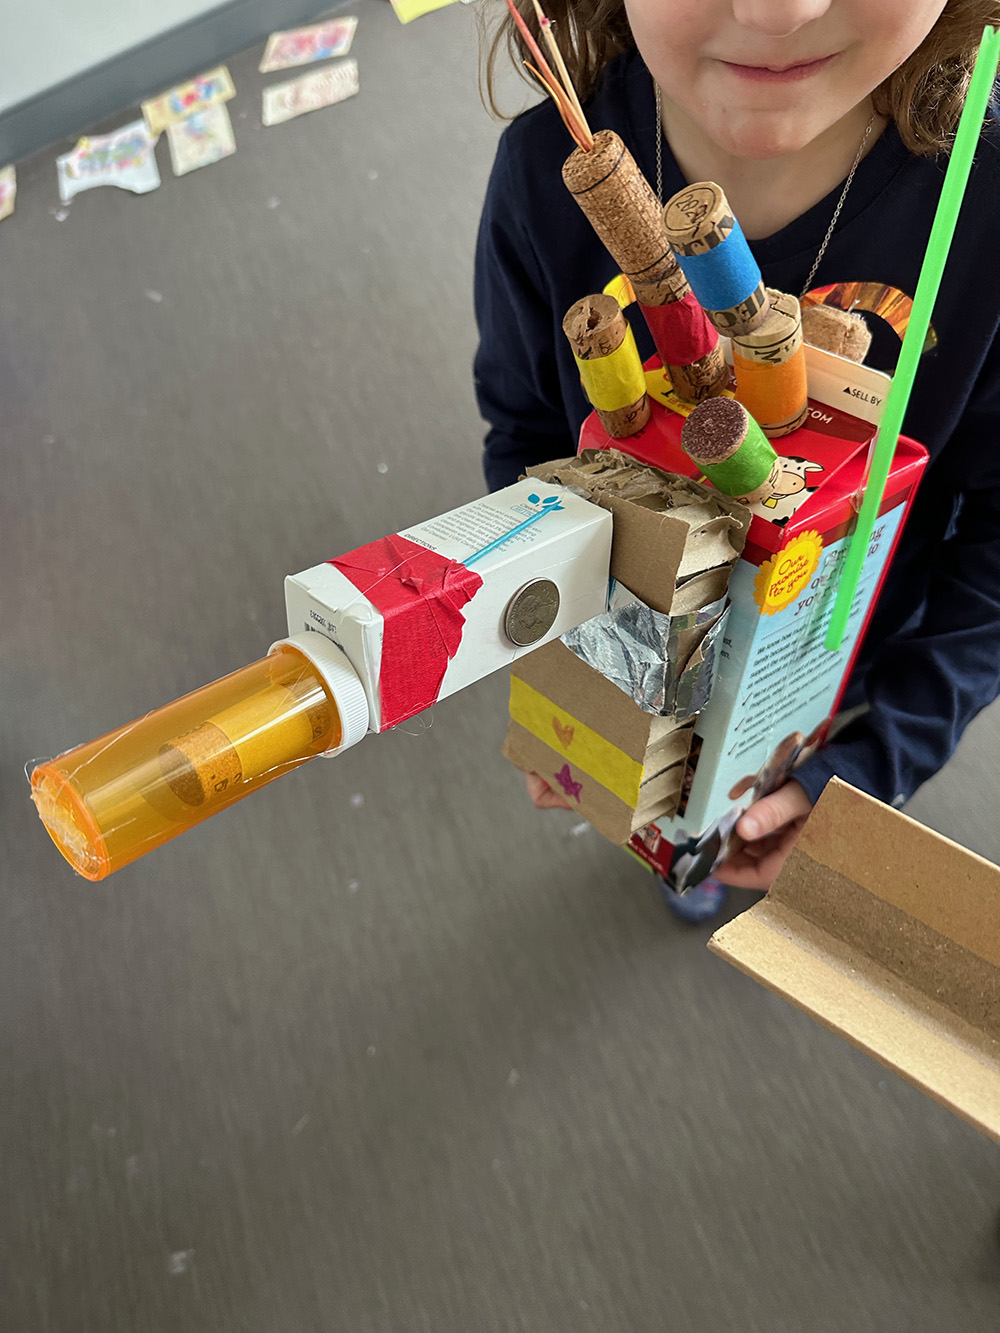
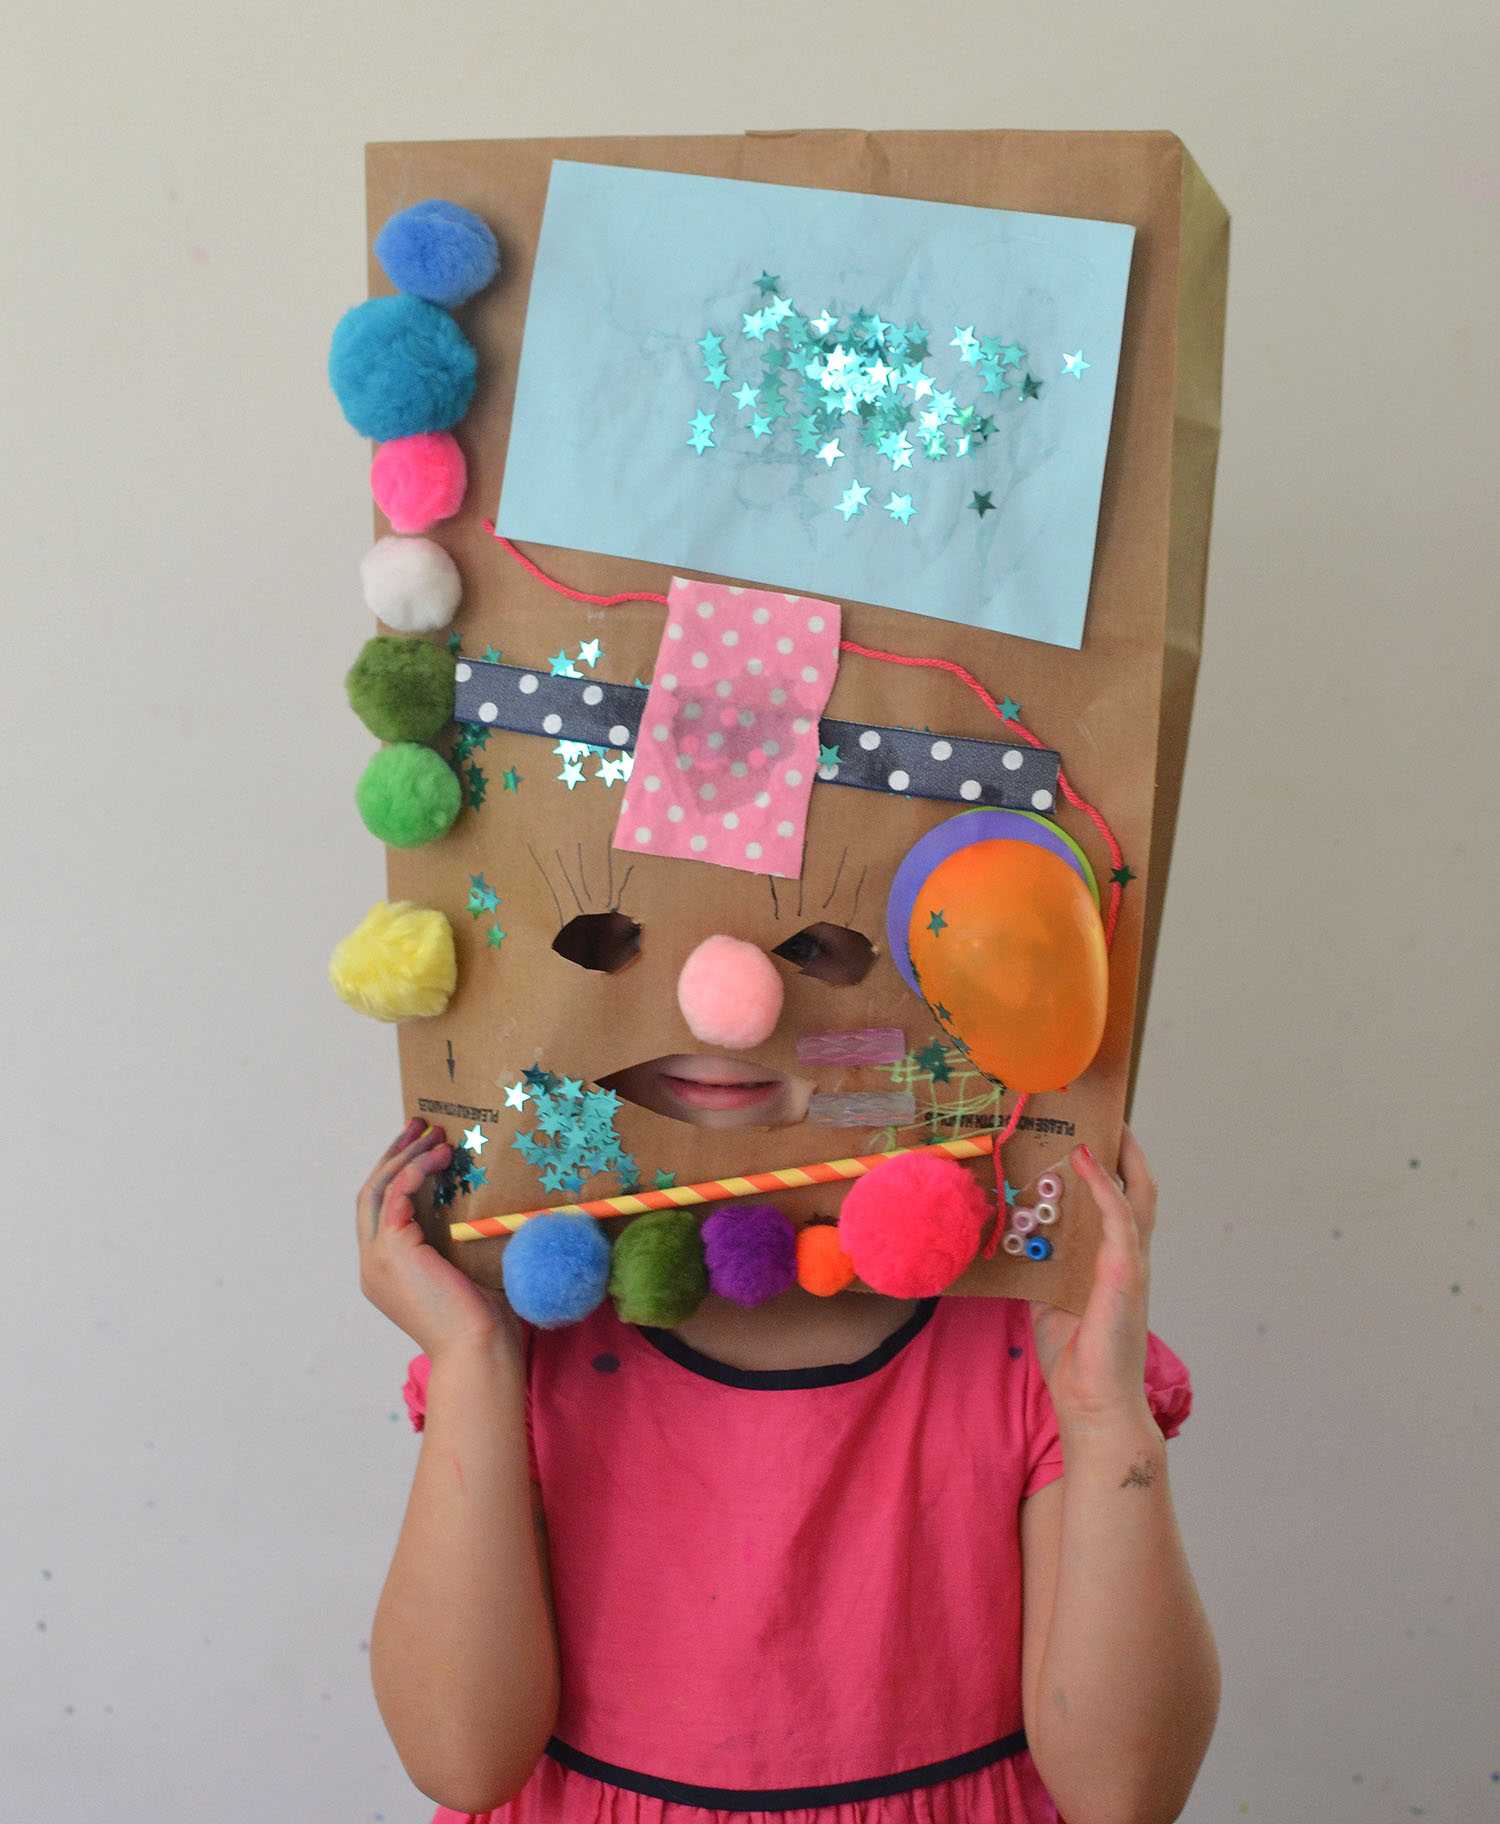
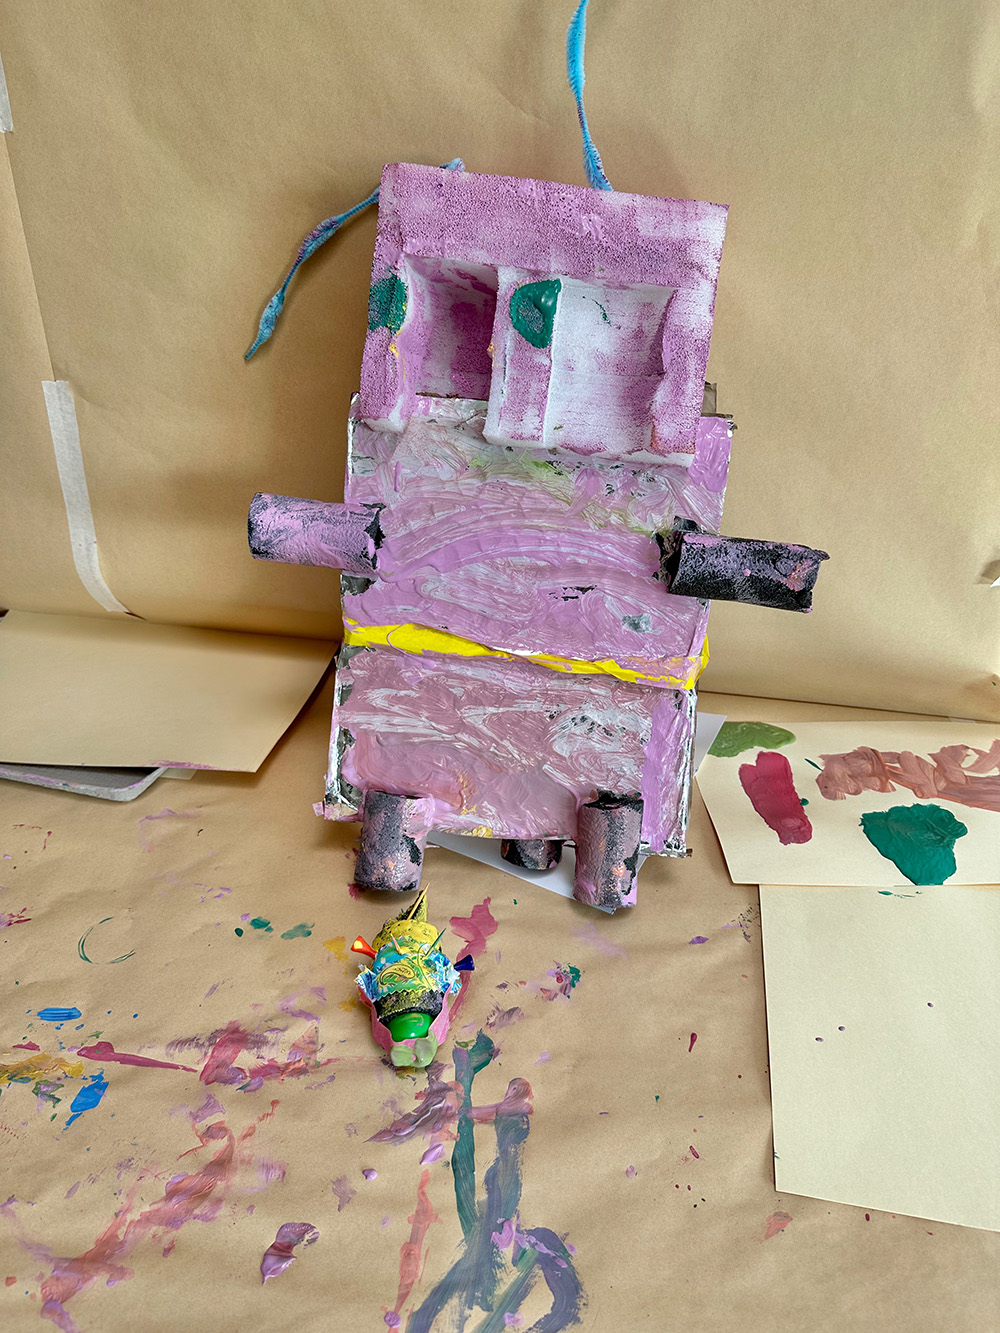
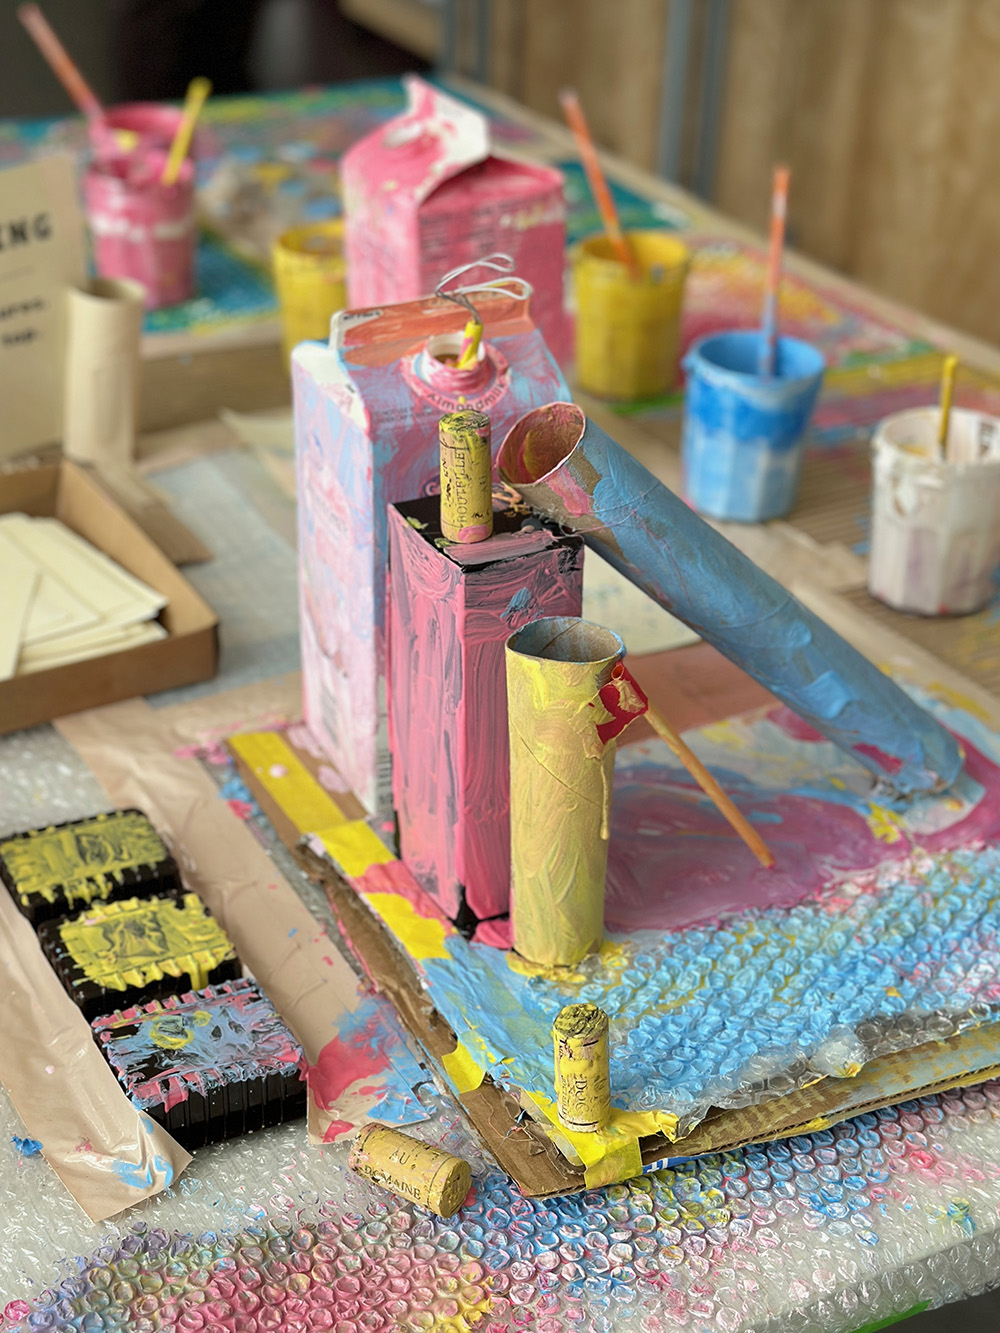
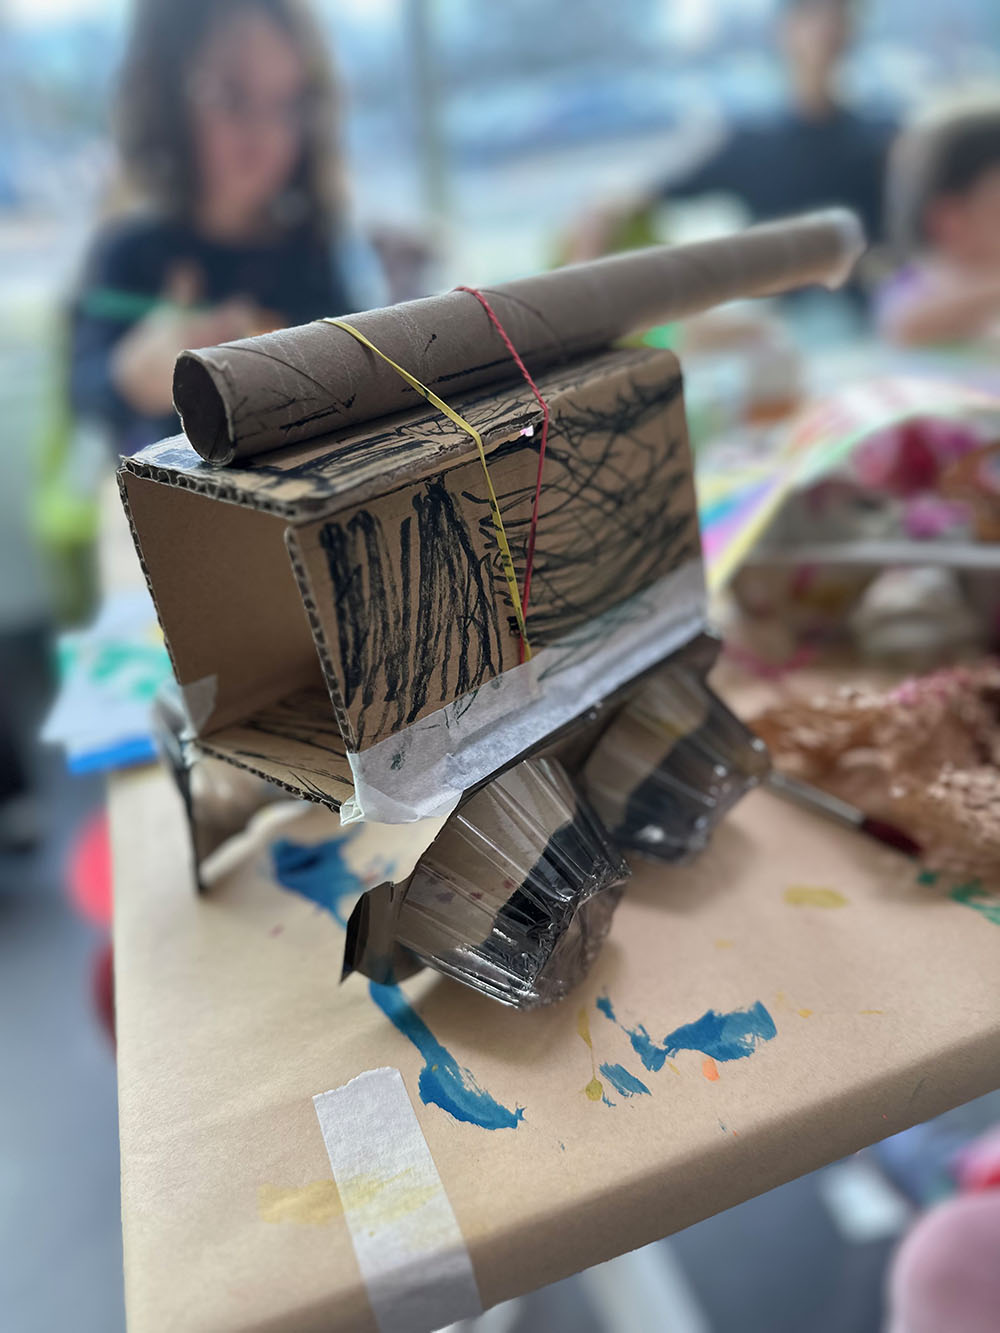
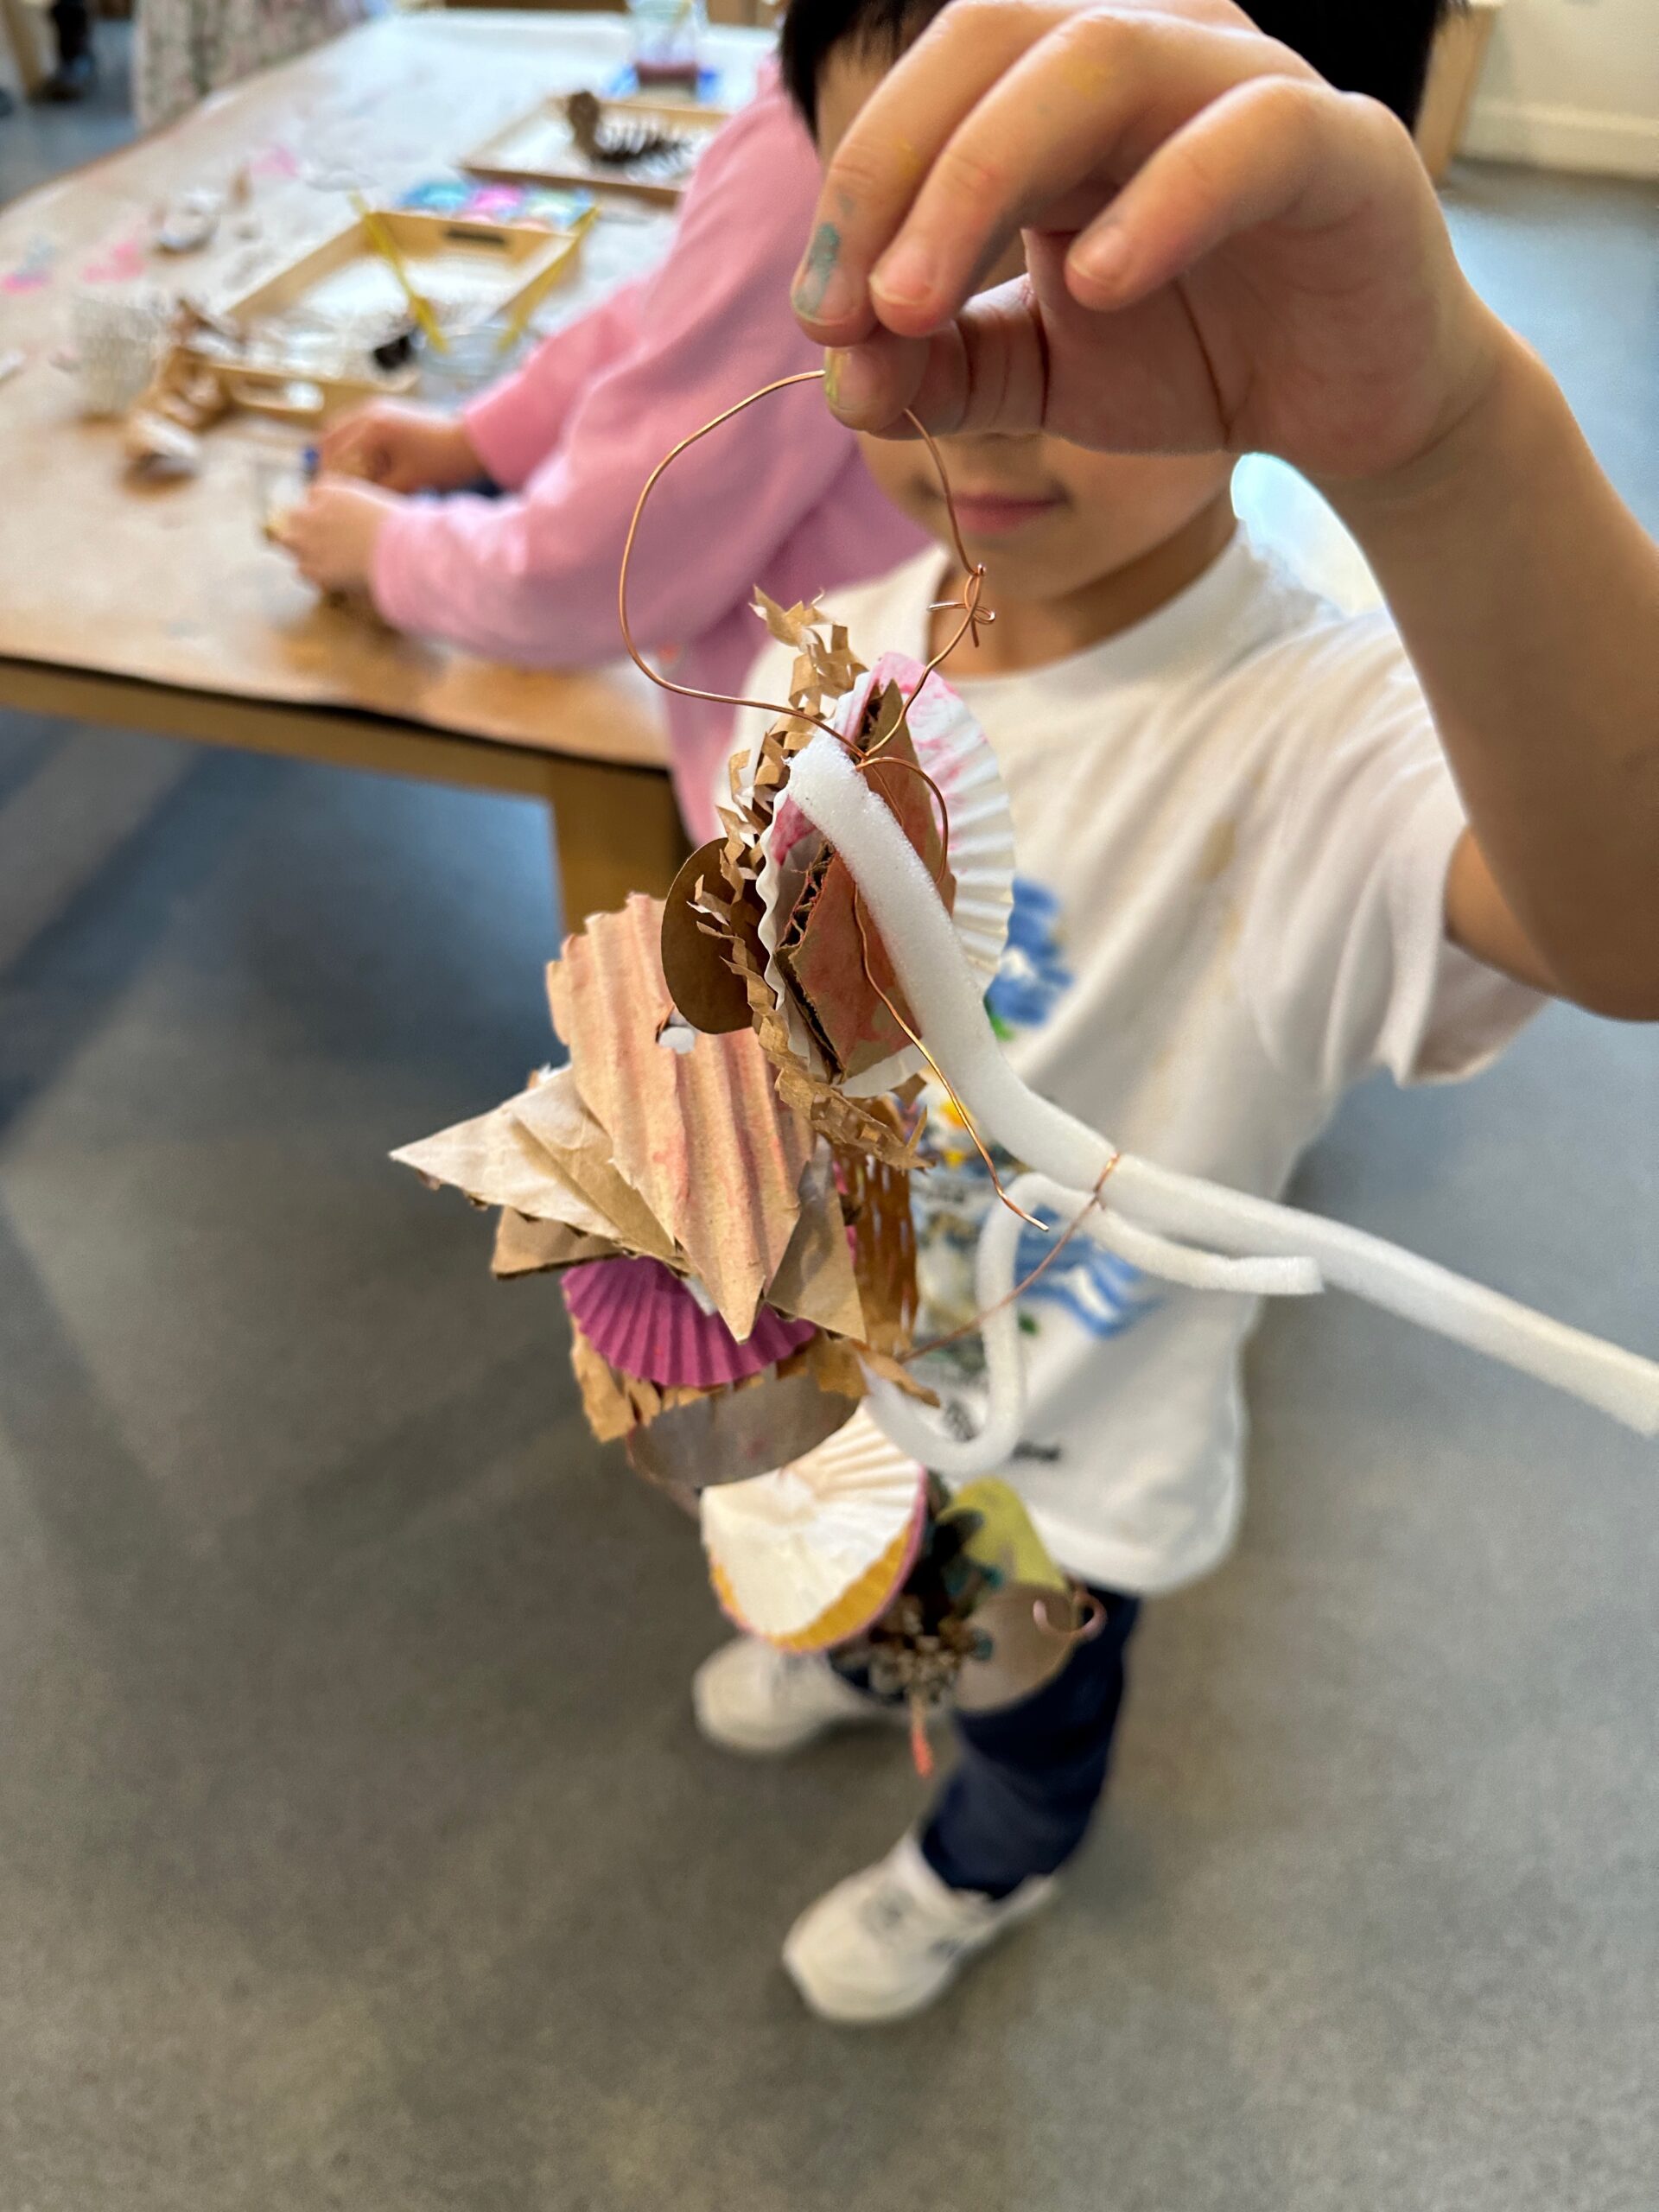
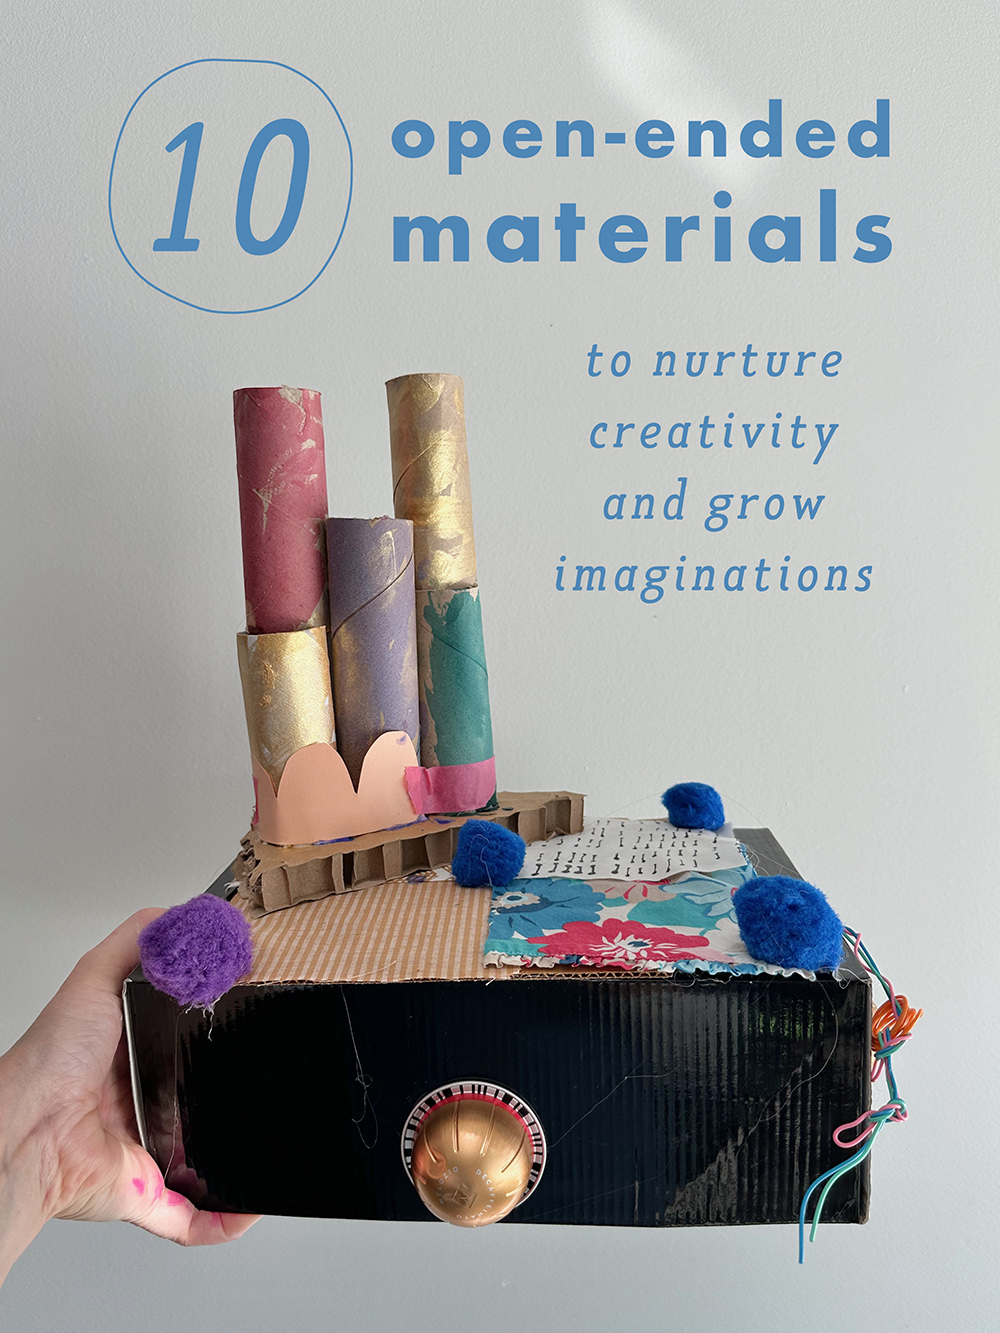
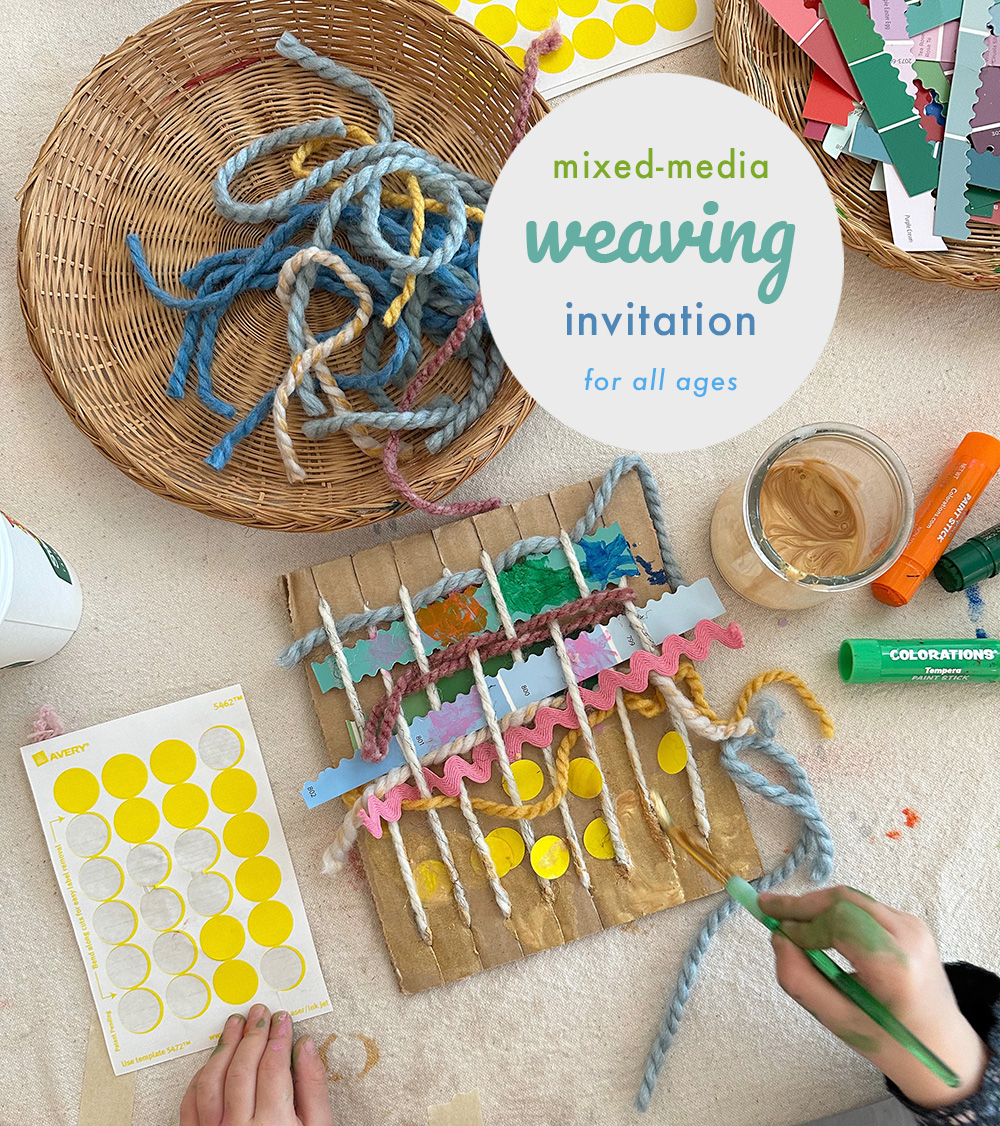
The piece pictured above is the embodiment of imagination, curious risk-taking, and creative thinking. When children have access to even just the simplest recycled materials, and time to tinker and play, it feeds their souls and helps them find their voice and grow their confidence. Let me also take this moment to say that the pairing of materials is where the magic happens. This is your reminder to always put out connecting or altering tools with any materials. I will explain more in the section below about connecting tools, but if you ever want more in-depth training on materials, we have the one and only course (that we know of) in the world at The Creativity Project called Materials Matter, which is 12 modules, self-paced, and includes an open-ended curriculum with everyday invitations. I believe it is the gold standard in training, with the exception of being in Reggio Emilia, Italy!
Note: Except for a few links for some materials, almost all of these categories are things you can source for free. You do not need to spend a lot of money to stock your art space with abundant materials!

Cardboard + Recyclables
Every art space should begin and end with recyclables. They are not only a free resource, but they run in all shapes and sizes, from giant boxes to medium egg cartons to small corks and bottle tops. They come in all kinds of textures, from flat and shiny to crinkly and bubbly to squishy and pokey. Providing children with such a wide variety of shapes and textures really satisfies their sensory needs, and did I mention that it’s all free? I like to sort my recyclables into canvas laundry bags. This makes my system for collecting and sorting so simple, and also easy to carry and transfer from home to the library and back again. (I open up my whole process and even show you how I transformed a small room in a church basement into a vibrant makerspace in our Materials Matter course). If you are in a space with limited room for art materials, I would say that having a bin of recyclables and some connecting and altering tools (tape, scissors, and mark-making at a minimum) is all you need to spark creativity and innovation. Low mess, and easy to clean up, too.
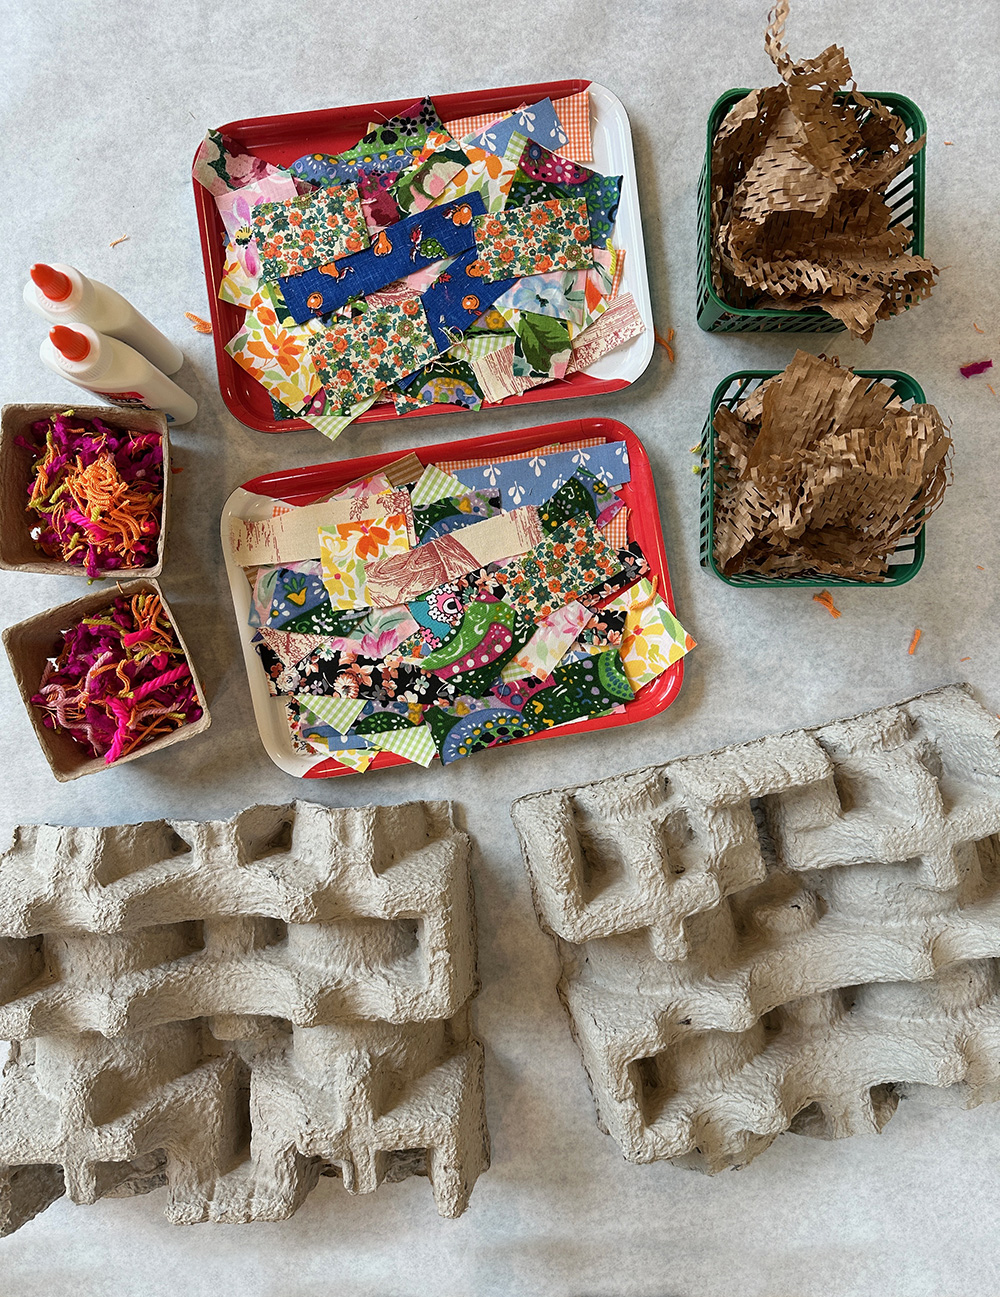
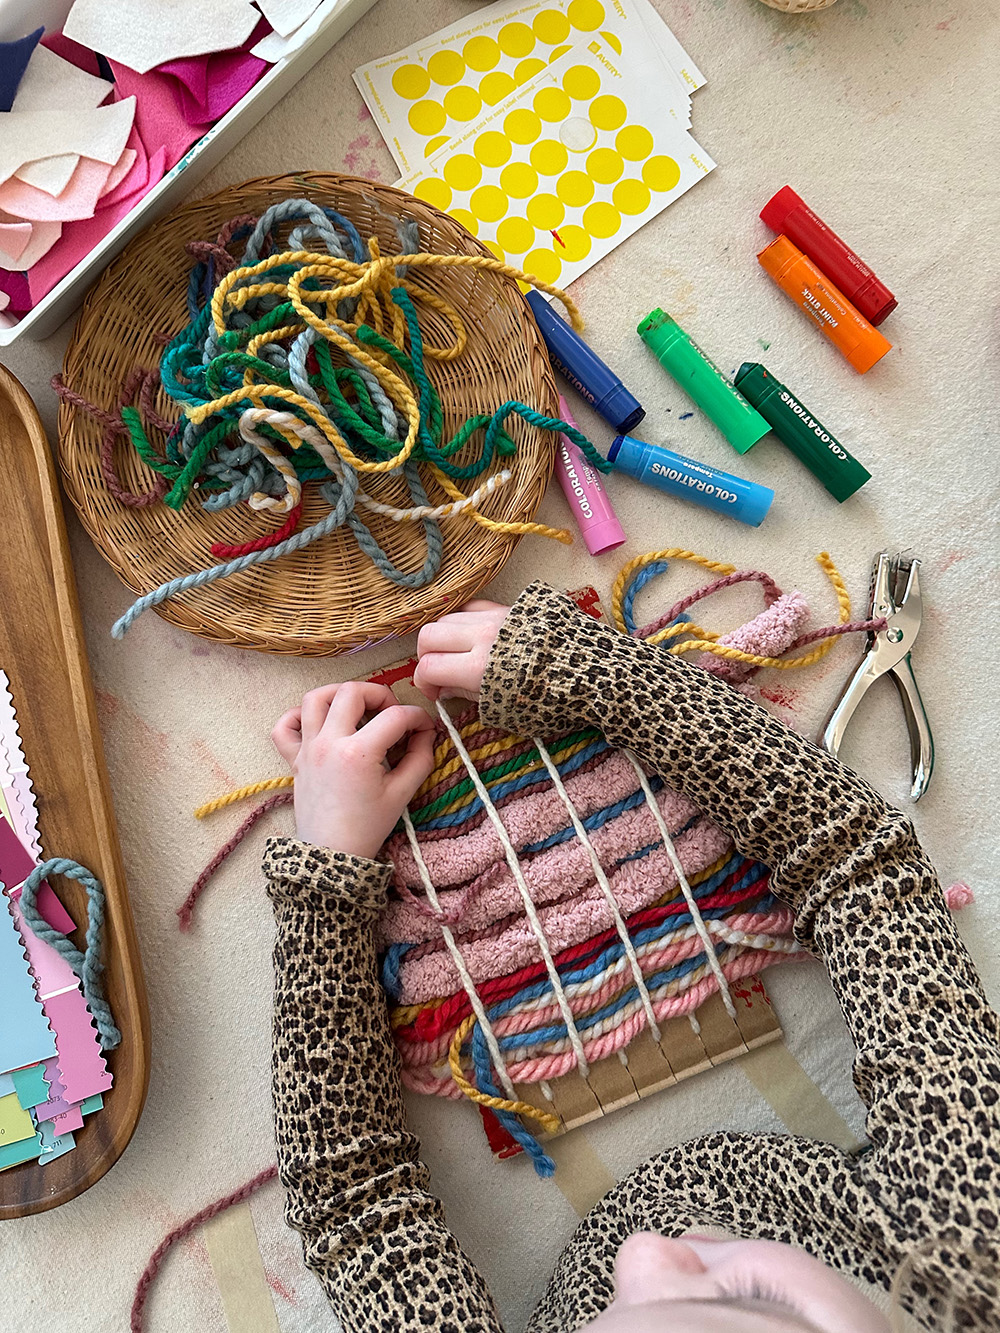
Textiles
Textiles are a soft, flexible, squishable material that becomes a wonderful and needed reprieve from the hard surfaces of a school day. Often in preschools and (hopefully still) kindergarten classrooms, there are soft, cozy spaces with pillows for children to decompress. But after that, classrooms seldom offer fabric, yarn, ribbons, pom-poms, or anything that feels soothing and familiar that provides a moment of calm regulation. This is why I often try to bring some of these materials into the art space. Fabric can be sourced from Goodwill and cut down into small pieces for collage (or save some bigger pieces for the dramatic play area). Yarn is pretty cheap in craft stores, and lasts a very long time when cut up into usable lengths. I also like to cut up teeny yarn shavings to use as “glitter” with any collage or glue-based structures. And I collect ribbons from packages in a ribbon jar, which are very useful for weaving, collage, or tying recycled pieces together. We go into even more depth in our Textiles playbook and video in Materials Matter, and offer lots of invitations for art and play.

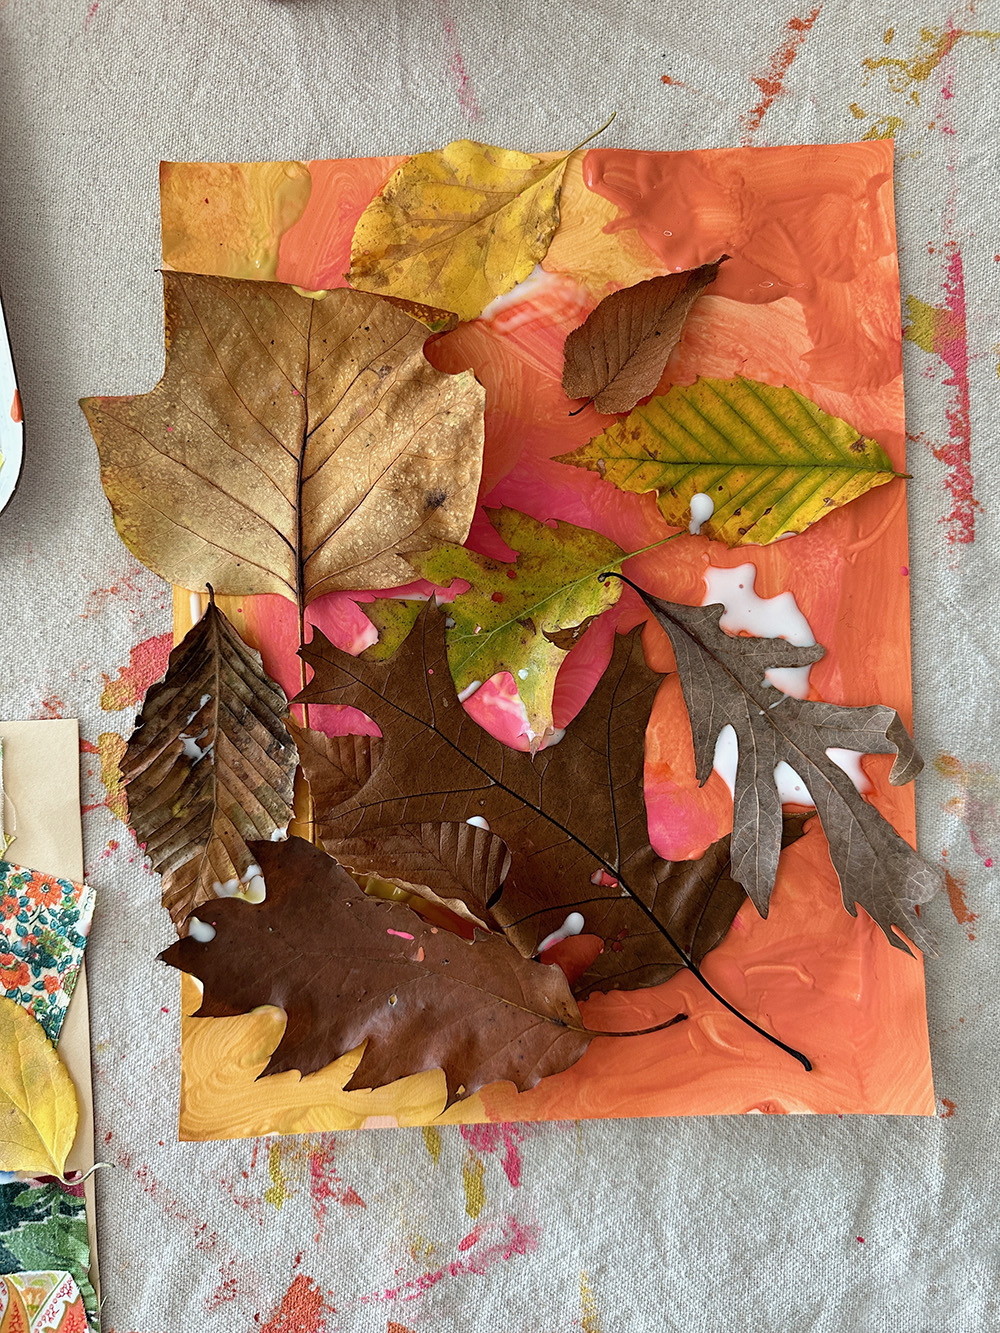
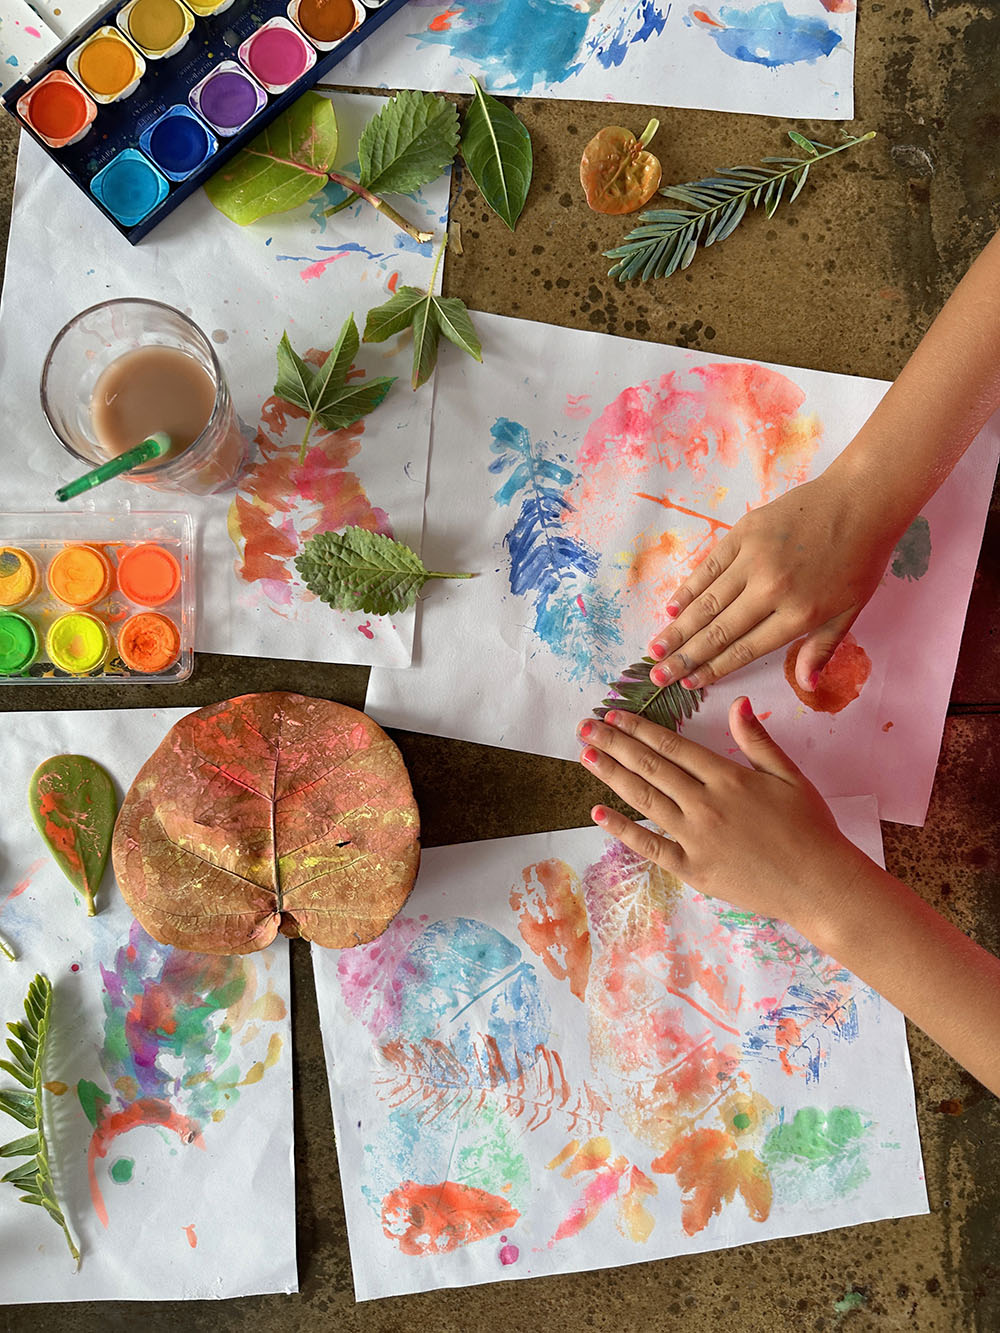
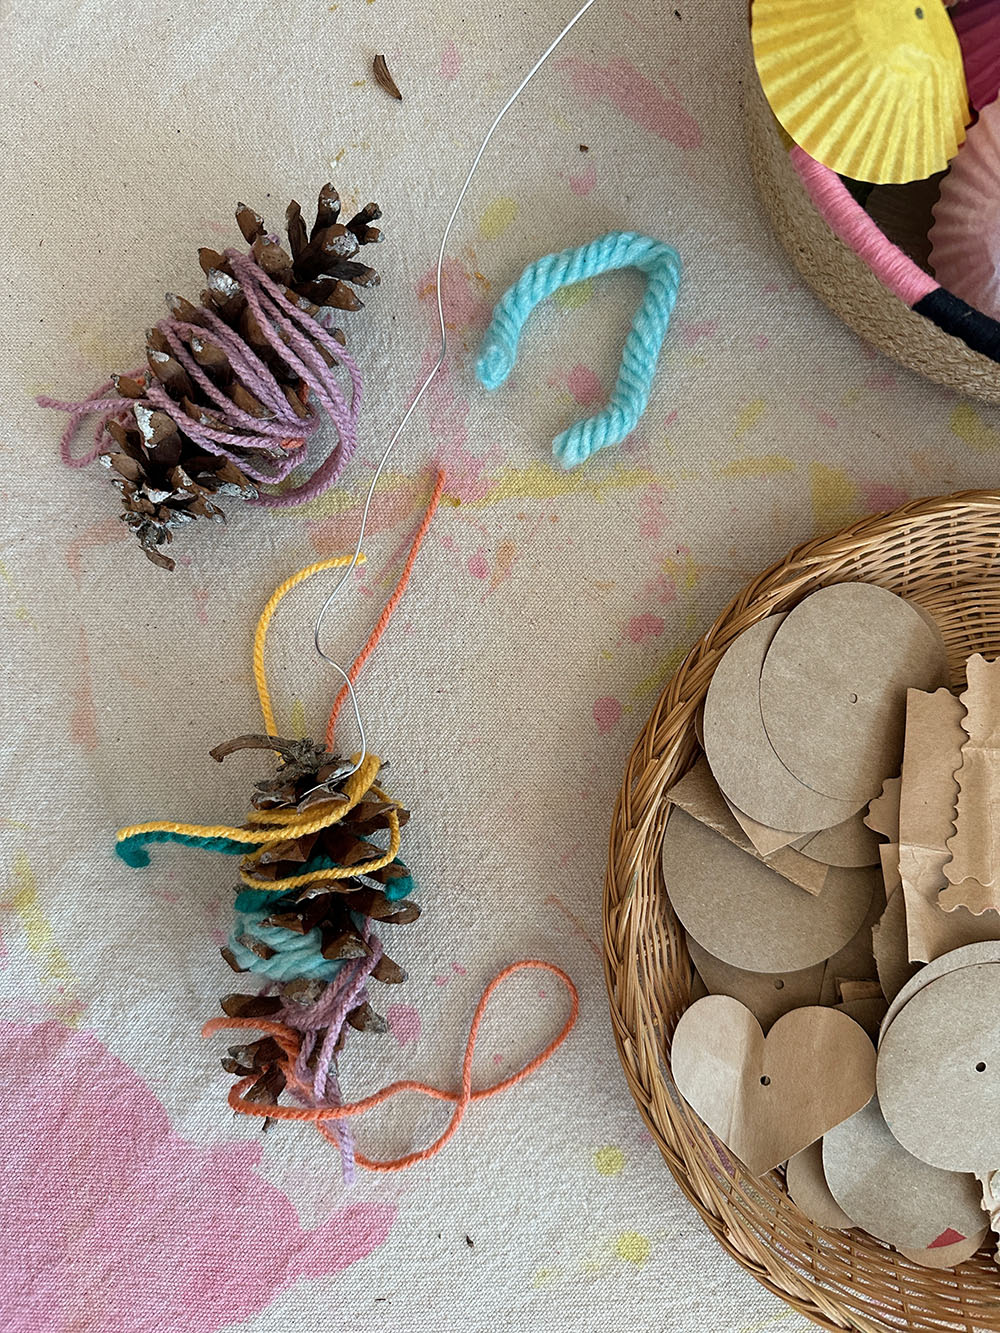
Leaves and pinecones
When the season is right, natural materials are another rich resource for your art space. Autumn brings the motherload of colorful leaves, and we make the most of this time of year. Leaves can be painted on, used as a stamp (turn it over onto paper), used in collage, or simply offered with scissors and hole punches to practice skills, develop hand strength, and flood the senses with the crunch and scent of nature. In the springtime, we can also gather leaves that have fallen on the ground and use them with watercolor for printing, or forage for flowers and set up a potion-making station. I collect pinecones whenever I find them, which seems to be in all seasons here in Connecticut, but especially in the Fall. I bring pinecones into the art space as a wonderful sensory addition to all sorts of invitations. I offer them with paint and wire, or with yarn for wrapping, or sometimes just in a basket near an art space, and children can decide what to do with them in their own way. Often, pinecones have sap on them, which adds such a homey and nostalgic scent, but make sure to have some wipes nearby for sticky fingers. We have a whole module on natural materials with a 25-page playbook full of ideas and an in-depth video in our Materials Matter course!
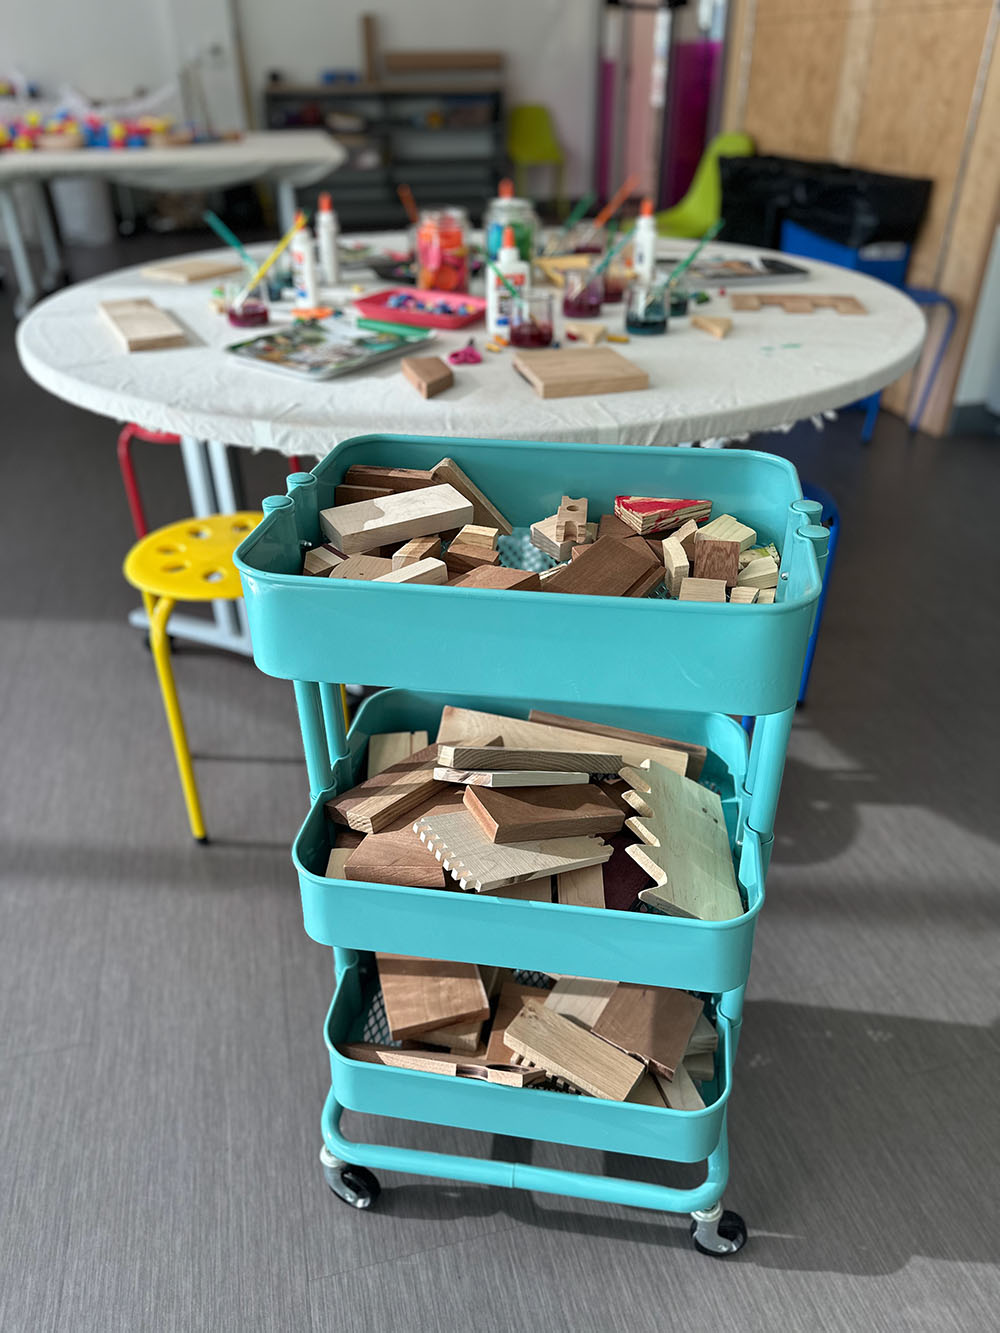
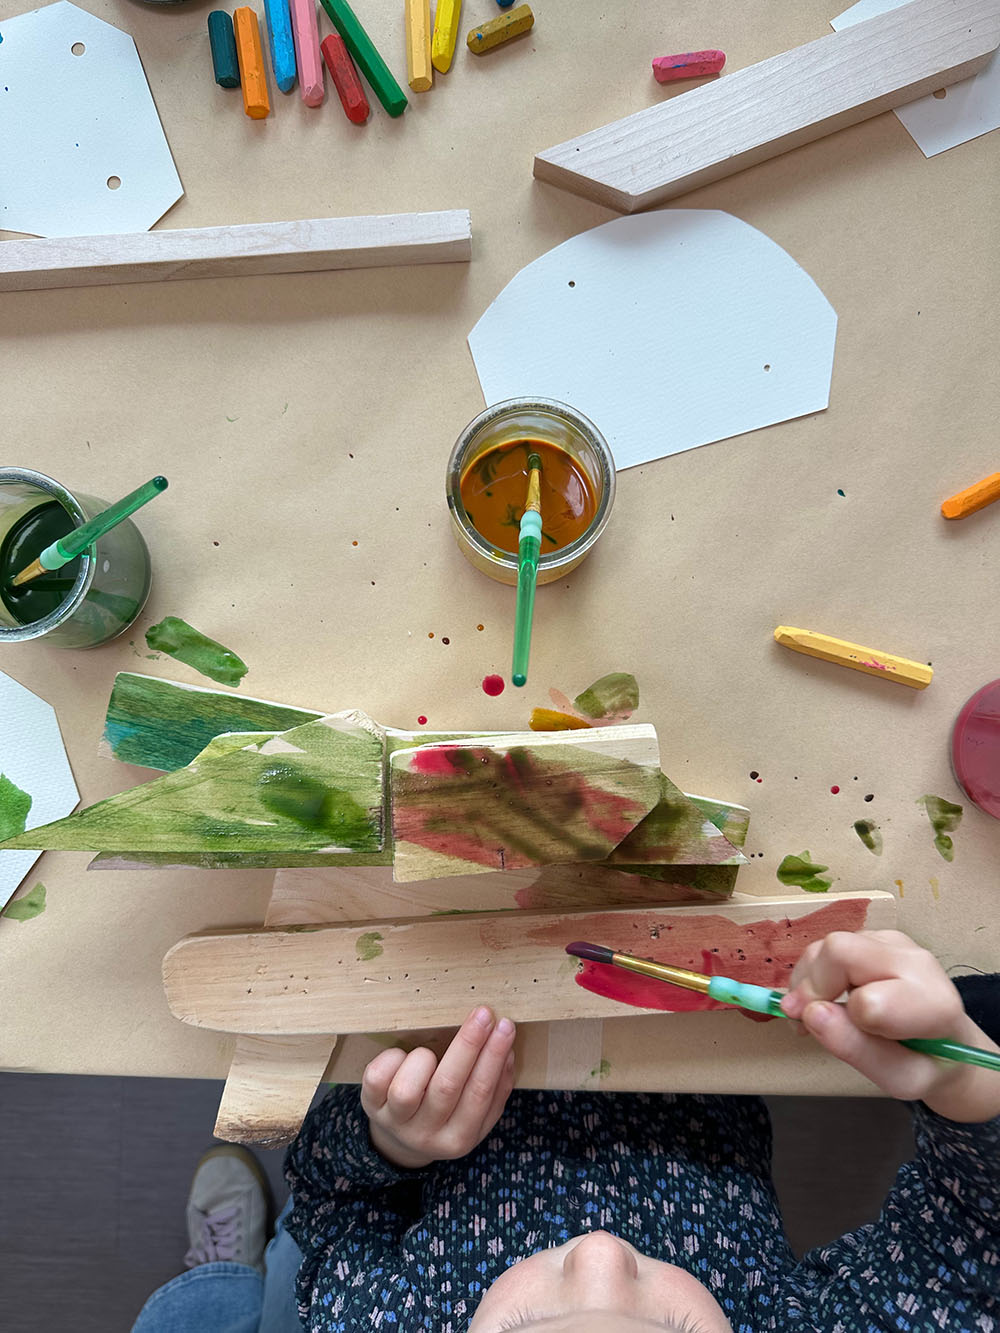
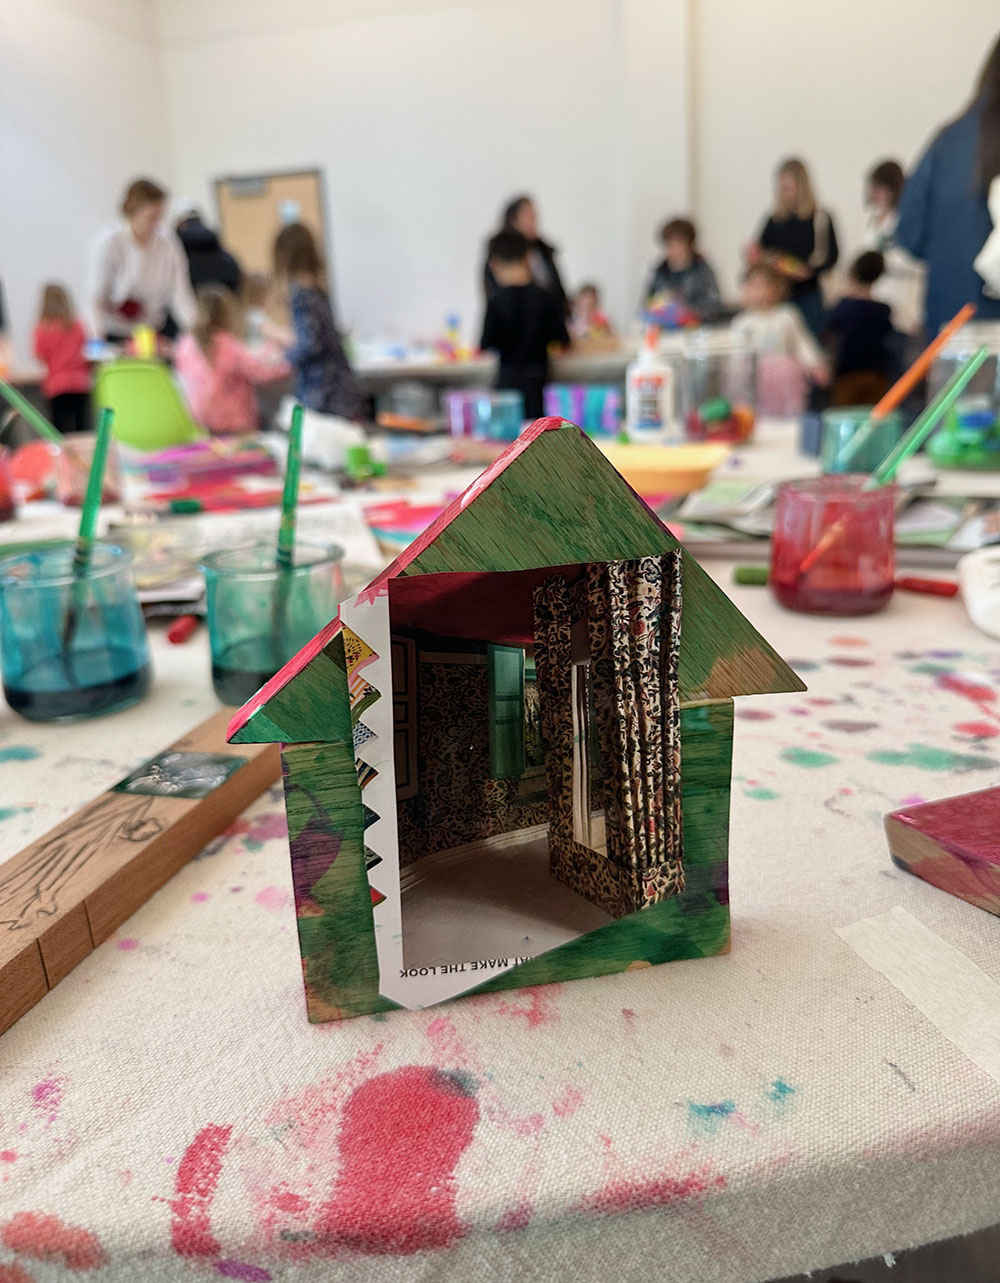

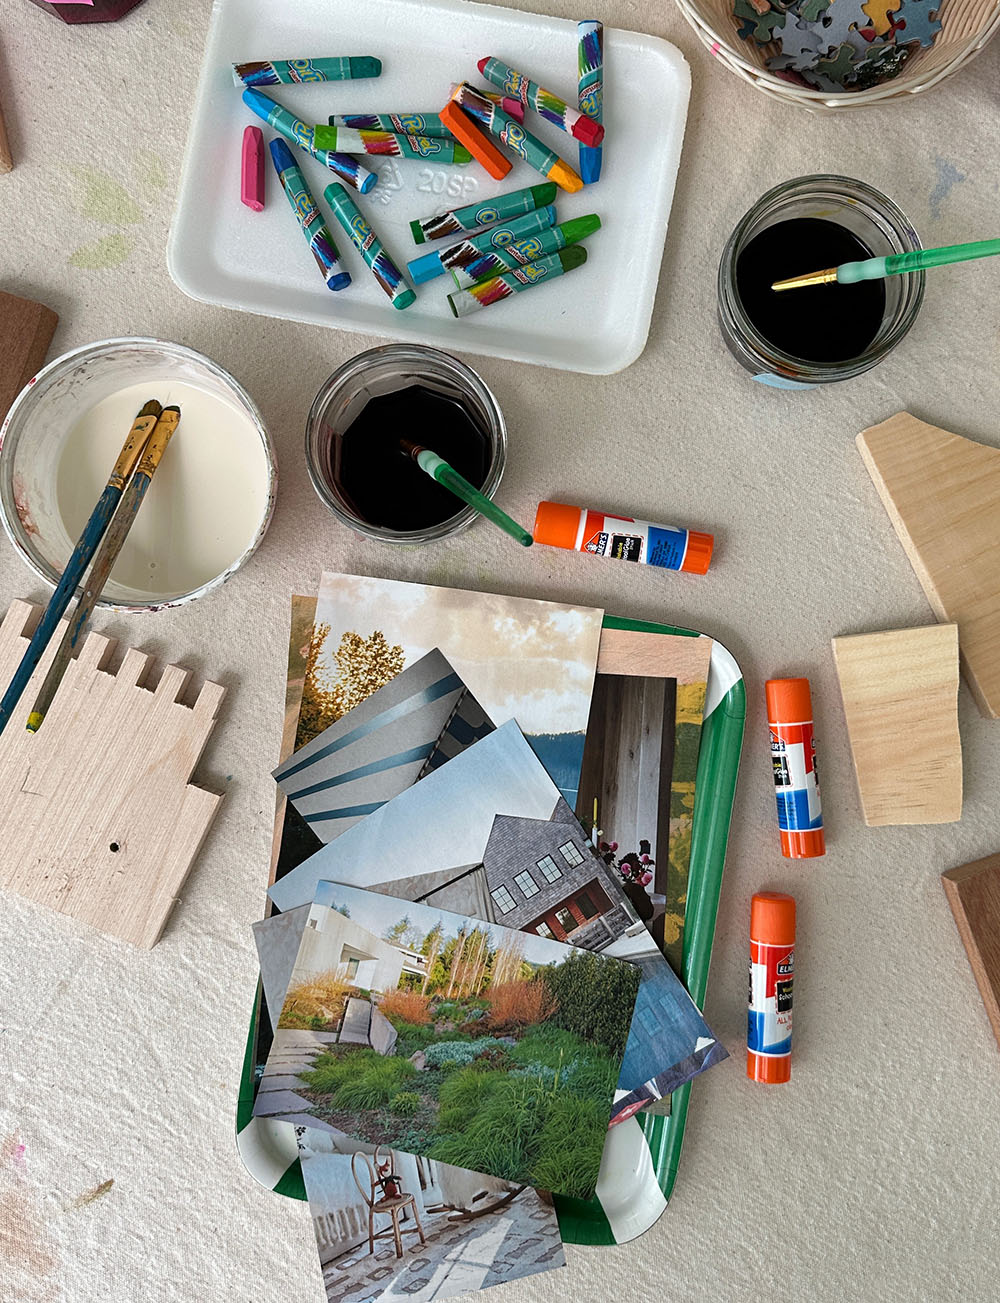
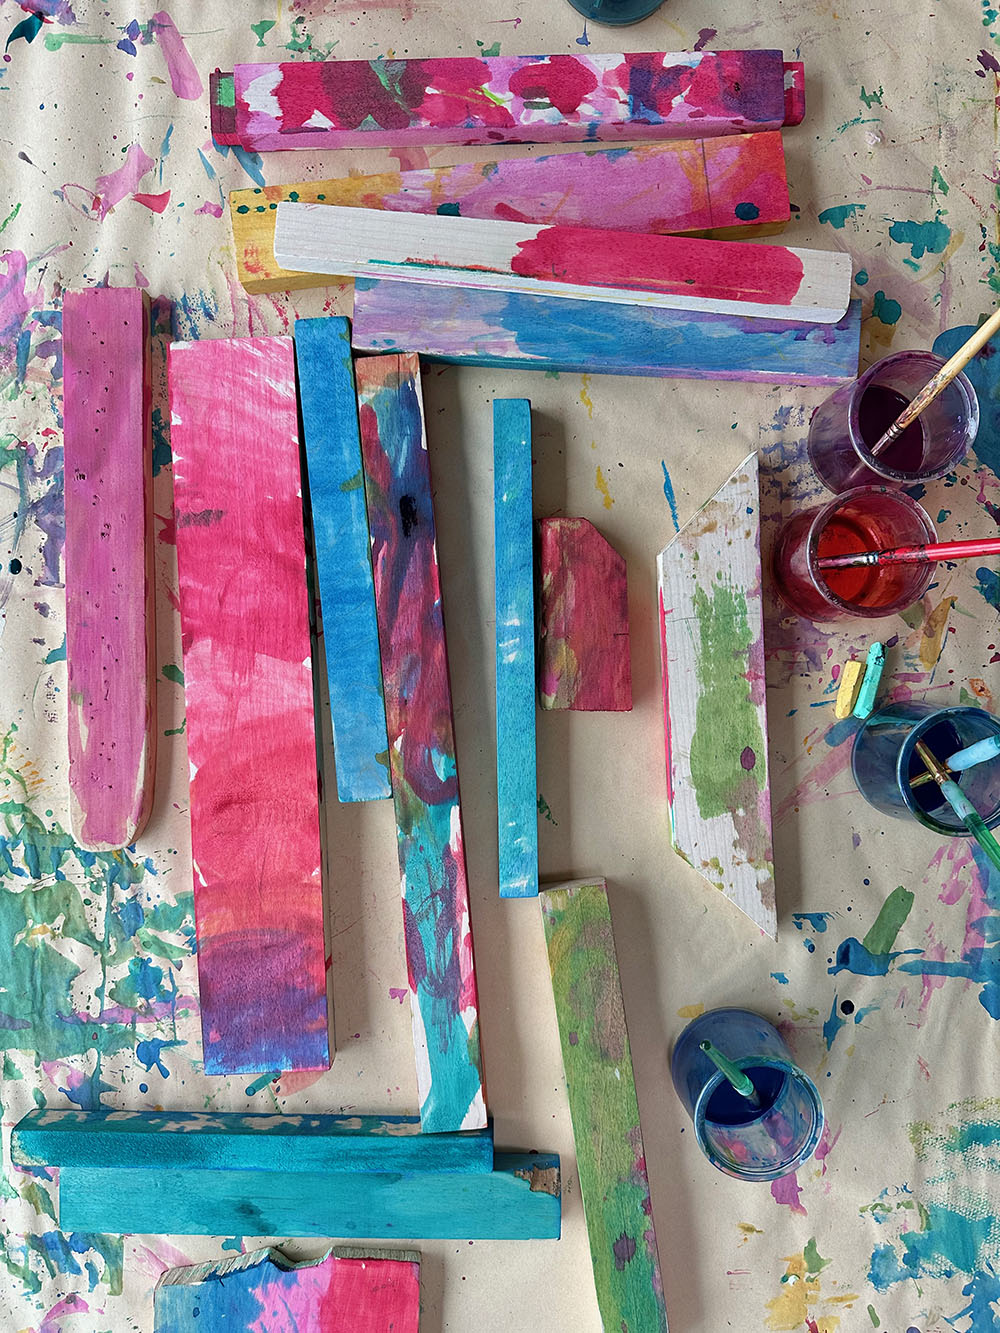
Wood scraps
Years ago, when I was doing my art classes in my house, I used this online source called Casey’s Wood, where I would buy their “seconds” in bulk (they no longer offer this). This is when I discovered the absolute magic of unfinished wood in an art space. Especially paired with liquid watercolor and oil pastels or crayons. The wood absorbs the deep, rich color but leaves the wavy grain to create the most beautiful texture. Now I collect my wood scraps from my local high school’s wood shop. I make sure to sand down the edges, and then I offer them on the table with paint, mark-making tools, collage, and glue. I keep extra scraps in a big box or in a rolling cart for children to choose from. Samara from Purple Twig introduced me to using magazine tear sheets of architecture and gardens with wood to spark imaginative structure ideas. Offering bottles of white glue with the collage materials is very exciting for children, especially when they aren’t often given opportunities for squeezing to their heart’s content. There are no rules at the library; they can squeeze as much as they want. Interestingly, most kids only squeeze the amount they need. One trick for the children who love to squeeze is offering them shoebox lids so the glue stays contained.
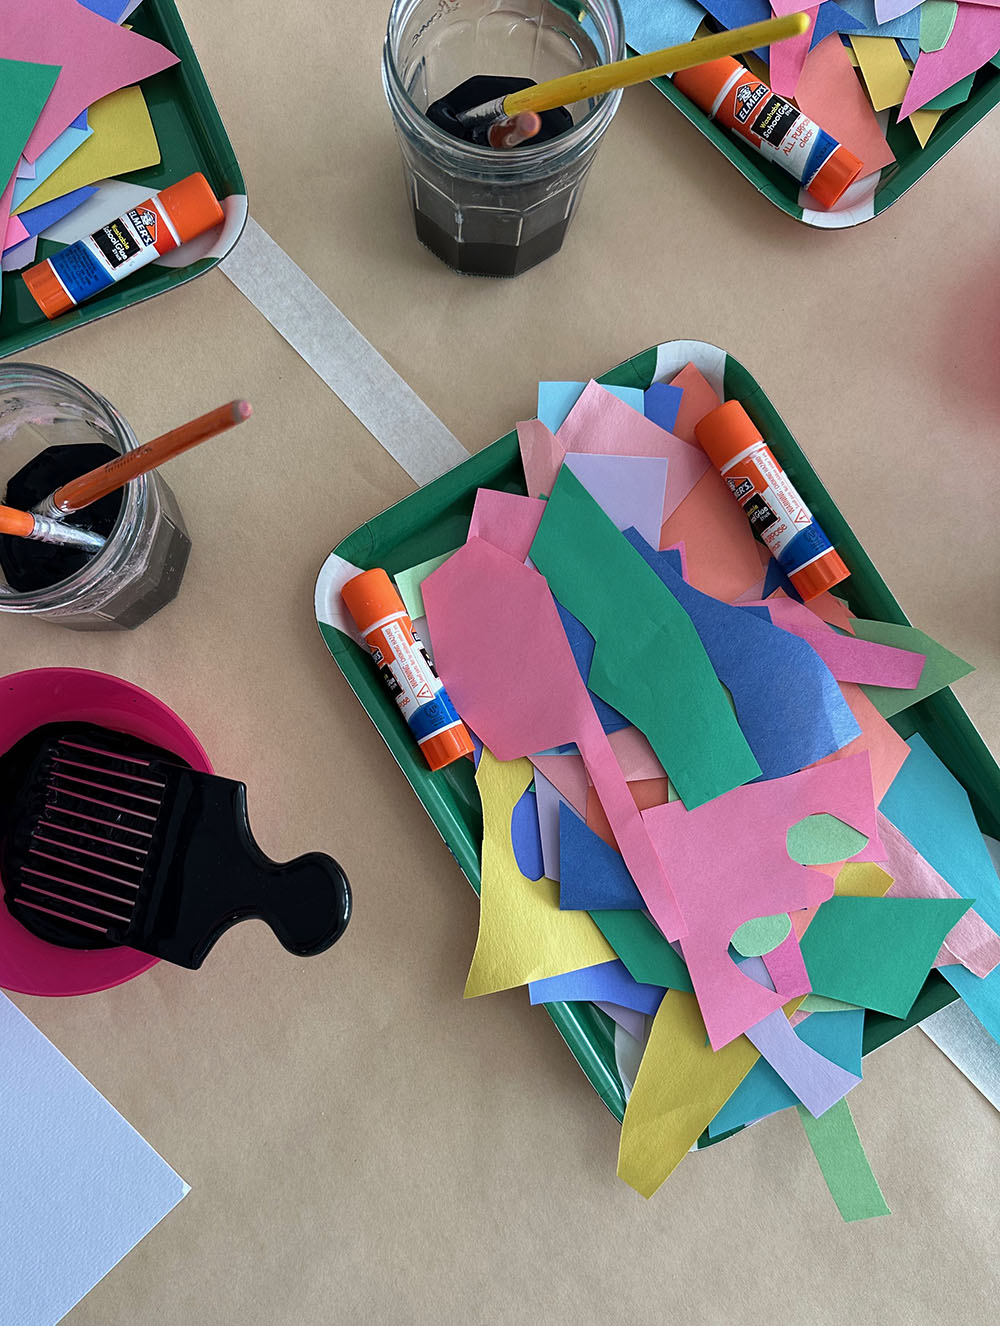
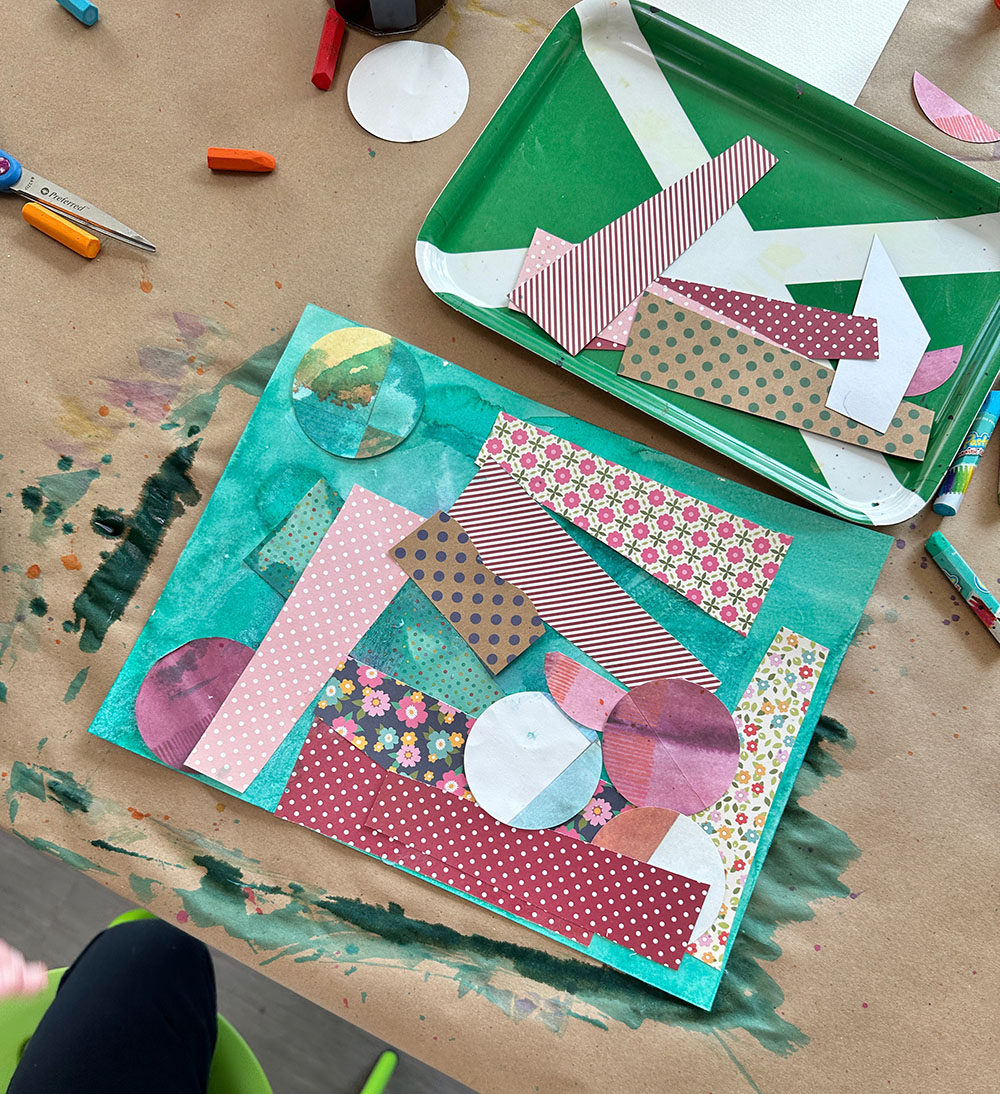
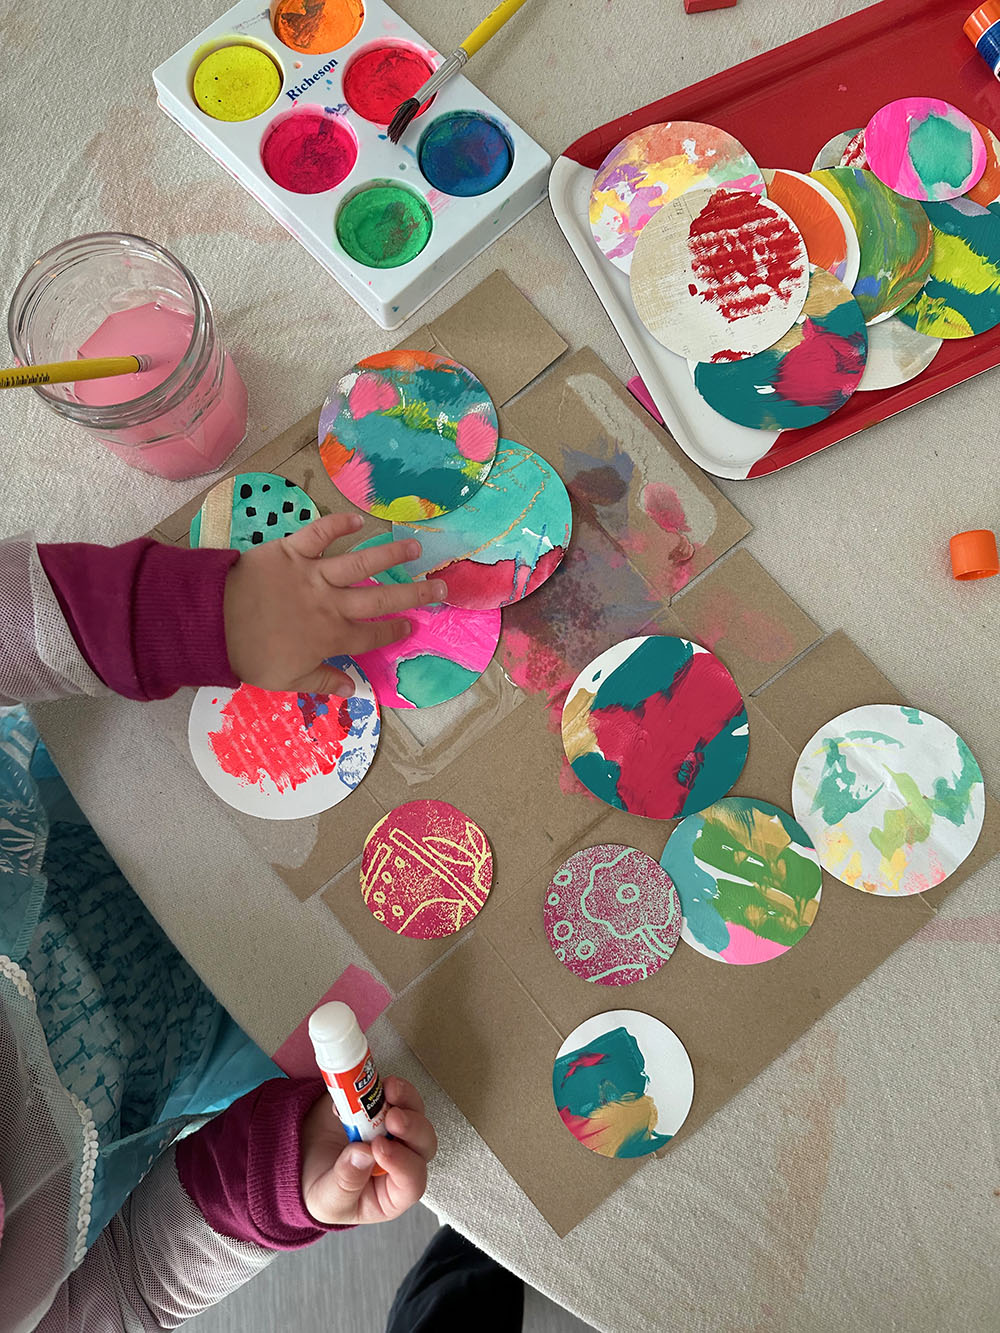
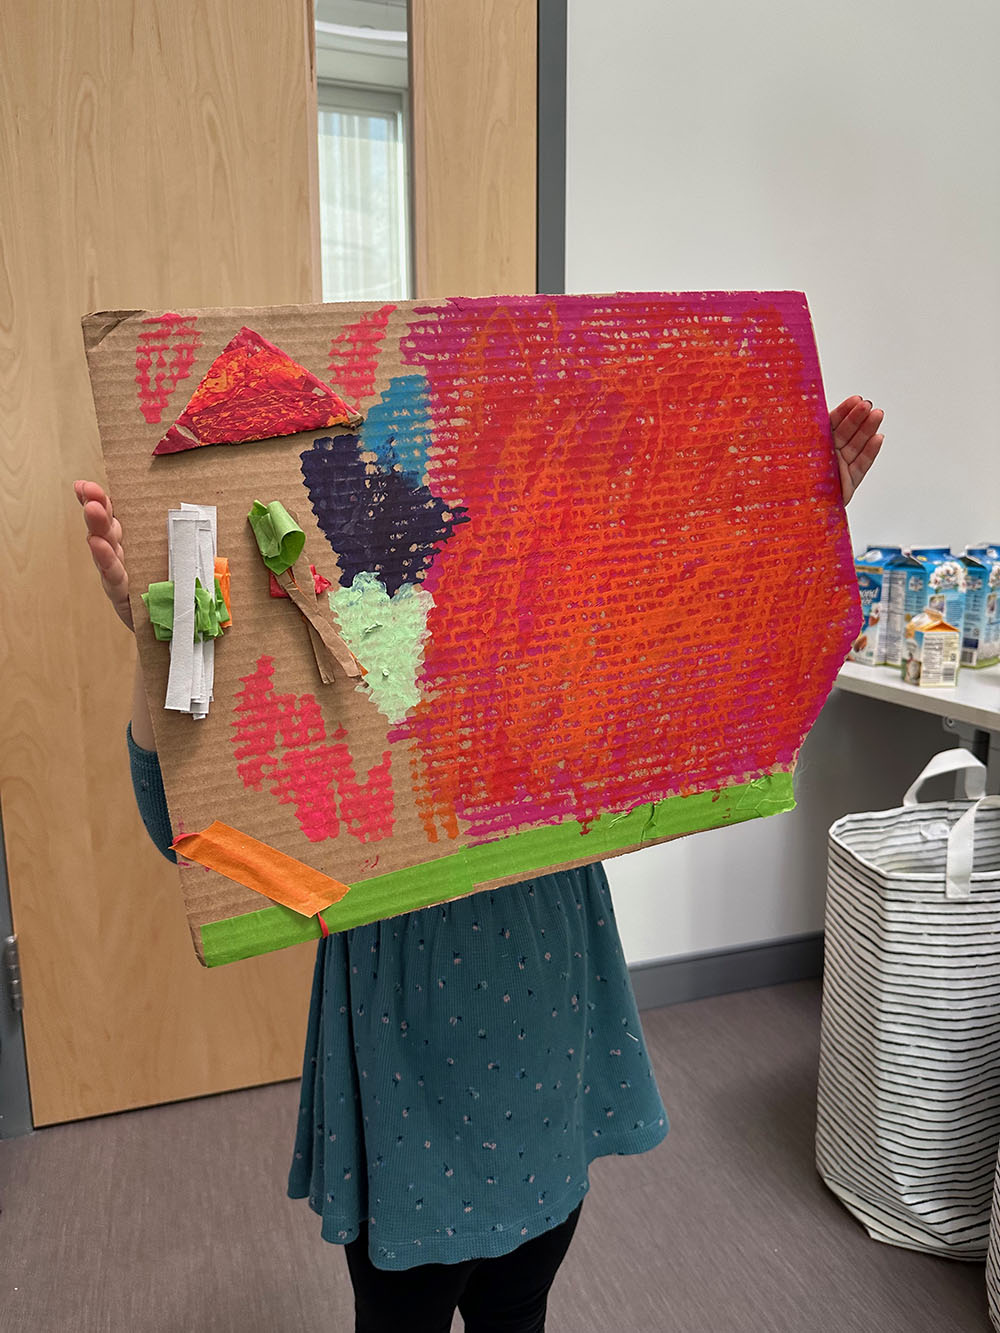
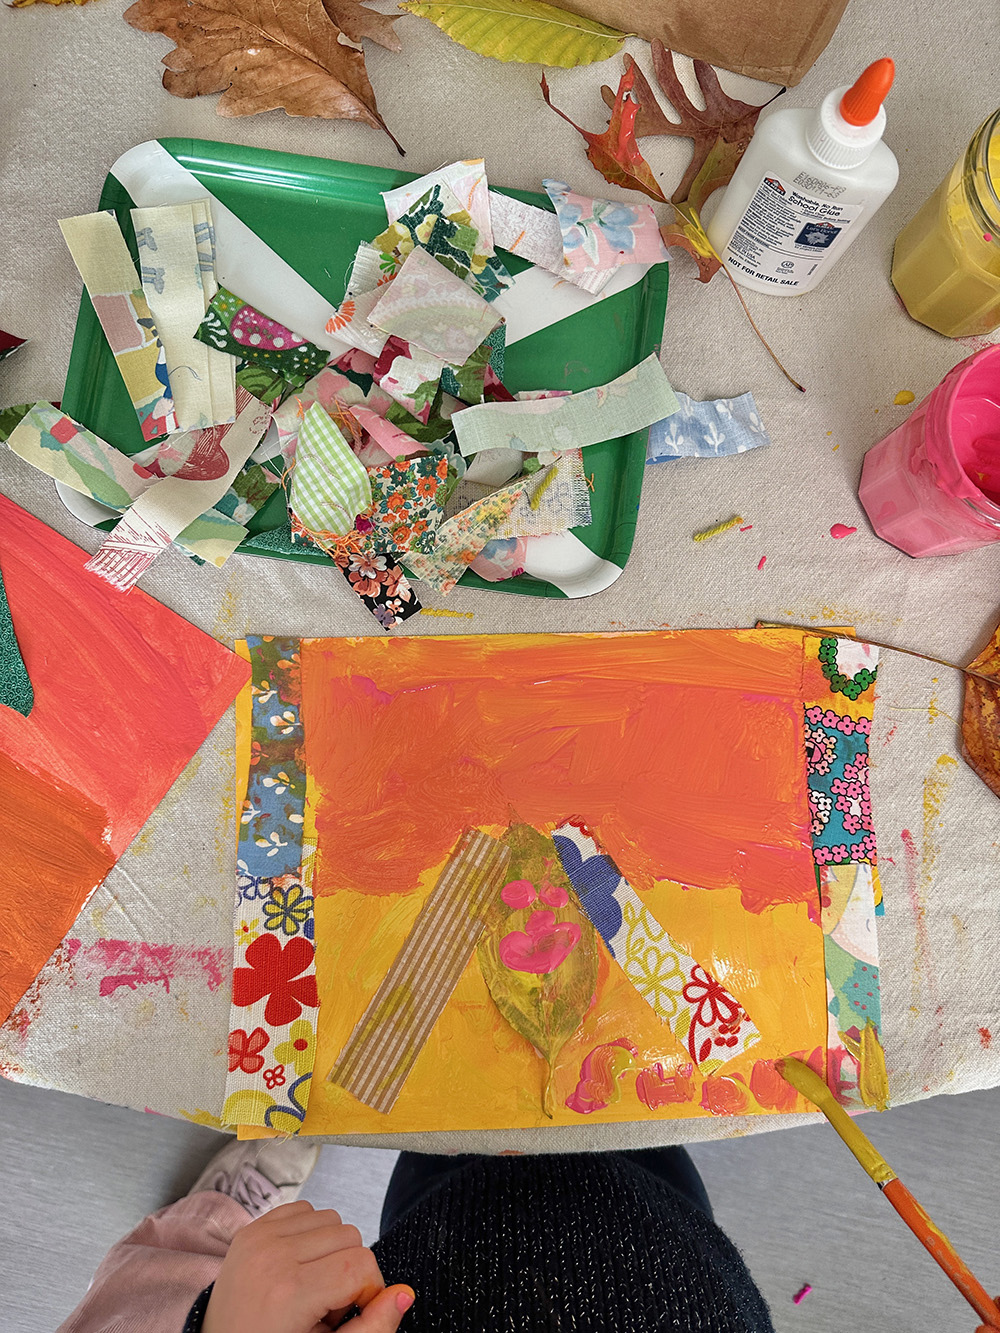
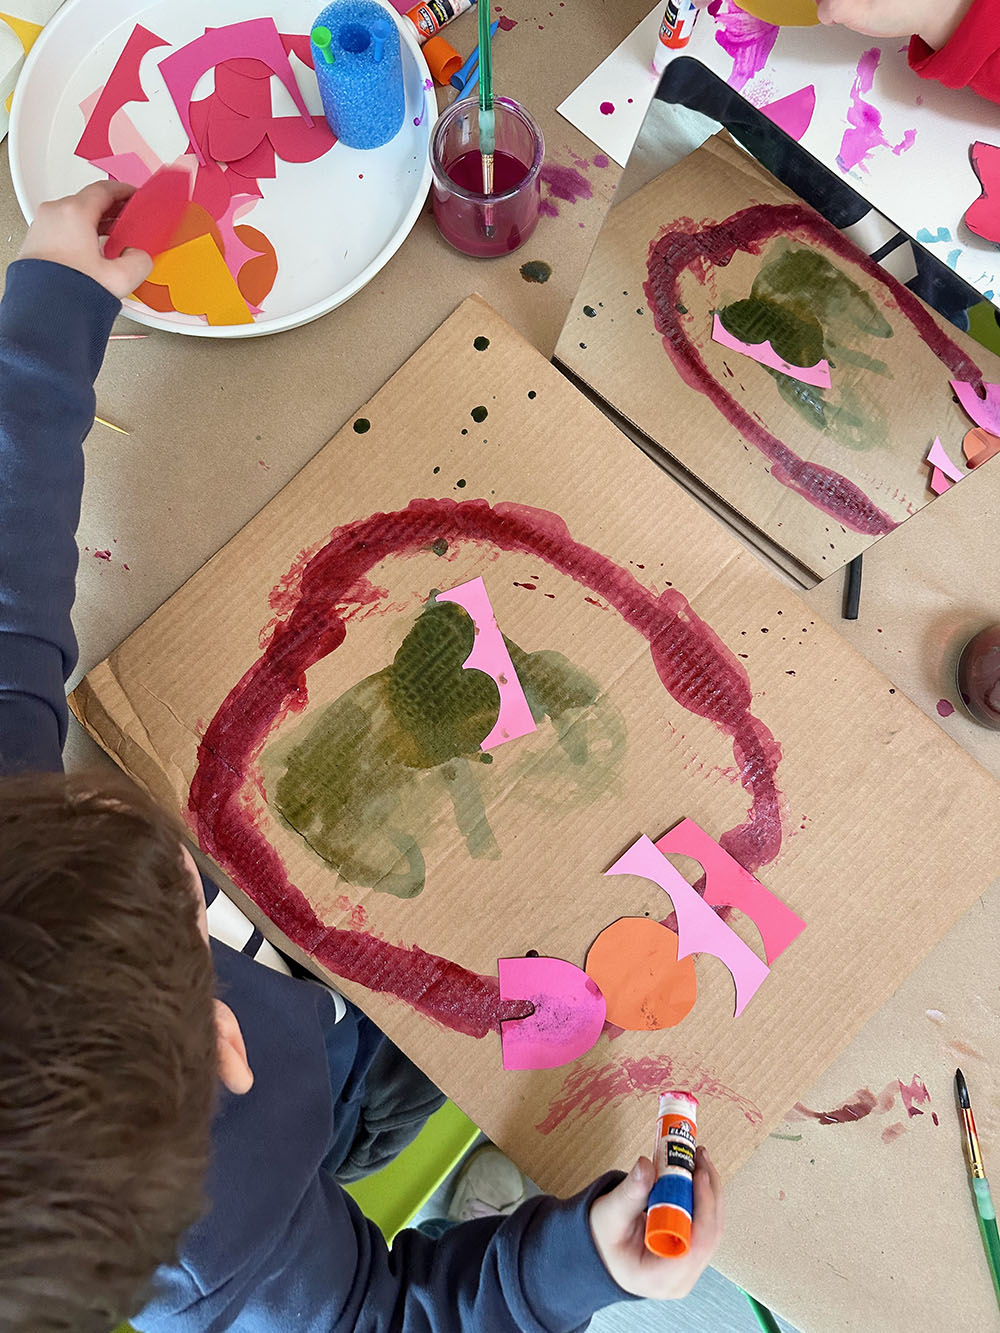
Collage material
Collage is a process that is so playful and forgiving. People of any age and any ability can feel successful. There is no wrong way to glue things to a surface, and every iteration looks like modern art that could hang in a museum. I mostly collect all sorts of paper scraps for collage, like colored paper, old art, scrapbooking patterned paper, magazines, and catalogs. I use big circle paper punches (I like the ones from EK tools, they seem to be more durable, and sometimes I bring them to the library and let kids use them) to create round shapes, or cut paper scraps into different shapes. I also collect small recycled and repurposed materials like puzzle pieces, chocolate wrappers, bread tags, bottle tops, and fabric scraps to add to a tray of collage bits and pieces. Lately, I have really loved offering collage with other processes like painting and mark-making. Long ago, I used to stagger these processes so one day was for painting and then the next day for collage. But my open-house events at the library forced me to offer them at the same time, and now I don’t think I would ever go back. The choice of materials makes the experience so much richer and more engaging, and it appeals to children who want to collage, draw, or paint. We have a really incredible module on collage in Materials Matter with a video that covers all the best collage things.
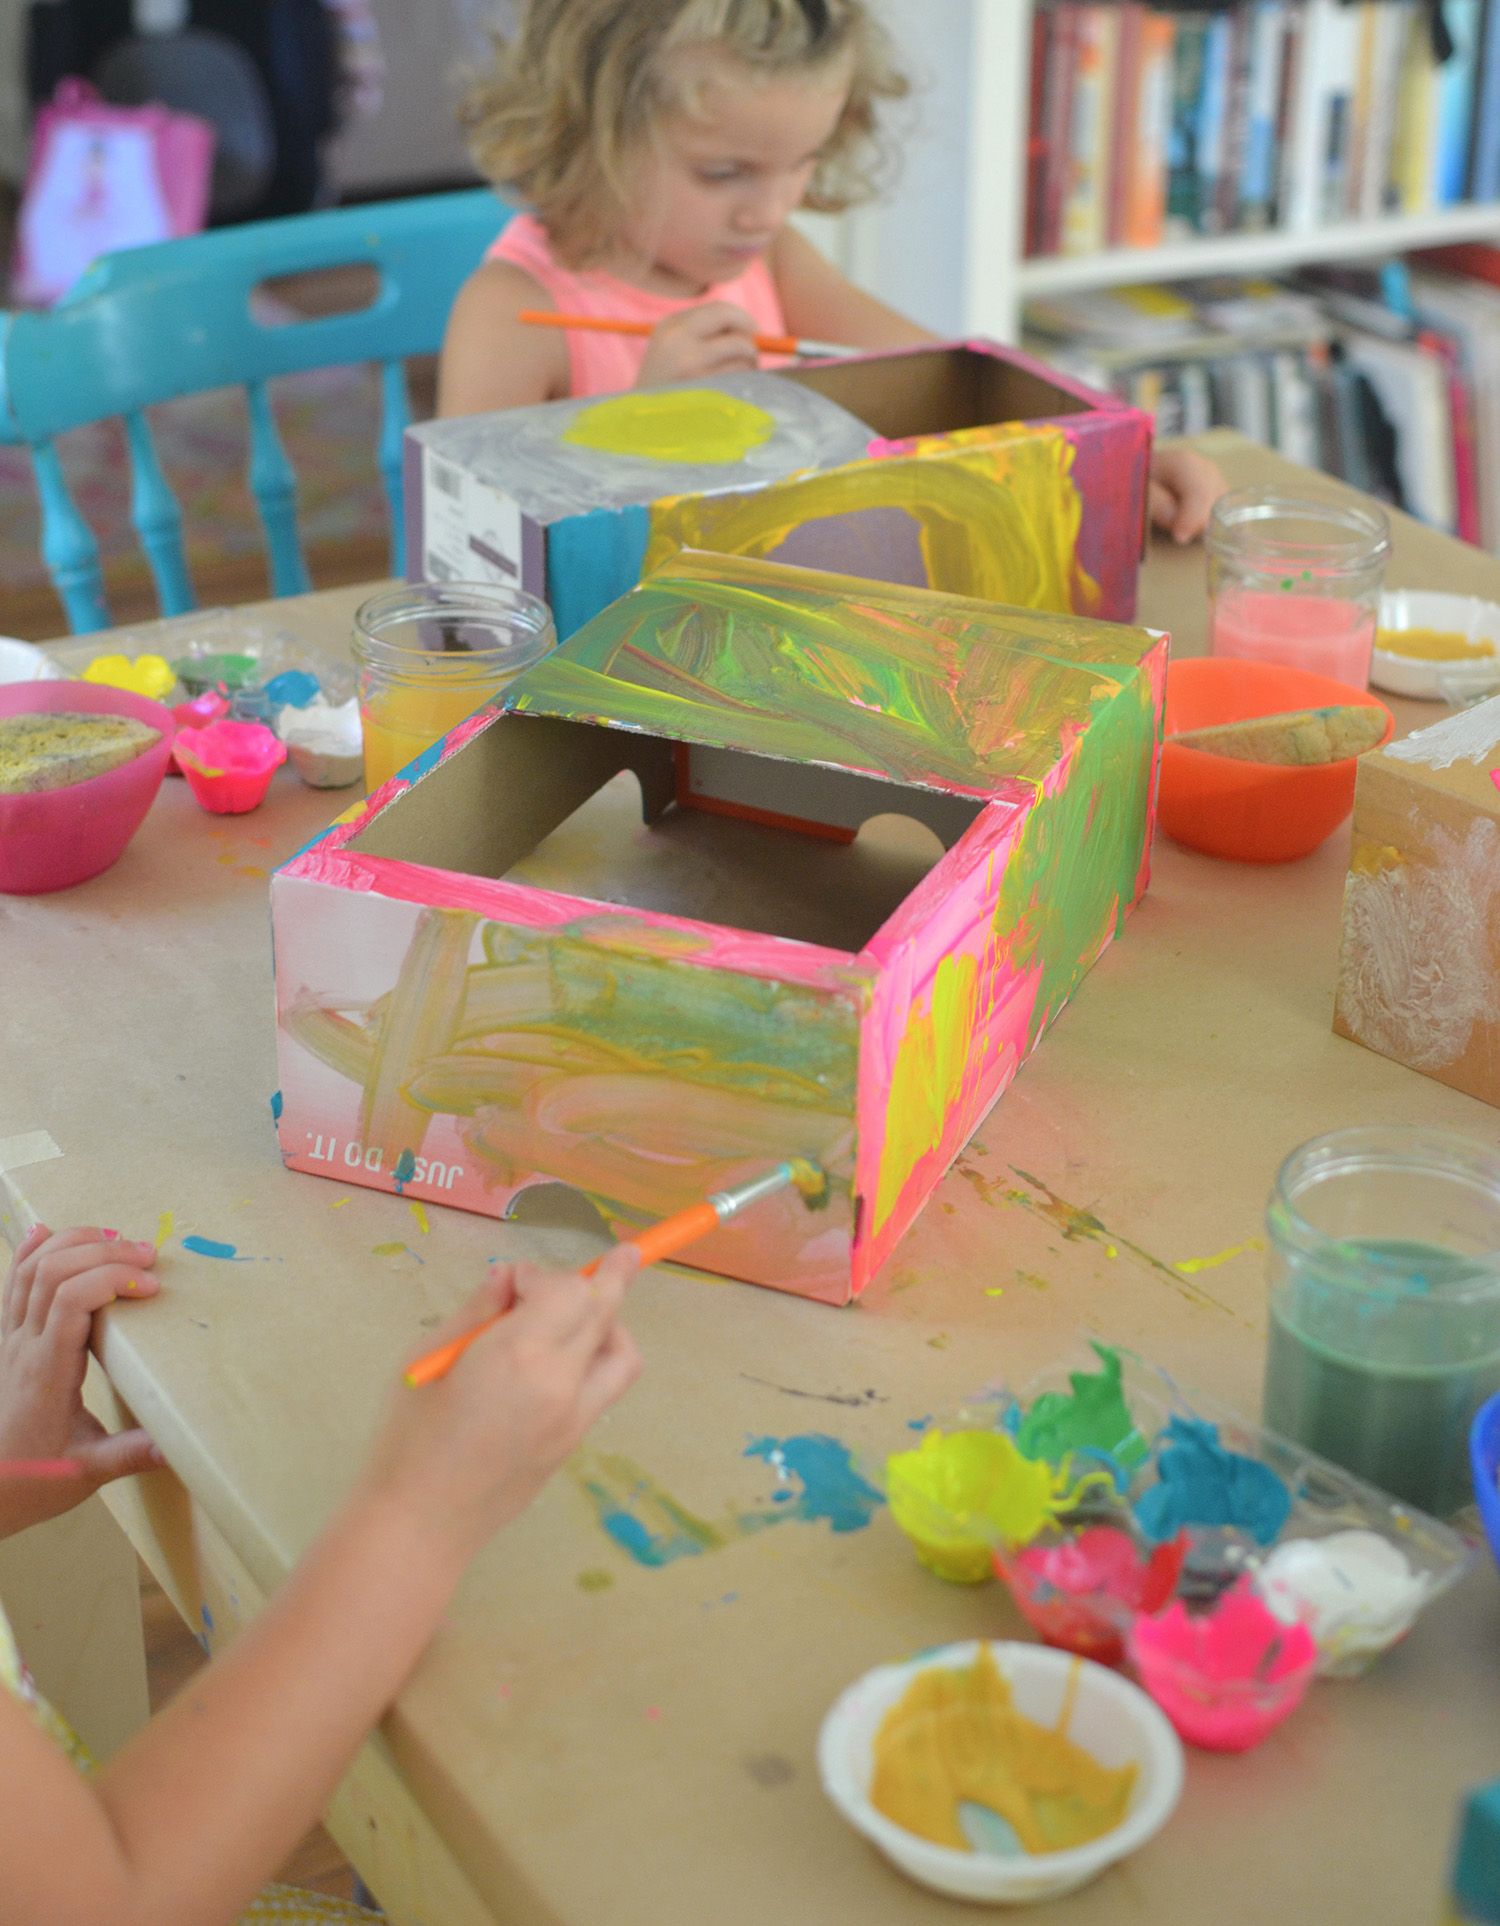
Surfaces
Surfaces are anything flat that can be painted, printed, drawn, or glued on. A more recognizable heading would be “paper,” but if you don’t have the budget for a variety of papers, you can offer recycled surfaces that are just as engaging and cost nothing other than time sourcing and preparing. Not to contradict what I just said, but I do believe in offering a good quality watercolor paper to use with liquid watercolor, if it’s in your budget. And I love sulphite paper (white and colors) for collage and tempera paint, and pan watercolors, too. But I also use a ton of cardboard. In fact, Shannon, my partner at The Creativity Project, came up with the genius idea of using cardboard attached to easels with binder clips so that paint can be layered and the surface can stay up for days without tearing, and then turned over to use the other side. I also save cereal boxes and other boxed packaging and then cut them open and bend them flat to use as surfaces. And of course, brown paper bags cut open with the handle on are another favorite (I love these winter collages made in Shannon’s studio many years ago). Cardboard and brown surfaces also take oil pastels and chalk pastels beautifully.
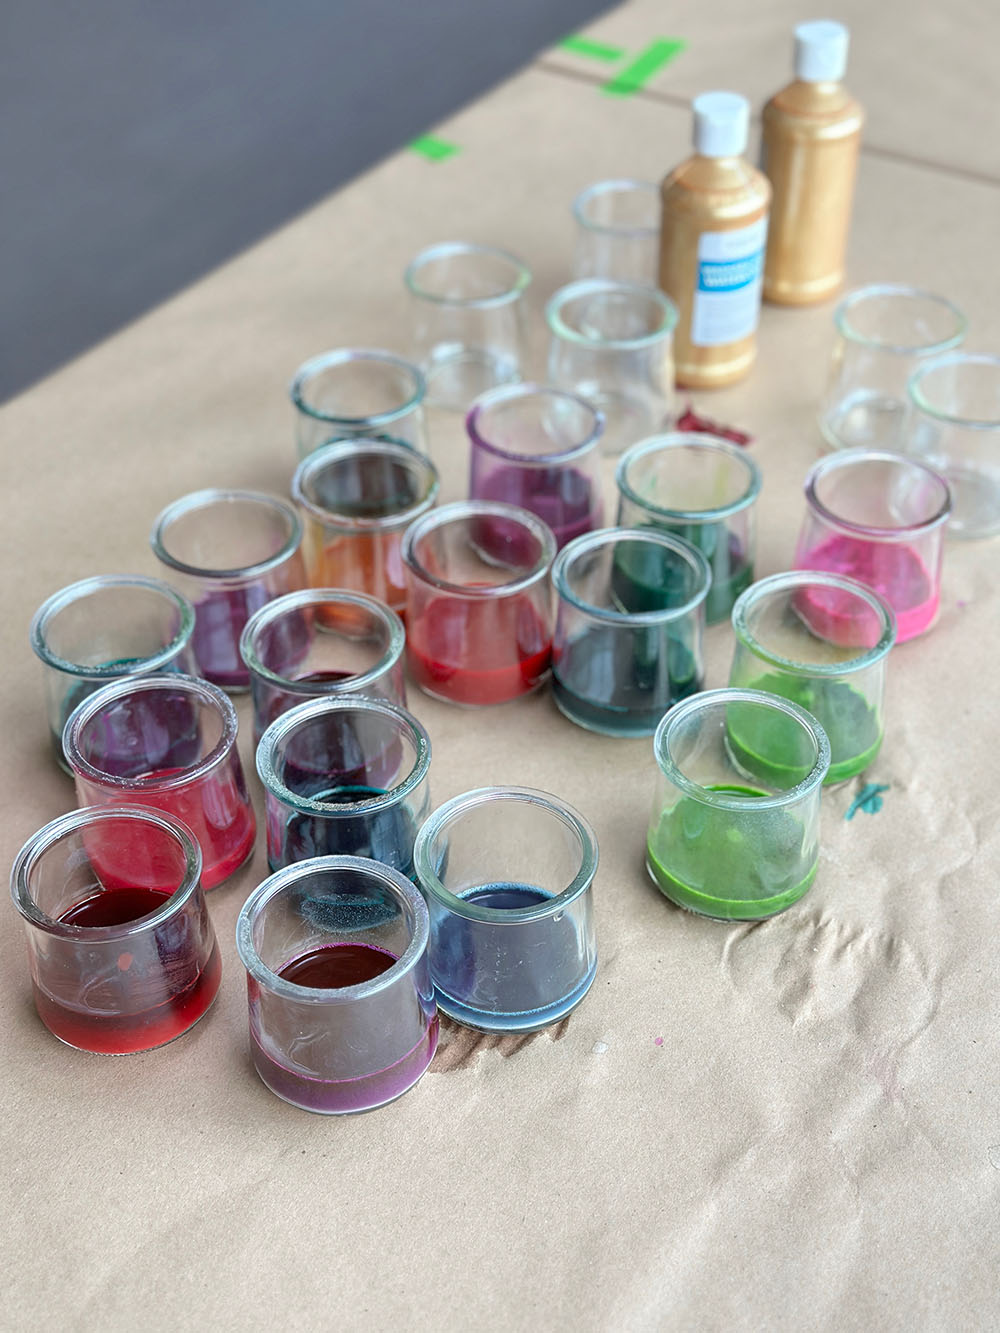
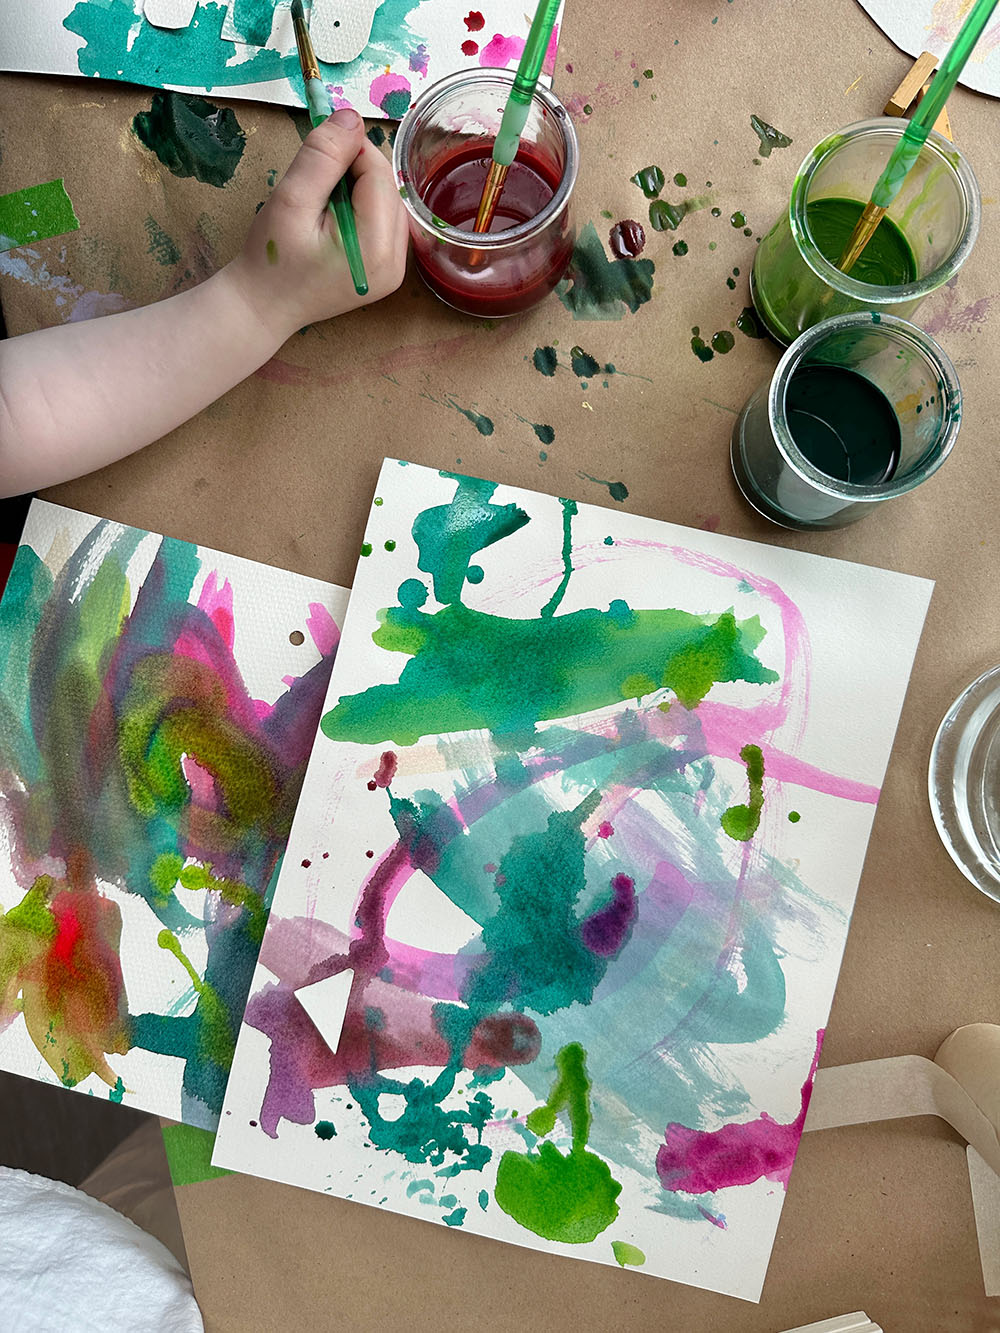
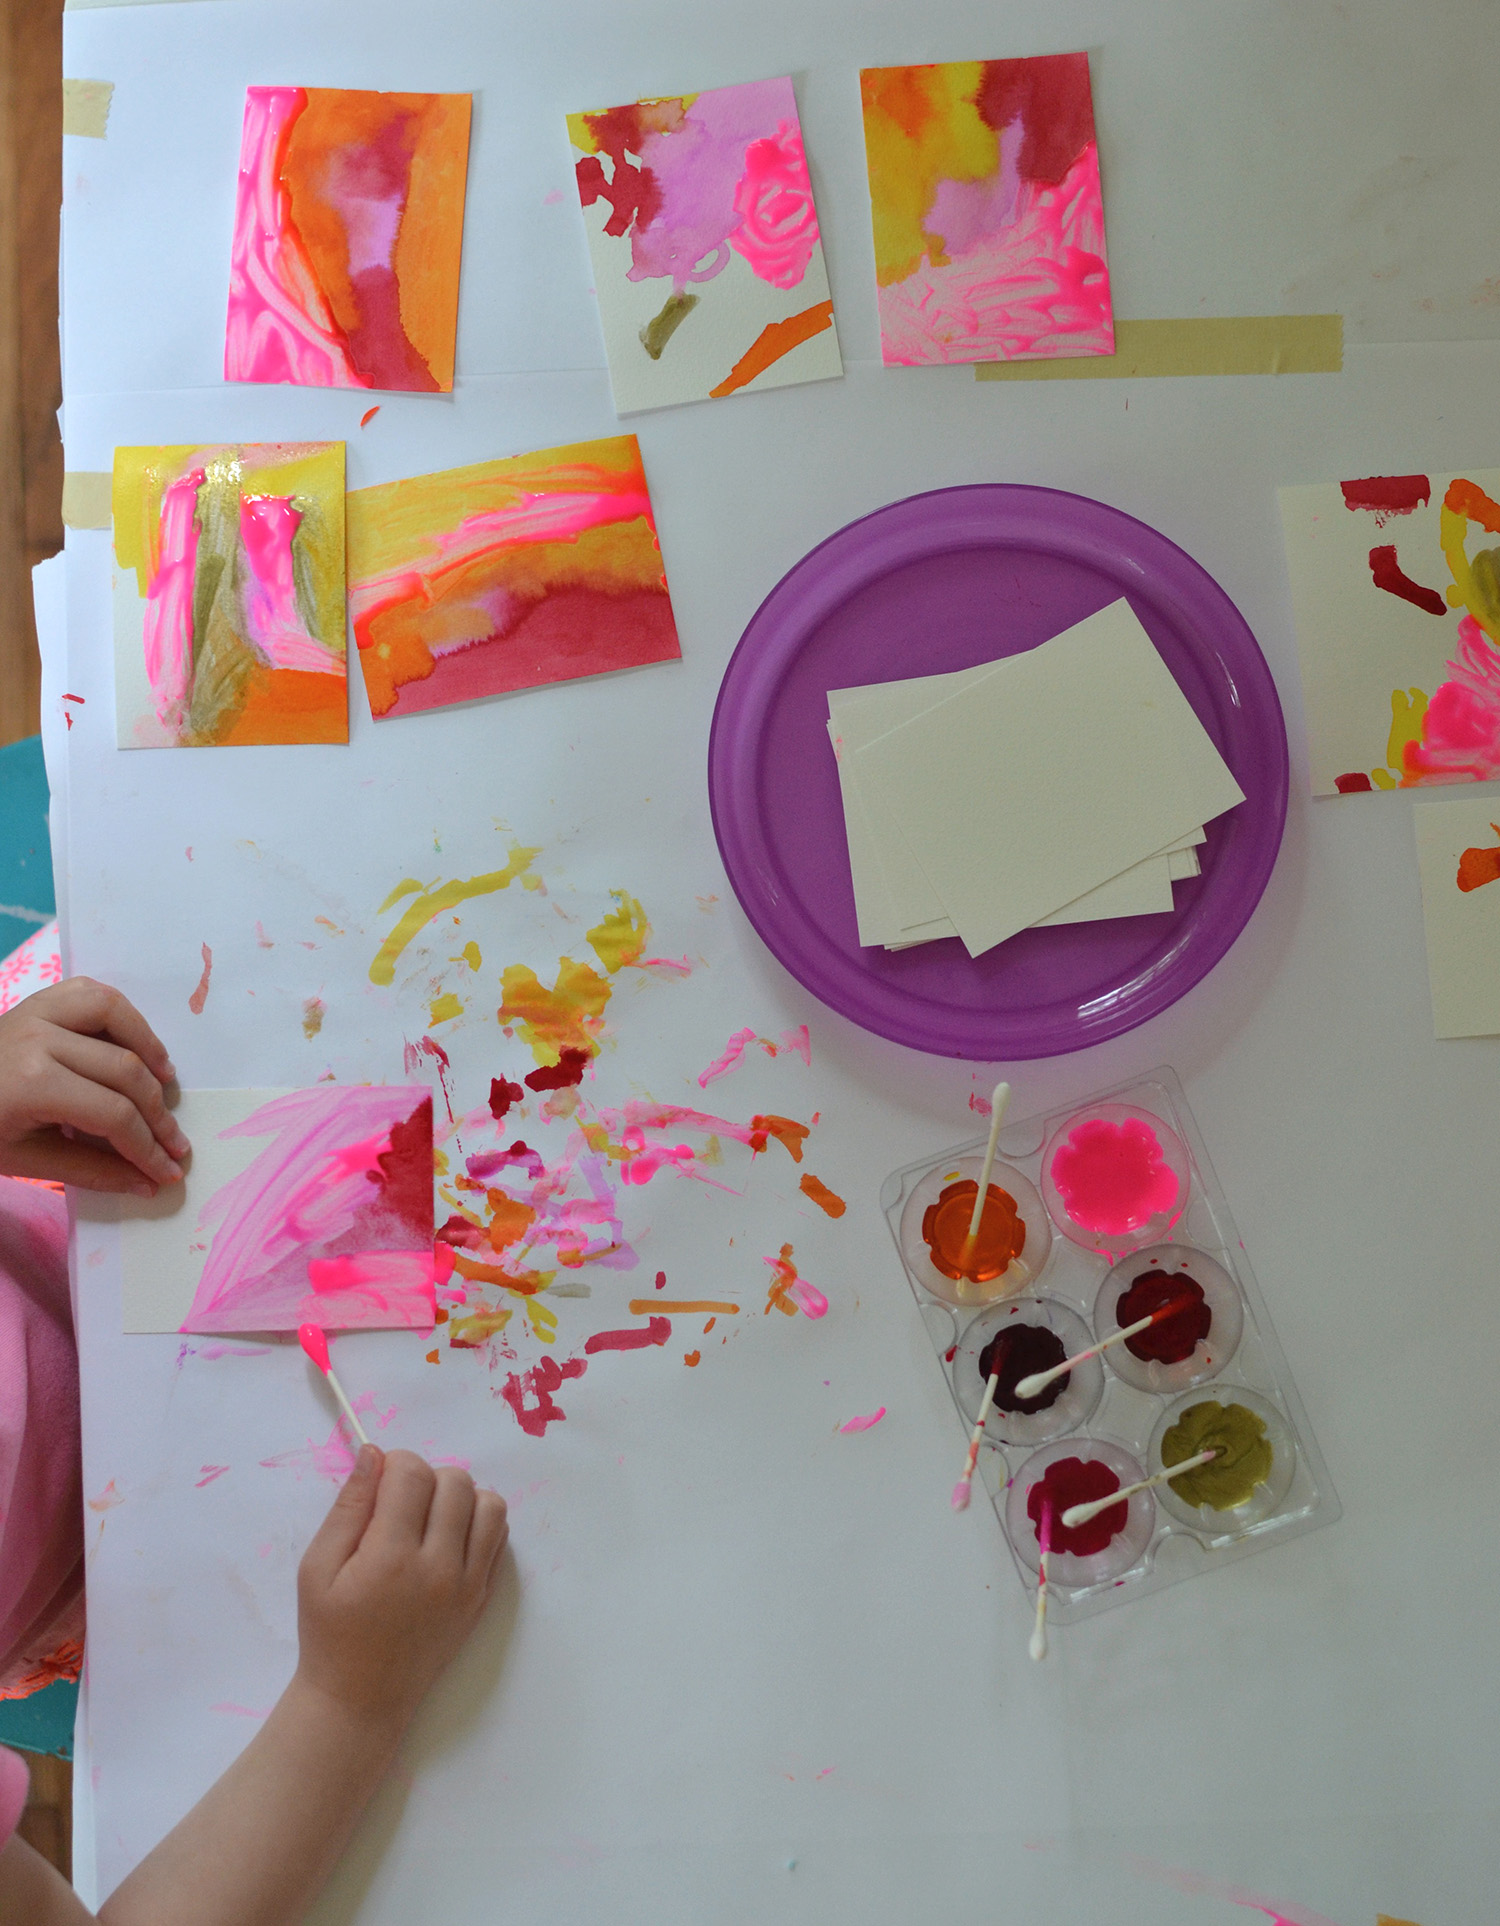
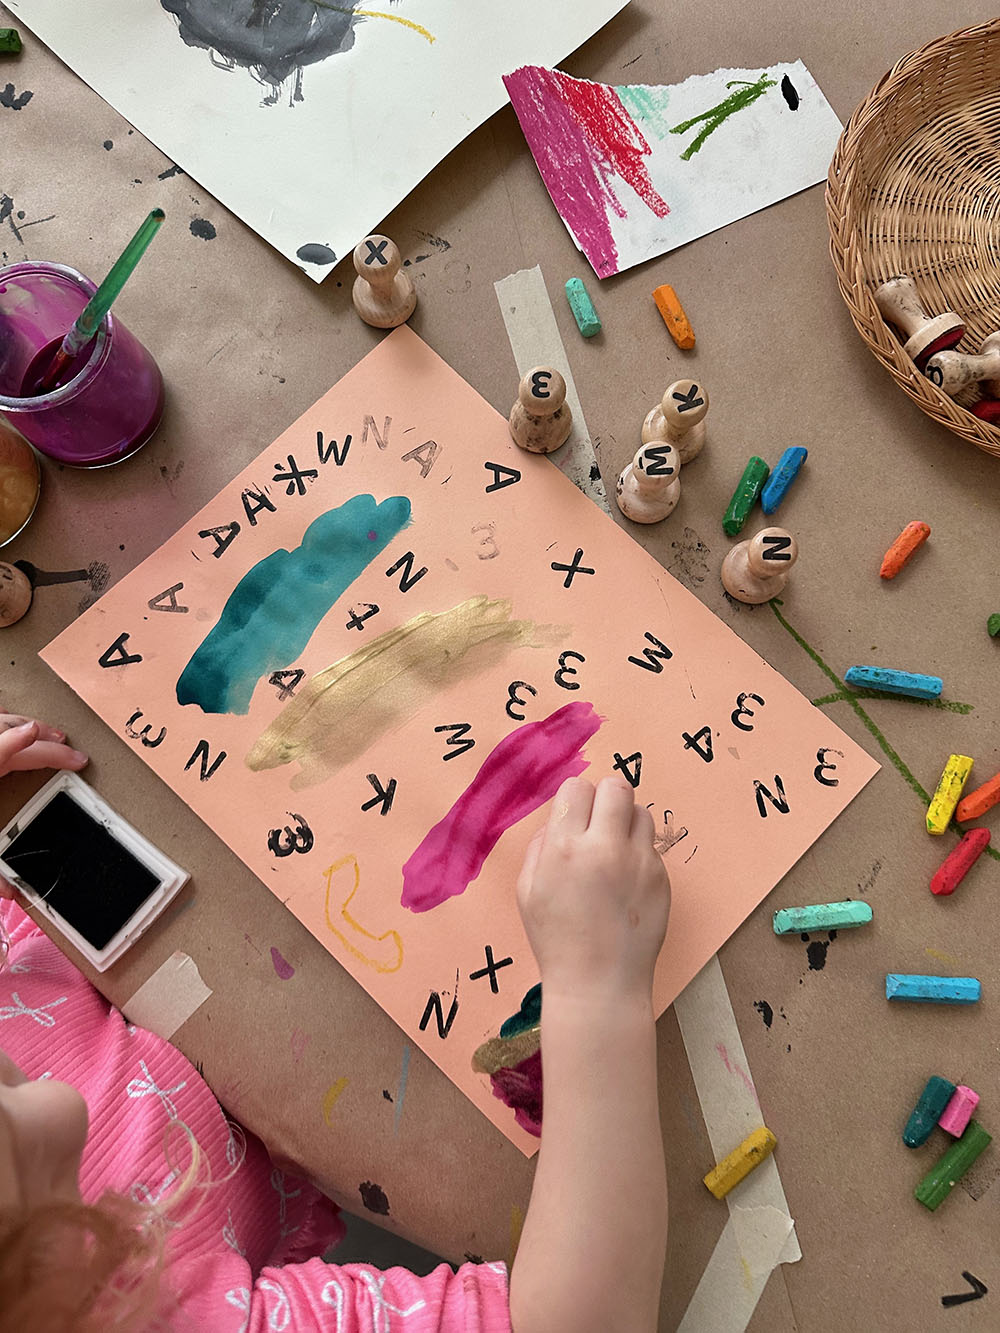
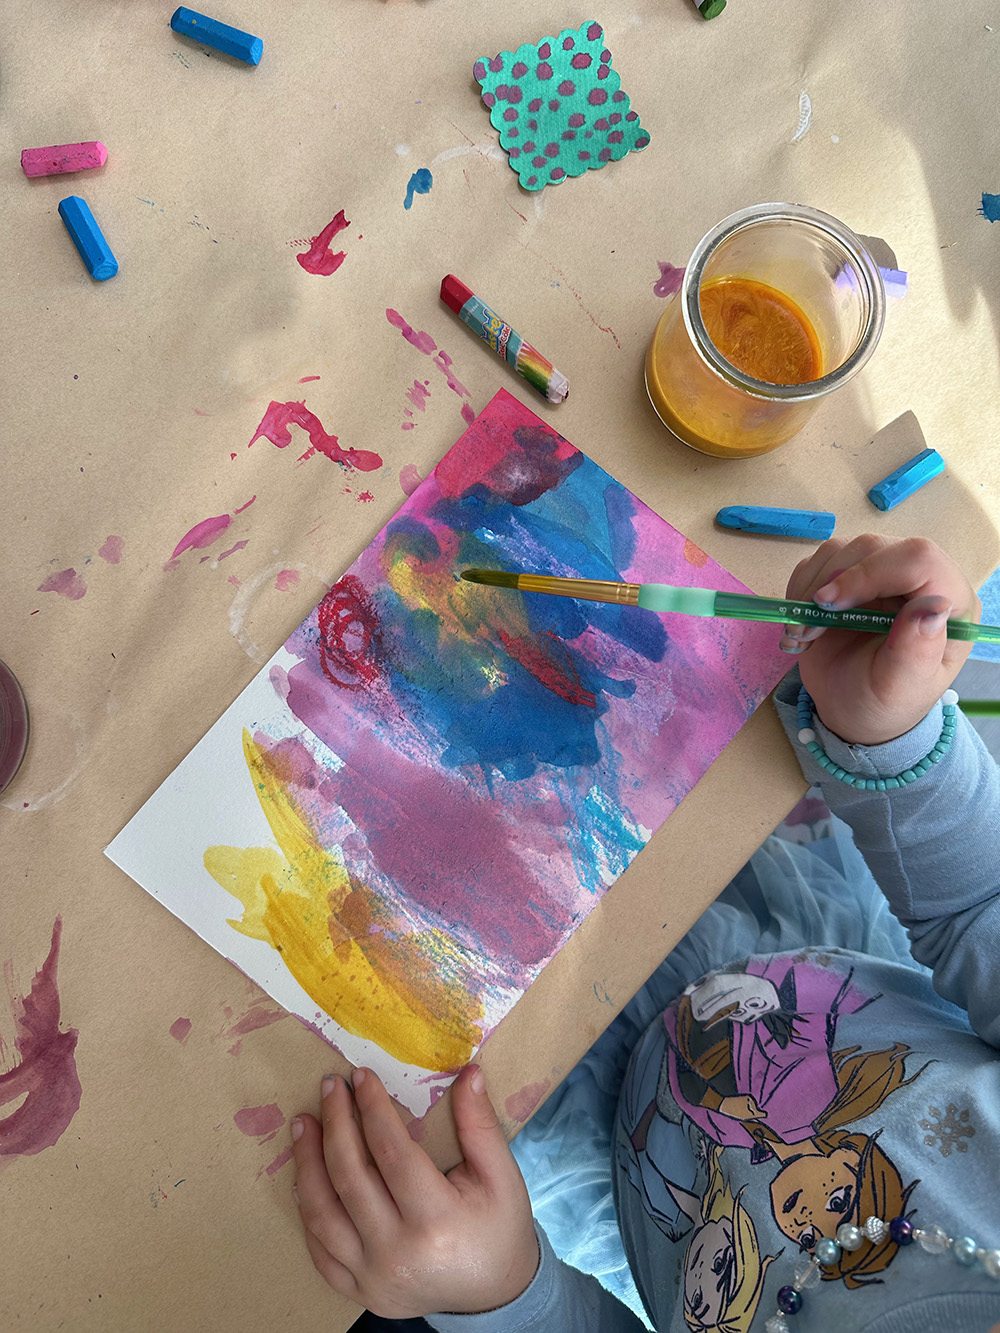
Liquid watercolor
Liquid watercolor is a hidden gem. I don’t think it’s a common medium that schools or parents at home are even familiar with. I also don’t know if it’s available in all parts of the world. Before I discovered it myself (when my writing partner, Betsy McKenna, gave me some bottles after cleaning out her classroom), I used to water down tube watercolors in plastic egg cartons. You can also water down tempera paint as a hack if you don’t live somewhere that sells liquid watercolor. But if you can buy some of this remarkable paint, do it! A little goes a long way, so the bottles last a while. I like to mix my liquid watercolor with some water, about half and half for the darker colors, and a third water for the lighter colors. I fill small recycled yogurt jars about an inch or less, and each color gets a brush. This is my system after many years of using liquid watercolor. This way, it won’t be too wasteful if it spills, and there is only a smidge left when washing them out. If you want to save the paint to use another day, you can buy lids for the jars. Or you can buy no-spill cups with lids. I like open jars because it’s more visceral and you can look in and see the color swishing around. It’s just all part of the experience. My favorite brushes to use with liquid watercolor are size 8 plastic from Royal. They hold the paint well, and children can dip and then fill their paper with color easily. Don’t ever use the little brushes that come with watercolor sets. Having the right tools is really important for success and engagement. You can read more here about some favorite liquid watercolor experiences I have offered over the years, and I talk about mixing colors here. And again, our Materials Matter course has an entire module on paints, along with an extensive playbook of ideas and an in-depth video tutorial including color theory and color mixing!
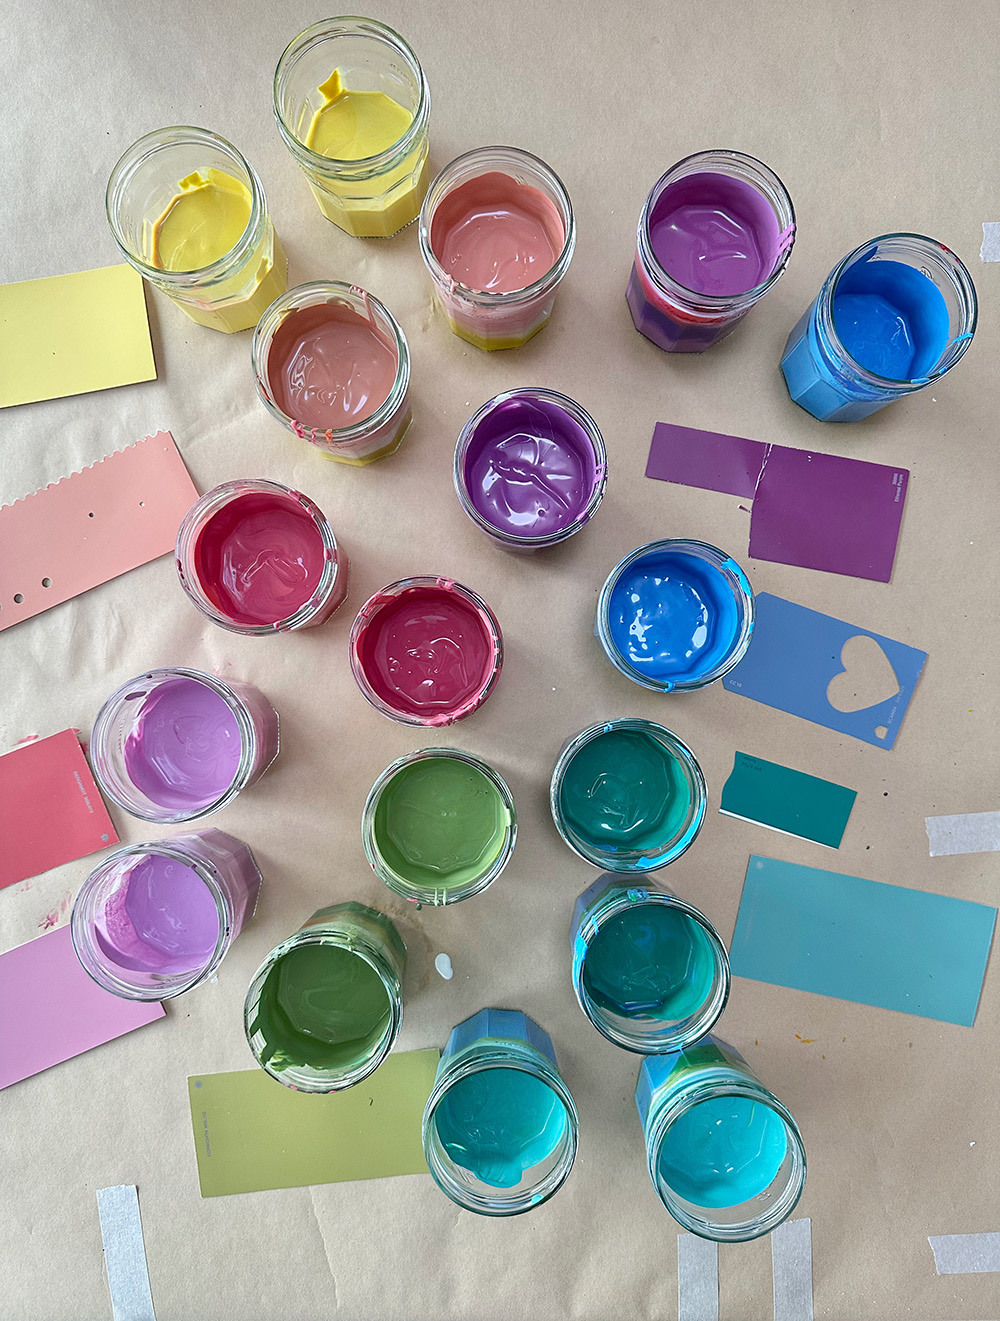
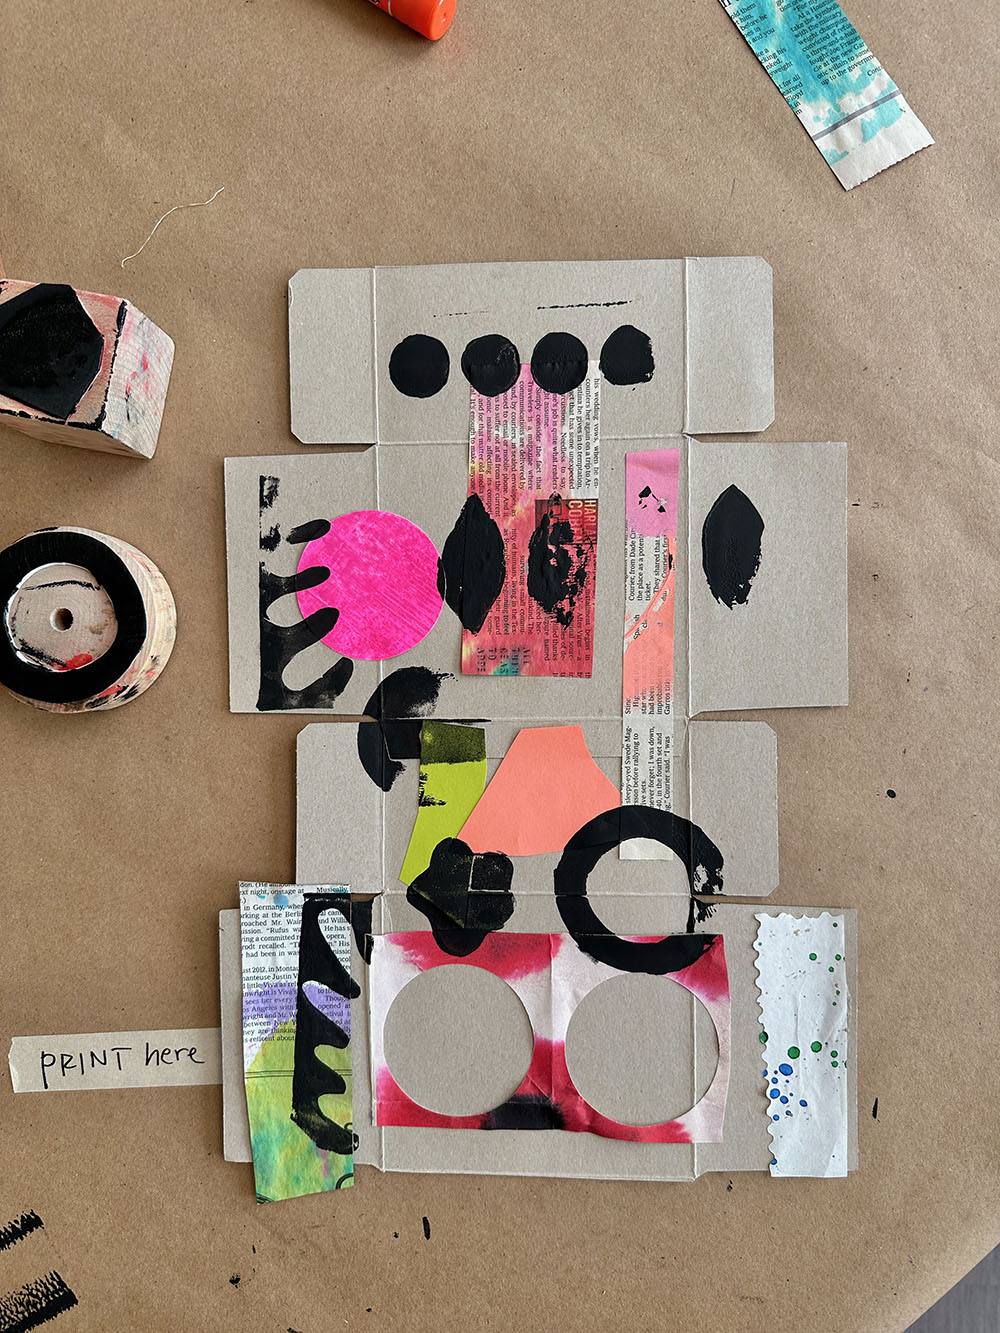
Tempera paint
A good water-based tempera paint is an essential in any art space. Jars of tempera paint are a magnet for children, and if there is one art medium that I would say is a sure thing, it is tempera paint. But it has to be good quality, and I never just squeeze it out of the bottle; I always mix colors with white. I do this because I usually offer cardboard and recyclables as surfaces, and adding white to paint makes it more opaque and really pop when dry, even on brown. To see this in real life, I show how to mix tempera colors and what they look like on different surfaces in our Materials Matter course, plus I talk about color families, which is very helpful when setting out colors with toddlers and young children who like to mix all the paints together. I also talk about mixing tempera paints here on the blog, with links to my favorite brands. I hear from teachers that they don’t often set out tempera paints because they are messy and take a while to clean up, and I do understand this. You have to be in the mindset for a painting experience, and perhaps factor in some extra time for cleaning, and some systems to make it easier. For example, you can have a bin filled with water and a towel for children who want to wash their hands. This can also be the place to throw the brushes in when finished. The no-spill cups are great if you want to put a lid on and save for another time. I use jam jars because I like an open jar. I like to use brushes by First Impressions for tempera paint, either size 8 or 10. As you can see from the collection of photos, I offer tempera paint with just about any surface, mostly recyclables. Two more time-saving tricks: one, if you don’t have time to add white to the paints, just set out some white, and children can mix in the white organically; and two, you can also save time by setting out just one color and white. Just buy a big gallon of white!

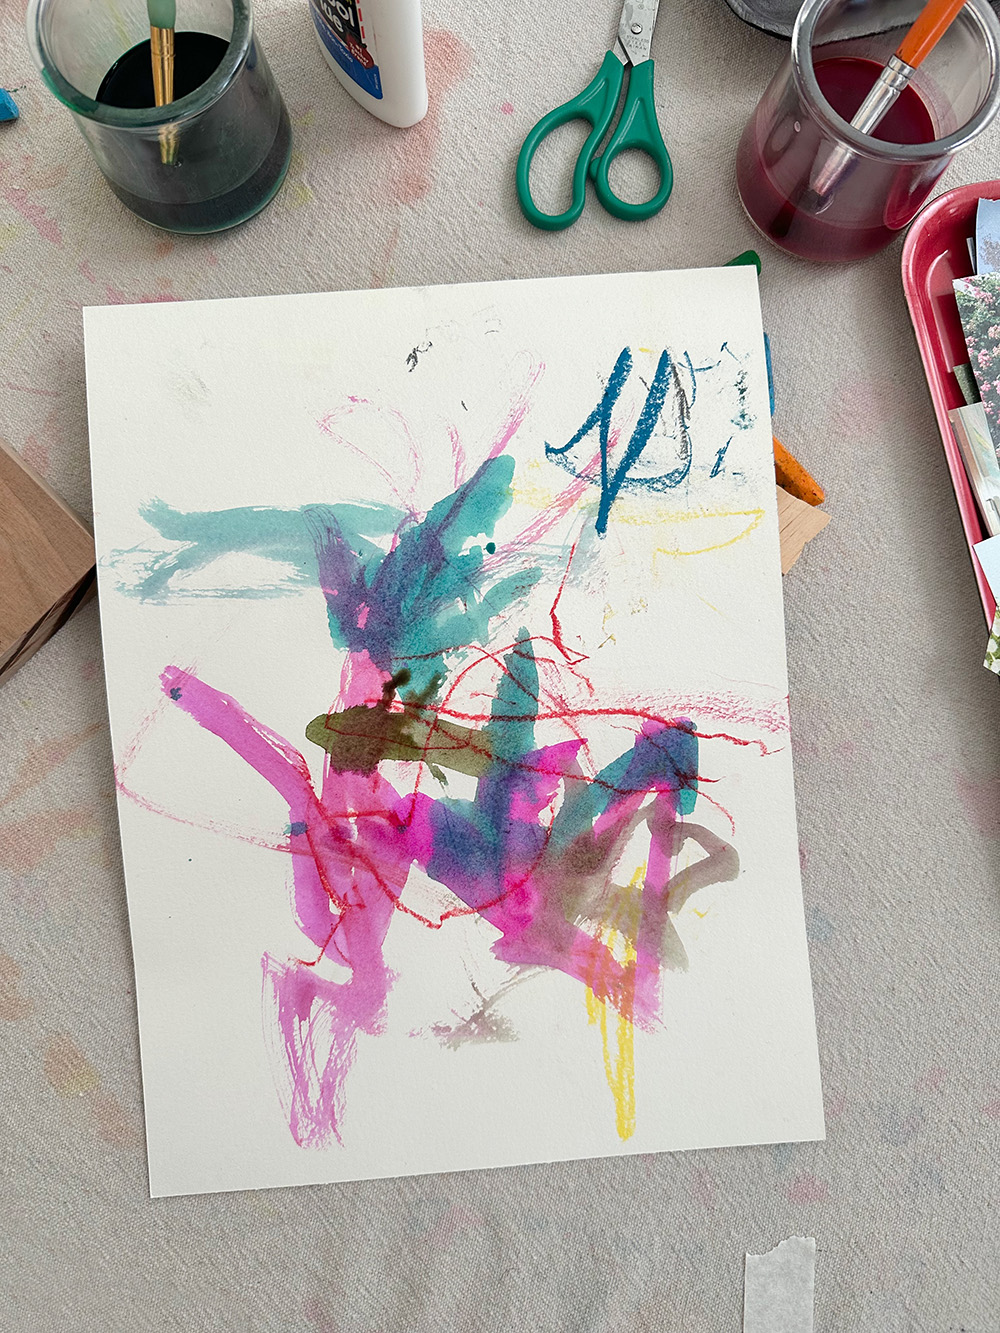
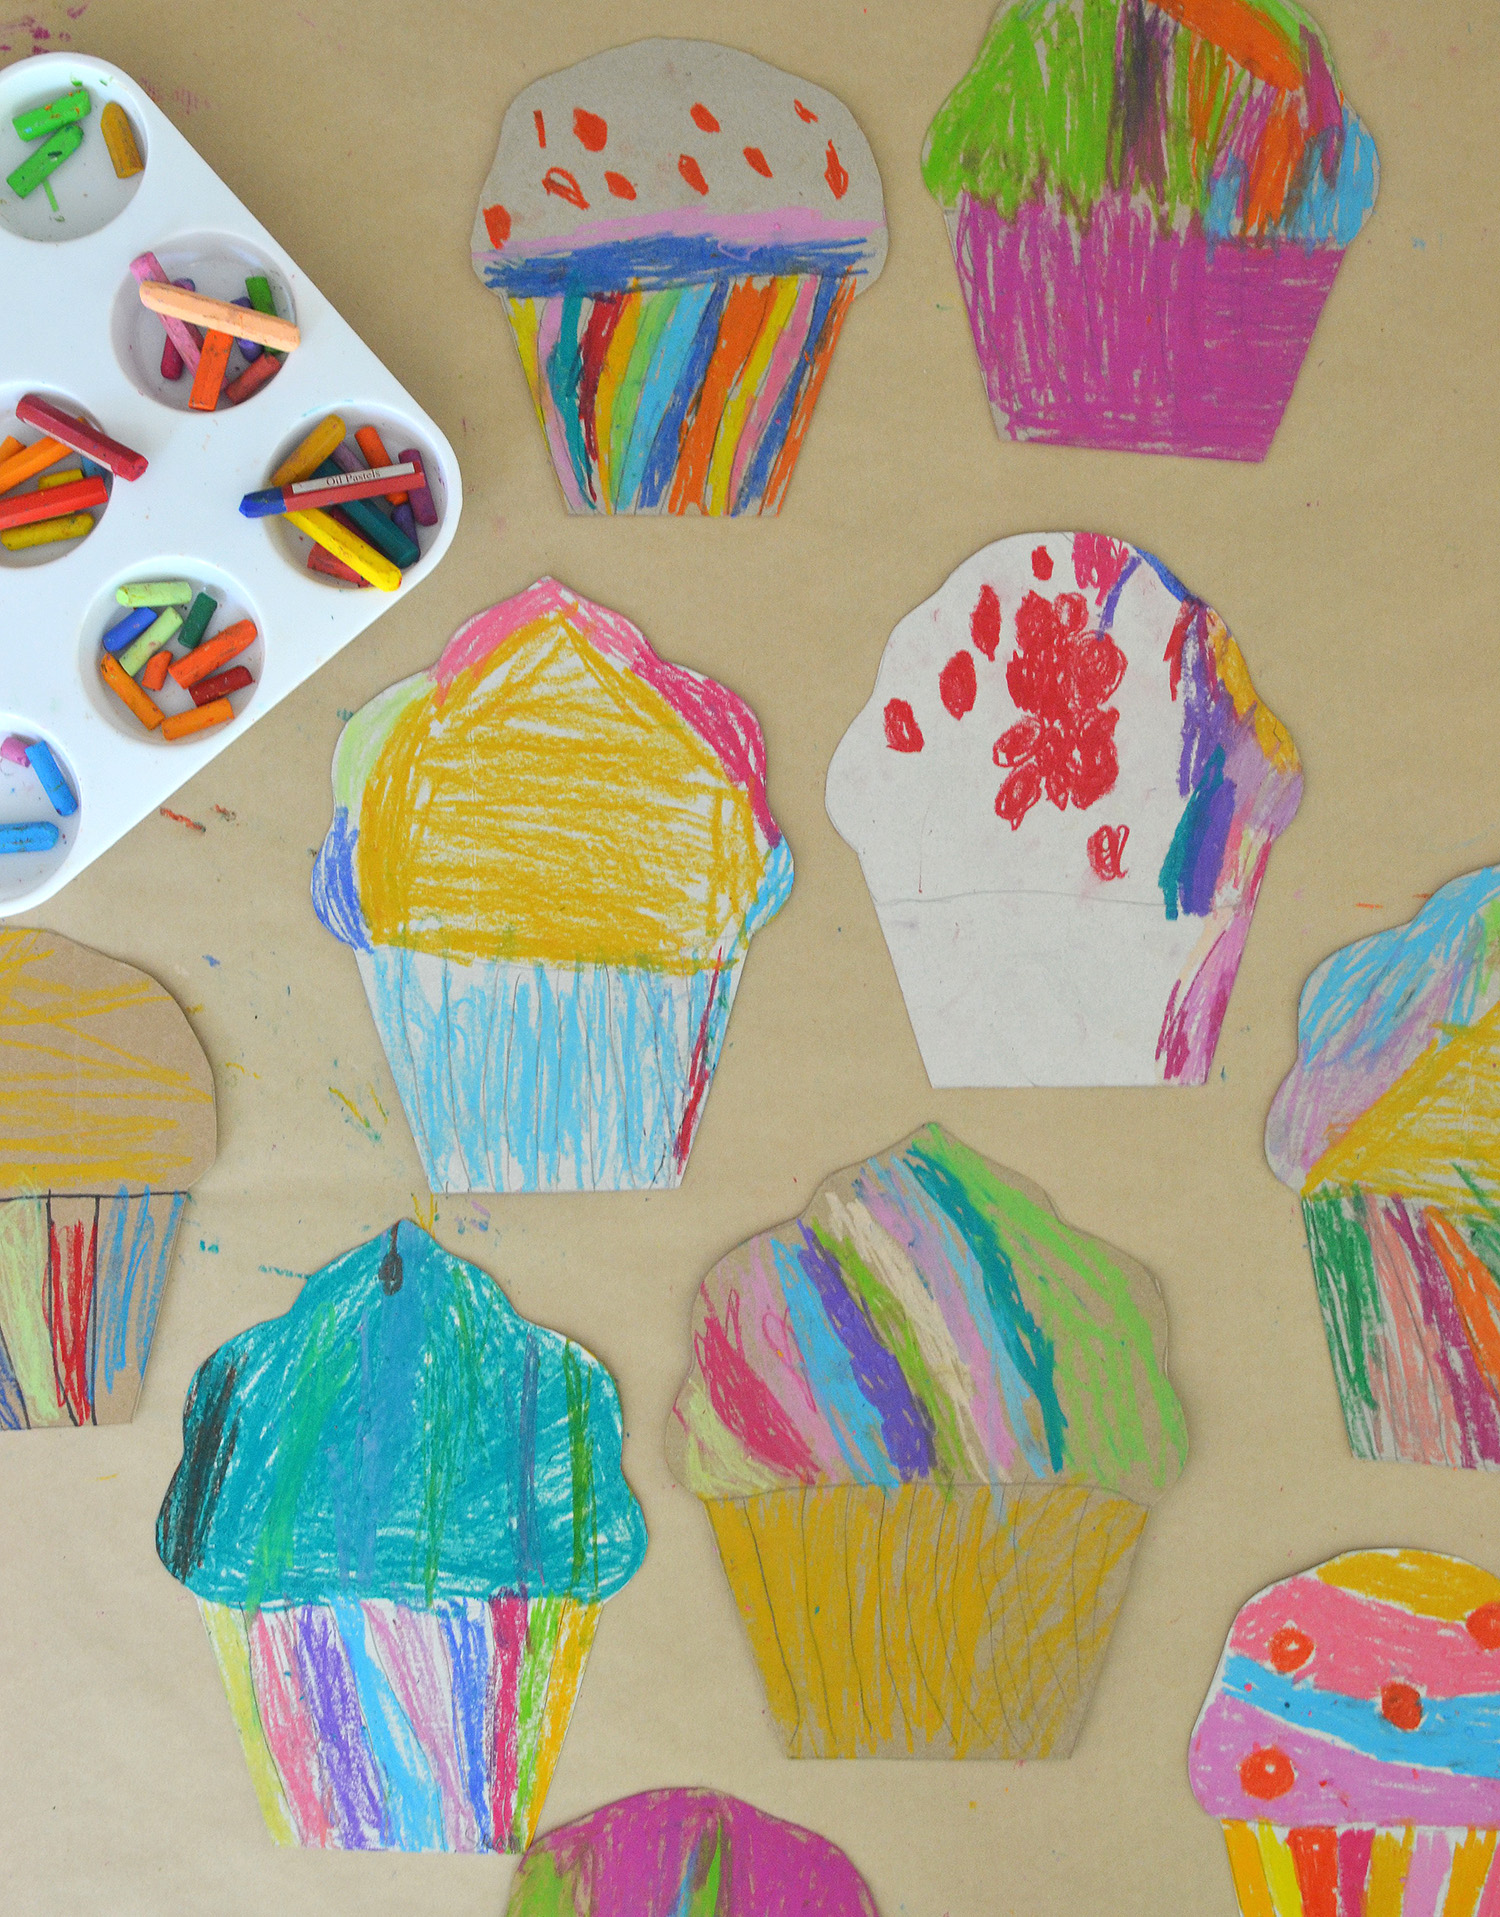
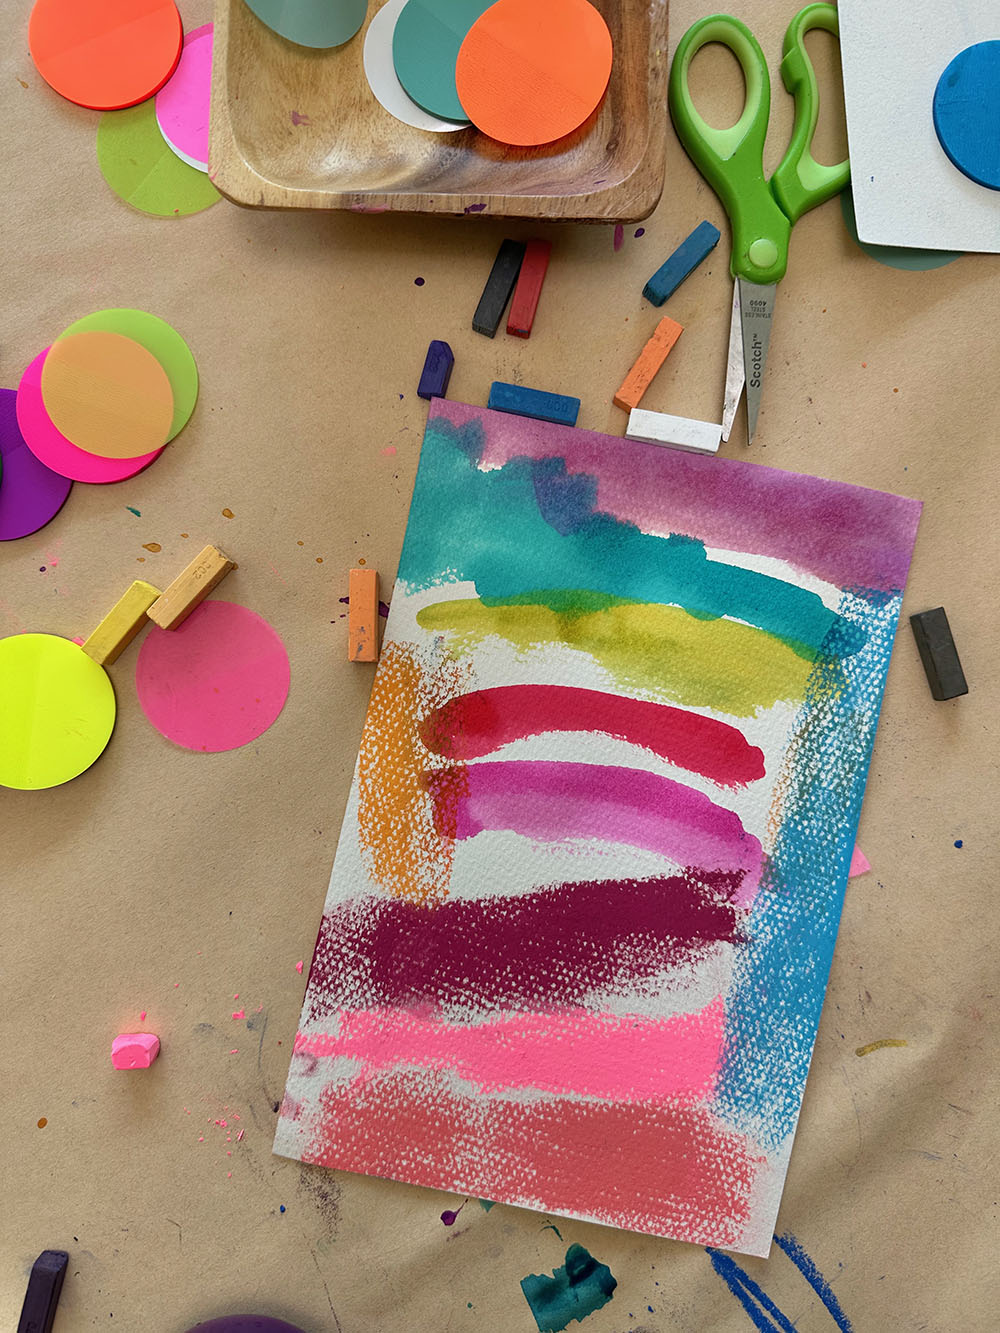
Oil & chalk pastels
We have a whole module in our Materials Matter course on mark-making tools, which are essential in any creative space, but my two favorites are oil pastels and chalk pastels. These may seem like very mature mediums for young children, and they are. But here’s a secret that you may not know… when we give children good tools, like the kind made for artists not just crayons and markers made for kids, their engagement goes way up. They are as captivated by good, rich, real materials as we are. They know when it’s good, too, because their marks are richer, the medium feels like silk when it glides across a surface, their hands are a little messy, and they can blend the colors together. Sumptuous, luxurious tools and materials invite children to stay longer and explore deeper. It’s true! I’ve seen it over and over again. And I don’t want to contradict all that I have said about using recycled and repurposed materials as much as possible. If you are going to spend money, spend it on good materials. The links I provided aren’t even that expensive, and oil pastels and chalk pastels will last a while. I always take the paper off, and don’t worry about them breaking; it will happen almost right away. Just keep the nubs with the bigger pieces in a basket or container, and take them out and spread them across the table with the other materials. Children don’t care if they are just little pieces; they will just love the way they make marks and feel. Both of these mark-making tools pair beautifully with watercolors. Add in some scissors to expand the experience.

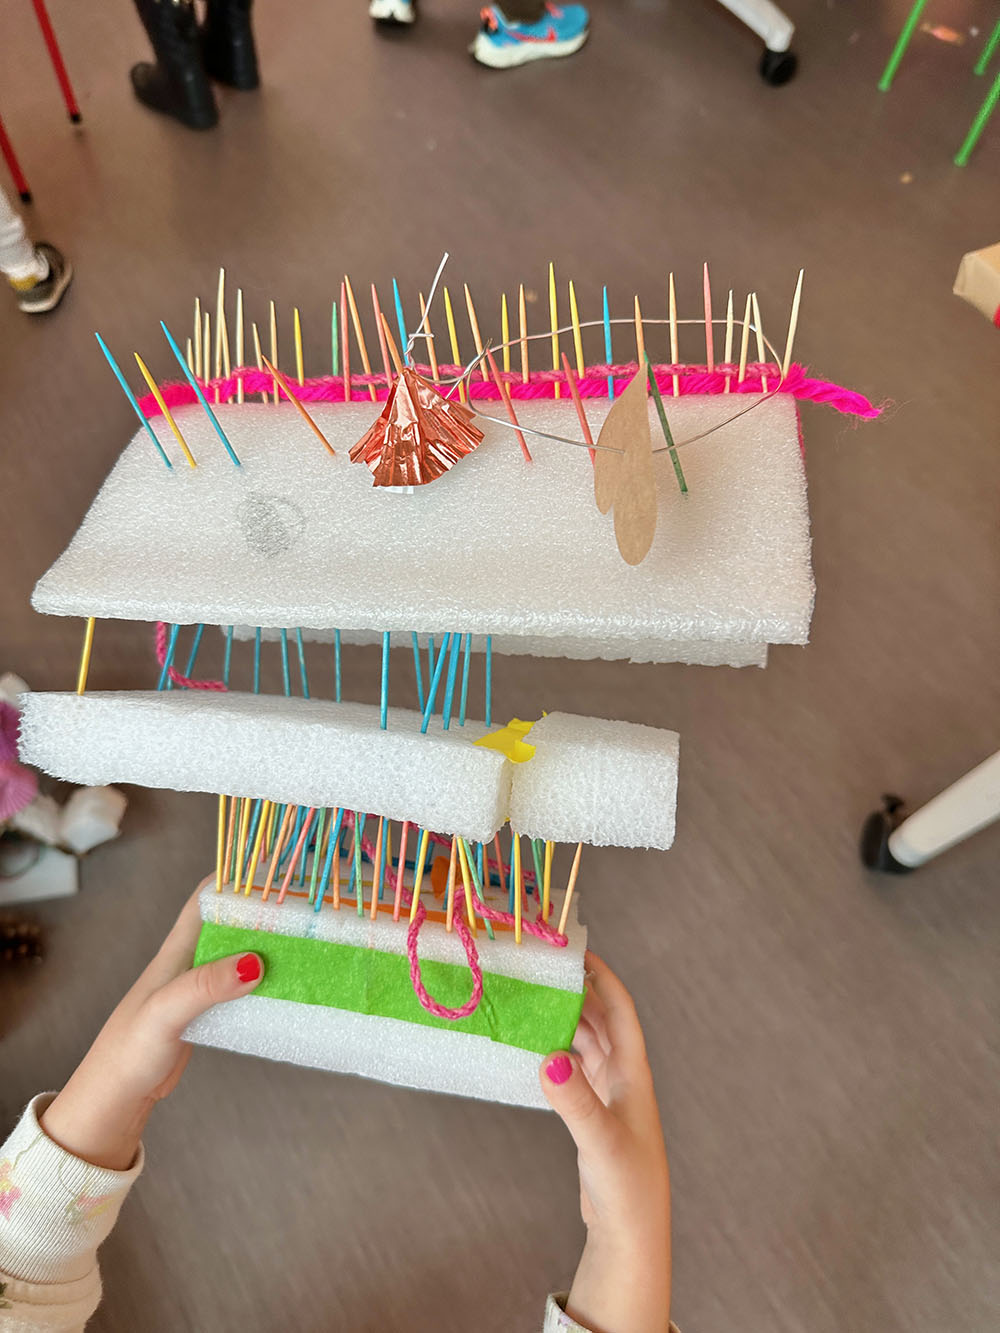
Tools to connect and alter
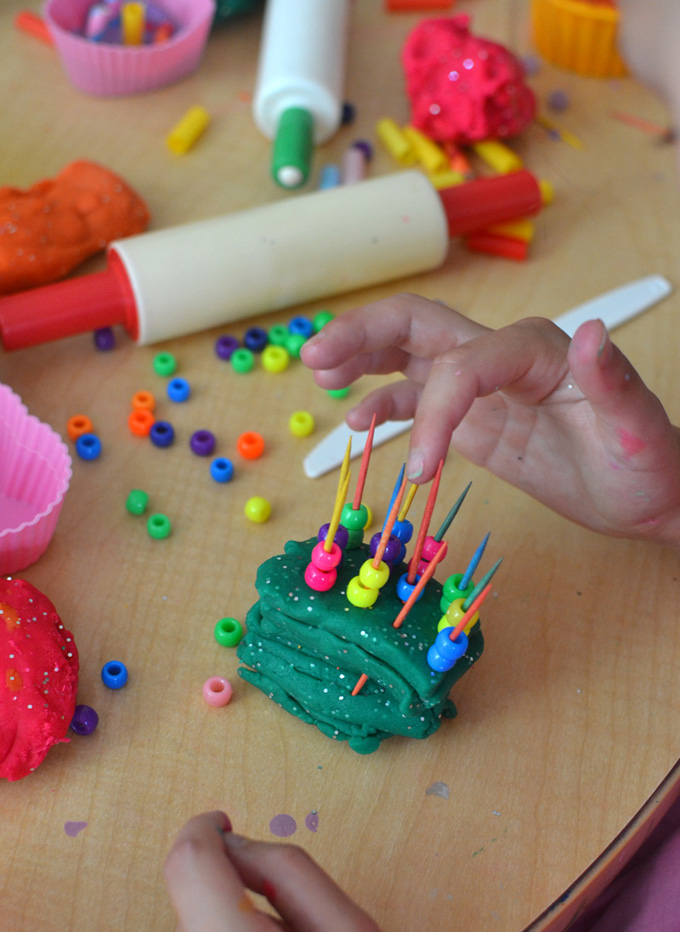
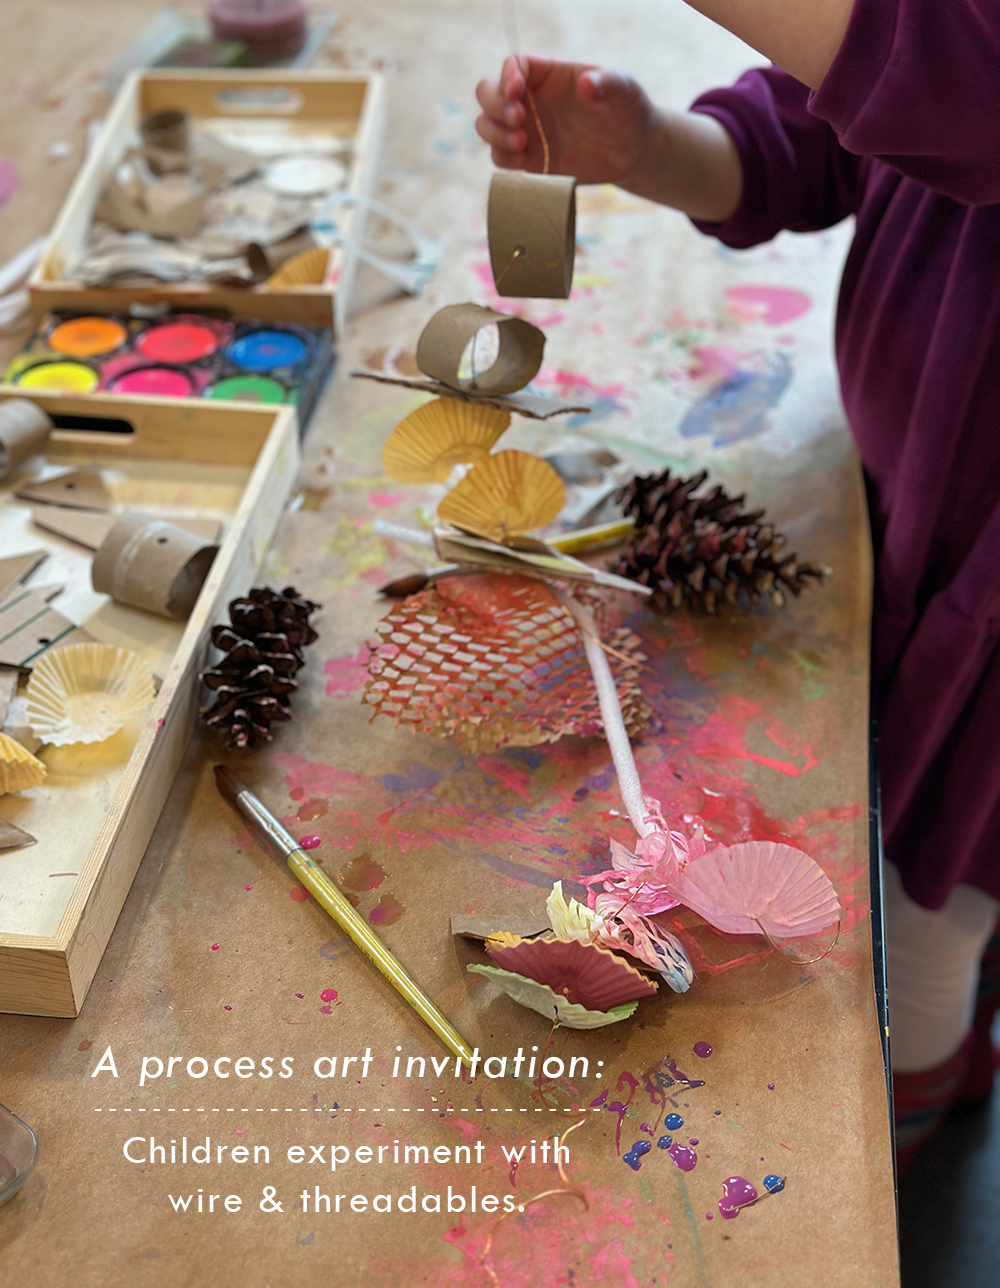
I almost always provide some way for children to alter their artwork or connect their creations together. These types of materials would include: masking tape, wire, glue sticks, rubber bands, scissors, hole punches, and toothpicks to use with styrofoam. I’m so excited by this category because it really is the backbone of all of these creative experiences. Even when I am thinking about offering a painting experience, it’s not just paint anymore; it’s paint with collage materials and glue, or paint with scissors or hole punches. And then if I offer hole punches, maybe I’ll set out some pipe cleaners in case a child gets the idea to thread the wire through the holes. Rubber bands and tape are almost essential when offering a bin of recyclables. I love the colored masking tape as it’s not only sturdy enough to connect big pieces, but it’s colorful and fun. But white masking tape does the job just as well. If you are lucky enough to have some styrofoam to use (the kind that feels like pool noodles, not the crumbly kind that makes a mess), cut it up and offer the pieces with toothpicks! I promise this will be the most engaging, sensory invitation that children will love. Craft wire is also a novel and very alluring material that bends and twists easily, and sparks lots of inventiveness and iteration.
One more essential material for open-ended art play:
Playdough + clay
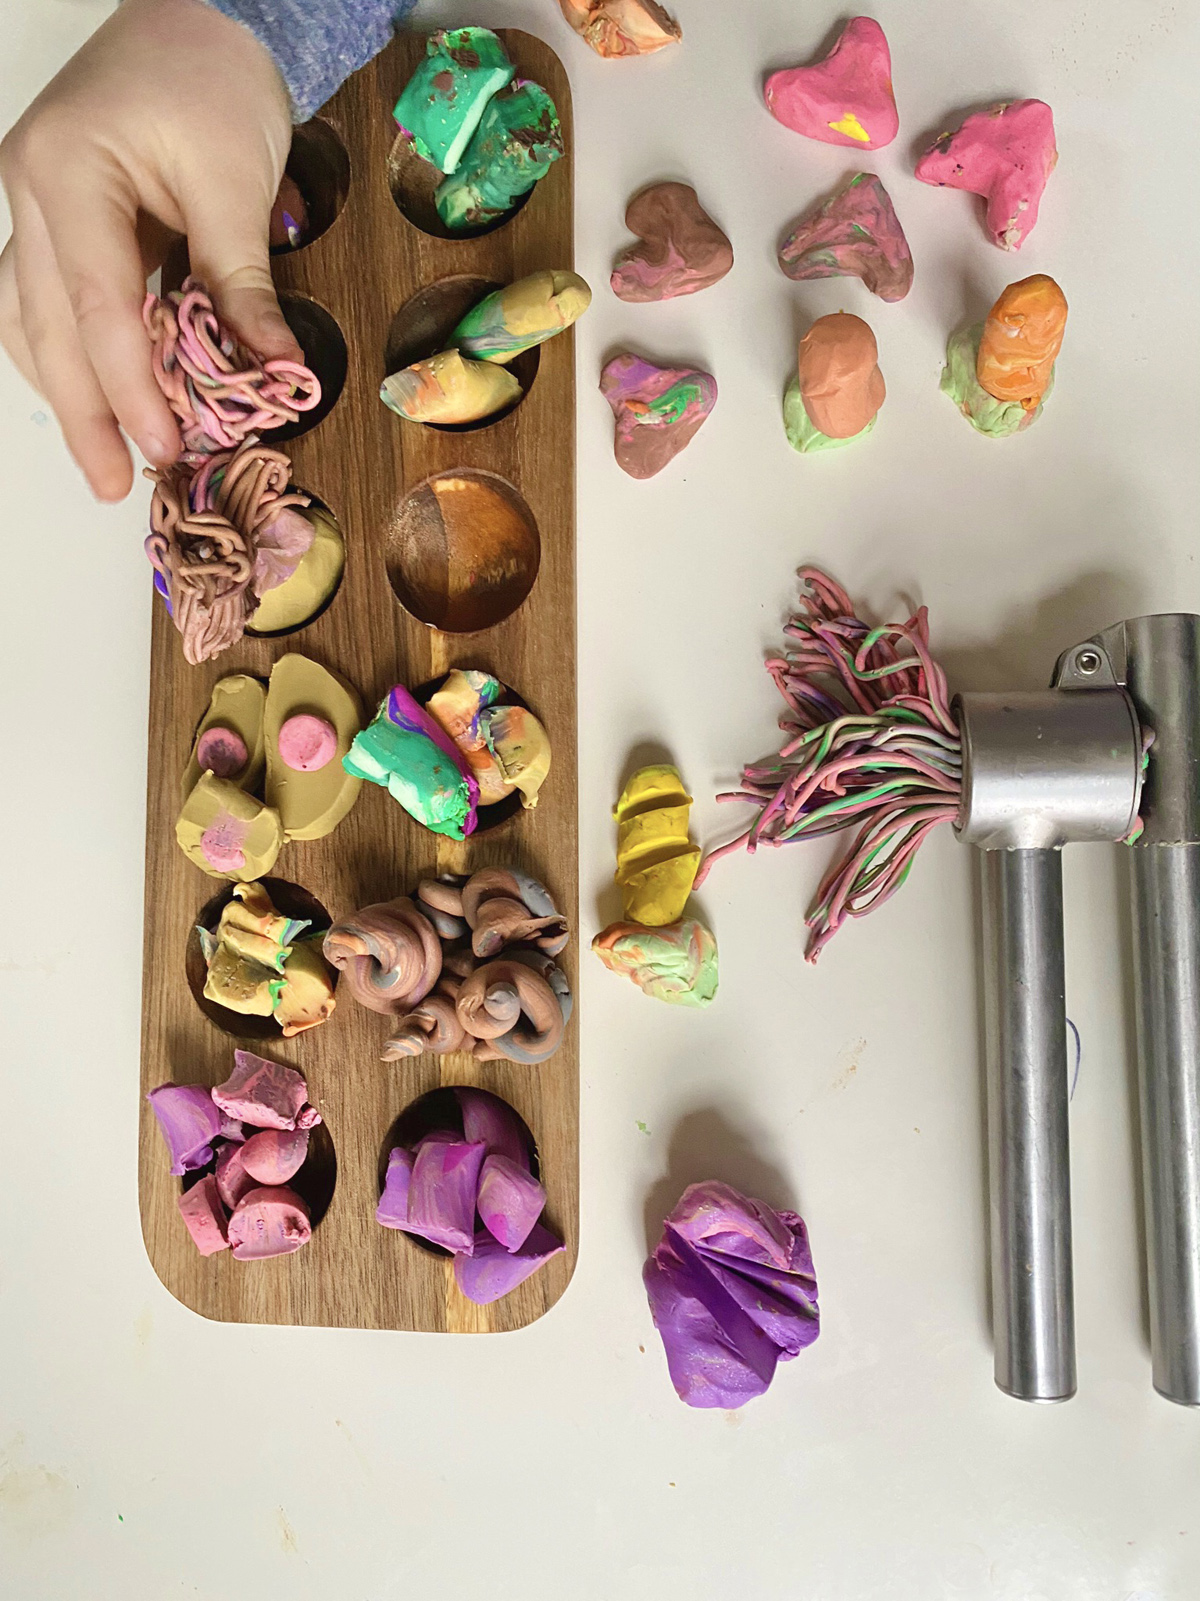
I didn’t add clay to this list because it’s not something I offer at the library. It would be too expensive for me to supply every child with playdough or clay to take home, and there are other constraints, like germs and contamination of other materials. At the library, I design and facilitate the creative experience, but then I step back and take a more observer role during the two hours. I don’t want to offer any materials that I have to gatekeep. This is a yes space, and I try hard to never say no. But as much as I would love to offer a smushy, sensory clay experience, I also imagine it would run out, or it would get smushed into the paint jars, or smushed into library floors and doors, and it would feel stressful. However, if you are a parent or a studio owner or a classroom teacher or spend time with children in any capacity, playdough and/or plasticine clay are both essential. When my kids were little and they came home from school disregulated or woke up from a nap grumpy or just needed some peaceful time to get into a flow state, I always made some homemade playdough and set it out with kitchen tools. It really is a sure thing. So, depending on what kind of space you have, adding clay as a rotating material is highly recommended! Here are two favorite recipes (Shannon turned me on to the boiling water technique, which is quicker but a little less sciency and magical). And here is a little bit more about the plasticine clay Shannon uses most often. She loves it because it never dries and can be left out all day. Our Materials Matter course has an entire module on clay if you want to dig deeper and become a materials expert!
To conclude, I just wanted to say that children have always needed time in childhood to use their hands to make things and play. But now more than ever, the skills they develop through these experiences are imperative for their future well-being and success. I’ve been reading everywhere about children’s “lost skills” in this new ed tech world where screens have replaced so much hands-on learning in the classroom, even as young as preschool, sadly. Communication skills, flexible thinking, regulating emotions, building empathy for others, innovating, even core strength and pencil grips are a struggle. Offering time and materials for making things and playing with ideas should not be a challenge; it should be as essential as filling bodies with fresh air and food. Play is how children learn! Anyway, I hope this post will inspire you to collect some things for making and maybe even join our Materials Matter course so that you, too, can become an expert at cultivating creative thinking through art making!
xx, Bar
– – – – – – – – – – – – – – – – – – – –
Did you like this post? Here are some more process art ideas for you:


Leave a Reply