I am thrilled today to introduce you to a new contributor to Art Bar. Please welcome Jennifer Bryant from small hands big art in Charlotte, North Carolina!!! I have been stalking wooing Jennifer for many many months because I simply am in awe of everything she does with the multi-age kids in her art studio. And she does it all! Classes, camps, birthday parties, workshops, and even a fantastic blog. I love how her blog is broken up into age categories: toddler, preschool, elementary, middle school, and teen. Her projects range from process art to in-depth artist studies. You MUST go over and spend some time on her website, it’s truly such a treat.
[ I am a participant in the Amazon Services LLC Associates Program, an affiliate advertising program designed to provide a means for us to earn small fees at no cost to you by linking to Amazon.com and affiliated sites. ]
Today Jennifer is sharing a step-by-step guide on how to make these gorgeous, layered paintings. And she has one secret supply + technique that she is sharing with us that will blow you away!
And now, without further ado, here is Jennifer…
Do you love the idea of allowing kids to just freely paint whatever shapes and designs come to mind, but don’t always love the final results? Greenish-orangish-brown may have been a popular home decor color in 1979 but it’s not showing signs of a comeback anytime soon! By allowing kids to fully explore the painting process without any limitations, the reality is that colors get muddy and ugly and most paintings end up in the recycle bin.
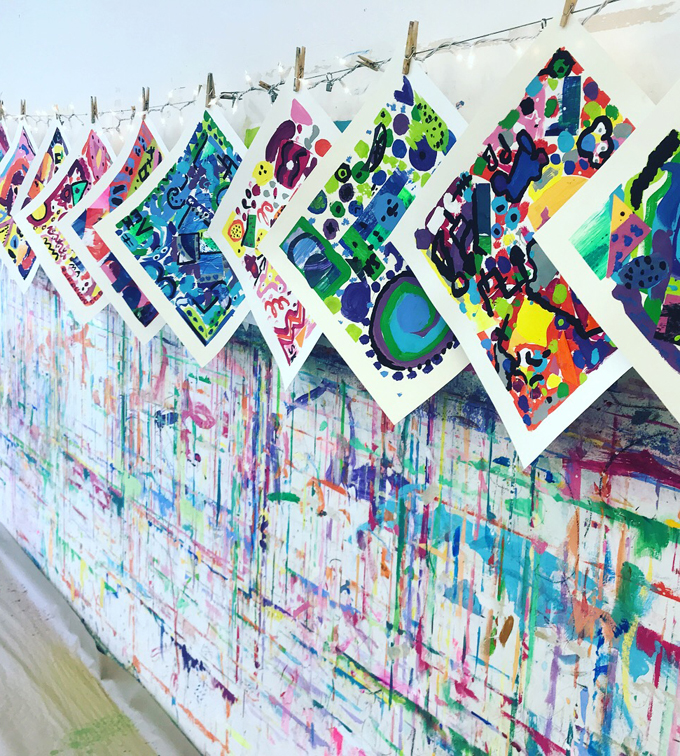
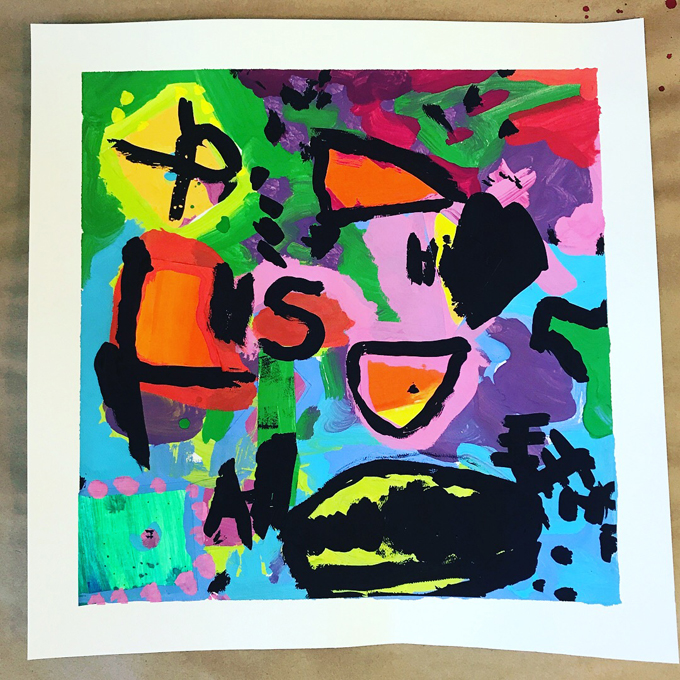
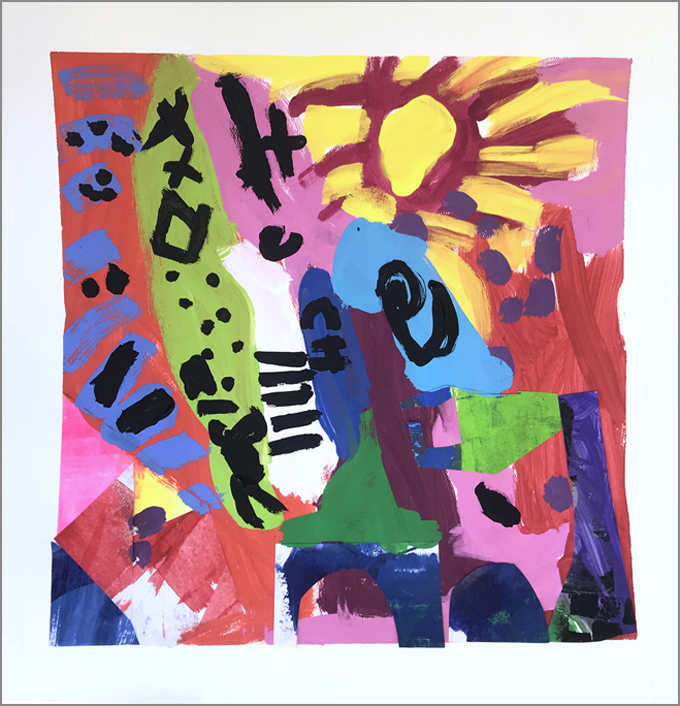
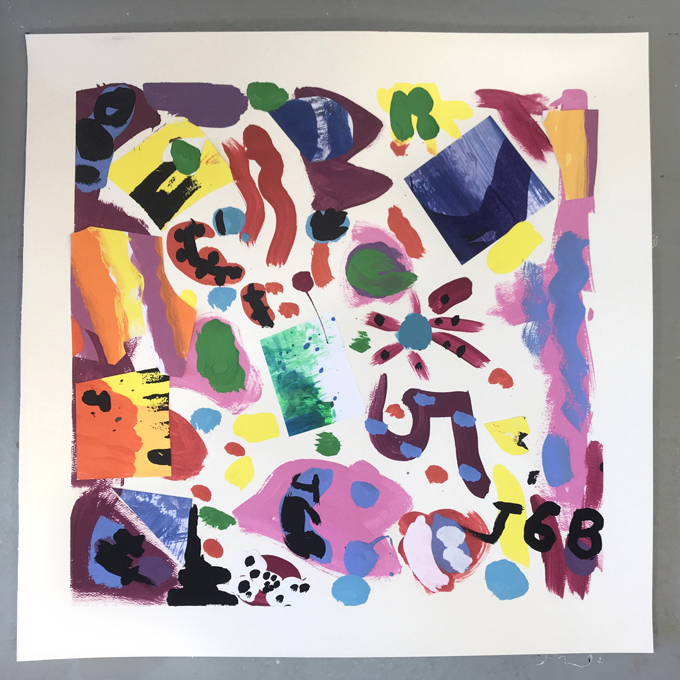
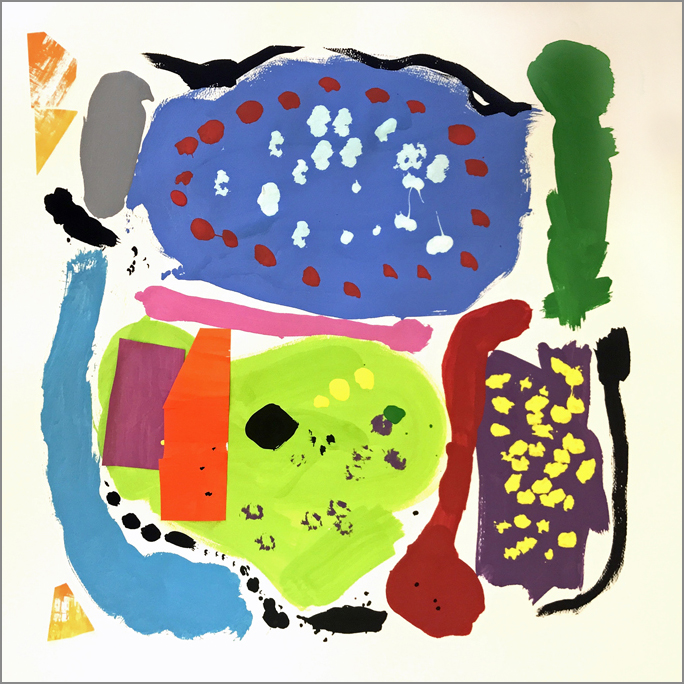
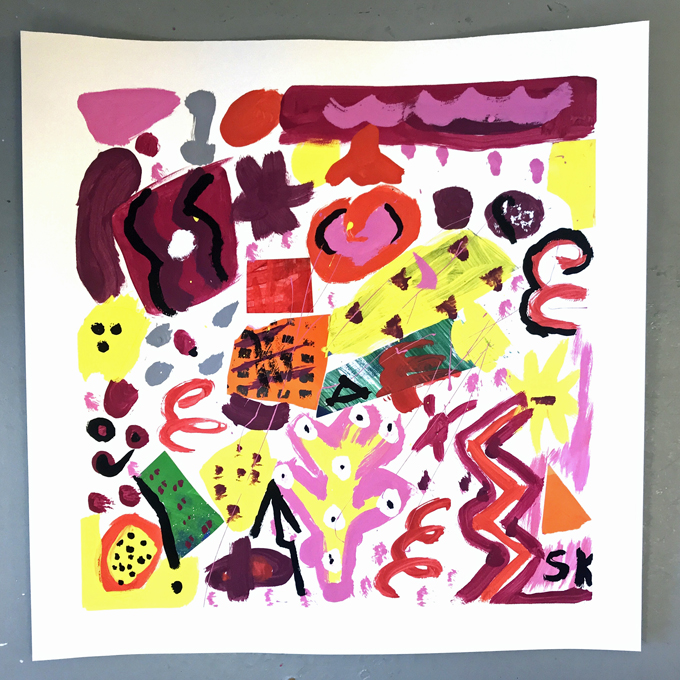
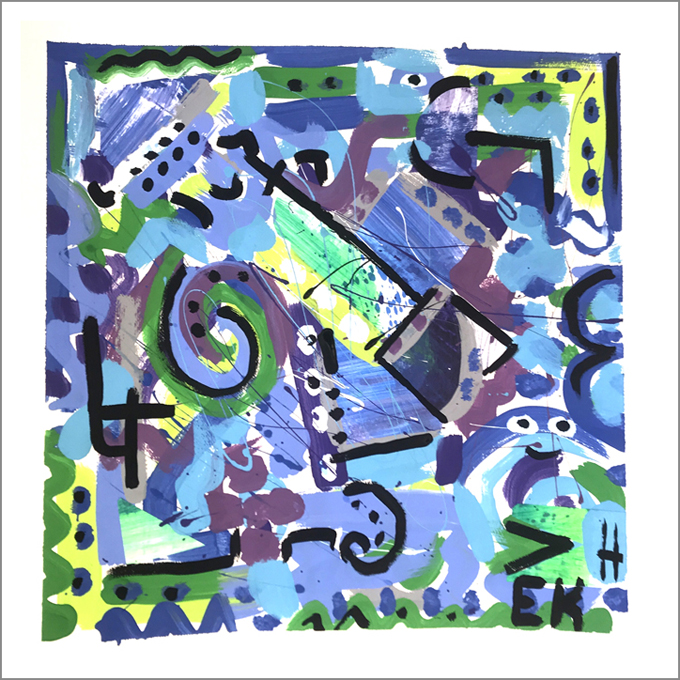
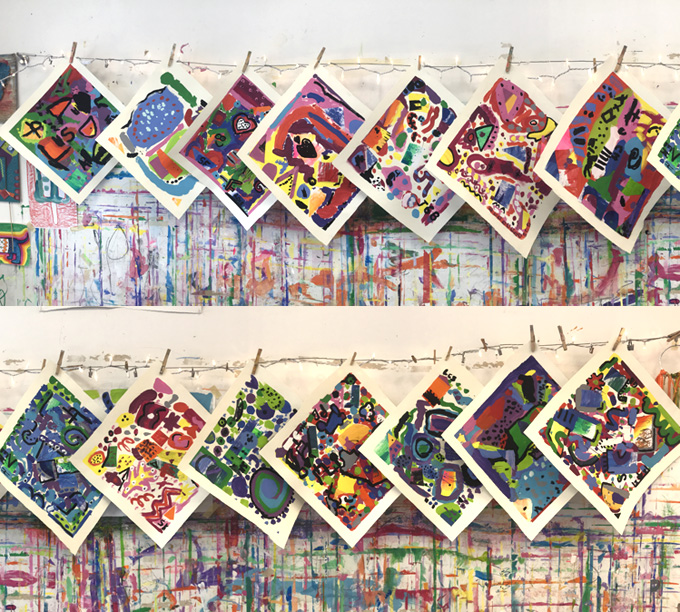
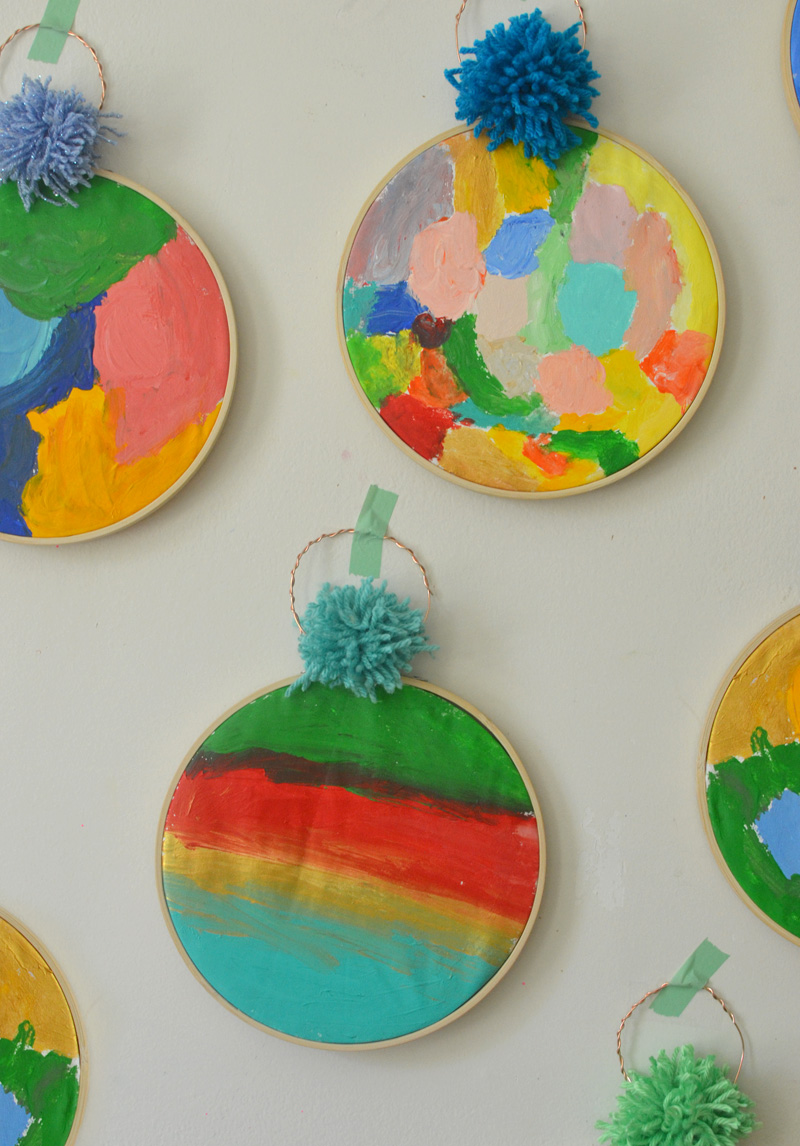
These stunning masterpieces you’re about to feast your eyes on are beautiful because the colors are clear and crisp and not muddy!
Whether you’re an art teacher or a parent of a creative little person, this painting process I’m about to share with you is what we affectionately call a SURE THING! Follow these little secret, and without fail, anyone can whip up one of these gallery-worthy babies.
First, a few thoughts about kids, painting, and color. Most kids fall into two categories: those who slip into a half conscious trance-like state from the relaxing motion of this open-ended painting process. They honestly could not care less about what color they are painting with, they just want to slather it on and watch it mix & mingle. At the other extreme are the kids who literally might die if purple doesn’t fall out of the sky and land in their hand right this second. So what’s an art teacher to do? You don’t want to interfere with their creative process. You can’t deny them their choice of color. And you can’t catapult over the table to bat the brush out of their hand right before it all goes terribly wrong. You’ll never get there in time. Ask me how I know.
The great thing is that both of these types of kids are perfect candidates for this painting project! And there is only ONE thing you need to do in order to gently control the end result, and none of the kids will even notice or object!
Are you ready for the big surprise? Close your eyes. Ok, kidding. You’re probably figured out by now our big secret really isn’t anything all that magical or scientific. All you have to do is dole out the paint one color family at a time, paint in layers and dry thoroughly between each layer.
Yep, that’s all there is to it. You can pretty much figure it all out now, but I’ll walk you through our process!
[ I am a participant in the Amazon Services LLC Associates Program, an affiliate advertising program designed to provide a means for us to earn small fees at no cost to you by linking to Amazon.com and affiliated sites. ]
Supply List for Layered Abstract Paintings:
~ Heavyweight watercolor paper or drawing paper (we love to paint with tempera and acrylic on heavy 200# watercolor paper, but it’s easier to find 140#)
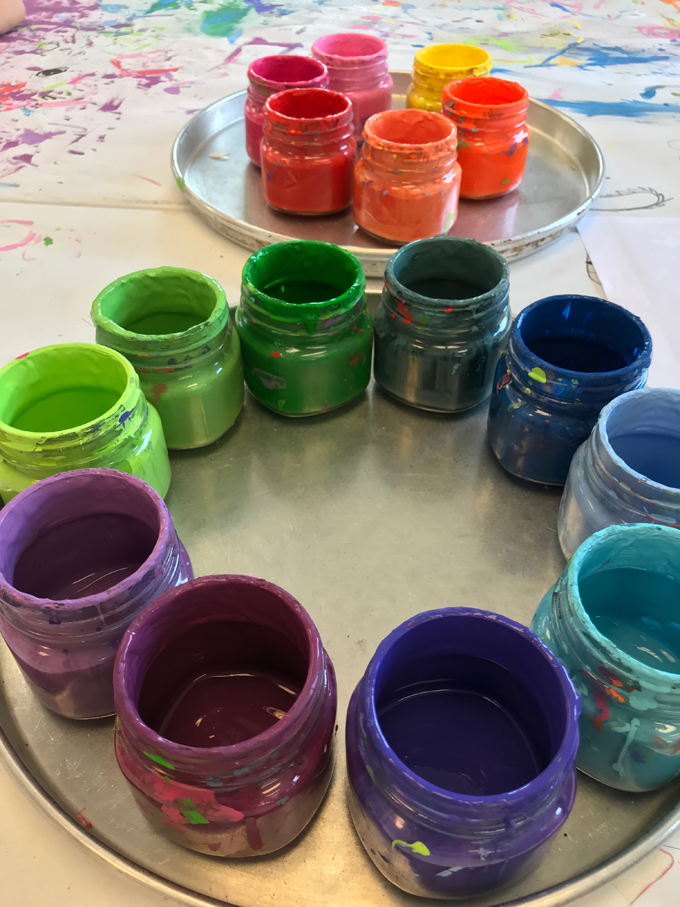
~ An assortment of tempera paint colors (we literally never use paint straight from the jar without mixing lots of beautiful shades)
~ Paint Brushes
~ An assortment of painted papers or sticker paper (instructions to follow)
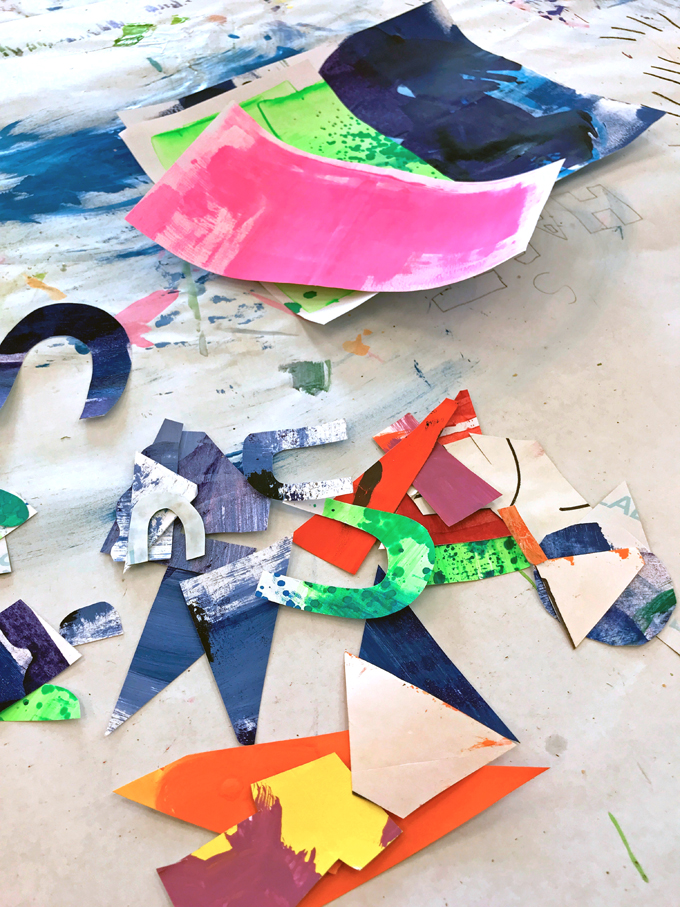
* Pro Tip: We love to make painted paper with full pages of sticker sheets. It’s a fun project in and of itself to pre-make a bunch of warm and cool painted paper sheets (almost everything we do in the studio is separated by warm & cool colors). We give kids texture scrapers, spray bottles and other tools to make different textures on the papers (usually blending two to three colors) and hang them all up to dry and cut them down as we need them. Great for any type of collage on any type of surface. Kids need a lot of patience to peel the sticker backing off, but doing that seems to outweigh the alternative of messy glue sticks or school glue! And no drying time!
How to Make Layered Abstract Paintings Step-by-Step Instructions:
(The ages in this class ranged from 4 – 12, it was one of our multi-age summer camps.)
FIRST LAYER:
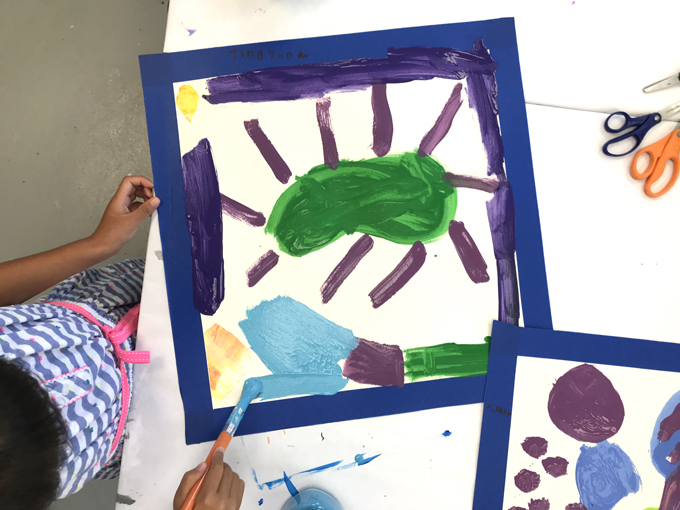
1. Pre-tape borders on 18×18 watercolor paper with painter’s tape.
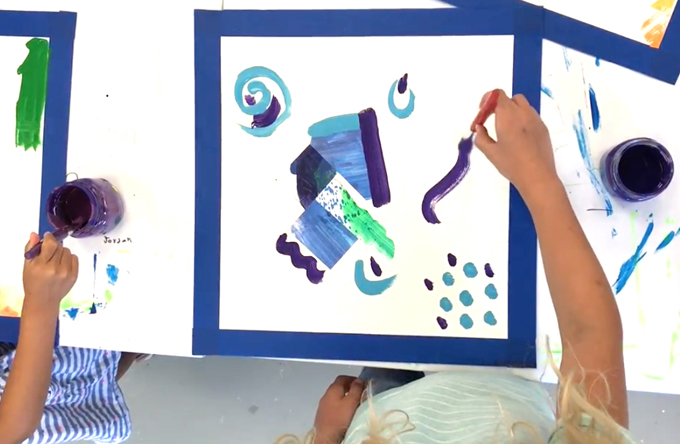
2. Divide paint colors into warm and cool groups (one table with warm , one table with cool.) Using a color wheel for reference, we have a quick conversation about the warm and cool color families.
3. Have kids cut and arrange about five interesting shapes of painted paper and stick them anywhere on their painting (except on the painter’s tape border). For kids under age 5 or 6 you could pre-cut some shapes for them to select from. With our older students we always have them draw the shapes and cut them out (we instruct them to draw on the back side of the sticker so we don’t see the lines when they are cut out).
4. For this first layer, kids can only paint with either warm or cool colors, so they need to make a big decision! No one needs to panic, they’ll be able to use the other color family later if they’d like.
5. When we have a big group of kids, to avoid having to pass all the jars of paint around, we set the jars of tempera paint around the studio tables (again, keeping warm and cool separated), and instruct them to just walk around to a color that is available and paint a little, then physically move with their painting to another color. No jars get passed – they stay put on the tables!
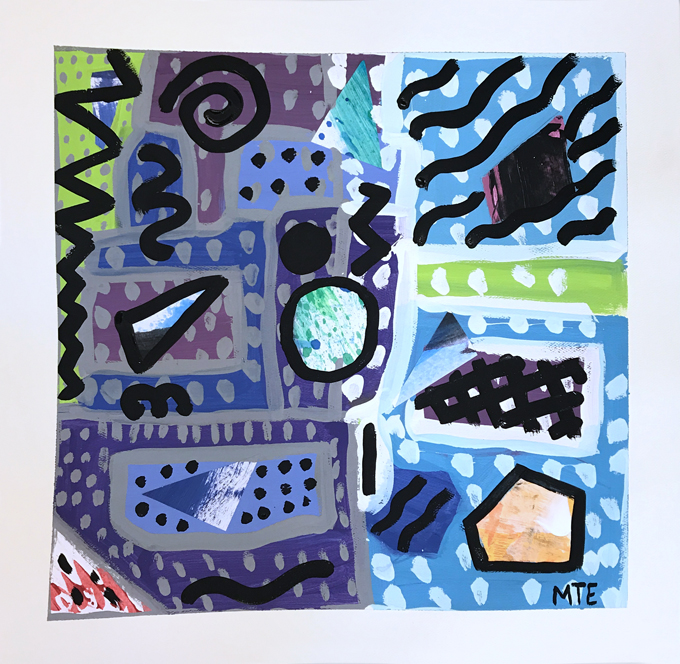
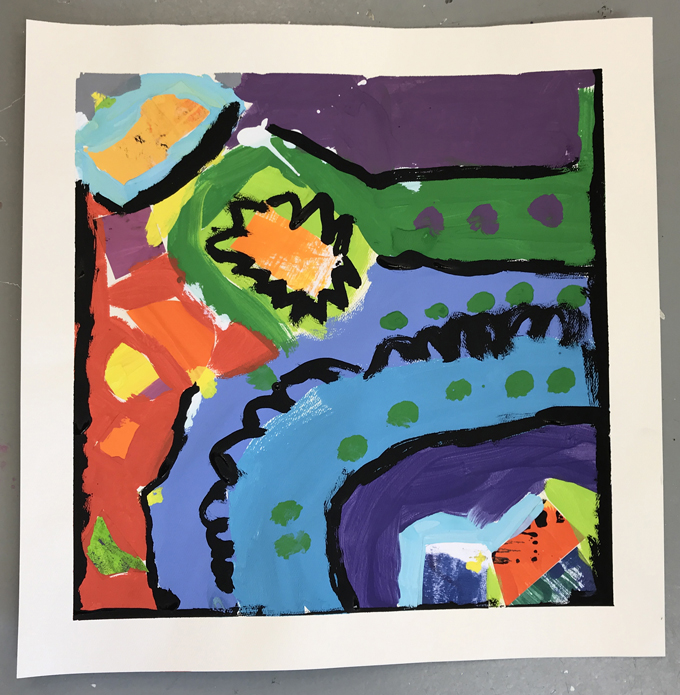
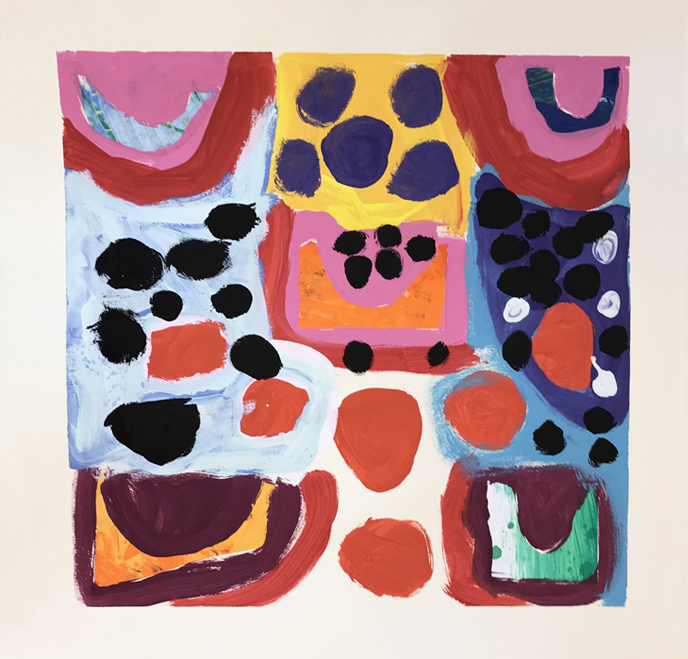
6. We demonstrate that for this first layer, we are not painting a “picture” – rather, we’re just color blocking and laying down a base of nice colors, side by side. We ask them not to paint one color on top of another color – it has to be next to a color. The nice thing is even if they overlap a little, that’s fine because all the cool colors get along, and all the warm colors get along.
7. They can paint a blob of color, or a big shape of color (like a big circle, square, etc.). They are also able to paint different types of lines – wavy lines, zig zag lines, curly cue lines, etc. They can paint around their paper stickers or a little on top of them. We’re painting quickly but not sloppily and we’re not thinking too hard about any choices.
8. Set aside to dry completely. Tempera paint on watercolor paper is a little chalky and dries fairly quickly – allow about 30-45 minutes drying time.
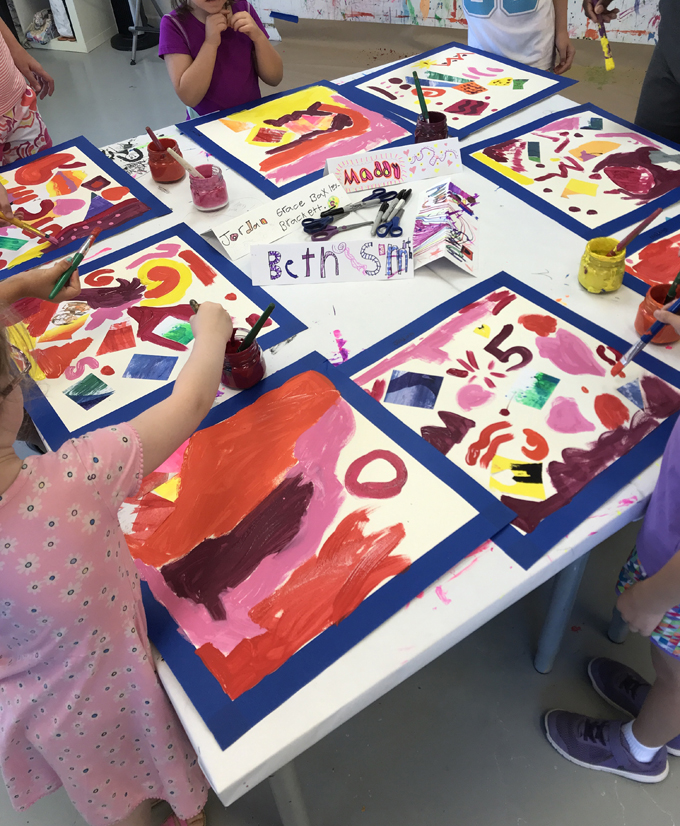
SECOND LAYER:
9. Add a few more painted paper sticker shapes.
10. For the next layer, we give them the choice to continue with the same color palette as the first layer, or switch to the opposite palette. We confess we love these when they stick to only all cools or all warms, or only use one or two spots of the opposite family.
11. We encourage them to paint in the white parts first, and then they can go in on top of the dried paint with shapes and lines.
12. We also talk about how white and gray are neutral colors, and encourage them to use a little of both colors.
13. We talk about pattern and repetition. The trick with this layer is to keep an eye that no one is going completely nuts. Sometimes the hardest thing is knowing when to stop.
14. Set aside to dry completely.
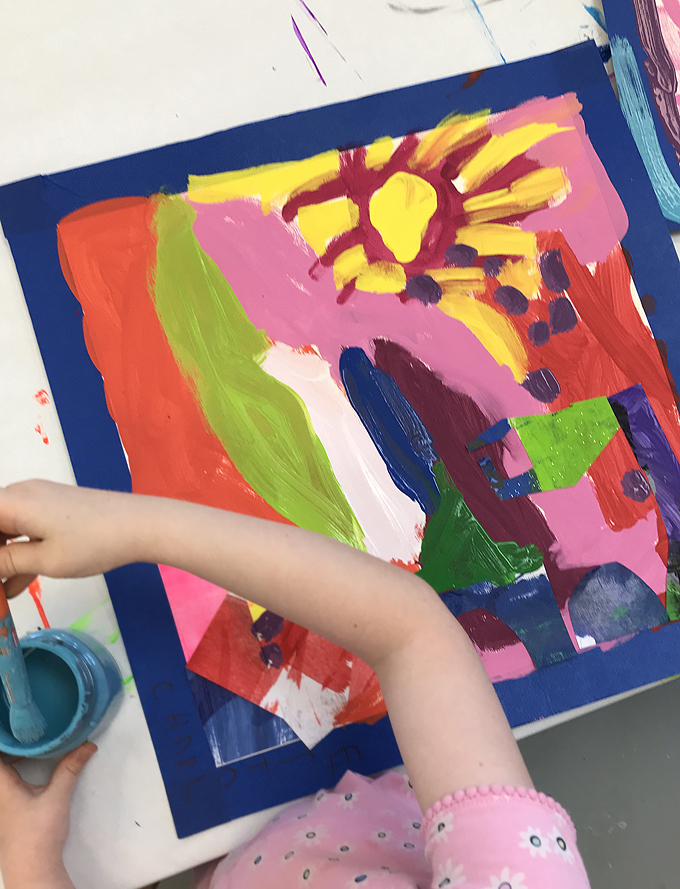
THIRD LAYER:
15. The final layer is to add a few black lines and shapes for contrast.
16. Something strange always happens at this point – kids paint smiley faces and suns. Whyyyyyyyyy? It literally happens without fail if we don’t specifically instruct them not to. Kids of any age. I think it stems from not really knowing what type of lines or shapes to paint, and they just revert back to what they know. Smiley faces. I guess. And all it takes is one kid to paint a smiley face and they catch on like the plague.
17. The other tip here is to educate them about how to paint in moderation. A few black lines & shapes here & there look nice and create visual interest. Too many, and well, it’s just not as nice. Less is more.
18. Set aside to dry completely before pulling off the painter’s tape. Unless you want to accidentally smear black all over the clean white edges. I don’t know…that just seems like something that could happen.
19. As an extension, sometimes we add a layer of chalk pastel – it creates a nice texture and some dimension to the paint colors. If we had added chalk to these, we probably would have done it on each dry layer, sticking to the “cool on cool” and “warm on warm” guidelines.
And there you have it! Try it! We’d love to see how yours come out and would be interested to see everyone put their own creative spin on this process! Tag us on Instagram at @smallhandsbigart.
xo Jennifer
_ _ _ _ _ _ _ _ _ _ _ _ _ _ _ _ _ _ _ _
A little about Jennifer:
As the founder of small hands big art, Jennifer learned at an early age the power that art and creative (albeit deviant) thinking can have. Other than that one time she strategically scrawled “Jenny is a Pig!” on her bedroom door & let her brother take the blame, some of her fondest childhood memories involve creating art.
A college art scholarship naturally led to a 17 year career in financial services compliance, where she memorized SEC regulations and honed invaluable skills implementing out-of-the box enterprise deliverables & driving for consensus. (huh??) After stepping on that little shelf thingy on the top of the corporate ladder labeled “Not a Step,” she’s spent the last nine years simply enjoying what inspires her most: Children & art.
Jennifer opened her studio 2009 to provide fine art enrichment programs for children & young adults up to age 14, through age and developmentally appropriate classes, parties, camps and workshops.
Follow Jennifer on Instagram (you will be blown away) and Facebook.
– – – – – – – – – – – – – – – – – – – –
Did you like this post? Here are some more mixed-media projects for kids:


These are GORGEOUS! Thank you so much for sharing your technique. I will definitely be doing this project!
Did you do the project? I wonder about the brightness of the crayola tempera?
Hi Belinda, adding a little white to any color will make it brighter and more opaque. The Crayola paints are great, one of my favorite brands! Hope this helps! ~ Bar
These are gorgeous! I learned just from reading the instructions on this post! Less is more 👌
Thank you so much having Jennifer share the steps for these AMAZING paintings. I loved these ever since I first saw them on IG and I had no idea how they turned out so perfect! Thank you for the tips!
Barbara Rucci, thanks for the article post.Really thank you! Great.
Lovely! Just so great! I’d love to try this with my daughter. It’s a great balance of rules and freedom for all ages!
I love this project. I plan to try it with my granddaughter. I have one question. Is a sticker paper sticky? I was unclear on this one aspect of the project.
hi Victoria, yes the sticker paper is sticky! once you peel off the backing. So it’s like a regular white label would be: white on the front where you draw or paint, and then you peel off the backing and it’s a sticker! does that make sense? I hope this helps! good luck! xo Bar
What style of color wheel would you suggest using with preschoolers? The ones I have seem to compacted for them.
Thanks!
Mary
I wonder how this activity would work on a canvas? Has anyone tried it?
The stickers don’t adhere well to a canvas, so they are best for the paper surface recommended. I think it’s to do with the little movements with the canvas – many pieces on stickers had to be glued down on a project I did where I used painted stickers. Other than that, it was fun to paint the stickers – the kids really enjoyed that.
Thank you for the very clear instructions! I am looking forward to trying this with my grade four students. Thanks again!