Welcome back to Week 3 of our Art and Play Activity Guide for Learning at Home! Shannon and I hope these guides have been helping you loosely frame your days. Children need routine because it makes them feel safe and more relaxed. And parents need routine because it allows them to find some time for themselves! Which is so important.
Click here for all 7 Learning at Home guides!
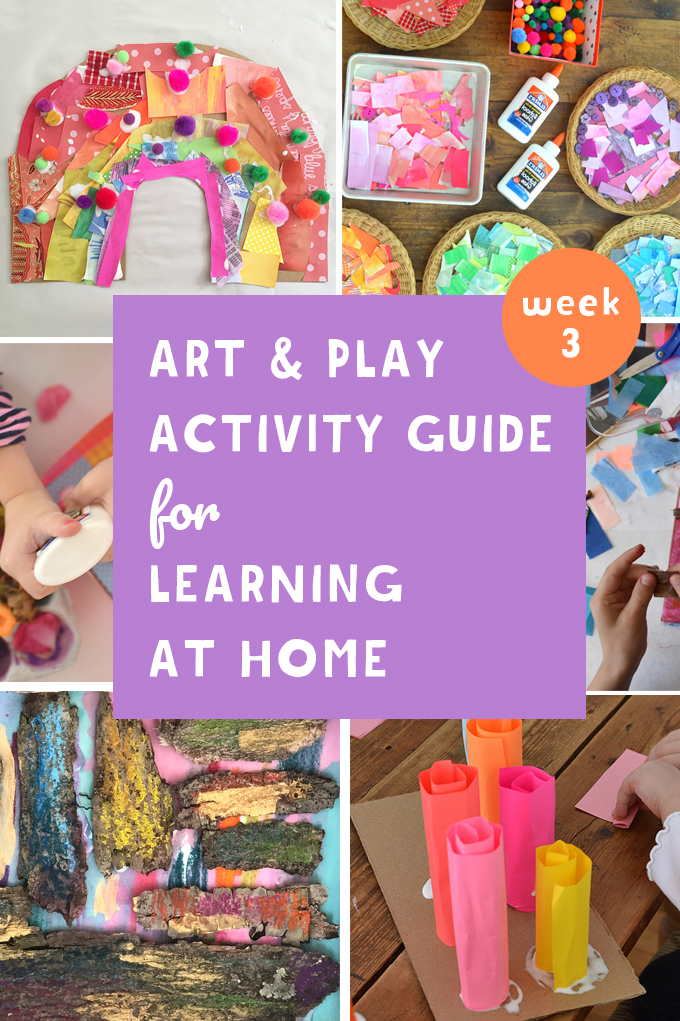
This week, we’re exploring collage. With just a few materials on hand, you and your children can create some amazing works of art! Young kids will be working their fine motor skills when they cut, fold, crumple, and squeeze. Older kids might discover math connections and use collage for storytelling independently.
Click here for Week 1 Guide: Drawing Tools
Click here for Week 2 Guide: Playdough & Sensory Play
Art and Play Activity Guide Week 3: Collage
The format for this week is the same as the past two weeks. Muddy Monday for sparking outdoor exploration in the backyard or safely in your neighborhood. Tinkering Tuesday with a math bent. Wee Readers & Writers Wednesday with a literacy focus. Together Thursdays with a social studies focus. And Free Fridays for an extra dose of process art goodness.
You won’t need much for these collage-making experiences other than white school glue, a gluestick, some scissors, and lots of collage material which can be repurposed from just about anything! Let’s jump in and get started.
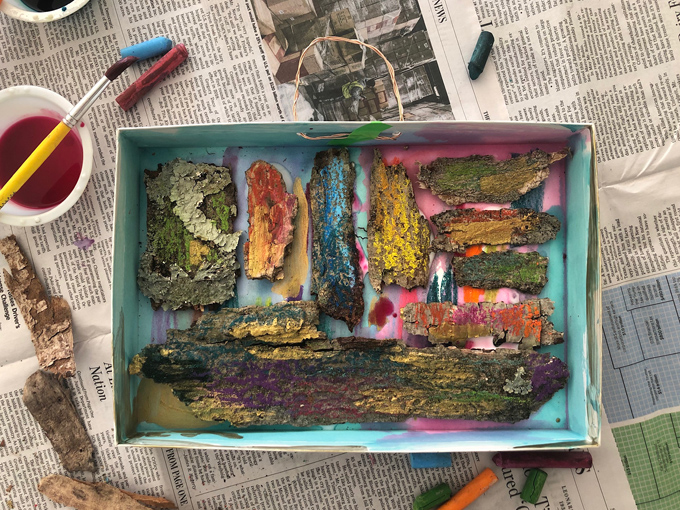
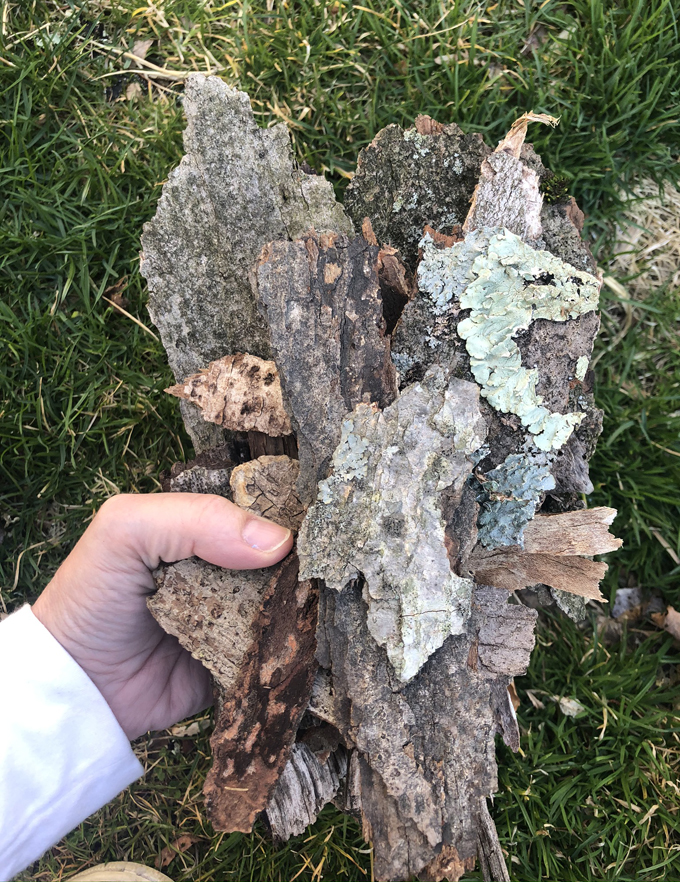
Day 1: Bumpy Bark Collage / Science
Today we will go for a nature walk and look for bark, stones, sticks or other sturdy nature materials. But mostly we will try and look for bark. Trees shed their bark for different reasons. They certainly shed as they grow, but they can also shed during extreme heat or after a frost, which makes Springtime a perfect time to find bark pieces. Some trees that shed their bark after winter are birch, maple, sycamore, and hickory trees. Maybe you and your child can be tree detectives and figure out what type of tree your bark comes from!
Click here to print Day 1: Bumply Bark Collage / Science
Morning Ritual
Get outside this morning in the backyard or balcony and take some deep breaths together. Connect and get centered for the week. Try writing down together your hopes and worries for the week. You can fold a sheet of paper in half so it has two columns. Ask each family member to contribute.
Prep
Prep is minimal for this nature collage, which makes it a great candidate for the first project of the week. You can collect most of your supplies easily on Sunday night or Monday morning so they’re ready to go when you return from your nature walk. Once back home from your nature walk, present each child with a surface – this could be a shoebox lid, some cardboard, a cereal box – ideally something with a lip edge that will make puddles of glue easier to contain. (Kids love squeezing glue, it’s inevitable and part of the fun.) They can first color their bark and surface, or they can start their bumpy collage right away and color later. Or they don’t have to color at all.
Supplies
~ Bark and/or other nature materials
~ Shoebox lid, cereal box, or piece of cardboard
~ White school glue
~ Liquid watercolors, tempera paints, oil pastels, or chalk

Photo by Shannon Merenstein from Hatch.
Art Activity
1. Gather bark, sticks, rocks, or other sturdy nature materials.
2. Add color to nature materials and surface.
3. Glue nature material onto surface.
4. Optional to create a hanger from some wire or yarn to hang your nature collage.
Variations
Younger kids can:
~ Just enjoy squeezing glue into a shoebox lid. You can color white school glue by adding tempera paint or food coloring.
~ Soak chalk first then use the wet chalk to color the bark, twigs, and rocks.
~ Use wet chalk on a tree outside.
~ Add bark, twigs and rocks to another mud kitchen soup!
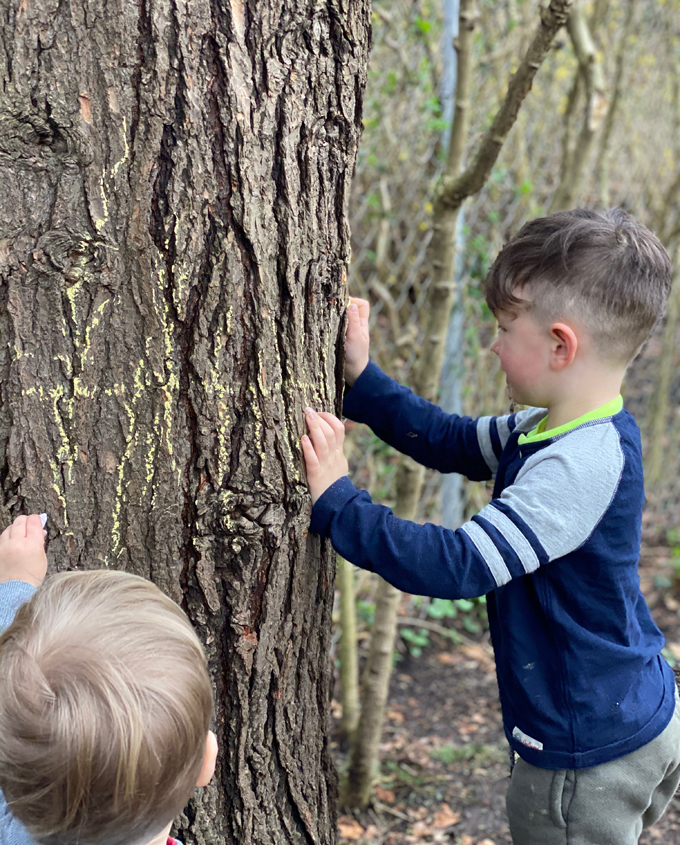
Photo by Shannon Merenstein from Hatch.
Extensions
Older kids can:
~ Make a bark mobile: use string to attach painted bark pieces to a branch, adding beads for embellishment.
~ Paint stones to leave around the neighborhood or on the front porch.
~ Make bark boats or other 3-D sculptures.
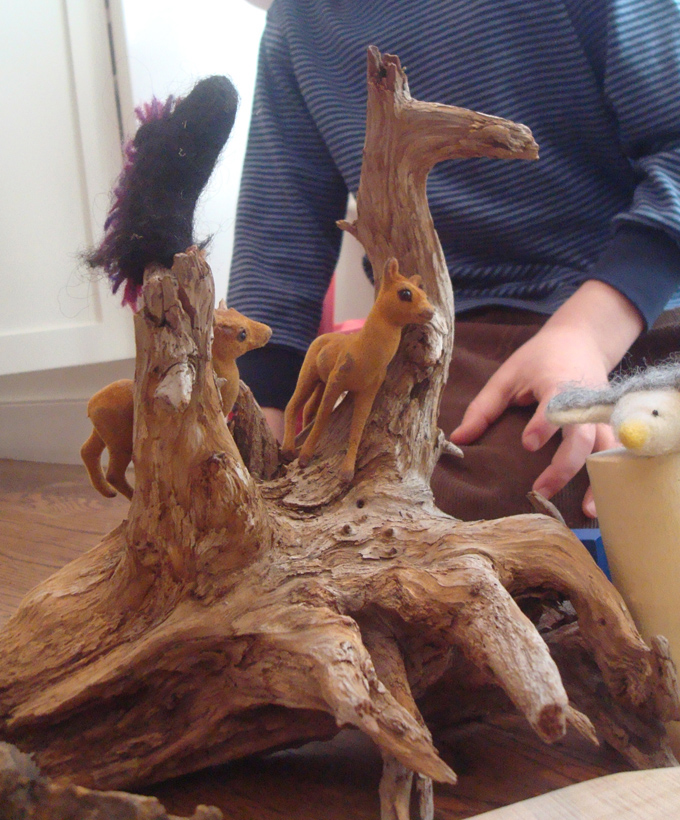
Play Activities
~ Once the bumpy collage is totally dry, it’s the perfect scene for playing with small figures and animals.
~ Just take all of the nature materials, put them in a basket, and use them with block area for extended imaginary play.
Afternoon Ritual
After independent play, lunch, and rest time, come back together and make a family snack. My kids love snacks that you can play with. A plate for each person and some popped popcorn is all you need to make a silly popcorn face or other design. Tonight after dinner, ask each person to share a Rose, Thorn and Bud of the day. See Shannon’s Instagram for a video of her talking about this ritual (it’s an IGTV movie) or Week 2 of our activity guide.

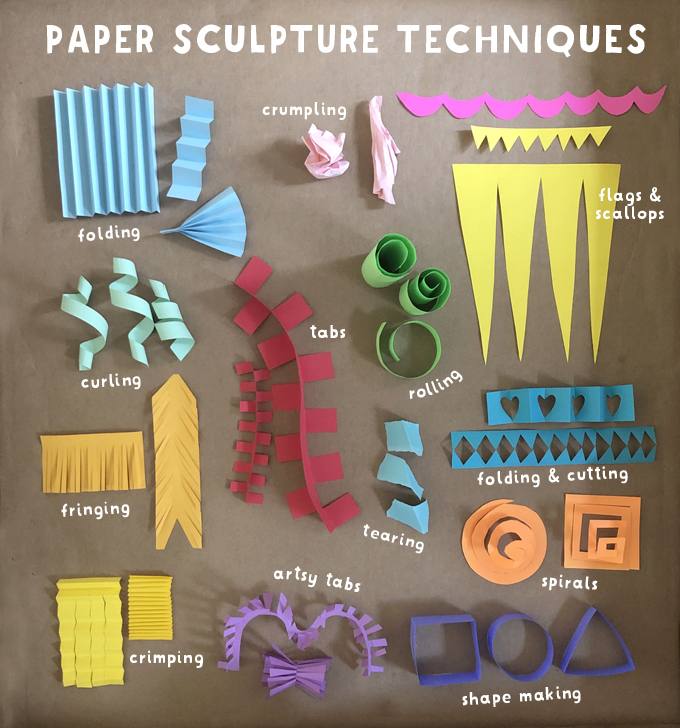
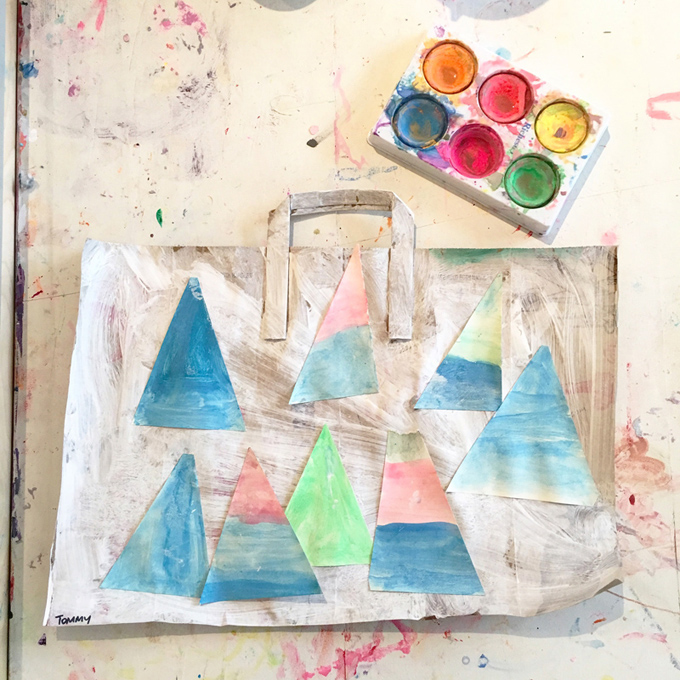
Day 2: Paper Sculpture Collage / Math
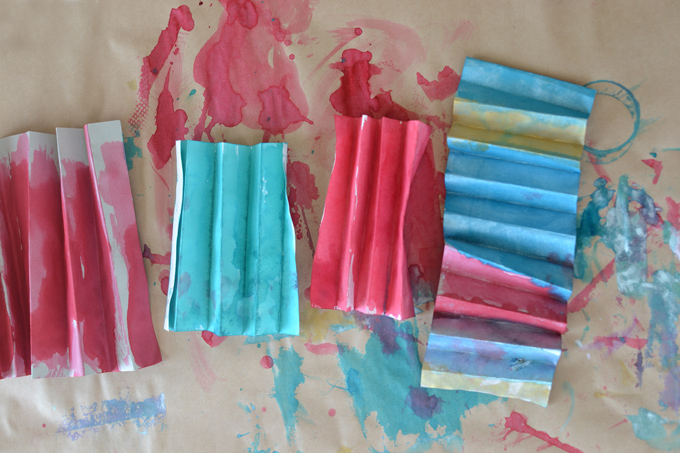
There are so many mechanics to folding paper, today we are going to try practicing them! You can roll, curl, fringe, fold, and even cut paper into spirals. All of these techniques, or most of them, turn flat paper into 3-dimensional mini sculptures. Put them all together and you have a collage. There are so many geometric math elements to discuss, such as shape, dimension, scale, space, symmetry, and proportion. Today kids will also practice their cutting skills, which is always good for small motor development.
Click here to print Day 2: Paper Sculpture Collage / Math
Morning Ritual
This morning, take some counting breaths as a family. Breathe in for 1, and out for 1. Breath in for 2, and out for 2. Breathe in for 3… and so on. Close your eyes as you breathe together.
Prep
Today’s prep will be fairly simple. All you need is a pile of colored paper, or if you don’t have colored paper, just white printer paper will work fine! Clear off space on a table and use the paper sculpture techniques below to make some of your own. If your child is young, you can do this with them until they have figured out some techniques that they can do on their own. Older kids can look at the chart and make everything by themselves.
Click here to print Paper Sculpture Techniques
Supplies
~ Colored paper (we love this pack), or white paper
~ Scissors
~ Glue stick or tape (or white school glue if that’s all you have)
Art Activity
1. Cut your paper into smaller pieces and fold, crimp, curl, and roll to make 3-dimensional shapes.
2. Use a glue stick to adhere your pieces onto paper or cardboard to create a sculptural piece.
Variations
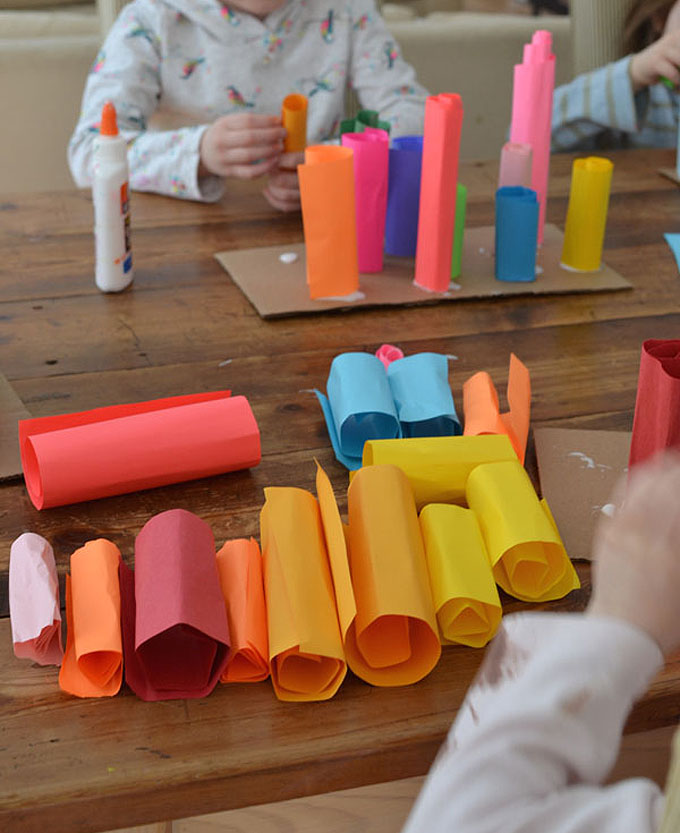
Younger kids can:
~ Practice tearing paper and crumpling to make a collage.
~ Roll paper into mini-tubes and glue upright onto cardboard, using white school glue.
~ Wrap paper strips around sticks to create spirals, then glue onto paper.
~ Crumple paper into balls and then paint them, then uncrumple and see the different painted patterns (like this). Cut and use in a collage if desired.
Extensions
Older kids can:
~ Fold and paint “rainbow ladders” then make a collage.
~ Create a “Paper Sculpture Techniques” chart (see above).
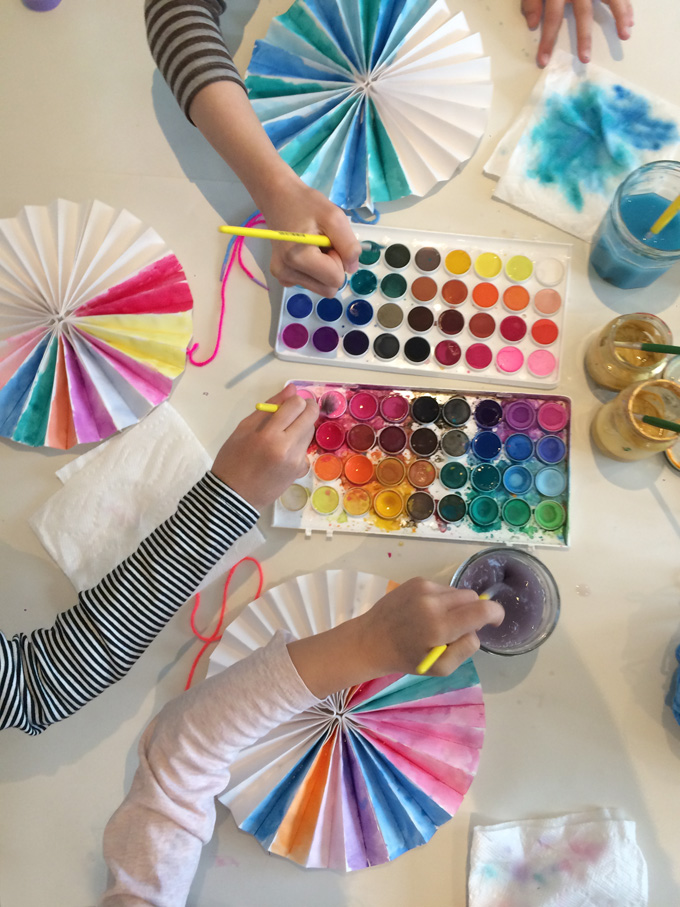
~ Make paper pinwheels (click here for tutorial), paint them, and hang them in your room.
~ Make paper “fortune tellers”.
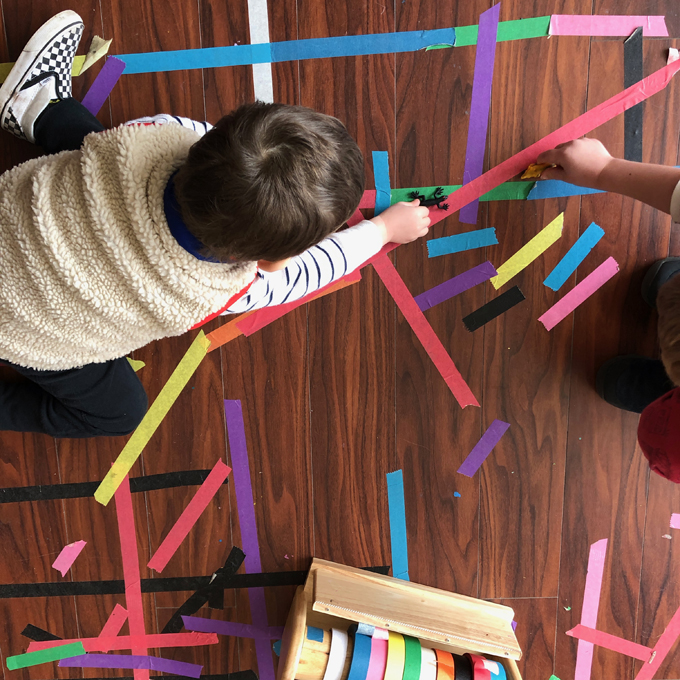
Photo by Shannon Merenstein from Hatch.
Play Activities
~ Make a masking tape road! Offer your child a roll of masking tape and scissors and invite them to make roads for their toy cars or add roads to block and doll play. The criss-crossing lines could make interesting shapes. If you don’t want to use masking tape on the floor, lay down a tarp or tablecloth first and then use masking tape on top of that.
~ Make paper houses to use in imaginary play.
Afternoon Ritual
Make a sorting and counting snack. Mix together a trail mix of cereal (1 type or multiple different types), dried fruits (chopped if they’re big), mini marshmallows, pumpkin seeds, goldfish, teddy grahams, and whatever other pantry snacks your kids like. Then offer the kids a muffin tin to sort their snack, and count and tally each kind of snack before eating.
Day 3: Beginning-Middle-End Collage / Literacy
Today’s collage is a storytelling prompt. Children are natural storytellers, often telling and retelling stories as a way to make sense of their world. This art activity will challenge them to split their story into three parts: beginning, middle, and end. Another way to frame this is, “First, next, then…”. As in, first I brushed my teeth, next I put on my pajamas, then I got into bed. Each part of the story will get its own section in this 3-part collage.
Click here to print Day 3: Beginning-Middle-End Collage / Literacy
Morning Ritual
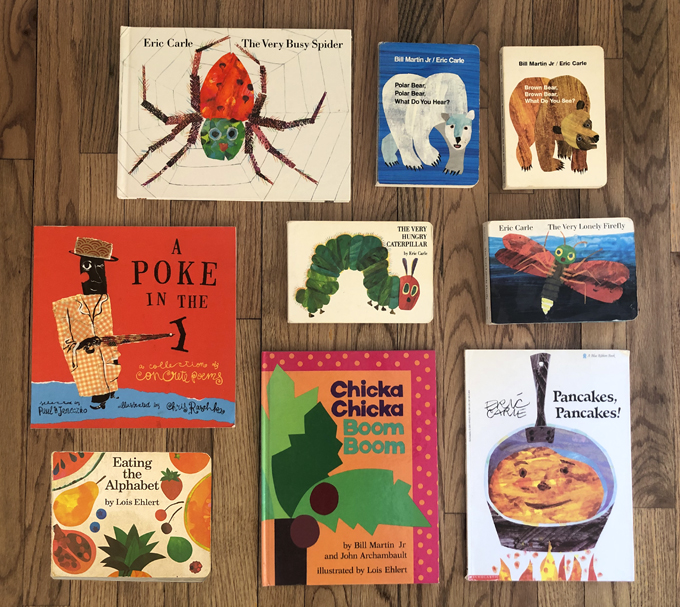
This morning, curl up with a stack of books over breakfast and coffee. If nothing else gets done in the day, reading with your child is so beneficial. It fosters a deep connection between you and your child and also develops essential literacy skills. If you need to get some work done, check out the many incredible authors who are reading their own books and recording them for children.
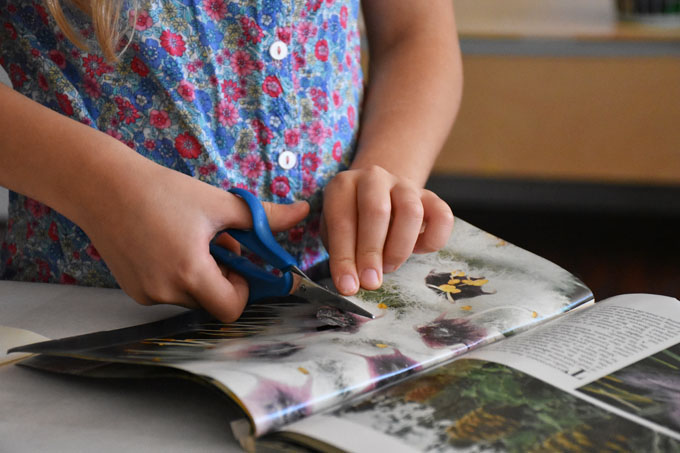
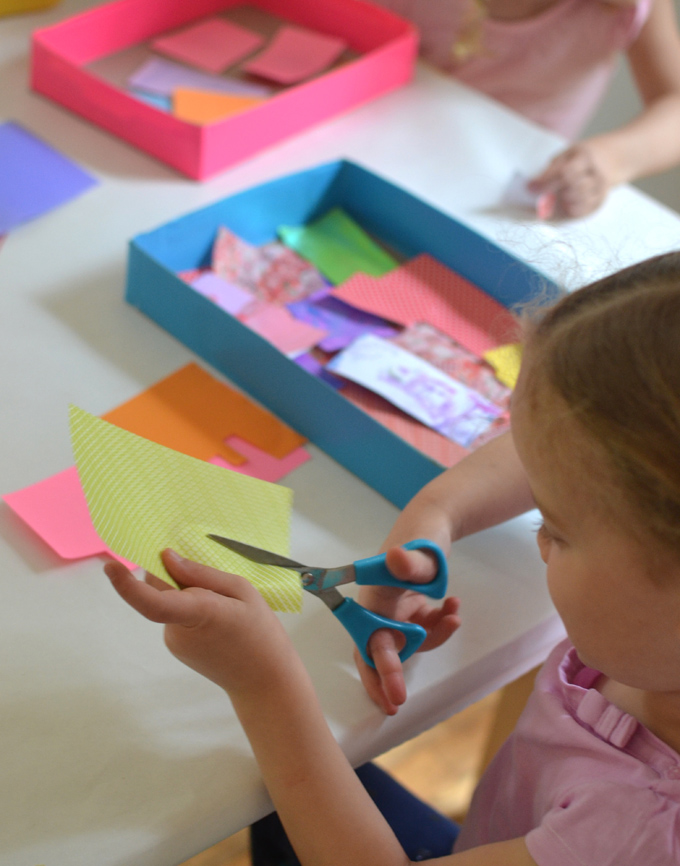
Photos by Lauren McNulty for Collage Workshop for Kids, by Shannon Merenstein
Prep
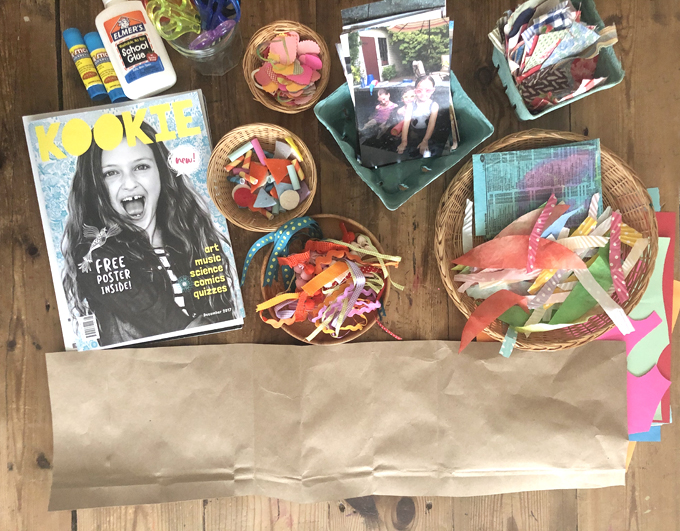
For this project, you will need to collect some materials ahead of time for collaging. Gather some old magazines or catalogs, scraps of construction paper, tissue paper, or any other paper scraps you have laying around. Set out some drawing and coloring tools, scissors, and glue. If you have a roll of paper, then great. If not, you could cut a brown shopping bag into a long strip. Fold your long sheet of paper into thirds.
Supplies
~ Long strip of paper folded into thirds
~ Collage material such as magazines, catalogs, tissue paper, wrapping paper, ribbons, bottle tops, buttons, recycled materials such as bubble wrap or that netting that lemons come in, or whatever you have that can add texture and interest
~ White school glue or a gluestick
~ Scissors
~ Baskets or trays to separate the different collage material
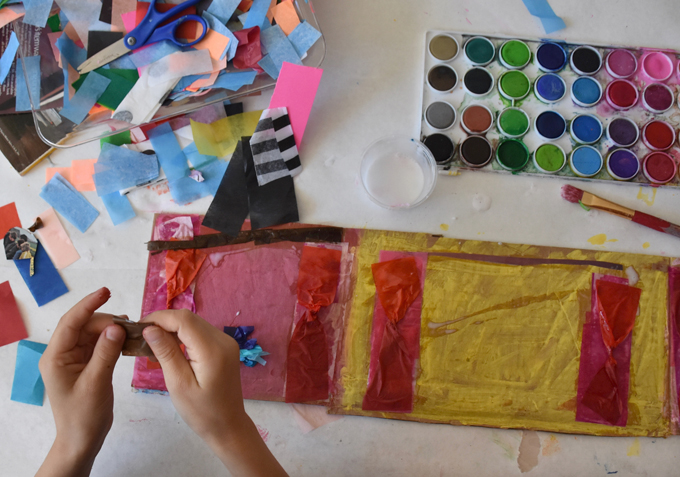
Photos by Lauren McNulty for Collage Workshop for Kids, by Shannon Merenstein
Art Activity
1. Ask your child to tell you a story. Write it down in the format of “First, next, then…”
2. Fold a long sheet of paper, or paper bag, into 3 sections.
3. Using the collage materials, begin with the scenery for each section, then add the main characters and other important details.
Tip: It can be helpful to paint the glue onto the paper first, then stick down collage material. Although this only works if collage material is cut and ready to go, otherwise the glue can dry out. If your child is frustrated cutting out shapes, you could precut shapes for them. Or your child could draw out their shapes or characters and scenery and they can either follow the lines while cutting, or you can cut it out for them.
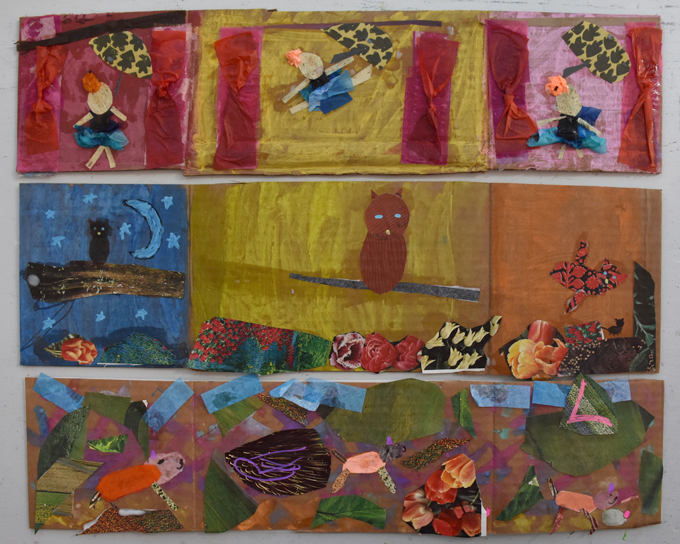
Photos by Lauren McNulty for Collage Workshop for Kids, by Shannon Merenstein
Variations
Younger children can:
~ Use pre-cut shapes (that a parent will prep) to make their story collage.
~ Draw a story together with your child, then add collage for details.
~ Use the collage materials to make a non-objective collage together without any story or set outcome, just enjoy the process or cutting and gluing.
~ Limit the kind of collage materials or color palette for a less overwhelming collage experience. For example, just make it a black and white collage.
~ Make a one-scene story collage using the prompts “How does it feel to be you today?”, or “What does your imagination look like?”
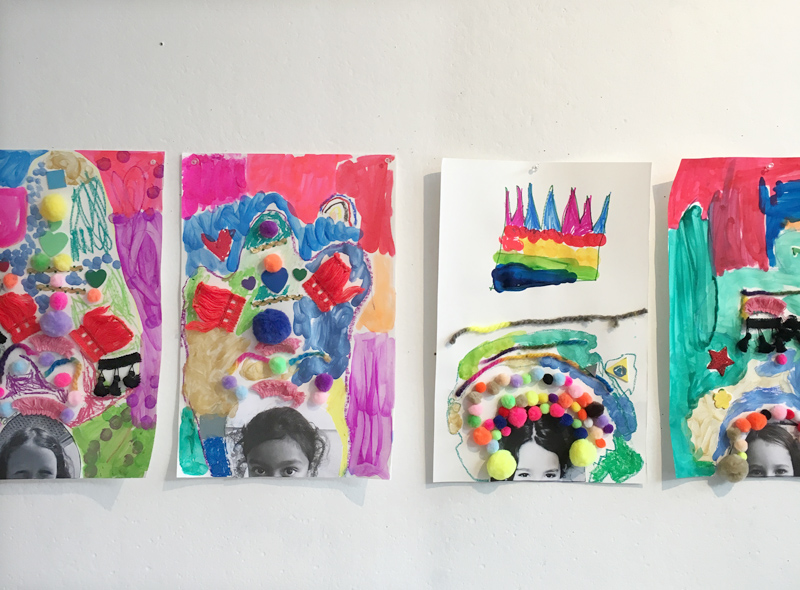
Photo by Shannon Merenstein from Hatch.
Extensions
Older kids can:
~ Pose for three photos that they can print and incorporate into their collage, whether it is an imaginative story or a real one.
~ Focus on creating the main characters entirely out of collage. Look at illustrations by Lois Ehlert, Eric Carle, Leo Lionni, Bryan Collier and others.
~ Order Shannon’s book Collage Workshop for Kids for more inspiration.
Play Activities
~ Tell a story with toys. If your child has more than one doll or stuffed animal, they can practice their “First, then, next…” storyline.
~ Act out a story.
~ Record a story on your phone. Send it to loved ones or friends that they miss.
Afternoon Ritual
Tell a silly snack story. Using clementines or bananas, or anything with a thick peel, draw on a little face and play with your food before eating!

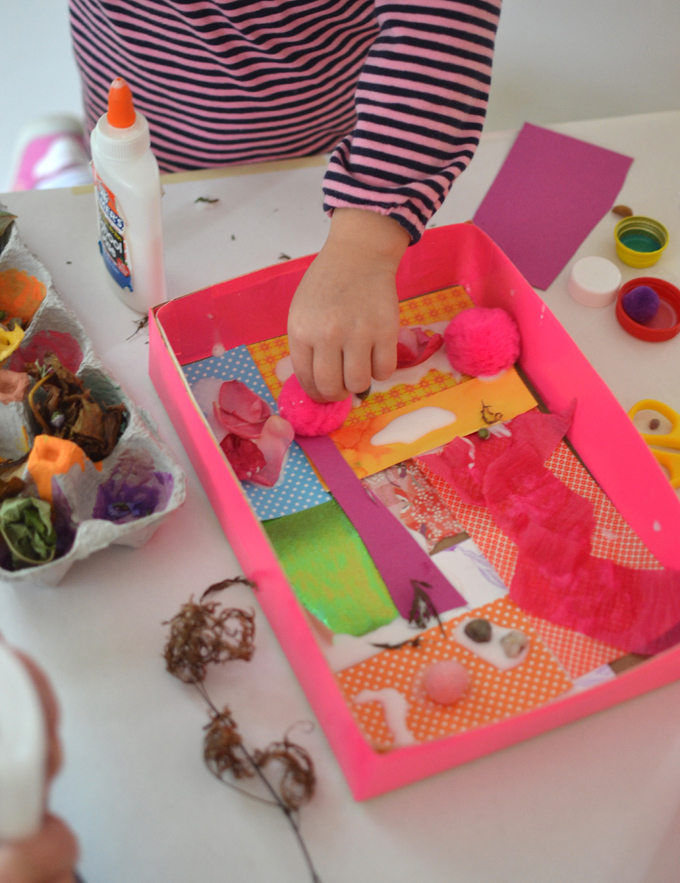
Day 4: Rainbow Collage / Social Studies
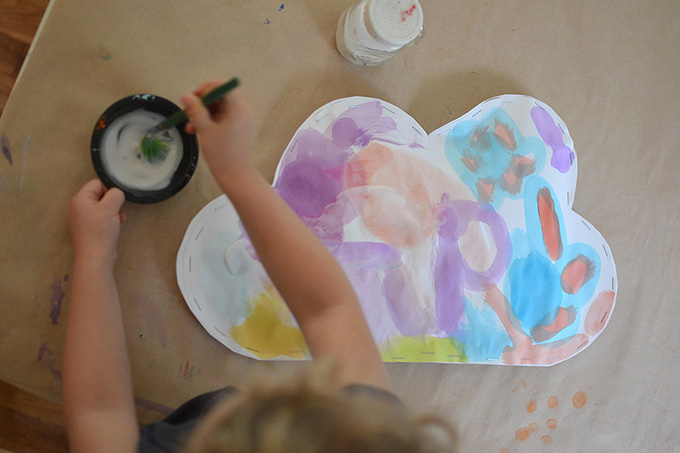
Rainbows symbolize so much in our society. They represent love, following your heart, following your dreams, and most of all, they stand for hope. Today we are going to use all of our leftover paper scraps and make cardboard rainbows to share with our neighbors. For most of us, it’s been a few weeks or longer since we’ve been able to be together with the ones we love. Our children miss their friends. What if we all made rainbows and hung them up in our windows? We can take a walk or drive around the neighborhood and find all of the rainbows, like a giant “I Spy” game. What a wonderful way to talk about the people we love, and to spread a little joy and hope.
Click here to print Day 4: Rainbow Collage / Social Studies
Morning Ritual
Go for a rainbow walk! Walk far enough or long enough in the neighborhood until you find at least one red, one orange, one yellow, green, blue, violet item – natural or otherwise. Along your walk, take some time to recognize your neighbors, from the friends next door to the friends at your local grocery store.
Prep
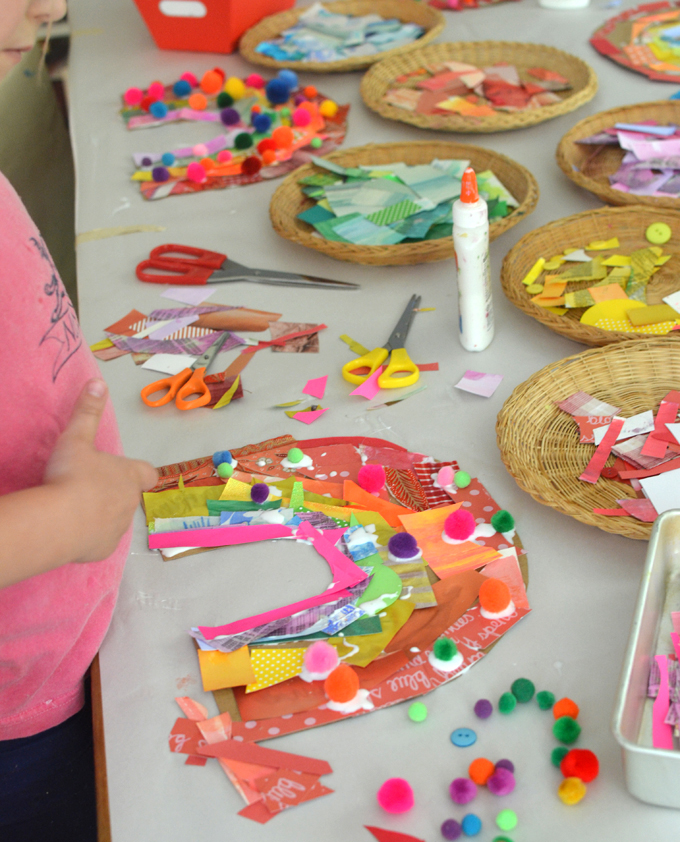
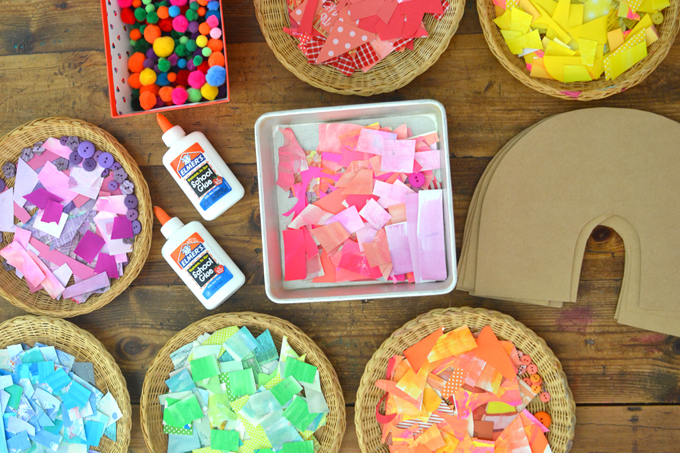
Today’s art activity takes a little time to prep. First, find some baskets, plates, or even some small boxes. Use these to separate your paper scraps and collage material into different, rainbow colors. Then cut some cardboard into rainbow shapes. Clear off a table and set everything up the night before or after breakfast.
Supplies
~ Collage material in rainbow colors, such as paper, bottle tops, buttons, beads, and pom-poms
~ Cardboard rainbow shapes
~ Scissors
~ White school glue
Art Activity
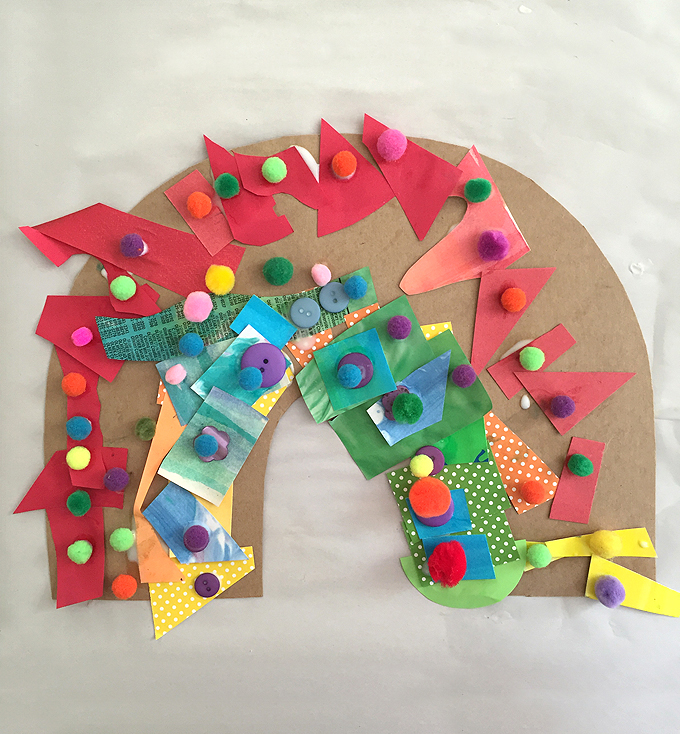
1. Supply your child with cardboard rainbow shapes and rainbow collage material.
2. Use the glue to adhere the rainbow collage material onto the cardboard.
3. Optional to punch holes at the top and add some wire or spring for hanging.
Variations
Younger kids can:
~ This art activity is really great for every age. Younger children may not yet know about the colors of the rainbow so they can just practice squeezing glue and covering their rainbow will all the colors.
~ Practice cutting skills. Cut long strips for paper and then let your child use their scissors to snip little pieces. They could be very good prep helpers!
~ Using a muffin tin, let your child help you sort all of the different colored collage material.
~ Cut out a giant rainbow that the whole family can collage together.
~ Go on a nature walk to find materials for a nature rainbow.
Extensions
Older kids can:
~ Paint the rainbow first, then collage.
~ Set out washi tape to use with the collage material.
~ Make a puffy cloud with white paper to attach to the rainbow.
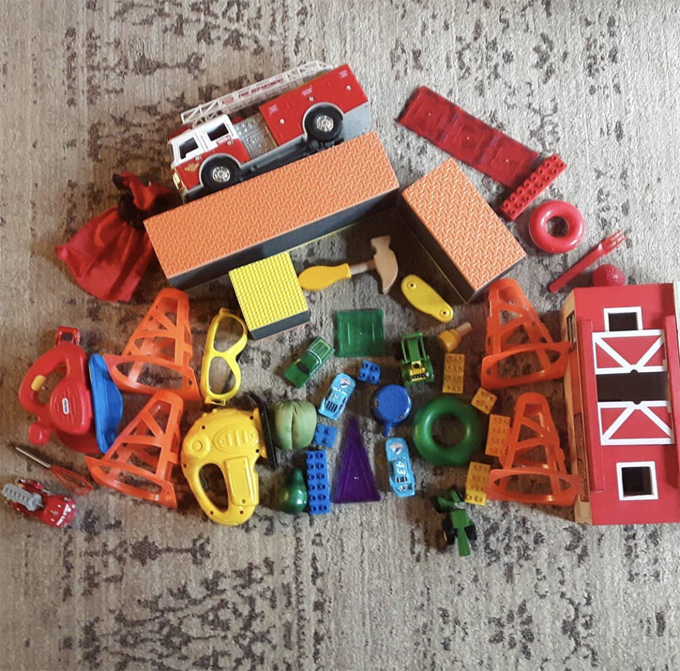
Photo by The Art House (@the.art.house.adventures).
Play Activities
~ Create rainbows with your toys.
~ Make a rainbow scavenger hunt in the house: Collect five red items, five orange items, five yellow, and so on. If you don’t want your child taking things from all over the house, you can limit it to downstairs, or just one room.
~ Fill a plastic tub with water, add a little color with liquid watercolor or food coloring, then together add water-safe toys of that same color that sink or float. Add a few scoopers or strainers. Kids love water play!
Afternoon Ritual
Make a Rainbow Snack! Search the fridge or pantry for snacks that represent the colors of the rainbow. Or if you don’t have all the colors, choose just one color. This fun idea encourages diverse and healthy eating. Here are some ideas:
Red: Raspberries, cherry tomatoes, jam on toast, or plain yogurt mixed with jam (pinkish)
Orange: Clementines, cheddar cheese, goldfish
Yellow: Pineapple (fresh or fruit cup), yellow pepper, golden raisins, pasta with butter or olive oil, chickpeas
Green: Pease, green beans (fresh or canned), sliced cucumber, veggie straws, dried seaweed, green olives, avocado
Blue: Blueberries, smoothie, yogurt mixed with frozen blueberries
Purple: Blackberries, grapes, jelly sandwich, purple carrots
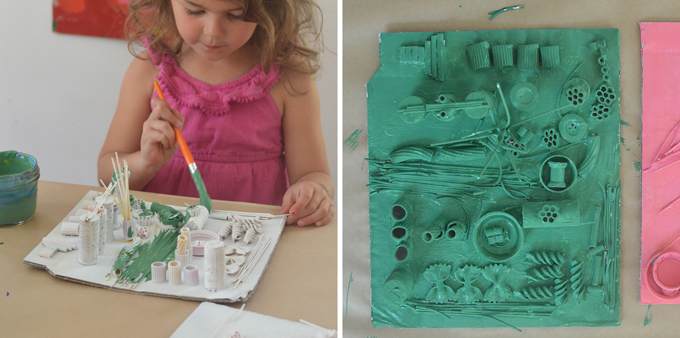
Day 5: Found Objects Collage / Process Art
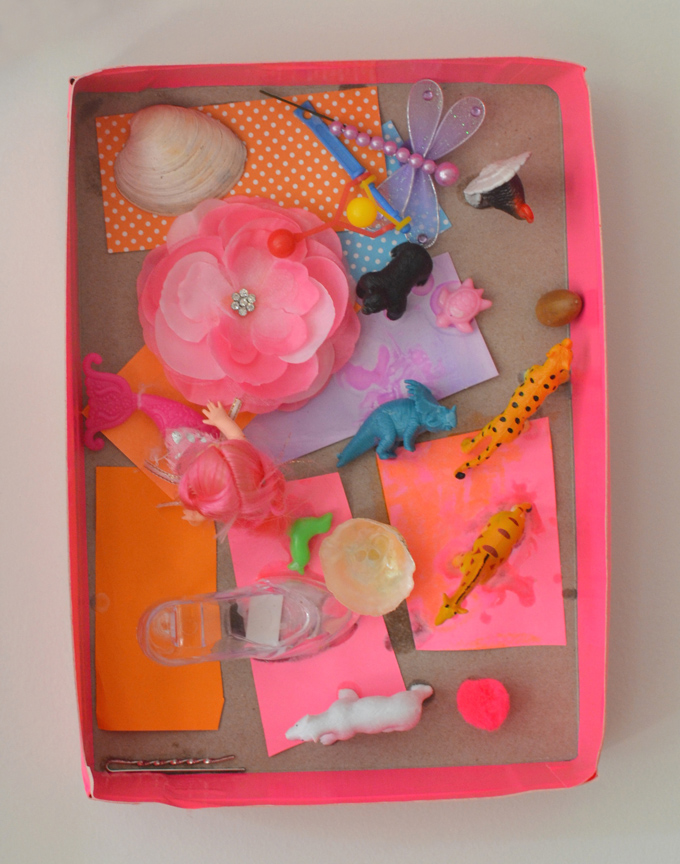
Our houses are filled with bits of junk. Let’s face it, we live with kids and collect trinkets and useless stuff on a daily basis. Even if you are the neatest, most organized Marie Condo aficionado, you still have a junk drawer. Today we are going to grab a bag or a box, and go on a treasure hunt throughout the house to find small objects that could be used in a collage. These objects should be things you are ok with not using/seeing anymore. Think of it as Spring cleaning! And a lesson for your child on letting go of “things”.
Click here to print Day 5: Found Objects Collage / Process Art
Morning Ritual
Start off the morning with some quality quiet time together before the scavenger hunt. It doesn’t have to be complicated. Bring a basket of books to the breakfast table or crayons and paper, and start the morning in a peaceful way.
Prep
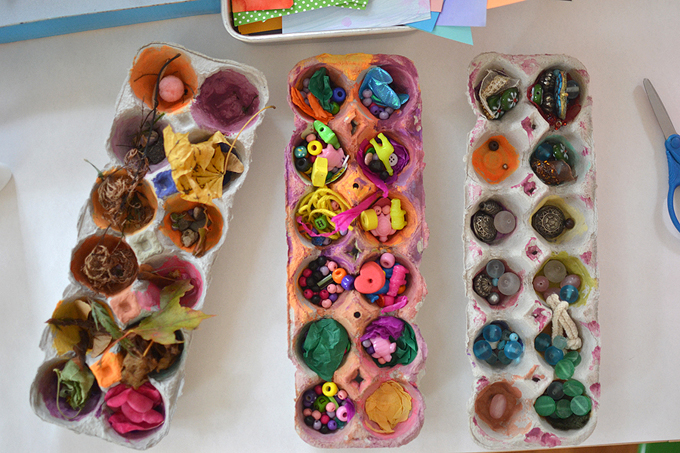
Decide what your base will be. You can use a cereal box with a rim which feels like a shadowbox. Or you can just use a piece of cardboard. Gather lots of different types of paper, scissors, and glue. If you have limited paper supply, you don’t need to use any at all. It’s a nice thing to paper the background, but you can also use paint or just leave it. You can use egg cartons to sort and display the small found objects.
Supplies
~ Found objects
~ Supplemental collage materials (optional) such as paper, bottle tops, corks, buttons, etc.
~ A surface such as cardboard, a cereal box, a shoebox lid, or a flat piece of wood
~ White school glue
~ Scissors
Art Activity
1. Collect found objects from around the house.
2. Use these objects to make a collage on some cardboard, a cereal box, or a shoebox lid.
3. Optional to add paper as the background, or paint.
Variations
Younger kids can:
~ Go on a nature walk to gather found natural objects.
~ Color the glue with tempera paint or some food coloring.
~ Fill the whole surface with glue (this will only work if you use something with a lip, like a shoebox lid or cereal box. Kids can really spend time squeezing and working small hand muscles. Once they have covered the whole surface, then they can glue on all of their found objects.
Extensions
Older kids can:
~ Study the artist Louise Nevelson who made found objects collages and then painted them all one color. Your child can even mix their own color. You will want to paint everything white first as a primer.
~ Make a sculpture from their found objects using a hot glue gun.
~ Make a diorama (a scene in a box) using and old shoebox.
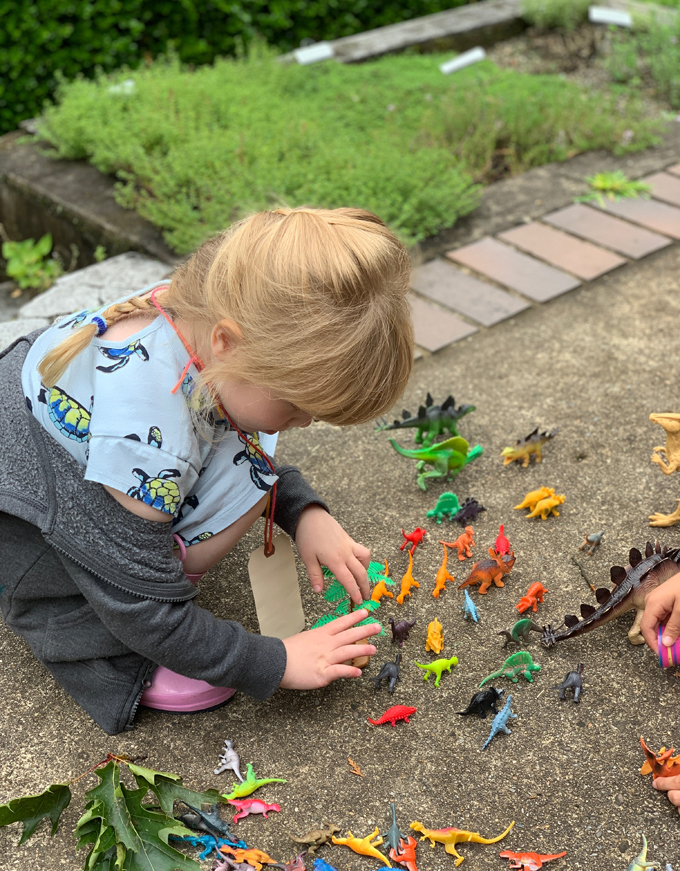
Photo by Shannon Merenstein from Hatch.
Play Activities
~ This would be a great sorting activity for kids. They love sorting anyway. Prompt them to line up their toys from biggest to smallest, or sort them by color or type. All the animals can go in one line, all the cars in another line, and so on.
~ This is actually a perfect day to organize the toys. Find baskets or bins that aren’t being used around the house and make an effort to really dig deep into the toys and organize them into categories. Your child would love to help. Or better yet, dump everything out and start from scratch! This could take a while, but think of how satisfying it will be to have a brand new play area for your child. And we guarantee they will discover old toys and play independently for hours or even days. Maybe through the weekend 😉
~ Take this opportunity to teach your child about donating. Have him go through all of his toys and games and pick out a few things that he feels OK giving away to other kids who maybe don’t have as many toys. It’s never too early to talk about gratitude and those that are less fortunate.
Afternoon Ritual
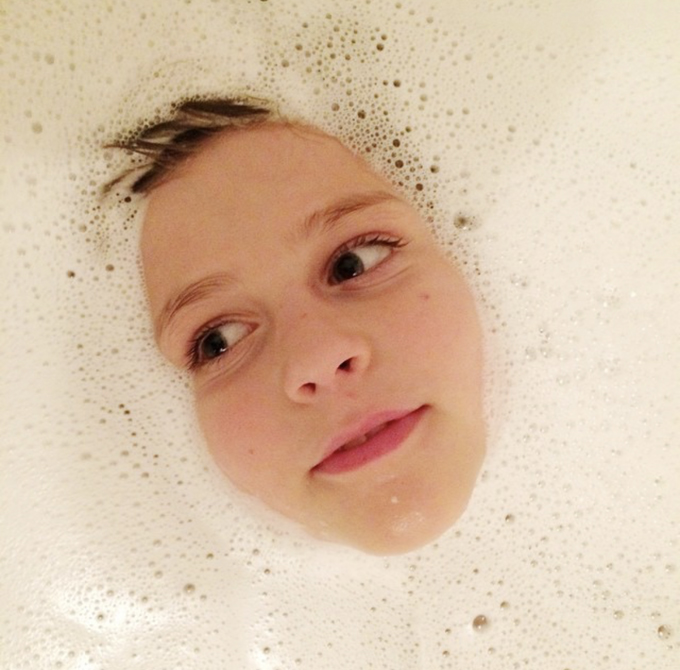
End the week with a nature walk or big body outdoor play session if you can. Even if it’s rainy, pull on your boots, grab an umbrella, and soak in the healing powers of fresh air. Or, if you can’t make it outside, give your kids a bubble bath. An unexpected splashy time might be just what you need to power through the rest of the day.
A Note from Bar + Shannon
Thank you for following along these past few weeks! We have been so grateful for the stories you’ve shared about how helpful this Art and Play Activity Guide has been in giving your week a little bit of structure and routine, and of course a jolt of creativity! We’ve been working hard to ensure your whole family is covered, from sunrise to sunset, with developmentally appropriate, easy to facilitate conversations and creative experiences. This time isn’t easy for any of us, but we are in it with you for the long haul. Moving forward, starting next week, a small $5 fee will be collected for access to our guides so that we can continue to help you frame your weeks and offer your children fun and imaginative experiences. We hope you will continue to join us.
Sign up below to get our new guides sent to your inbox each Sunday morning.
xo, Bar and Shannon
– – – – – – – – – – – – – – – – – – – –
A little about Shannon:
Shannon Merenstein is the founder and director of Hatch, an art and play studio in Pittsburgh. She is the author of Collage Workshop for Kids from Quarto Publishing, and a mom of two. Before that, she was an art teacher and instructional coach for years in an elementary school. Shannon also facilitates professional learning opportunities for teachers around the region to bring open-ended art-making and creative play into the school day.
Follow Shannon on IG @hatchartstudio, and find her on Facebook.
Shannon also makes the cutest “Hatch On-the-Go Art Kits”, and you can find her book on Amazon.
Read more of Shannon’s posts on Art Bar here.
– – – – – – – – – – – – – – – – – – – –


Hi Bar and Shannon;
First of all, thank you BOTH So. Much. for developing these weekly schedules! You did not miss a heartbeat when confronted with a need to provide parents (and, *ahem* teachers) with some creative ideas to keep kids engaged and learning despite the current national crisis. I work in a developmental preschool, and my colleagues and I feel grateful for your resource precisely because it delivers good content that is also developmentally appropriate. We have shared your site with our district and given it our endorsement as a resource for parents. I am also sharing it with the parents of my AM and PM classes in hopes that it can guide them gently through the distance learning experience.
Can you show us how to make the tabs in the paper sculpture techniques?
the tabs are made like this: cut a long strip and fold it in half longways, then unfold it so you have a crease all the way down the middle. use that as a marker and make cuts up to that mid-way fold. the cuts are the “tabs”. when you’ve cut all your even tabs, fold then one way and then the other way, alternating each side. I hope this makes sense! xx Bar
Thank you for all the great ideas and instructions!