Yesterday I taught my very first art class! You may have noticed that I have a new heading up top called classes. I am SO excited about this new adventure, it has been a dream of mine for a long, long time (as my friends can attest to). I can’t believe it’s finally come true!
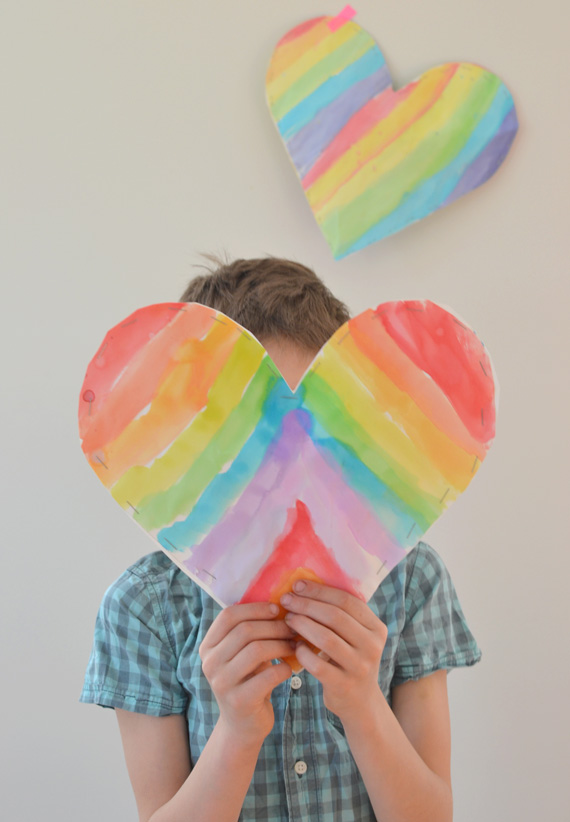
My class of 3 and 4 year olds (mostly 3’s) came over today and we make puffy hearts. I was thinking it might be a bit of a challenge, starting off with a “product” rather than some open-ended creativity, but I was feeling like I needed to take this opportunity to have them make something for mother’s day. I had my 8yr old son make one as a “trial run”, and he did so well! His only painting instructions were to use rainbow colors. He came up with his own pattern, cut, stuffed and stapled all by himself. I was feeling pretty good about this!
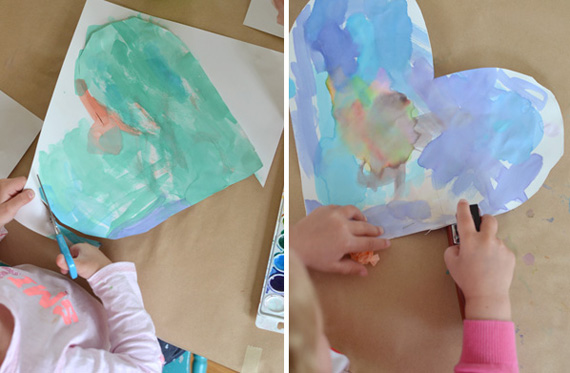
So my little kids arrived and we talked about rainbows (r.o.y.g.b.i.v.), and I gave them the choice of painting stripes or creating their own patterns. “Just fill the whole heart” was really my only request. I obviously have not been around 3 year olds in a long time. Five years, actually, if you do the math. I forgot that they are babies. First of all, the 3yr olds had never used watercolors, or scissors. (Thank goodness I had a 4yr old who could prove that it was possible.) So we started from scratch. I explained that watercolors need water to work. They all chose brown first, and then black (because those colors are at the end of the palette), and then they moved on to white. Every color went on the same spot on the paper. (Stripes? ha!) But…with a little encouragement and repetition of technique, they got the hang of it in no time, and even began mixing their own amazing colors! Such a smart group.
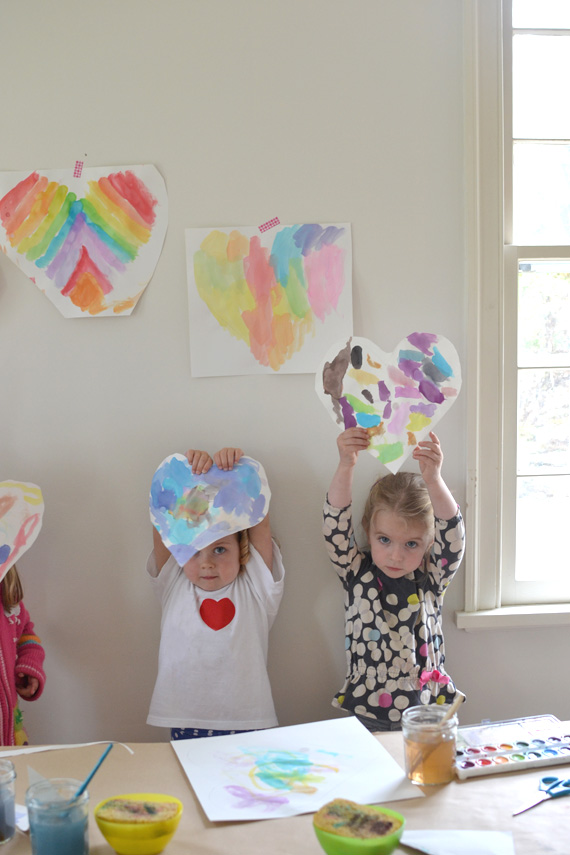
Look how cute they are!
This post contains affiliate links. Thank you for your support!
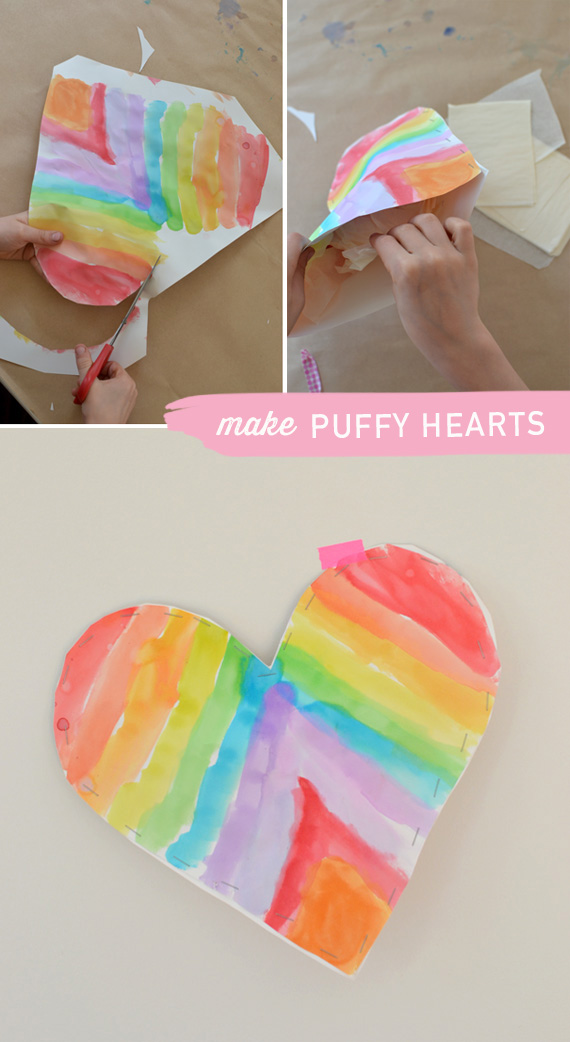
Here’s a quick tutorial on making puffy hearts:
1) cut out a big heart and use it as a template (heart should be symmetrical), then trace the heart onto two pieces of paper (we used sulphite paper, not watercolor paper which would be too thick)
2) paint both hearts with watercolors, then let them dry (we used inexpensive crayola watercolors, but I also love these)
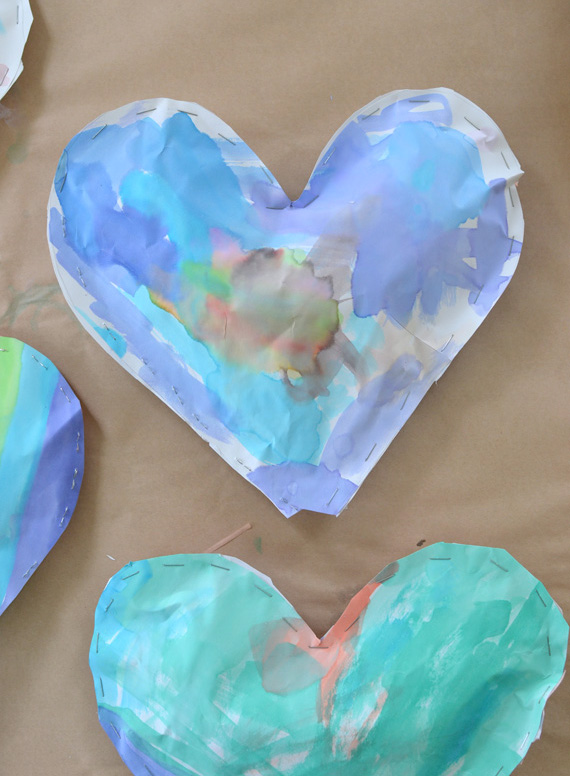
3) cut out both hearts, then staple together all along the edge, leaving one side open to stuff
4) use tissue paper, or cut up some newspaper or scrap paper, and crumple into little bits to use as stuffing
5) staple the last side closed
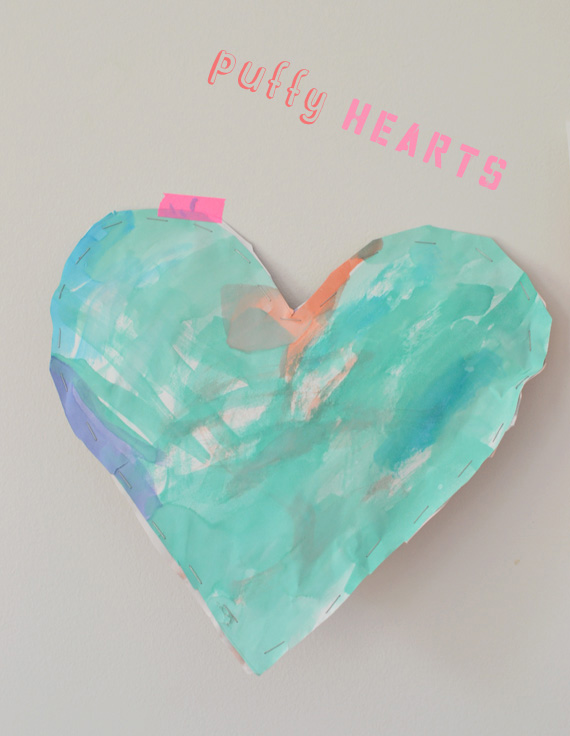
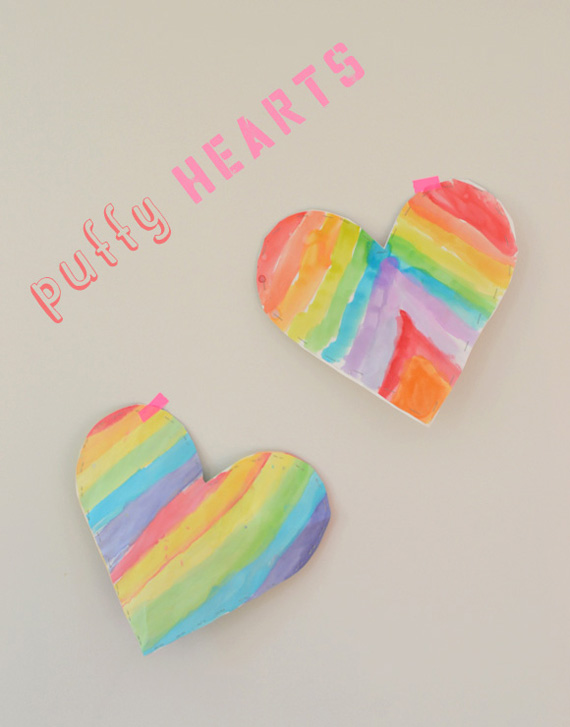
I just LOVE the way their hearts turned out so unique and moody and beautiful. I swear, little kids are so uninhibited that they really make the best art.
Have a try at this one, it really does work for all ages.
Happy Mother’s Day!!
xo, Bar
PS: for a good mother’s day quote, click here to see my quote collage from last year….you’ll like it.


Umm…this is the best post ever and those kids are ADORABLE and those hearts are AMAZING! If this is your first class I can’t even imagine what’s to come. I love making puffy stuff! This is just so so great! Congrats!!! And the pics are INSANE!!!
oh my gosh, thank you meri cherry!! you have made my day…thank you!!! xx bar
What a lucky group of kids to have you as a teacher! I’ll be sharing this on The Crafty Crow as part of a Mother’s Day crafts round-up!
awww..you are so nice, thank you cassi !! and thanks for including me on crafty crow !!! xx bar