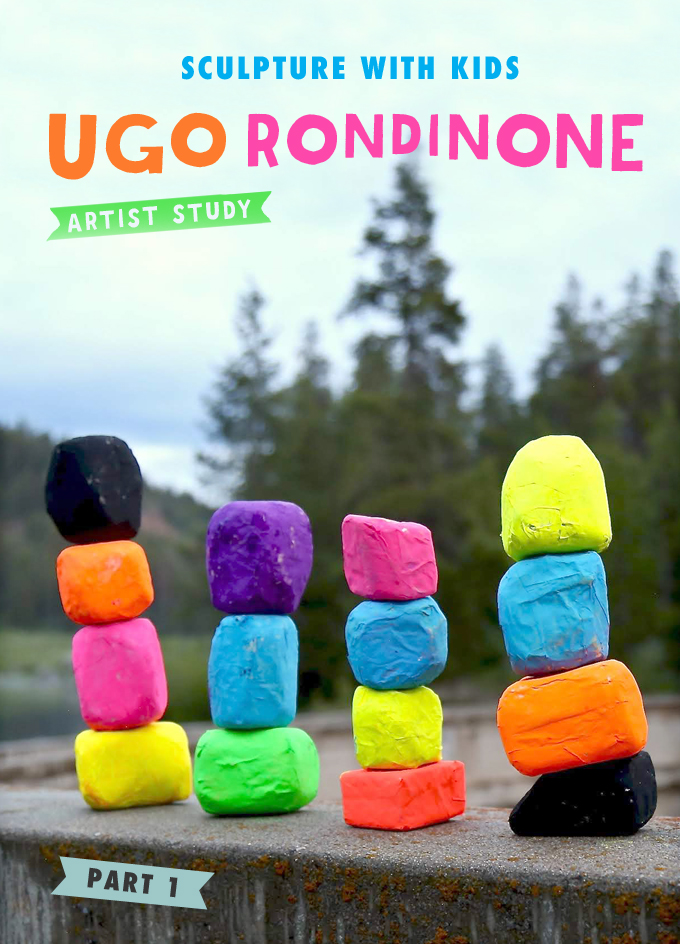
Today I have the pleasure of introducing you to one of my favorite people of all time. Ami from HANDMAKERY in Carbondale, Colorado is here to tell us about the amazing sculpture project she did with her kids, studying the work of Seven Magic Mountains artist Ugo Rondinone. Ami’s projects always blow. me. away. She literally has the most imaginative brain and somehow is able to translate it and motivate her students to make the most elaborate and fantastical creations. Definitely check out her website and Instagram for endless inspiration. Plus, she has this incredible knack for alliterations and her IG posts (and comments) are so impressive and always make me smile. I don’t know how she finds the energy. Maybe it’s that Colorado air.
This is part one of a two-part series. Read Part Two here!
And be sure to scroll down and check out the video of the finished stacking sculpture in action.
Here is Ami in her own words…
Are you and your kids ready to create these multifaceted + manifested + most magical + MOST MAGNETIC sculptures while learning about an incredibly inspiring artist?
That’s right, these sculptures are magnetic! They are not only a magnificent art project, but they are also a handmade toy that can be used to build and rebuild towers to your heart’s content.
Inspired by Ugo Rondinone and his fascinating 3D sculpture project Seven Magic Mountains, this is a compelling mixed-media project for young artists. Rondinone’s sculptures in the Nevada desert are one of the largest land-based art installations completed in the last 40 years. Would you believe it is made up of 33 boulders, each weighing 40,000-56,000 pounds!?! Would you also believe this project took five years from concept to completion with two years dedicated to the install!?!
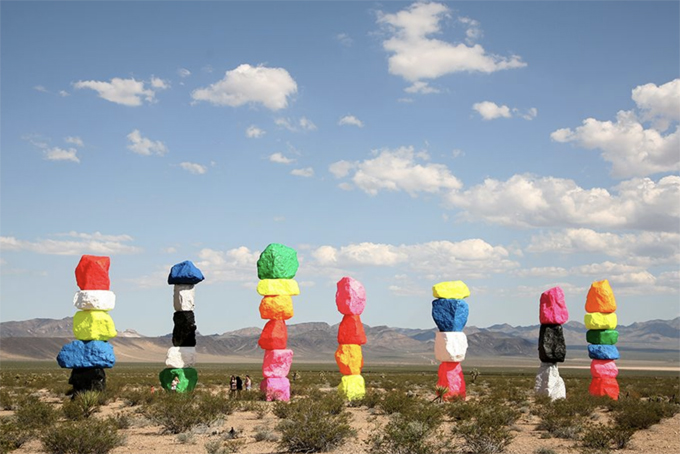
Seven Magic Mountains by Ugo Rondinone in the Nevada desert.
Magnetic building and construction are popular and perfect STEM activities. Kids love working with magnets as they explore key engineering concepts through playful learning. Magnets are not only exciting and affordable, but no batteries are required! This sculptural toy is interactive, yet quiet & calm.
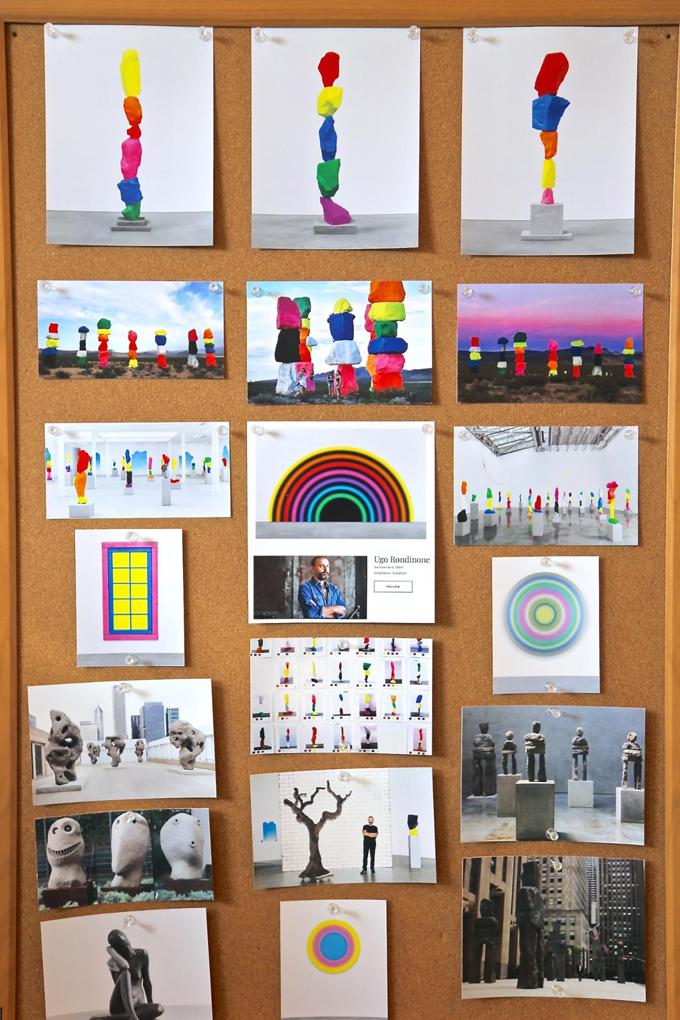
Our visual board.
[ I am a participant in the Amazon Services LLC Associates Program, an affiliate advertising program designed to provide a means for us to earn small fees at no cost to you by linking to Amazon.com and affiliated sites. ]
Supplies needed to make Ugo Rondinone inspired sculptures with kids:
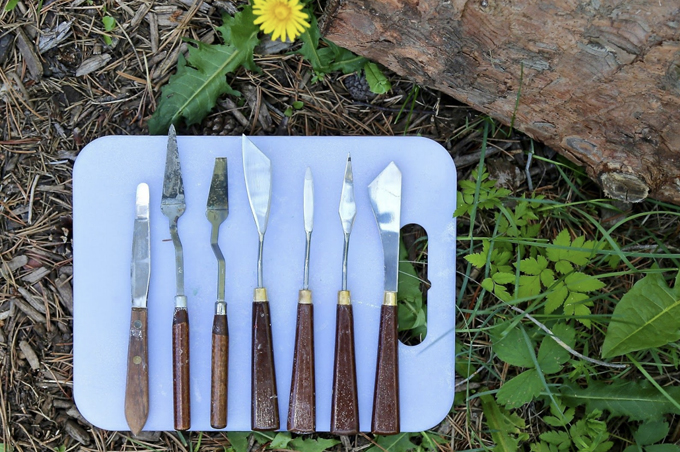
~ Simple tools or butter knife for carving
~ Work surface (if outside), like a plastic cutting board
~ Plastic bowls
~ Permanent marker
~ Magnets (you can experiment with a variety of sizes)
~ Masking tape, 1-inch
~ Newsprint or newspaper
~ Scissors
~ Paper mâche mix, or flour and water
~ Whisk
~ Plastic, like a shower curtain, or dropcloth
~ Plastic egg carton (optional but fantastic way to allow air drying)
~ Magnetic base (optional) or anything steel (tabletop, pan, or tray)
~ Tempera paints (neon, purple, silver, black)
~ Brush
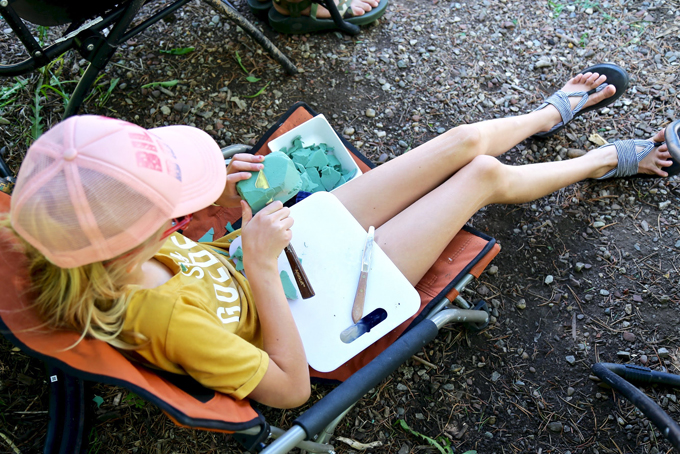
How to make Ugo Rondinone inspired sculptures with kids:
Our family took this process into the wild, camping in the sweet-n-savory state of Colorado for some extra creative connection, around the campfire with our two children. This process can be done anywhere… inside your home, within a classroom or studio, or anywhere in between!
1. Dive in by watching the full process of The Making Of Seven Magic Mountains which is a larger-than-life sculpture project located outside of Las Vegas, Nevada. This will give young artists inspiration in reaching new heights. Explore #ugorondinone and #sevenmagicmountains on Instagram to get a strong visual sense of his soaring and sophisticated style!
2. Start out by sketching a variety of simple shapes. Explore how simple 2D shapes can become 3D forms. Use inspiration from indoors, outdoors, and looking at Ugo’s sculptures.
3. Prepare large foam pieces into smaller, more manageable pieces by cutting up into smaller, square blocks.
Sculpt
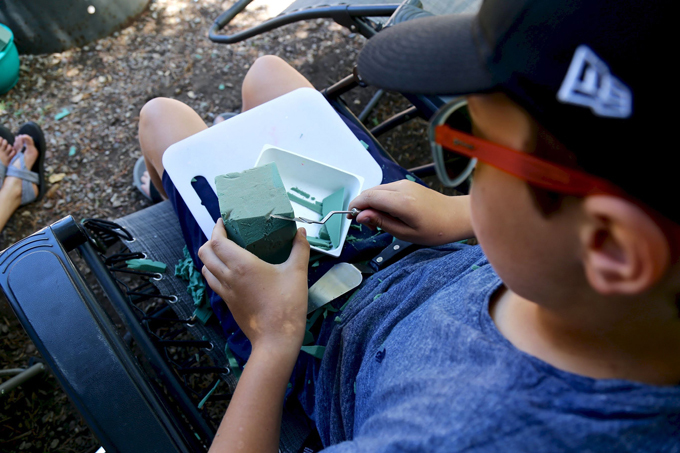
4. Children can simply and slowly subtract surface area to create their building blocks (aka boulders) similar in size to a baking potato. Begin sculpting simple forms using foam on a plastic work surface. It is important to keep foam pieces somewhat consistent in size, not too big or too small, as these pieces will be placed vertically on top of one another. It’s ideal for pieces to have both a flat top and bottom so pieces can simply stack with balance. Working with floral foam is messy so have a bowl for shavings. It’s also a really affordable sculpting medium with endless possibilities.
5. Use and experiment with simple carving tools which may include pallet knives or simple household butter knives or flat edge kitchen utensils.
6. When creating a variety of forms, really look at Ugo’s natural “bouldering forms” consisting of small jagged angles on the edges so they really take on the look of real rocks or boulders in nature. Forms can be detailed with textures, patterns, and mark-making. Others can be soft, smooth and sculpted for contrast. Floral foam cuts like butter, it can also be somewhat shaped and sculpted by squeezing.
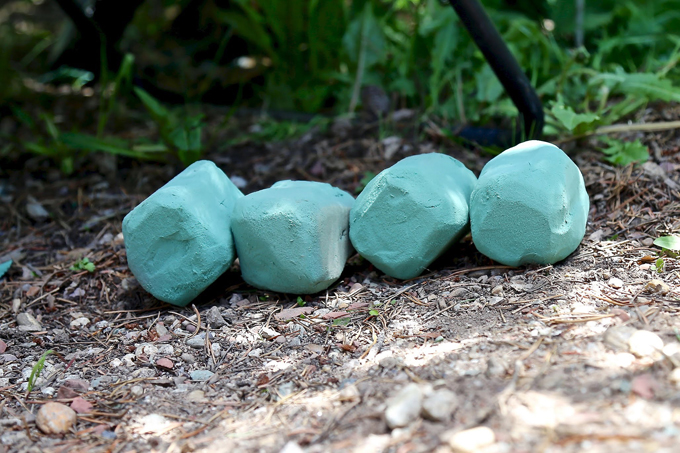
As my children simply expressed, “it’s very satisfying to cut foam” but be sure to remind young artists with this subtractive method, cut a little at a time as you can’t “put back” what has been taken away. We loved how the subtractive method was a complete connection to carving stone, yet 1000x’s easier. Having had the opportunity to sculpt marble in college it was definitely the most difficult and most timely process I’ve ever taken on, thankful there are easier options for young hands. Kids are natural sculptors with all materials, especially if you have a few example pieces to lead them into the process. Remember that with process art, it’s truly about the experience.
Important Note: There must be a natural or defined balance to make this project a success with an end goal of three to four small overall pieces so the overall stacked sculpture doesn’t get too weighted on top or tippy as the materials are extremely lightweight. Smaller/wide/flat pieces provide sturdier boulders rather than tall/narrow pieces. This is all part of the “experimental process” of learning balance and dabbling in sculpture.
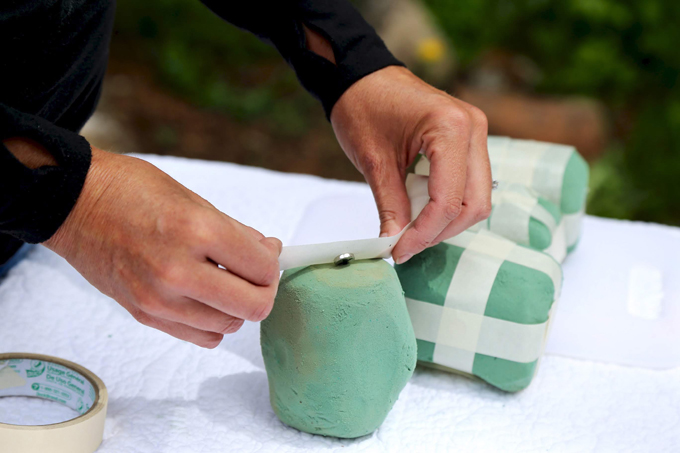
7. Use a black permanent marker to pre-mark the positive and negative attraction of each magnet so you know which side of each magnet “faces up” and which side “faces down”. Once foam pieces have been sculpted into tiny boulders, use 1-inch masking tape to secure a neodymium magnet (small yet extra strong) on the top center and on the bottom center of the foam piece. Be sure to not implant the magnet too deep, keep all magnets flush with the surface. Tape doesn’t want to stick to the foam so you’ll need to take the tape completely around the foam piece to “tightly” reconnect to itself. For strength, create another tape loop around the middle of the foam piece. It’s important to only have two layers of lightweight masking tape on top of each magnet so the magnet doesn’t lose any strength as future paper-mâcheing will also add a few layers. It’s also important for the magnet to stay embedded on the surface in the center of each piece. This is the most technical part of the project so staying patient and having extra hands is very helpful while also remembering it’s so easy to restart with a fresh piece of tape.
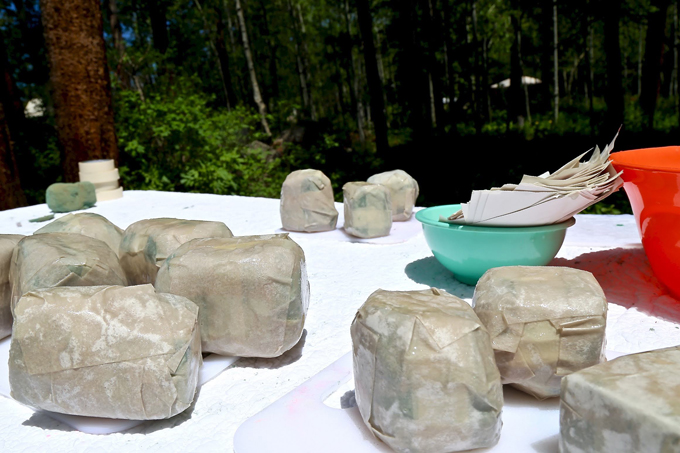
Paper mâché
8. Cut a small handful of approximate 3×3” pieces of newsprint which can be cut into smaller pieces as needed with scissors.
9. Mix up a batch of paper–mâche which is basically a dry powder plus cold water combination which equals complete goodness. You can also use flour and water (equal parts) and mix with a whisk until you have a glue-like consistency.
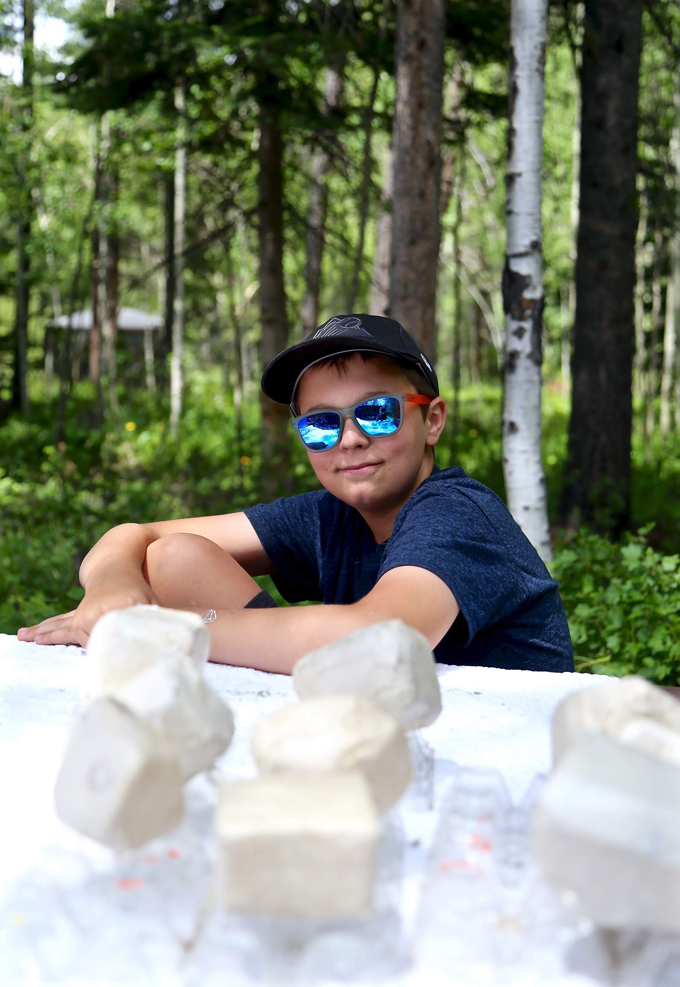
10. Prepare a work surface by laying down plastic (or simply use a table that you don’t mind getting messy and that you can clean with a sponge and water). Apply a small amount of paper–mâche onto your hands and rub both sides of the paper so both sides become saturated and sticky. Be careful to apply no more than two layers to cover each foam boulder. Gently rub and smooth along the way which is a very soothing and peaceful process most makers greatly enjoy.
11. Dry pieces by propping them up on plastic egg cartons with open airflow or bask pieces in the sun for 24 hours, usually overnight and you’re set for the next step.
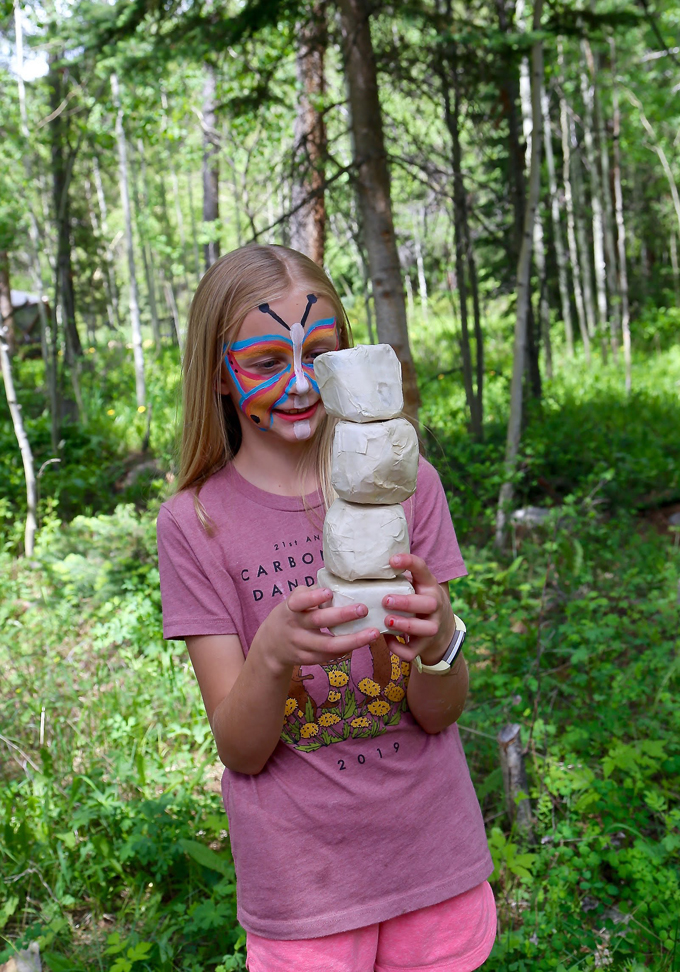
12. Once pieces are completely dry, experiment with stacking, arranging, and balancing. If one piece is not a precise fit, simply rearrange. If a piece is still not working, simply take it off or make a new piece in its place, really it’s all kind of a balancing act to joyfully juggle! The process is so simple, you can keep making more and more pieces to work with and/or make new and improved creative combos, the key is to stay flexible in your artful experimentation.
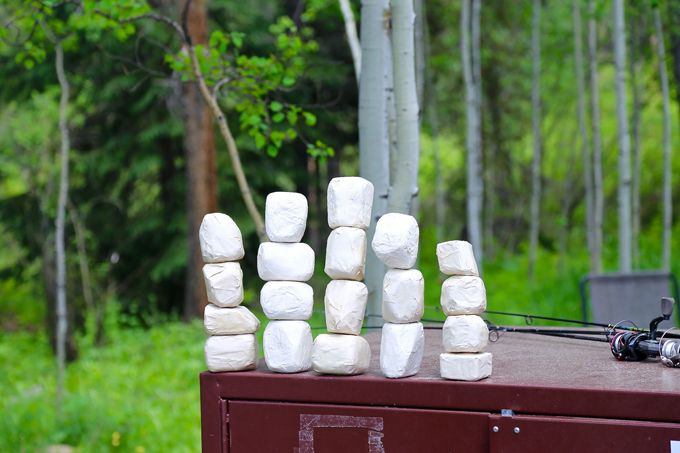
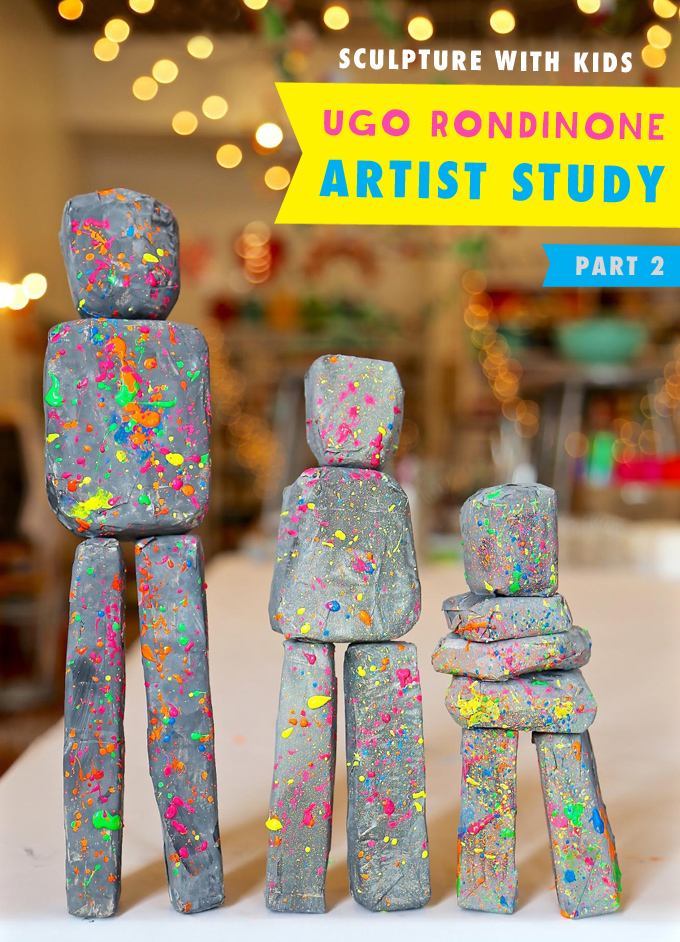
Important Note: Placing sculptures on a magnetic (a.k.a. steel) surface is most ideal to strengthen the overall sculpture and allow them to stand solo, otherwise they can blow over or tip as they’re incredibly light-weight. A bear-proof safe within our campground was the perfect “magnetic table” to proudly display these pieces in progress. My kids loved how interchangeable the pieces were to create new combinations. The taller sculptures, shown above, could easily be held but wouldn’t stand solo without a magnetic surface beneath, something to consider depending on your end goal. Magnetic bases can be purchased for a modern/strong sculpture base to add weight and magnetic support to your final creations or you may find something better for your end-goal such as a metal table or block with magnetic properties.
Paint
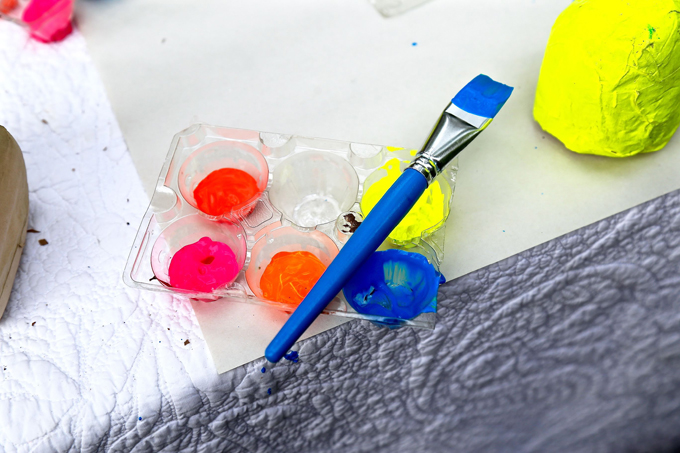
13. Explore and artfully add Ugo Rondinone’s signature color pallet to dry boulders by painting each piece a solid color using fluorescent/neon tempera paint plus black, white, purple, and silver. Children absolutely love painting their sculpture pieces with such a powerful array of colors to excite and unite.
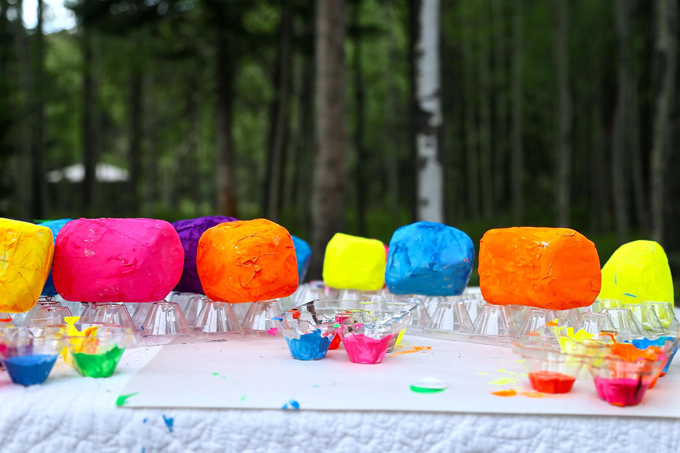
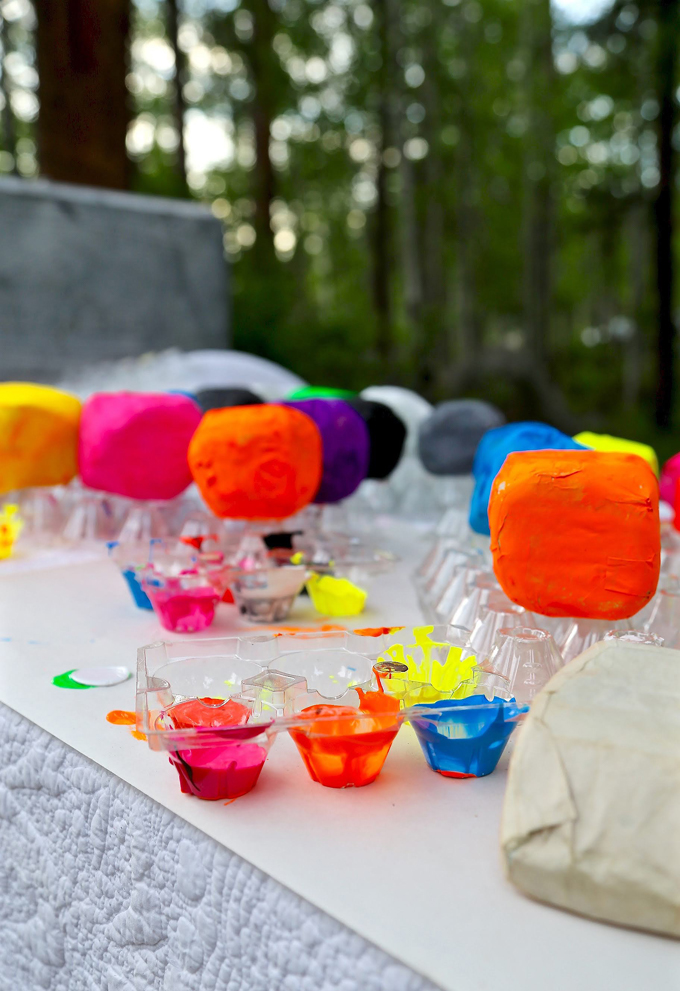
14. Allow pieces to completely dry propped up on plastic, we used plastic egg cartons.
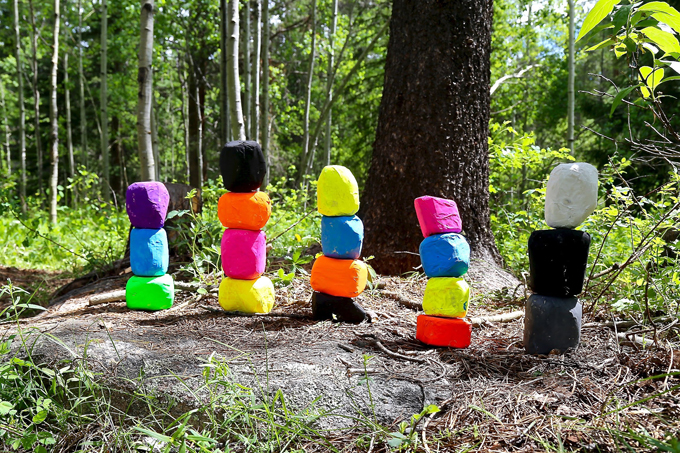
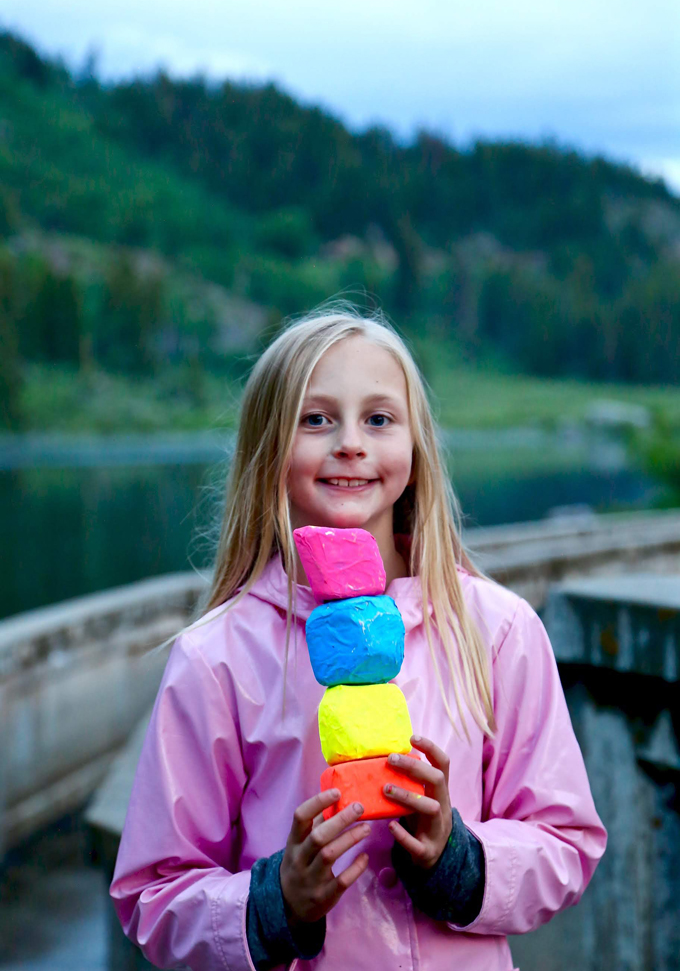
15. Once dry, stack your interactive + interchangeable, creative + colorful, child-friendly + collaborative creations for community spotlight in the city, country, or while creatively camping!
Watch this video to see how strong these magnets really are!
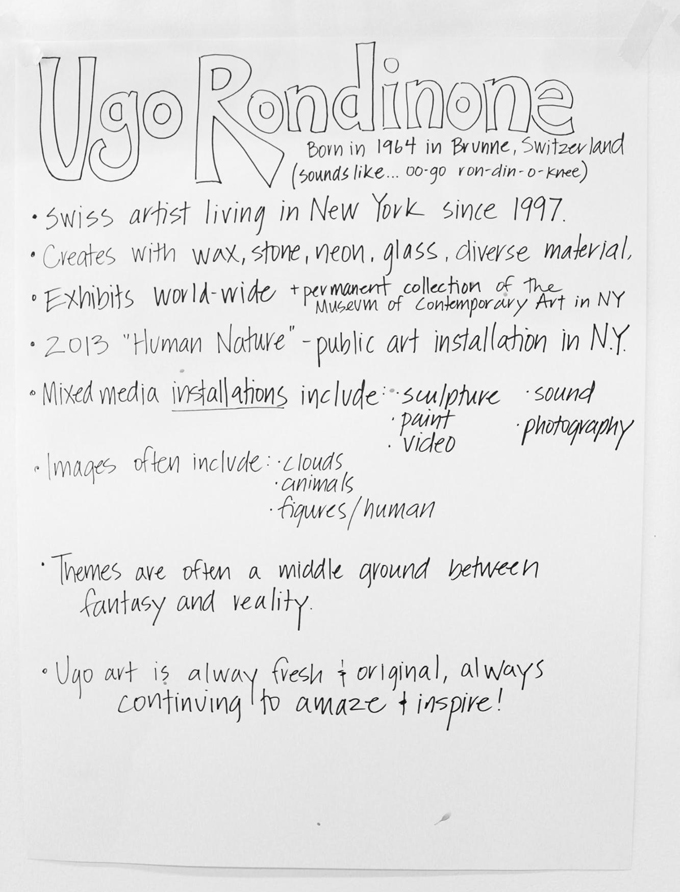
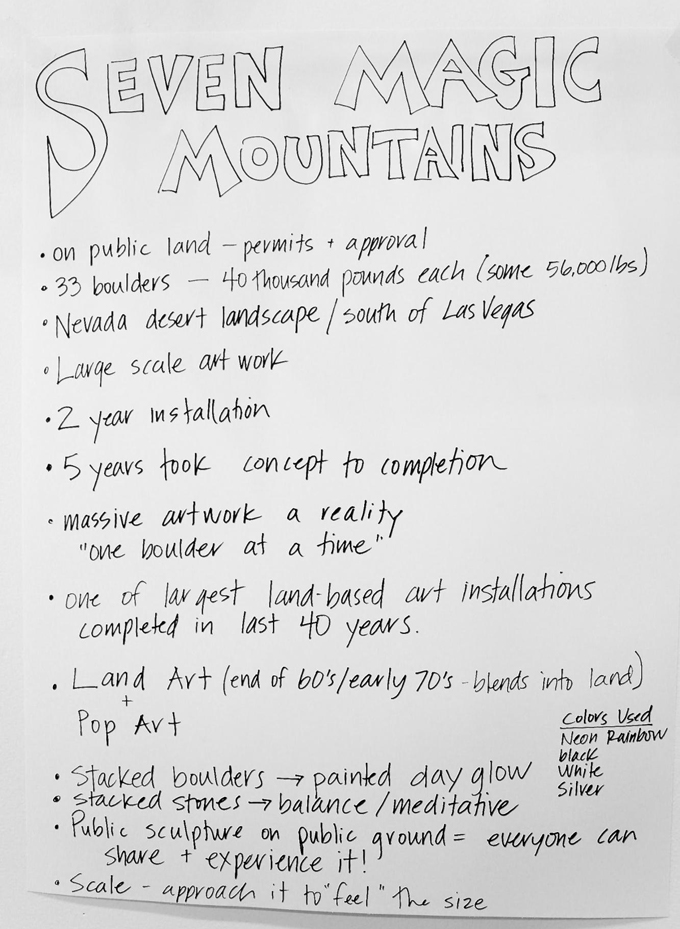
Here are two fact sheets that I made that might be helpful to you!
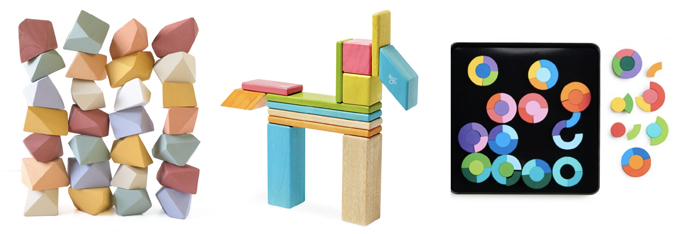
I also want to recommend three, gorgeous wooden block sets to artfully inspire creative construction and brilliant balance with children:
~ Tegu Magnetic Wooden Blocks , including the big dreamy set, or the smaller starter sets
~ Magnashapes set of three, or you can also buy individually
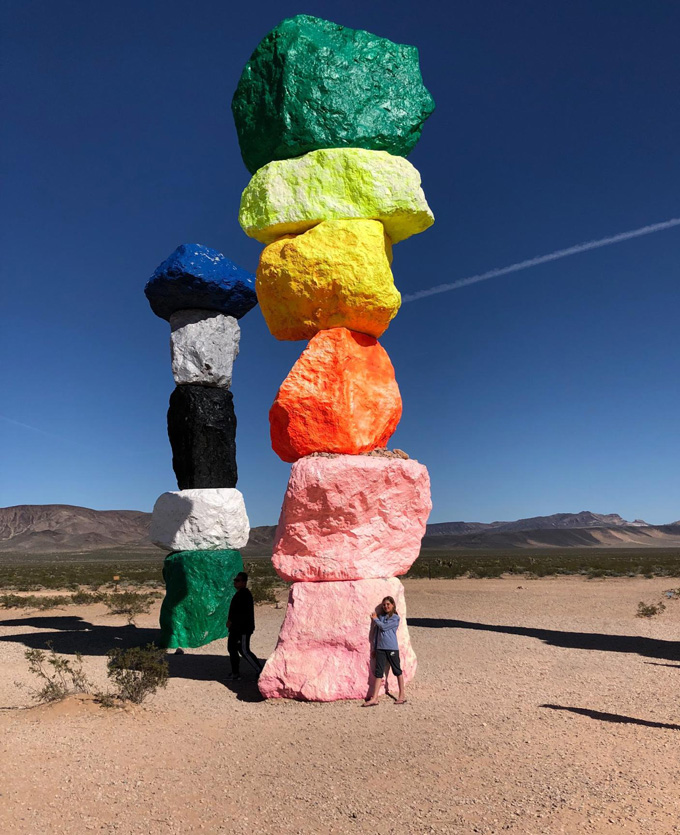
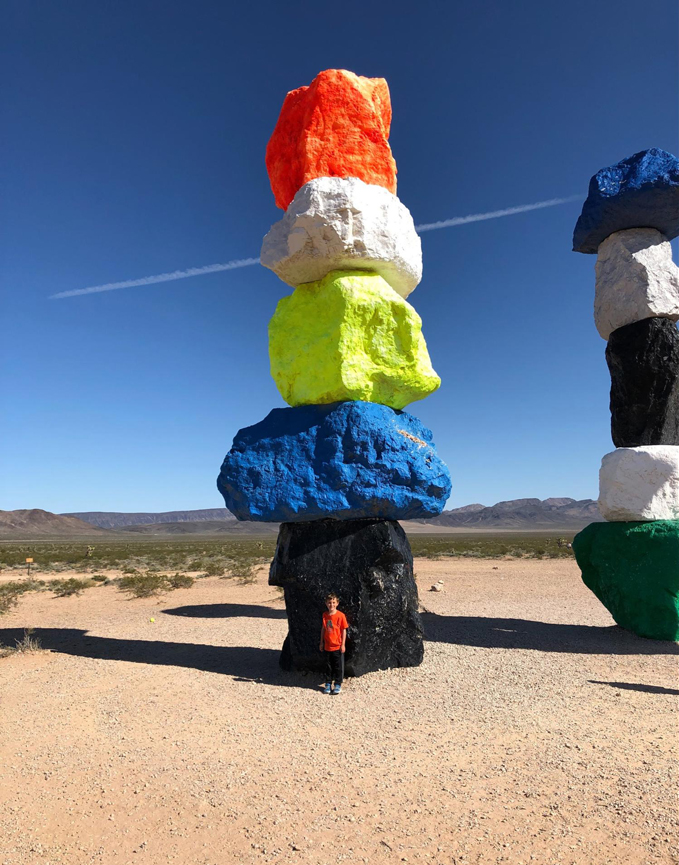
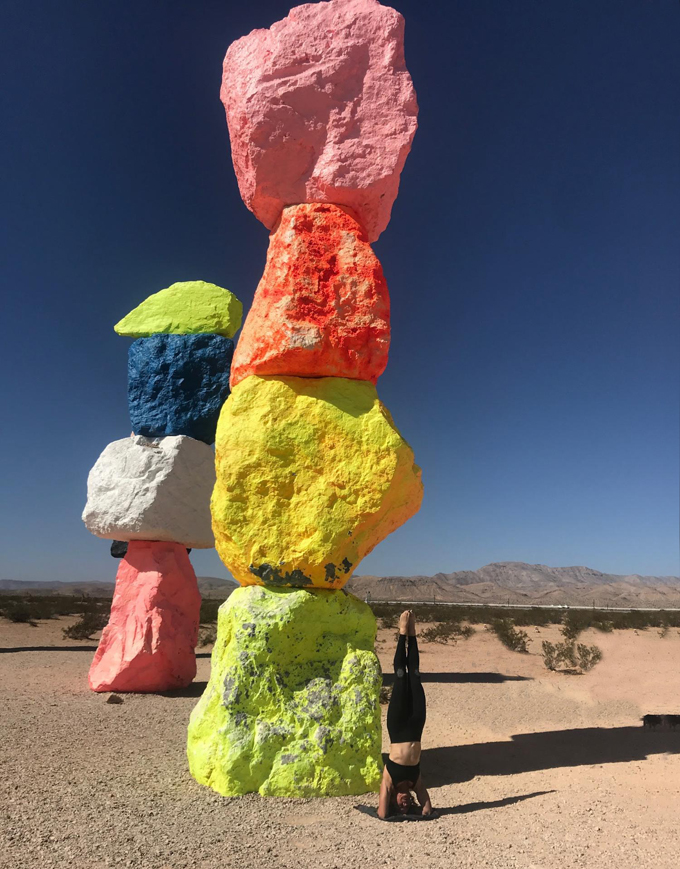
Learning about Seven Magic Mountains inspired friends of HANDMAKERY (one of my HM families…notice his orange shirt…. and an art teacher friend I introduced Ugo’s work to that was doing yoga next door…notice her headstand and six pack) to travel to visit Ugo’s amazing sculpture project for Serendipitous Sculpture to the Sky! selfies!!!
Be sure to check out Part Two of this monumental + magnificent Ugo Rondinone artist study!
XO Ami

A little about Ami:
Ami is the owner, creative director, and lead educator at HANDMAKERY in Carbondale, Colorado. She was born and raised in the mountains of Colorado and lives as a 4th generation Carbondale native with her husband and two children. Ami’s passion for art began as a little girl. Highlights include her kindergarten teacher telling her she was going to be an artist when she grew up, winning a shopping spree for designing the most “glittered up holiday ornament” as a kinder, and winning first place, SEVEN years in a row as a child, in the “Color the Cover” contest hosted by Carbondale’s Valley Journal, today known as the Sopris Sun. Ami grew up sewing and crafting handmade goods with her mother and sisters, and when she had the opportunity to work with young children in a studio experience in high school, she knew she had found her passion: ART + CHILDREN + HANDS-ON CREATIVITY! She started HANDMAKERY in 2013 and has never looked back.
Follow Ami on her brilliant Instagram where she delights us every day with incredible art projects, gorgeous photos of Colorado, and her signature alliterations.
– – – – – – – – – – – – – – – – – – – –


I love your blog! So excited to try this with the kids. I went to purchase the floral foam at michaels and saw warning labels that the foam contains carcinogens. I am trying to think of a good alternative to floral foam that can make this project doable without much success. Any thoughts?
hi Brittney, thanks for asking about the floral foam. This is what the internet says: “Floral foam contains formaldehyde, barium sulphates and carbon black. These elements contained in the base materials used to manufacture floral foam are considered carcinogenic. The toxicity of these elements is almost negligible once the product has been produced. There is almost no phenol or formaldehyde left in the finished product – less than 0.1 percent of each chemical. In saying this, prolonged exposure may cause skin, respiratory tract and eye irritation.” I would use this with my own kids as it’s just a one-time project, but if you want to use something else you could try the foam that sometimes comes in packaging. You can also get that foam on Amazon: https://amzn.to/39XatVX. I hate telling people to buy foam as it’s not environmentally friendly, but occasionally an art project calls for it. But if you can find some reclaimed foam that would be the best! Hope this helps! xx Bar