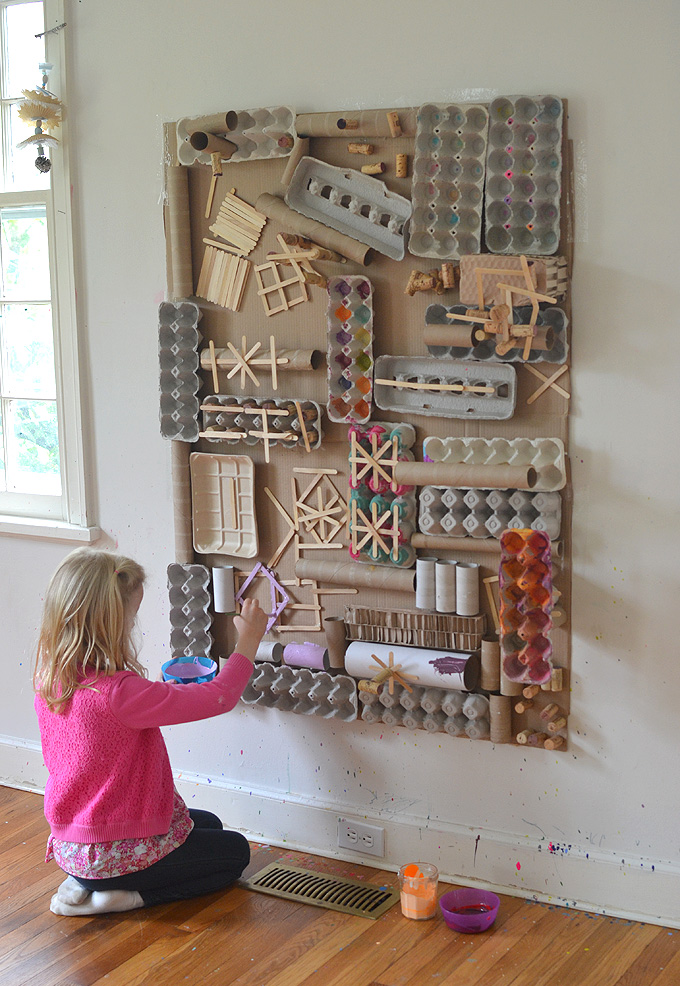
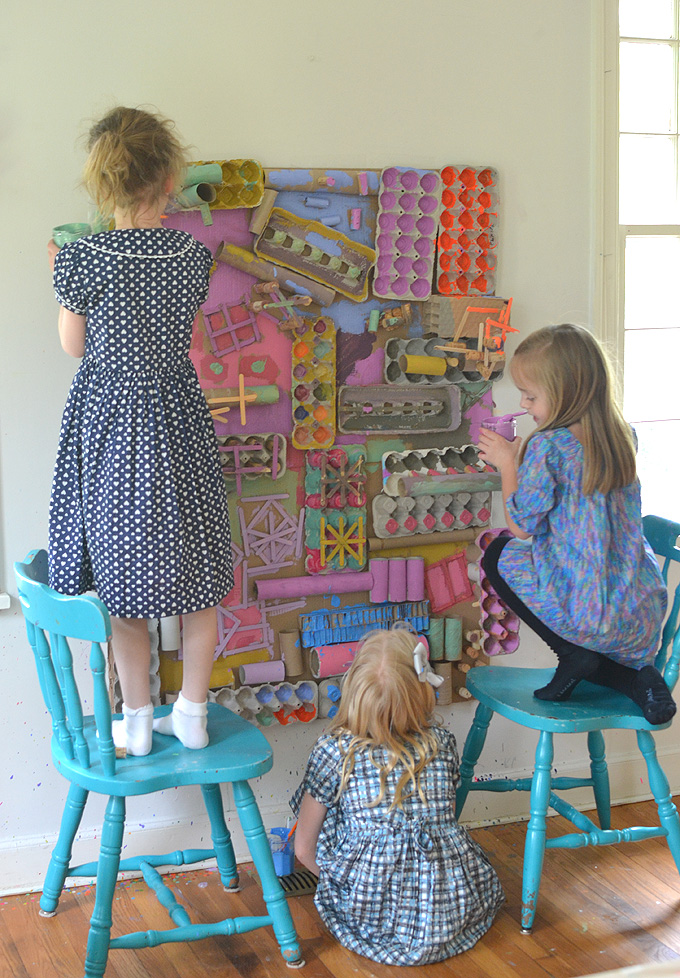
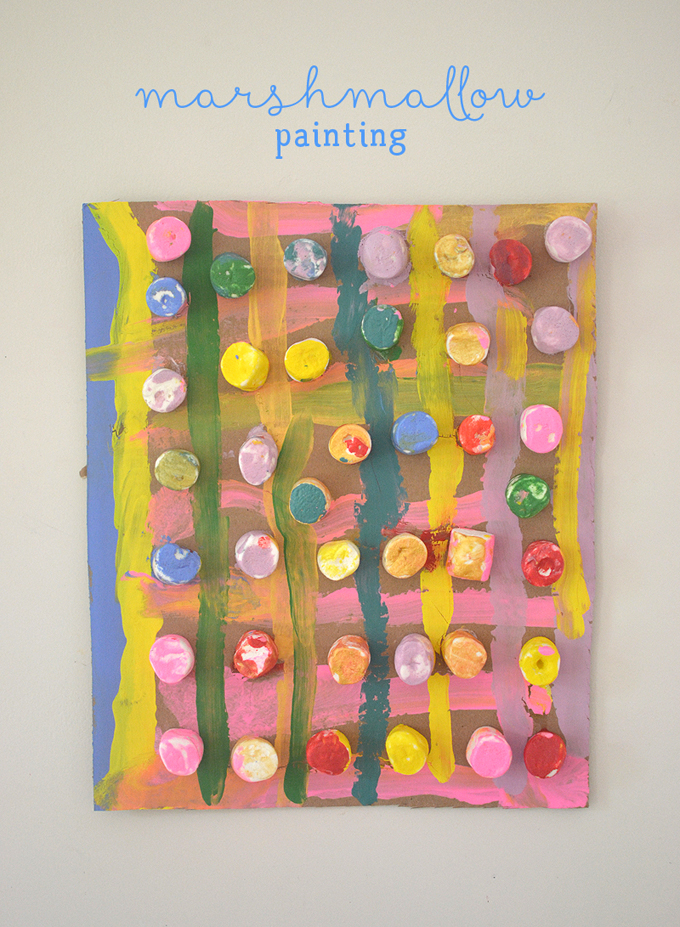
My young students constructed this art wall from recycled materials, and then they mixed all of their own colors and painted it!! Kids are so capable.

It’s no wonder that everything my students design and create makes me want to open a children’s art museum. Can you imagine how cool that would be? Artists from around the world could come and get inspired by young minds. Children are so creative because they don’t feel any constraints on their imagination. Especially during such a rich, process-art experience like this one. There is nobody telling them what things should look like, they have no vision in their heads – or if they do, they are flexible and fluid in their execution – they are purely creating and making from their instincts and their heart.
This post contains affiliate links. Thank you for your support in this way!
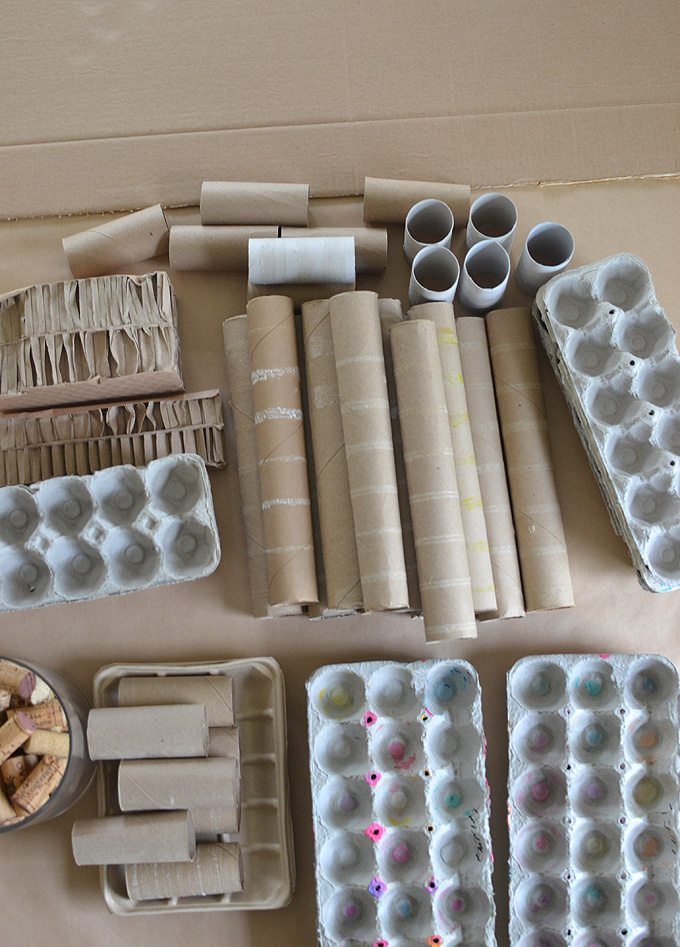
Supply list for recycled art wall
~ Anything and everything cardboard! Egg cartons, toilet rolls, paper towel rolls, packaging, milk cartons, berry containers, cardboard scraps, corks, craft sticks
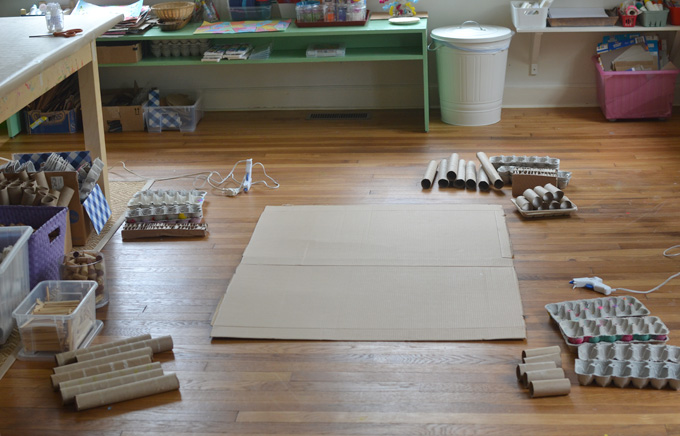
~ A giant piece of cardboard
~ Glue gun (I buy the low-temp to curb burned fingers)
~ Jars and bowls for mixing
Sequence for making a recycled art wall
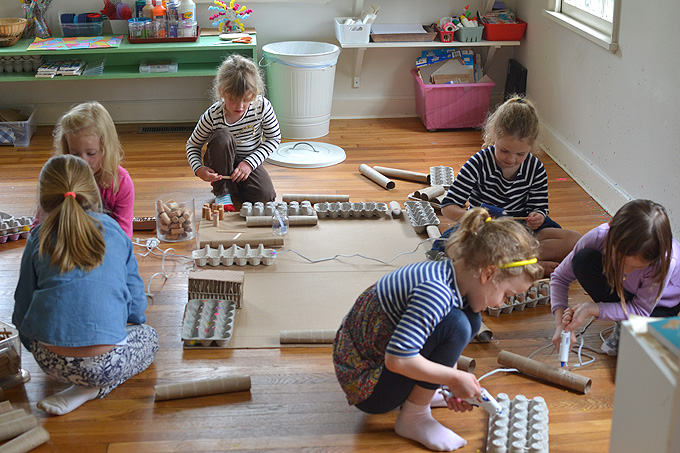
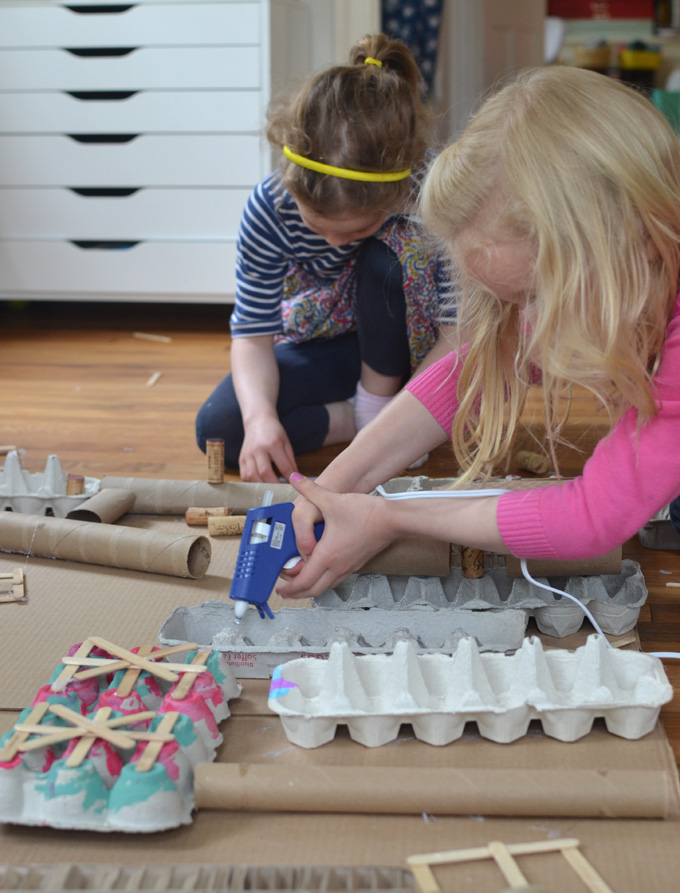
~ After gathering my supplies, I moved the table out of the way and put all of the materials on the floor. I only had four glue guns for six kids so that was a little challenging. I would suggest each child get their own because they are working non-stop. Alternatively, you can use regular white glue (or Gorilla Glue for wood which dries faster) but then let the whole structure dry overnight before hanging on the wall.
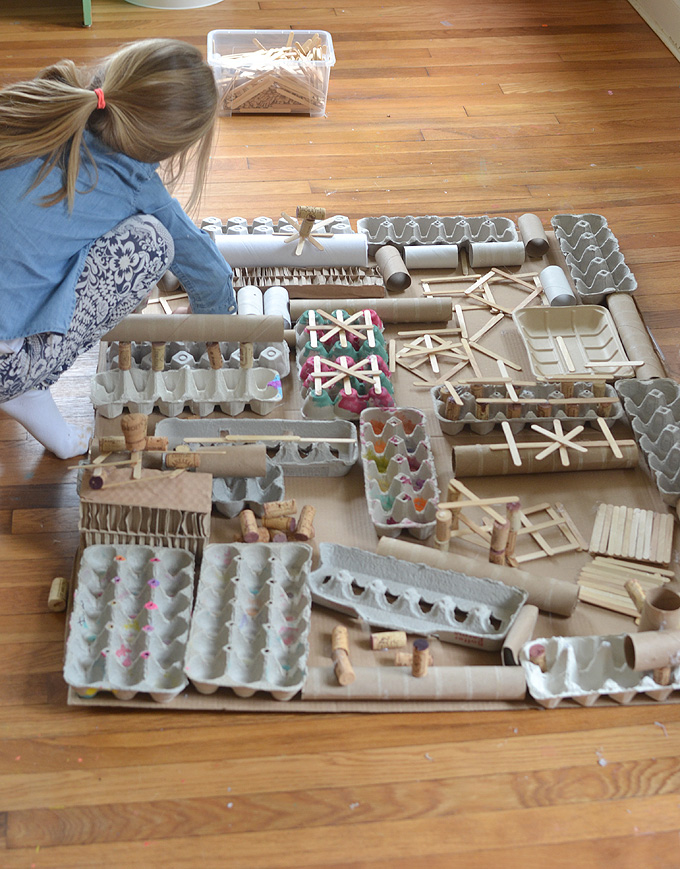
~ Once they finished gluing everything onto the big piece of cardboard, I used a piece of clear packing tape in each corner to stick it to the wall. (When I took it down, the packing tape did not take the paint off the wall, just as an FYI. Just pull slowly. Can’t gaurantee that it won’t happen, but it didn’t for me!)
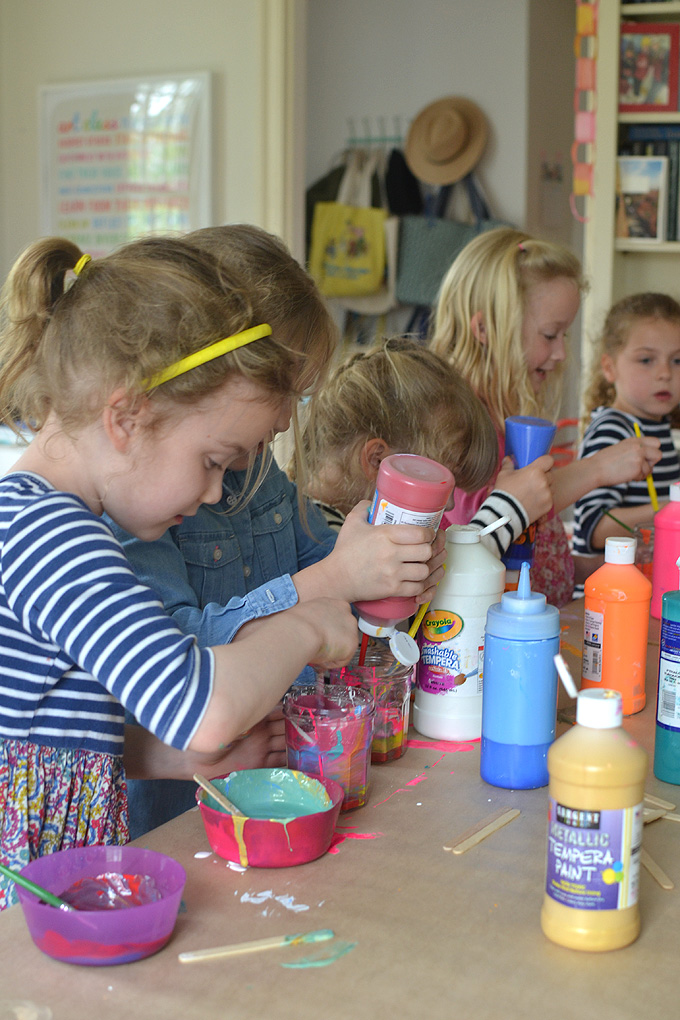
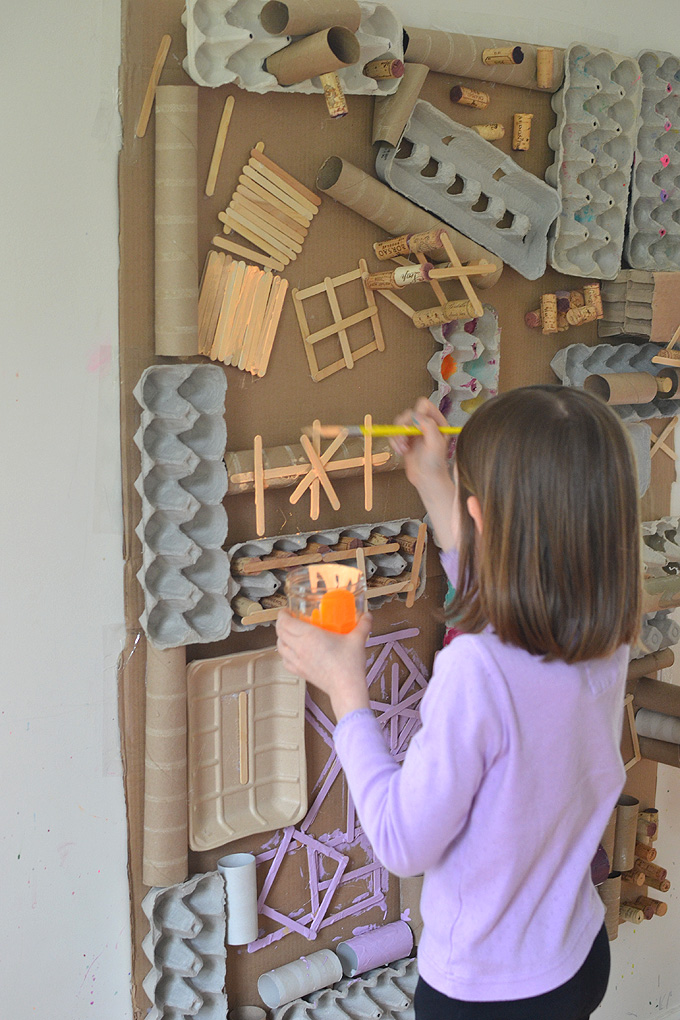
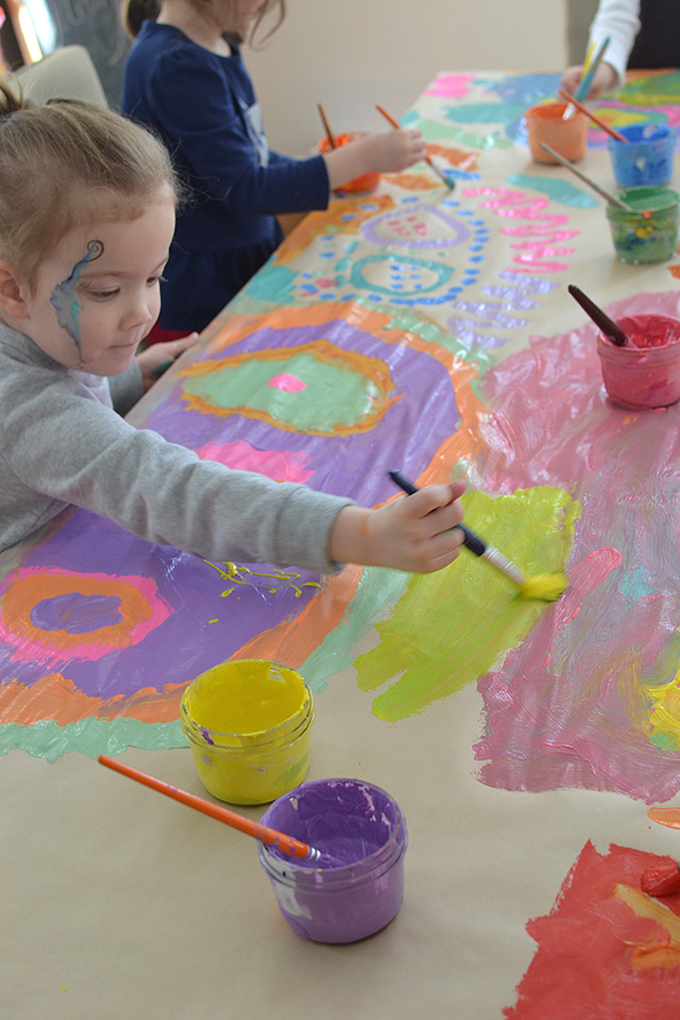
~ I put out paints, jars and bowls, and mixing sticks on the table. I told the kids they could mix their own colors and then paint their assemblage piece. Mixing paints is the NUMBER ONE favorite thing for my art students. They could do it all day, every day!
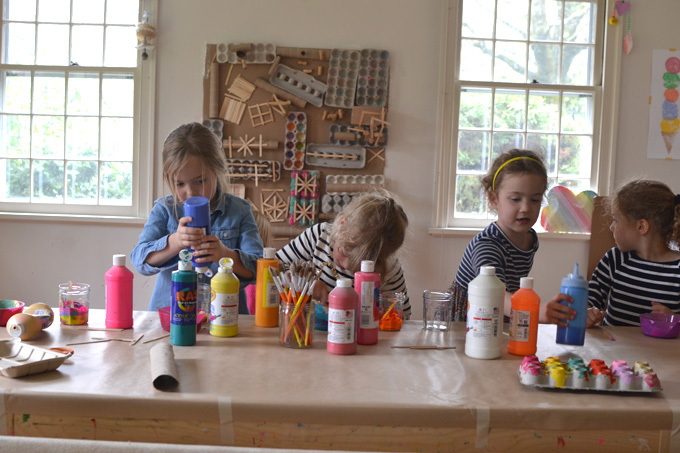
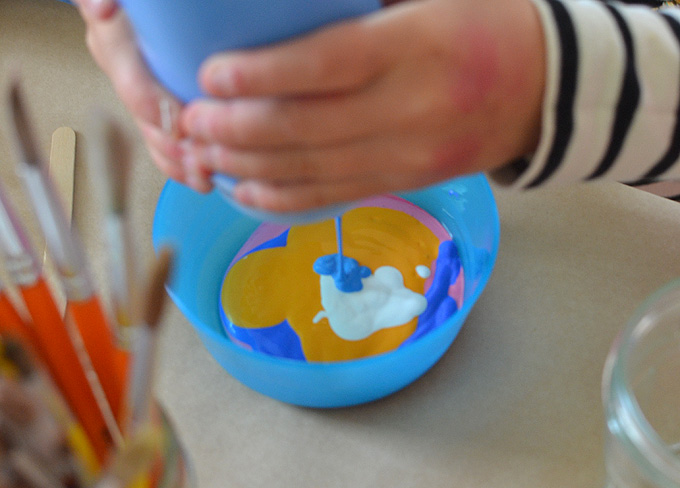
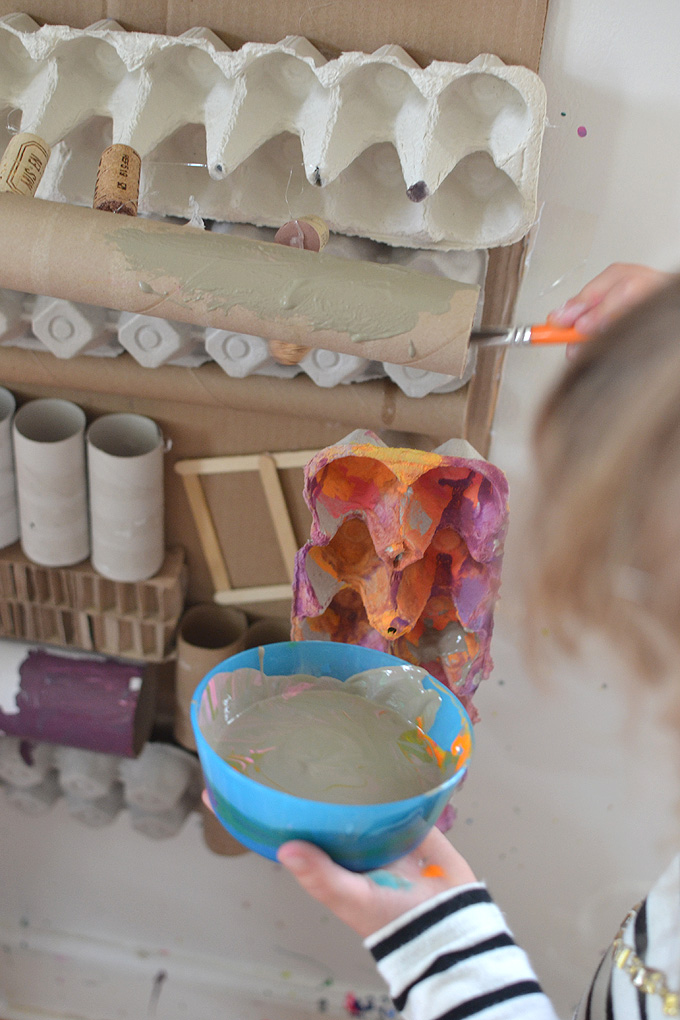
~ There were a lot of browns and grays mixed, which is usually what happens with little kids. But the older ones were able to stop themselves when they got to a color they liked, so the paints really did have a nice range of color this time. I did have to prompt them to stop mixing and start painting. We only had an hour to do this so I had to move them along. Next time I will do this project in art camp which is three hours rather than art class which is just one hour.
[ Try this other recycled art favorite: Shoebox Mansion ]
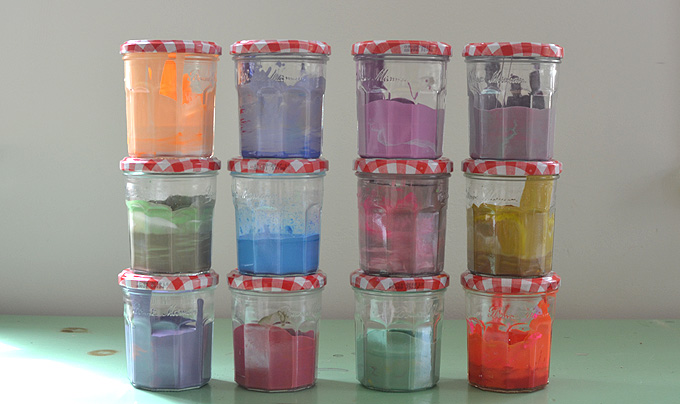
~ I saved their paints in jars until next class. They didn’t finish and wanted to keep painting. They named all the colors, too! I kept a record of that which is always fun to do, and exciting to look back on.
~ The next week the girls came to class in these gorgeous dresses. I was like, huh?? You do know you are painting in art class? Turns out they had picture day in school, and nobody wanted to change. It’s a good thing these paints are washable!
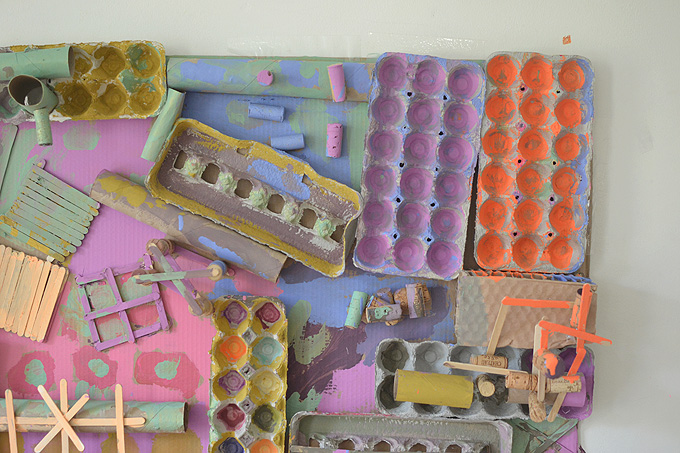
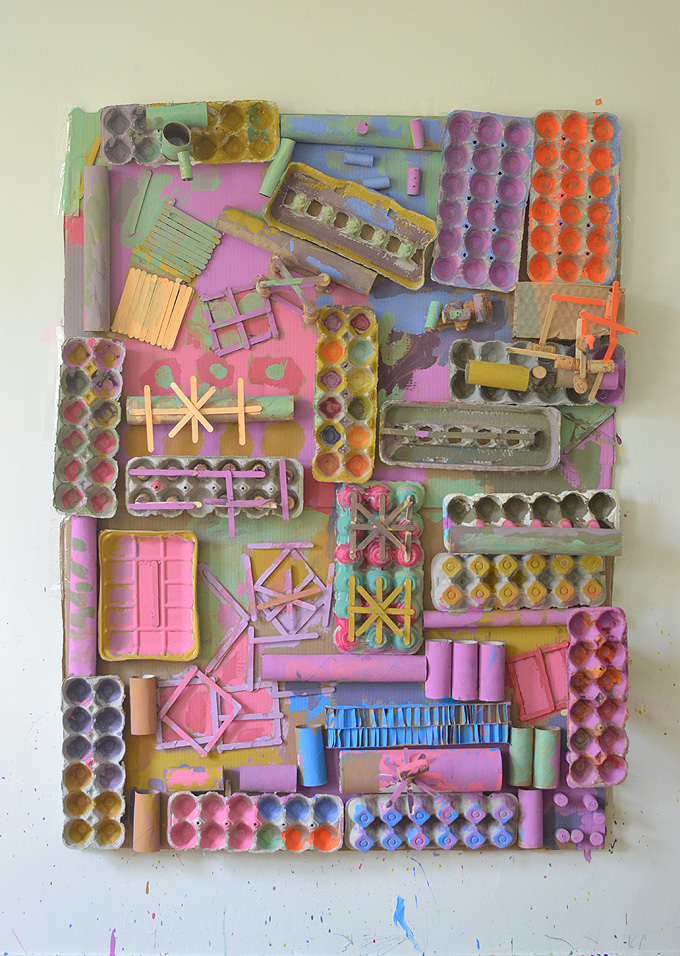
So far I have called this a structure, a collage, and an assemblage piece. I had a hard time figuring out what to call it! I think the most accurate description would be that this is art assemblage. It’s similar to collage but uses more 3-dimensional materials that stick out from the base. Either way, it’s an incredible collaborative art invitation that fully engaged the children for two classes (2 hours).
To expand this project, the children could continue to glue on materials after it goes up on the wall. The materials would have to be smaller and lighter so that gravity didn’t pull them down. Also, you could put out collage material for the kids to use after painting – like tissue paper, cut up art, pom-poms, feathers, etc. Or paint it all one color, as an ode to Louise Nevelson! So many ways to extend this process-art experience.
xo, Bar
– – – – – – – – – – – – – – – – – – –
Did you like this post? Here are some more collaborative art projects with kids:


Ummmm….yes, please open a children’s art museum!! That would be incredible! Especially curated by you!!!
I had an actual dream once that I opened a Children’s Art museum!! It needs to happen! Thank you for being such an inspiration, I love love love your creative ideas and encouraging voice to your students and blog readers!
Simply out of the world.beautiful mesmerising
Hallooooooo
Two of my favourite posts from you! the wall and the housing project!
Planning on trying the recycled assemblage during my Craft Camp during our December holidays
Thanks for always being such an inspiration
lotsaluv
This is the best!! Thank you for the inspiration.
This is a mind blowing idea!! Thank you for such amazing projects!! I can’t wait to do this with my kids.
Love this idea! What age students created this collage?
thanks Jeanette!! I had one 4yr old and the rest were 6 and 7. xo Bar
fantastic! i love this!!
question- i teach art to young children (ages 2-6) and while i really try NOT to be frugal with our paint supply (with the intention that i want them to explore the medium)- i also hate wasting it (we already go through so much of it!)… how do you allow the children to mix paints and use them freely without wasting? not sure if it’s a relatable issue in your studio but interested if you have any tips! thank you!!
that’s a great question, Kelly! I usually don’t let them use the big bottles of paint, I usually transfer the paint into smaller squeeze bottles. another idea is to put the paint in jars with spoons and let the kids scoop paint and mix. this way you can control the amount. for this project, though, I did let them use the big containers which was the BIGGEST treat in the world for them! they went nuts. I knew we had a lot of materials to cover with paint so probably not much waste. But I did have to cut them off at one point. they would have used all the paint in my house. Another great idea for kids to get that squeezing and mixing fix is to have a potions party (you can search it on my blog). good luck and have fun! xx Bar
thank you! that is so helpful!! x
This project is beyond fabulous! The kids look so engaged in creating and the final product is so inspiring! Thanks for sharing. I teach a 2-5 year old class and I’d love to do this with them – I think the teachers might need to be in charge of the glueing though. Do you think this would hamper creativity? Was using the glue guns part of the fun for the kids?
hi Hillary! so I don’t think the teacher’s glueing will hamper the creativity. I’ve done that plenty of times. in fact, this project was one of the first times I let them do it themselves (and mostly because I’ve usually only had one or two glueguns but for this project I bought some more). just have the kids tell you where they want things to go and then you become merely an extension of their body – it will be great!! good luck! xo Bar
Mixed media
Desde ya gracias muchísimas gracias por estos desafíos que nos propones consideras que se podría usar otro tipo de pegamento ya que me da un poco de miedo darles la pistola de siliconas por el tema de que se pueden quemar ?
hi Laura, yes they can use regular school glue but then just have to wait overnight for it to dry. I have also found that wood glue dries faster and is a little sturdier with cardboard. have fun! xo Bar
i was looking for some activity for my children to make them at home at these quarantine days and i found this awesome art board activity. Thanks.
Super idea! Thank you!