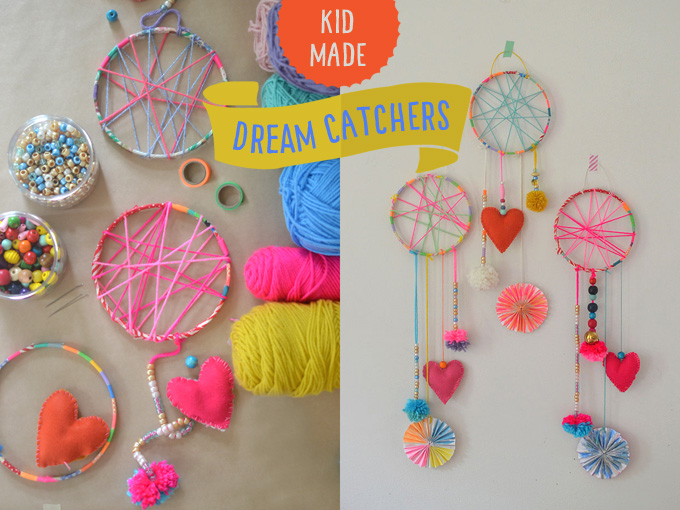
I’m so excited to finally get this post up!! We made these dream catchers during art camp in July and the kids were so into it. They really loved making all of the different elements: taping, wrapping, sewing, beading, painting and pom-pom making. It was a very busy three hours. I was SO proud of everything they accomplished completely on their own! I posted a photo on IG that day and it has been my most popular photo of the summer. I knew I had to get my act together and download the rest of my photos so that I could share our process with you – before next summer. (I’m slow like that.)

Before getting started, I looked up the history of the dream catcher so that I could share it with the kids. Did you know that they started in the Native American culture?
“Native Americans believe that the night air is filled with dreams both good and bad. The dream catcher, when hung over or near your bed swinging freely in the air, catches the dreams as they flow by. The good dreams know how to pass through the dream catcher, slipping through the outer holes and slide down the soft feathers [or pom-poms!] so gently that many times the sleeper does not know that he/she is dreaming. The bad dreams, not knowing the way, get tangled in the dream catcher and perish with the first light of the new day.”
So, without further ado…. The Dreamcatchers (drumroll)!

[ I am a participant in the Amazon Services LLC Associates Program, an affiliate advertising program designed to provide a means for us to earn small fees at no cost to you by linking to Amazon.com and affiliated sites. ]
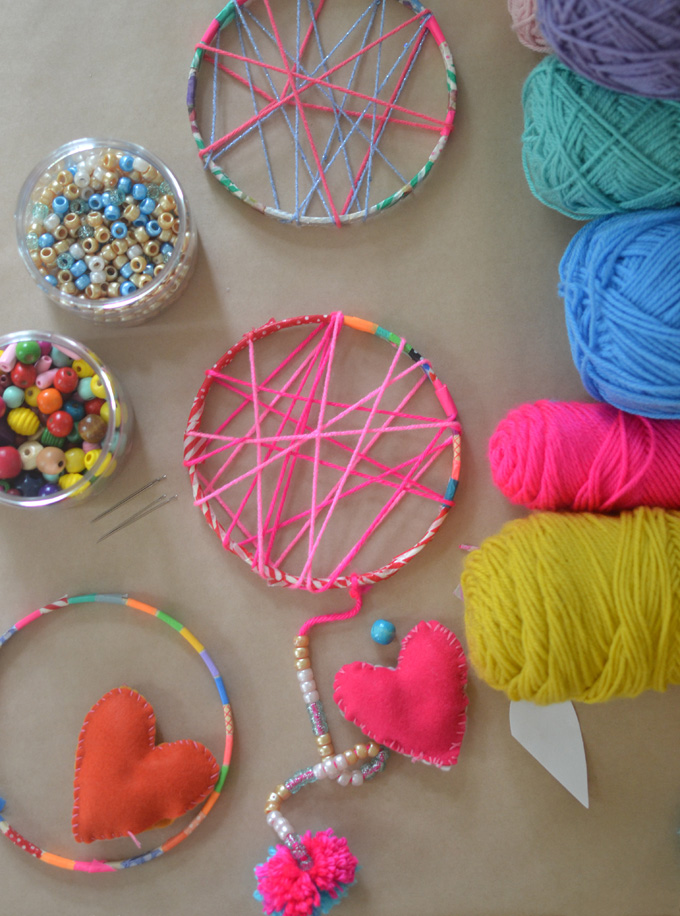
Supplies needed to make dreamcatchers:
~ yarn
~ felt (small piece)
~ polyester batting (a very small amount)
~ beads (we used pony beads and wooden beads
)
~ pom-pom maker (optional)
~ paper pinwheels made from sulphite paper (instructions here – we made them 4″ diameter)
~ piece of wire for hanging (silver or colored
)
Step-by-step dreamcatcher instructions:
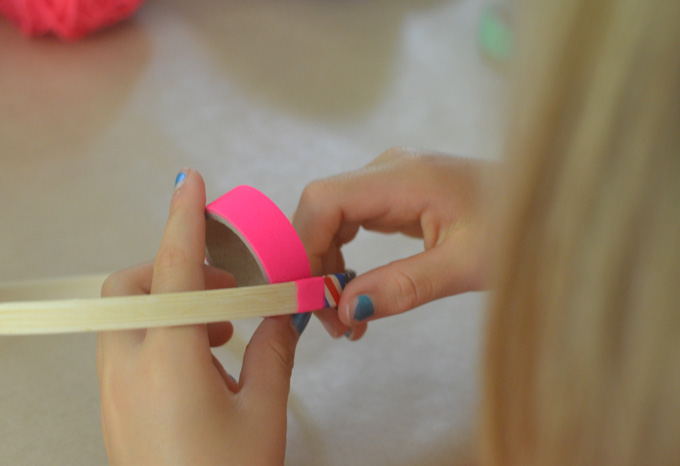
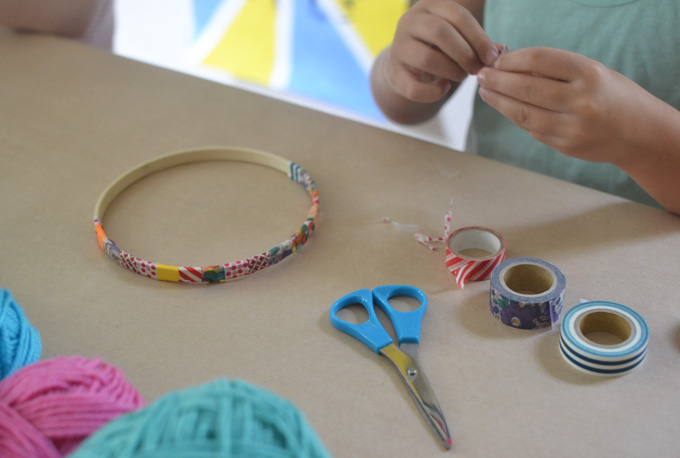
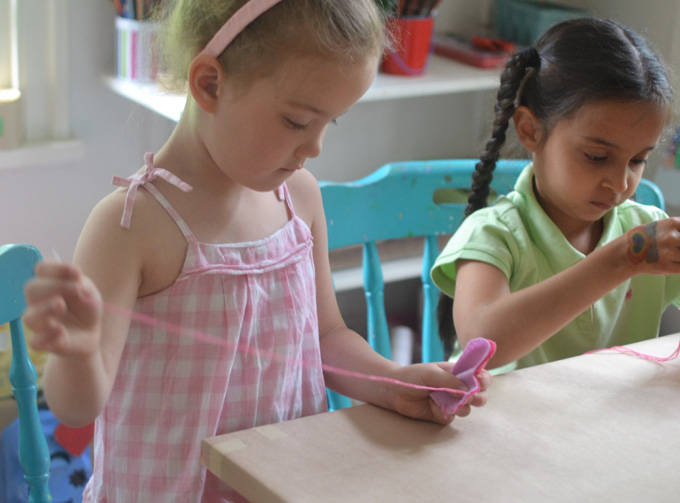
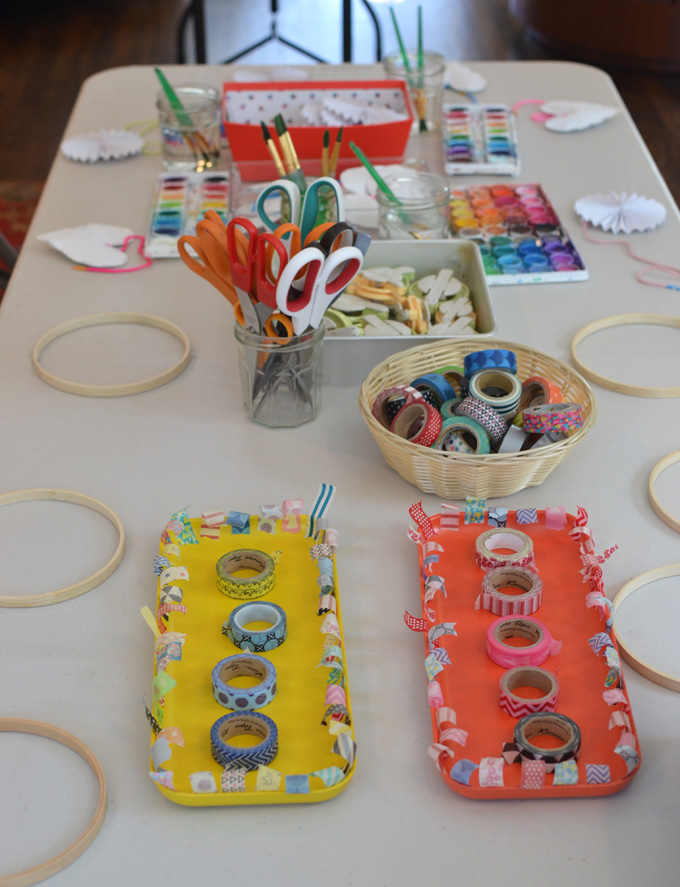
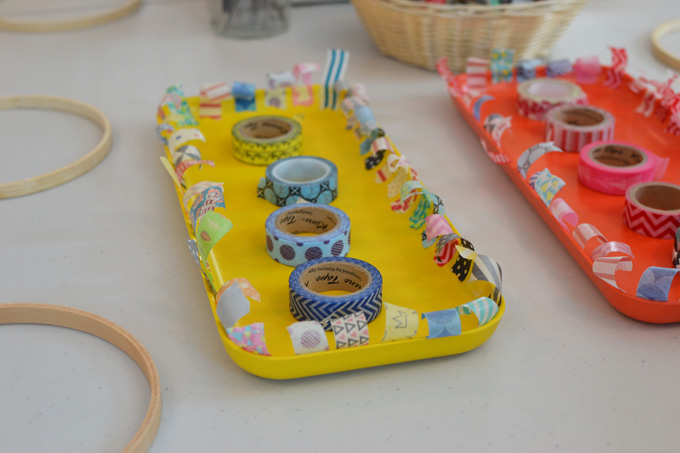
1. The kids started by covering their hoop with little pieces of washi tape. They can either tear the tape or use small scissors. Anything goes!
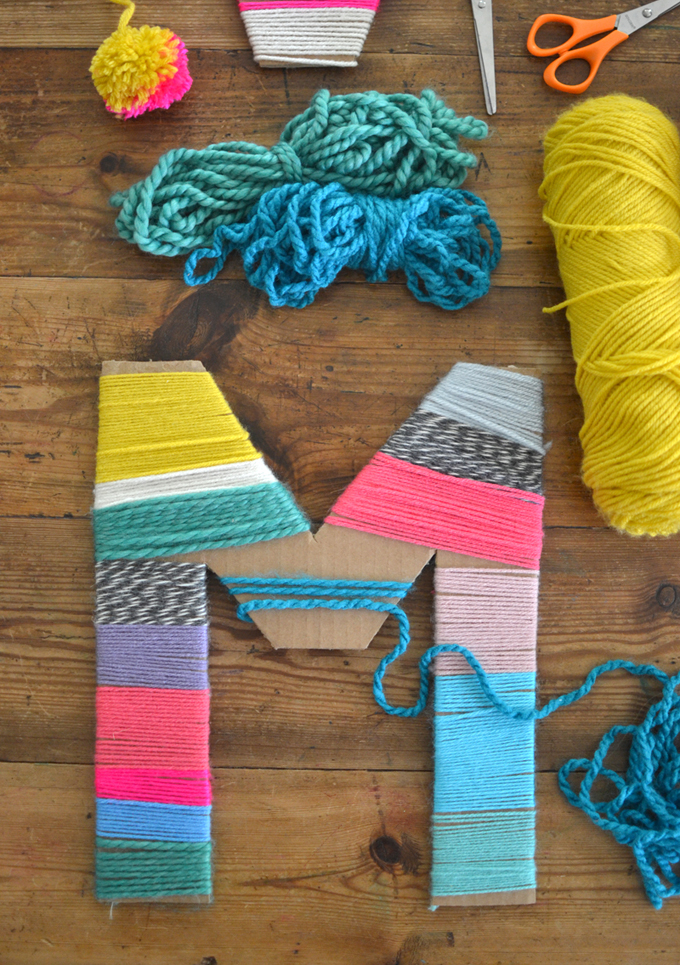
2. Next they chose two colored yarns and wrapped them around the hoop. I don’t have photos of this part because I was helping them get started. Once they got the hang of it, it only took a few minutes for them to wrap both yarns tightly. (If the kids wrap too loosely then the yarn will slide. Make sure it’s tight, and if not then pull at it a little in places. You could also use a dot of hot glue gun if necessary.)
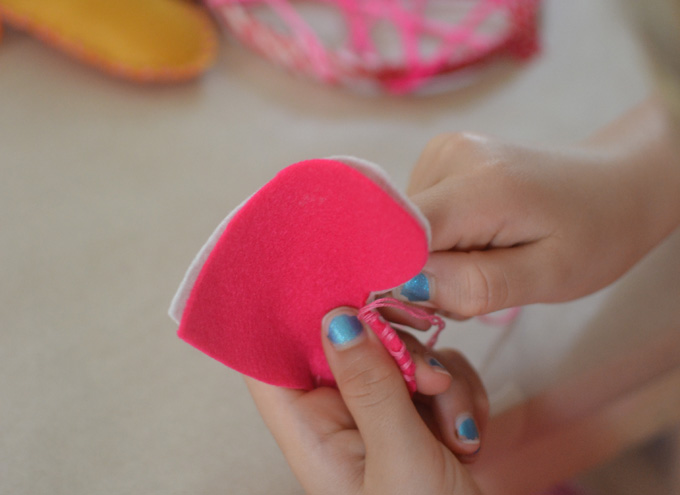
3. Next came the sewing part. I had a nice pile of different colored felt left over from my garland project so I let the kids choose their own two colors for their heart. I drew a heart on paper first then used it as a template. The hearts are about 3.5″ wide.
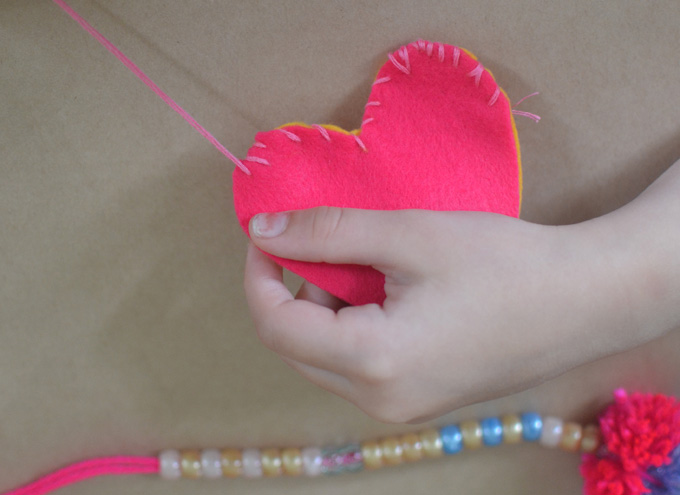
4. When threading the needle, double the string and then tie a knot at the end. This way, the thread will never fall out of the needle. I showed them the whip stitch and I was amazed at how quickly they got it. I kept an eye on them just so the two sides wouldn’t shift too much, but they did all of the sewing themselves and felt SUPER proud. (Here is a great YouTube tutorial for beginners on the whip stitch.)
5. We left a little opening to put in the stuffing. I stitched the heart closed for them.
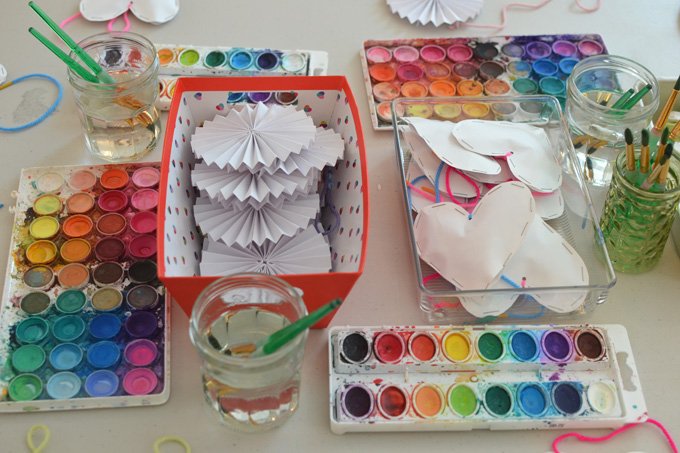
6. When they finished sewing, I had a station set up with the paper pinwheels (pre-made in the interest of time) and watercolors. I did not have a chance to take any photos, but here is my pinwheels post where you can see how fun it is to paint 3D paper! (It takes four pieces of paper to make one pinwheel, my paper size was 3″ x 4″.) We let them dry a bit and then punched a hole at the top.
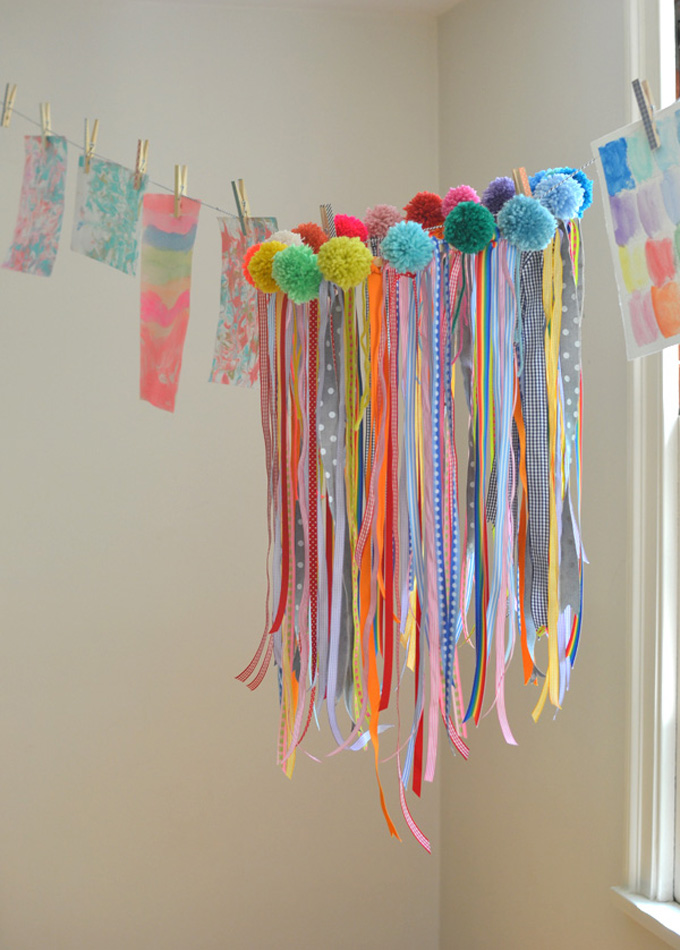
7. Next, the girls made two pom-poms each. We used pom-pom makers, but you can use any method that works for you. (Here is a good tutorial on traditional pom-pom making with a cardboard circle.)
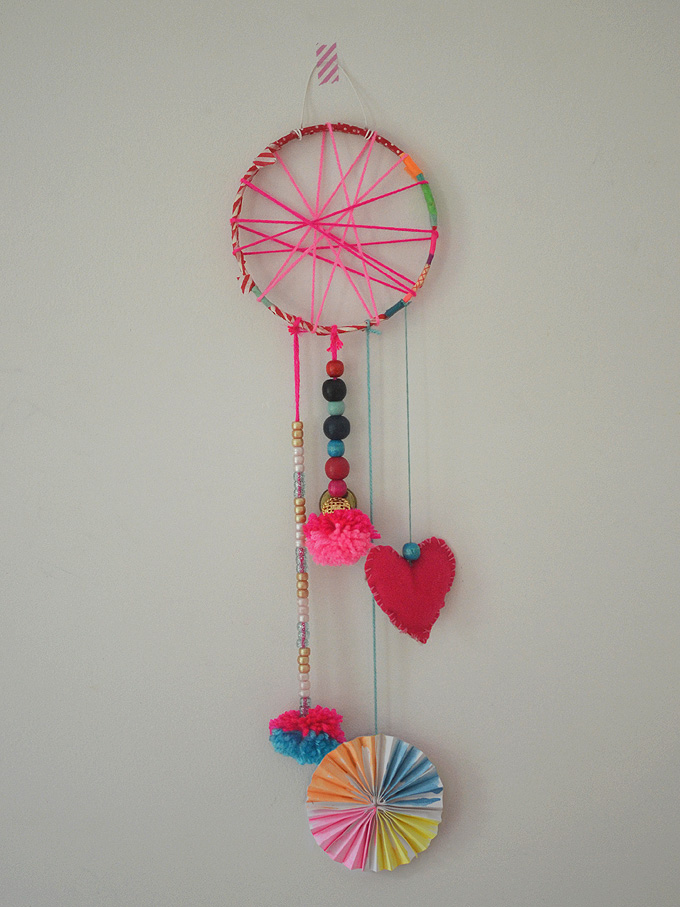
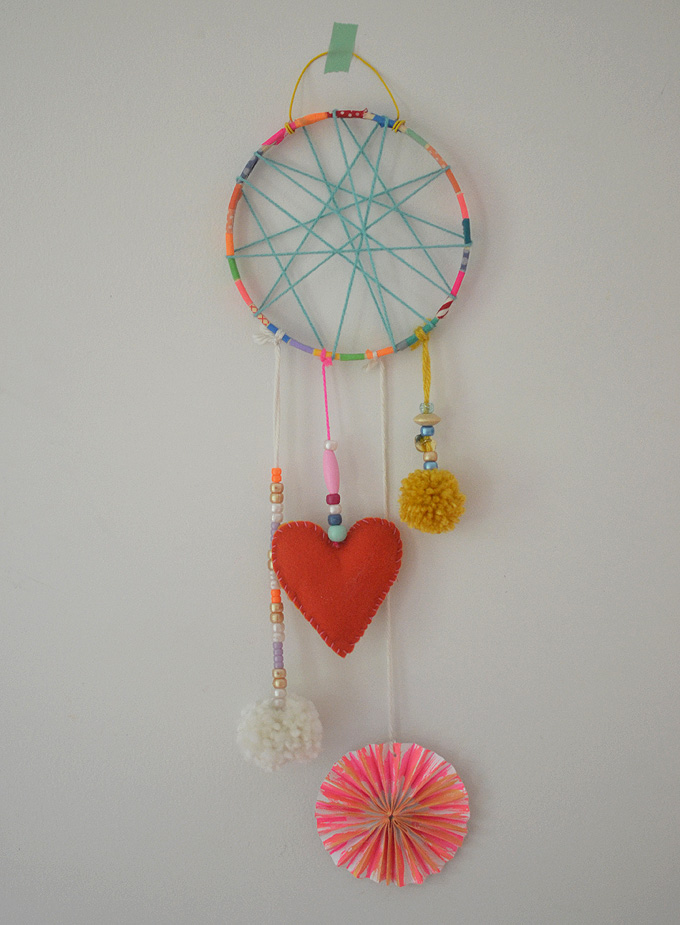
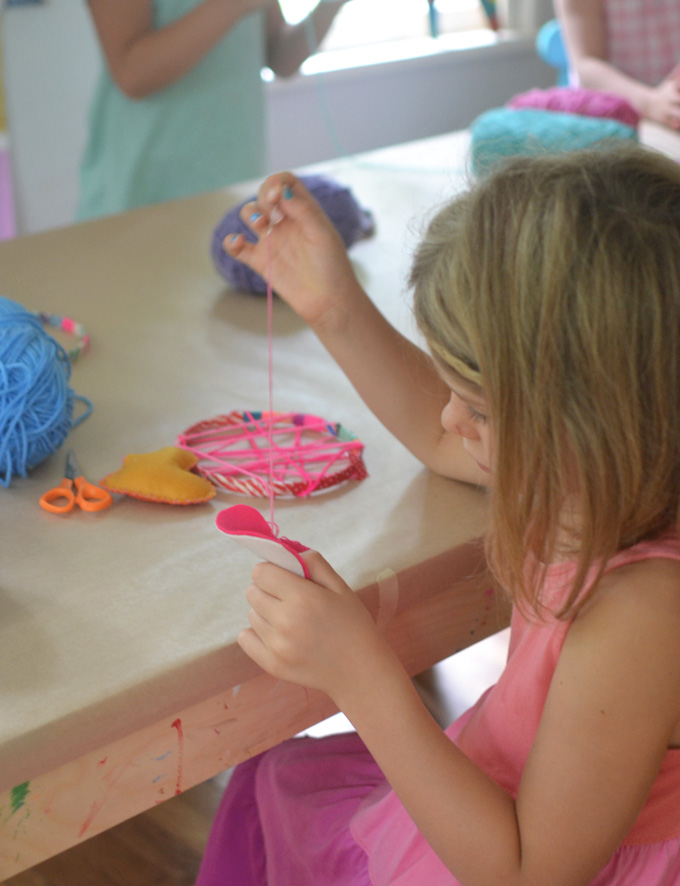
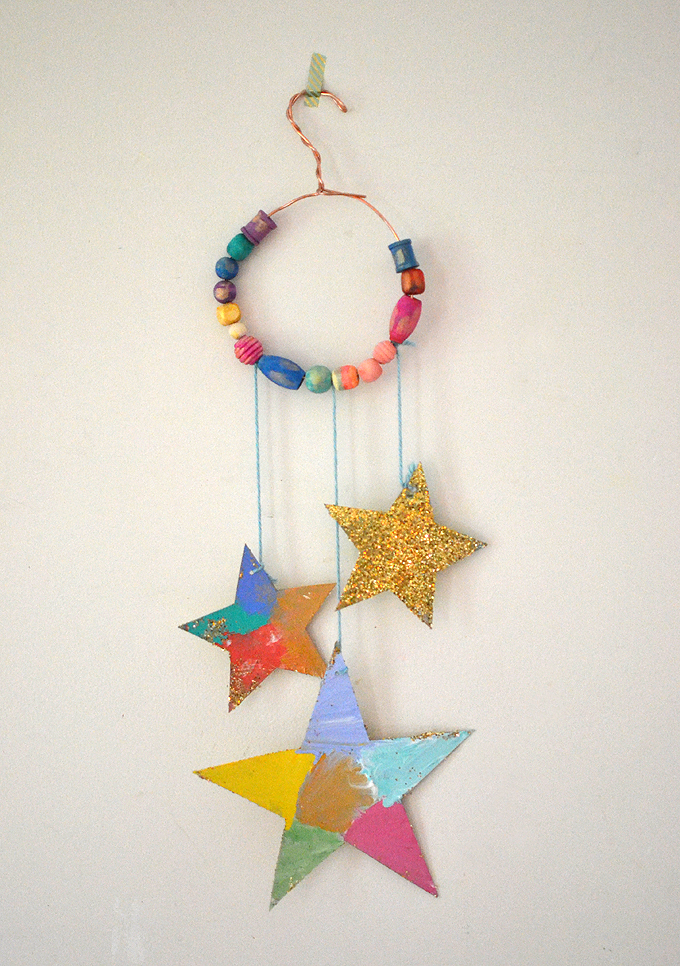
8. The last step was the most fun – putting it all together! I cut four pieces of string; one for each pom-pom, one for the pinwheel and one for the heart. (I used a larger needle to get the yarn through the top of the felt heart.) They strung beads on some of the strings. I also brought out some old buttons which they loved. Then I tied them onto their hoop at varying lengths. I found some old, colored wire and I made a hook at the top (which I secured with the hot glue gun).
Ready to hang up and catch those bad dreams!
This craft was such a hit, I’ve been doing it at birthday parties. Here are some photos from a recent party for an 8yr old. We had limited space and needed to get things done in an hour, so I split the table up into taping and yarn wrapping on one side, and painting on the other. I cut out the sewing part and instead had the kids paint mini puffy hearts and mini pinwheels that I made beforehand.
Making dream catchers was SO MUCH fun. I made one, too, and now I’m hooked. There are so many variations and possibilities!
Let me know if you make one, I’d love to see!
xo, Bar
– – – – – – – – – – – – – – – – – – –


They look just beautiful. Great job kids!
thanks meri! can’t wait to see your and add a link. hurry up sister! xo
Oh my goodness these are incredible!!!!
thanks Ana! making dream catchers was on my 2014 AND my 2015 new year’s resolutions list. now I can finally cross it off! xo
These look fantastic! Will be making some with my Rainbows & Brownies soon, I think they’ll love it! 😀 <3
please send me a photo, Hannah, if you make them!! my email is barbara@bruccistudio.com. have fun and thanks for stopping by to leave a comment! xo bar
Hi! Can you please tell me how to wrap the two colored yarns around the hoop? I dont have a clue… And how do you guarantee they dont fall from the hoop?
Thank you so much! These will be my xmas gift for everyone!
(portugal)
hi Mariline, i’m happy to answer your question. so you cut two long pieces of yarn (maybe like 300cm), then you take the ends and put them together. tape them to the hoop, then just wrap the string around the opposite side, moving around the hoop. when you are done you can tie a knot or use more tape. if you wrap the yarn tight enough then it shouldn’t slip. but just to be safe, you could use a dot of glue over the yarn. either regular white glue or a hot glue gun. I hope this helps! have fun making, what a lovely idea. xo bar
Hi! My name is Shannon and I’m ‘jumping into’ someone else’s post. Sorry!! I teach 6-9 year old Sunday School and I have a new student reporting nightmares. The older kids were quick to say “You need a Dream Catcher” and that’s all the encouragement I need to say “PROJECT!!” Although my Christian Class will be making “Christ Catchers.” It would be really helpful to know the pattern you used for the web within the ring. Is it just random? Thanks for your help! I love these beautiful Dream Catchers!
hi Shannon! yes, the webbing is random, just make sure that they wrap the yarn all the way across the diameter so it doesn’t slide off. best of luck, what a wonderful idea to make these in sunday school! xo Bar
Hi! Can you tell me what age you think this would be good for? They’re beautiful– can’t wait to make them with my gang!
hi Dena, i did these with kids as young as 5. you would need to help them a little, but actually they are quite capable. it does depend on the child. if they are up for doing something that uses fine motor skills and have a little patience, then they will love this!! thanks for leaving a comment, send me a photo if you do them! xo bar
Where would one buy said hoops
Hi Jessica, I got mine at a craft store. They are just wooden embroidery hoops. You can also order them online by clicking on the link I provided. Hope this helps!! xo Bar
I have not been able to find any without the screws. You found them without?
They all have screws! That is a necessary component. But the hoops come in 2 parts, and it’s the inside part that we use – that part does not have screws 😉 xx Bar
All of these dream catchers look like a lot of fun! It might make for a great family activity to make some. I’m sure ours won’t look as good as some professionals or what you pictured, but it will be a great time anyway. Thanks for the awesome article!
We finally finished a dream catcher – I am not sure what ages of kids you made these with, but it is a really long project to finish. The results are as advertised though – they are really cool to make. Also, when I had a dream catcher long ago I read that there is to be a hole in the center with a bead or something to “attract” the bad dreams to the hole – then the bad dreams go out the hole, and the good dreams get caught in the “web” here in the hoop. I am using this as a way to get my son to stay in his room at night! We just took some yarn and pulled a hole into the center (imperfectly) by wrapping the yarn that crossed through the center away a bit…and then hung some beads in the middle. Turned out great.
Hey Marlo, this comment made my day! I’m so glad you tackled this project with your son…and that it worked to get him to stay in his room! (I had one of those kids, and nothing ever really worked…). Yes, they are a little time and labor intensive, in this post the children range from age 5 to age 8. I prepped a lot before they came to class – and then the class was three hours and they each made one during the three hours. I love that you even made a hole in the middle of your “catcher”. I bet it looks really good. And even if your son didn’t stay in his room, you will always have the memory of making something together. xo Bar
These are adorable! 🙂 I can’t believe they’re made by kids, they look so professional! This is the kind of thing kids should be doing, thinking about magic, nature and catching their dreams! 🙂
Can you please tell me how long it took to do this project? I’m thinking of doing it with my Girl Scouts.
Thanks,
Lynn
hi Lynn, if I remember correctly, it took about 4 hours. We did it in two different sessions. hope this helps! xx Bar
Hi! I have a question about the embroidery hoops you used. Did each child use a fully assembled hoop, or did you divide the hoops into two and give one half to each child? Would it make a difference either way? Also, I don’t see the little twisty part at the top of the hoop in your images. Did you unscrew it somehow, or cover it up with Washi tape and we just can’t see it? What do we do about that bit?
hi Jessica, for this project we only used the inside hoop, not the outside one that has the metal part at the top. hope this helps! xx Bar
Digitizing Logo Embroidery
Thank you for a great explanation. I was looking online for a similar idea and really appreciate it
My daughter and her friends loved these and made them for her birthday party. The only mistake I made was buying “glitter” washi tape. When wrapping the loop, the glitter washi tape will not stick if it is overlapping on the glitter side. Wish I ouldve known bc it took so much longer than necessary. After lots of glueing, they still came out super cute. Just an fyi for others.
oh no!! yes, stick to plain tapes, the glitter tapes are awful for this. glad it ended up working out but sorry for the troubles. xo Bar
When you made these did you only use one part circle/ hoop or did you use both I do not see the screw or knob in your photos ?
thanks
hi Lisa, I used just the inside part for these dream catchers. 🙂 xo Bar
Ho did you attach the Pom poms to the string?
hi Amelia, so when you tie the string in the middle when securing the pom-pom (before you cut the strings), just make that string really long. that’s my trick! hope this helps! xo Bar
Approximately how much in materials did each one take? My PSR class would like to make some for a local children’s hospital and I’m trying to figure out how much in supplies. We’d need to make about 180 of them. Thanks!
Oh my gosh, 180 is a lot!! ok, so obviously one embroidery hoop for each; I’m guessing 3 yards of yarn which includes the webbing and the pom-pom; you can probably get 3 hearts per felt square; maybe don’t do the pinwheels, that would be a nightmare to do 180 of them – just cut a paper feather that they can paint with watercolor or color with markers, and you can probably get 5 feathers out of a piece of 9 X 12 sulphite paper; and then just like 15 beads. I hope this help, best of lucks!! xo Bar
Hi! These look great!! What size hoop would you suggest? I’m thinking the smaller 6” size would be better to keep tension easier? Or larger? What do you think? My age range is 5-8 year olds. Thanks!!
I am a teacher of Fantasia Art Lab in Korea.
Can I use this class for our one day class? It’s a lovely class?
hi, yes you can use this tutorial to teach a class in your own space. good luck! xx Bar
Hi, these look great and I’m about to get the kids to make them during my daughters 6th birthday party. How did you attach the pom poms to the wool hanging down from the circle? Did you leave excess wool from the pom poms?
hi! yes, when you tie the pom-pom closed, before trimming, just keep that yarn long and then use it to tie around the circle. I hope that makes sense! good luck! xx Bar
Thanks so much for your quick response, that’s really helpful.
This idea is amazing! I’m making one for my mom for mothers day. She made dream catchers for everyone in my family now it is her turn to get one back. But this is way for kid friendly then the ones she made. Thank you so much for the amazing idea
I’m doing all the prep work as I have 7 girls round for my almost 8 year olds birthday. Do you think it can be completed in 1/1.5 hours or am I being too ambitious? I have literally prepped everything.
Thanks
hi Jessica, I think you can do it in 1.5 – but definitely get helpers. The part that takes the longest is the pom-poms. But this is the perfect agegroup for these, they will LOVE it!! Best of luck! ~ Bar
Hello! I would like to use you DIY instructions for several different crafts for my summer camp classes. My lesson plans will not be online, this is just for their instruction and my reference. Is this okay? Thanks for taking the time to put your ideas online.
My 10 year old is excited to make these at her next birthday party! We so wish we were near enough to attend your summer camps, they sound AMAZING!!