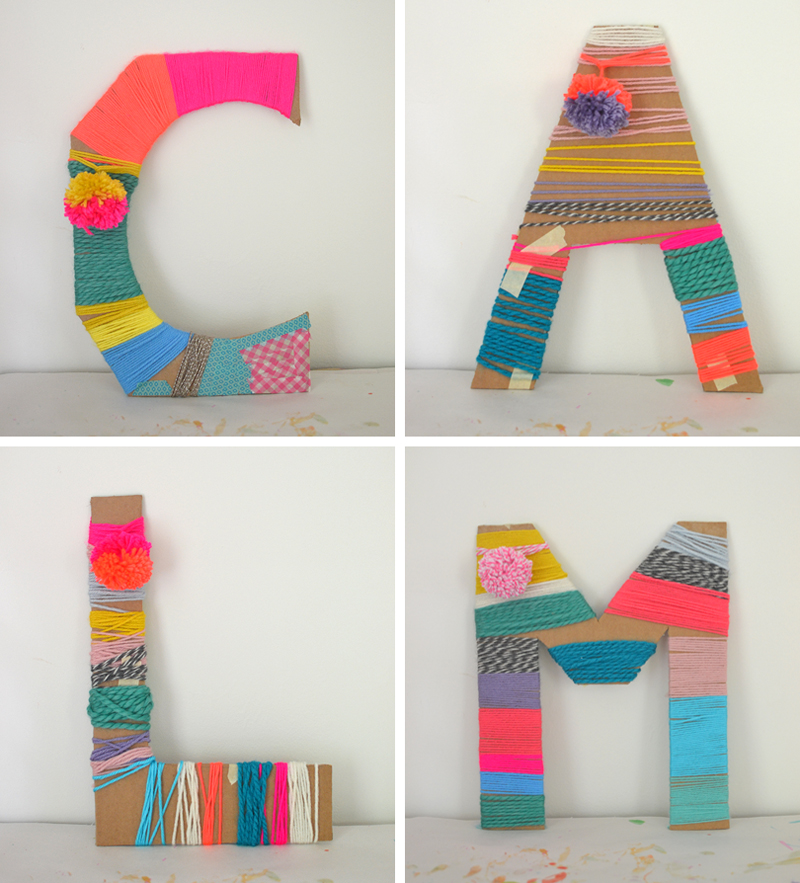
I’ve been wanting to share these cardboard letters for so long! My art camp kids made them back in July. The other day, as I was going through these photos, I realized that four of the letters spelled C.A.L.M. Boy, did I need this message. If there is anything that I am not these days, it’s calm. Although I’ve never considered myself an activist – my brain has a hard time grasping political concepts – I do feel like these last two weeks of the new American presidential administration have blown me away. I can’t peel my eyes from reading the news. And when I read things about feminist issues, and the National Endowment of the Arts, my blood starts pumping. I am typically a pretty calm person, so I really needed to see this yarn-wrapped message to help me breathe again. My mind is spinning in finding ways that I can make a difference (ok, I guess the activist in me has awoken). Let me know if you have any ideas!
And now back to our regularly scheduled program. Read on to find out how the children made these artsy and colorful letters…
This post contains affiliate links. Thank you for your support!
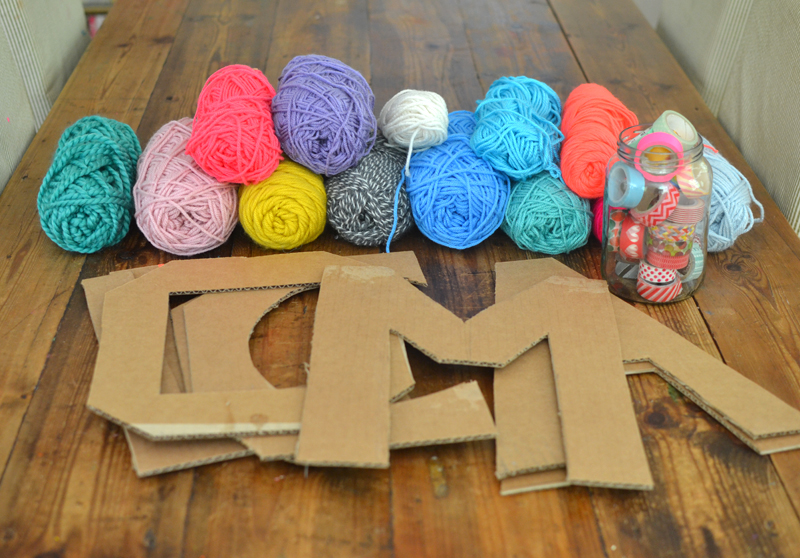
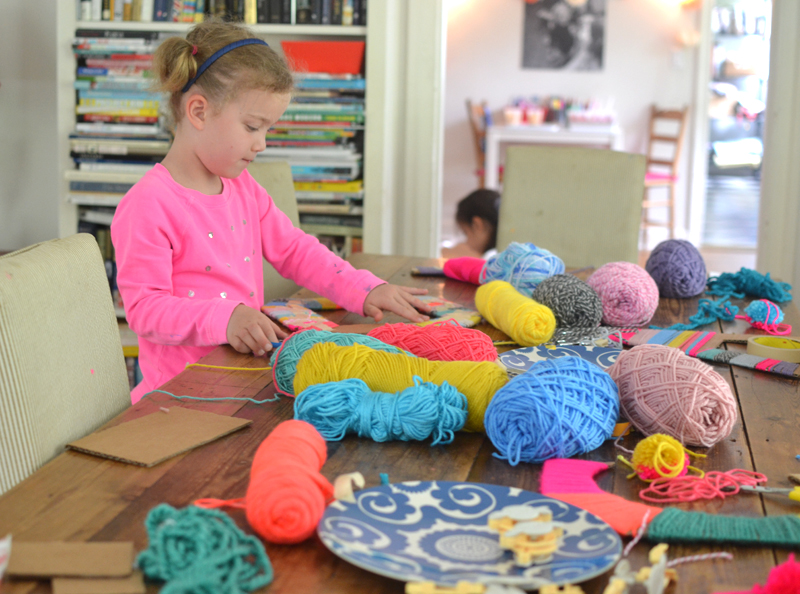
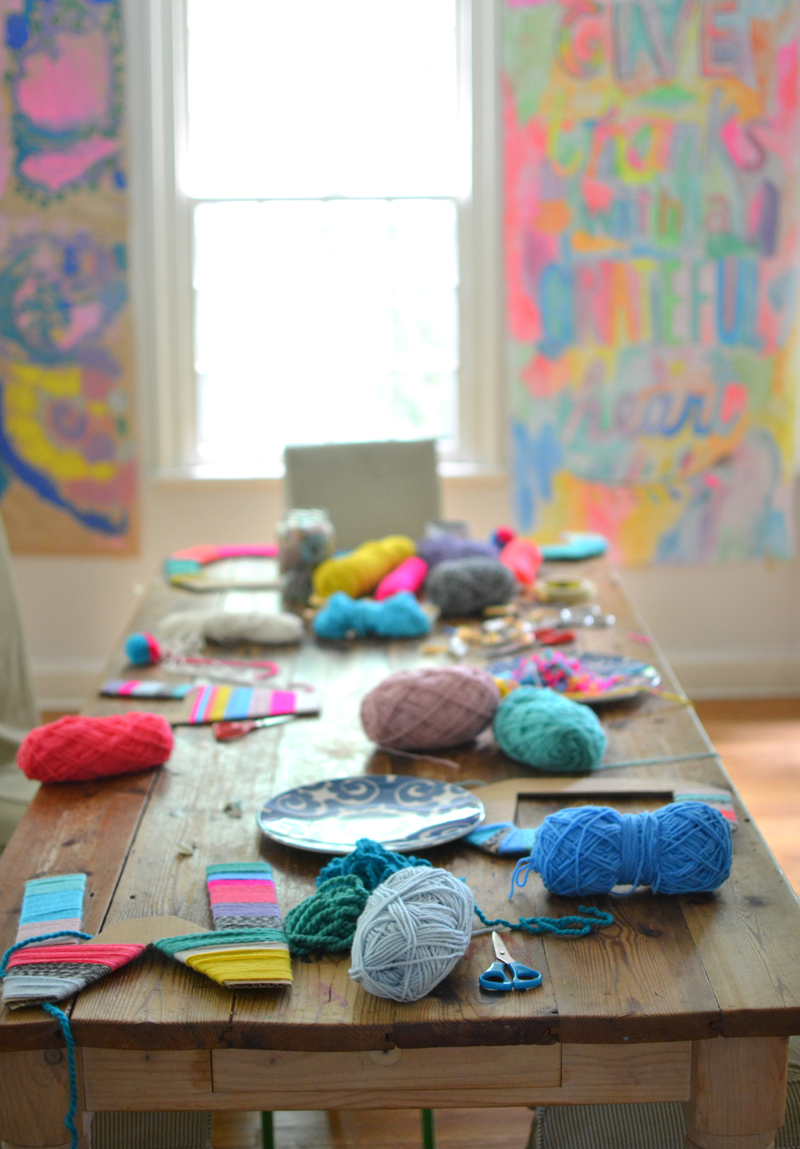
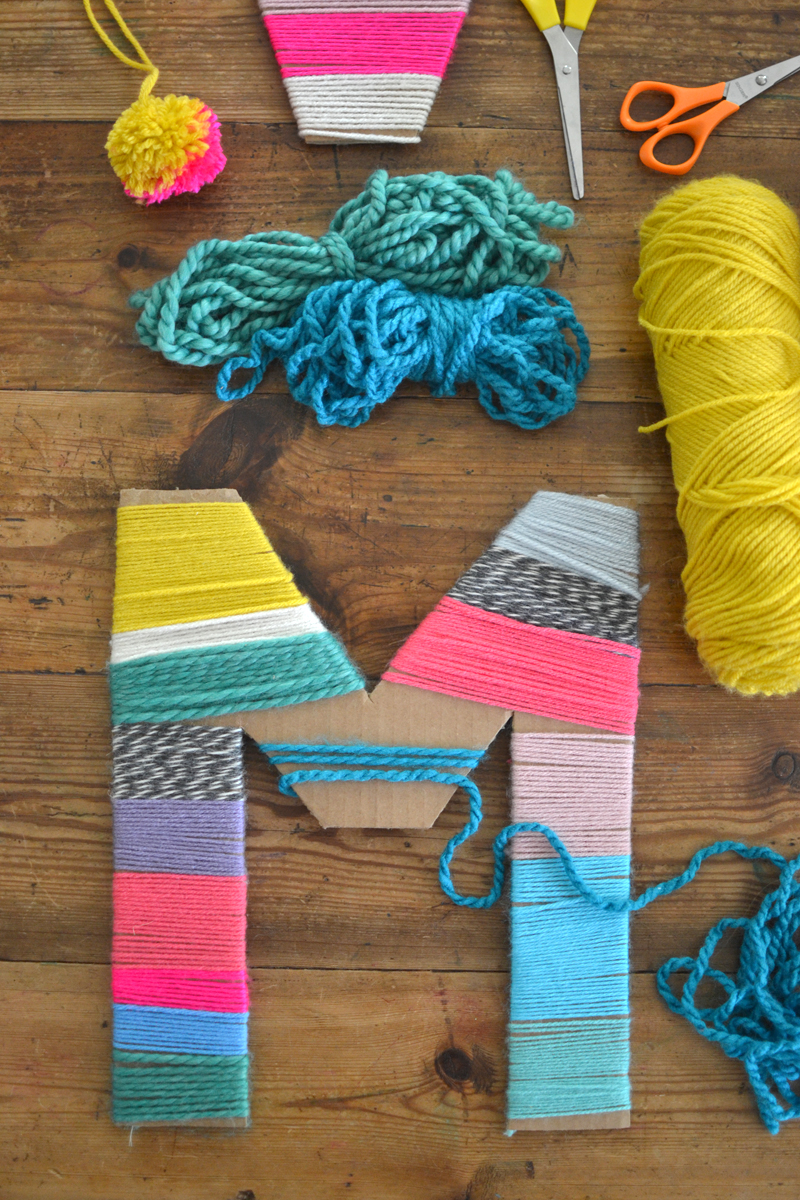
Supplies:
~ Cardboard (I hand drew the first letter of each child’s name)
~ Sharp scissors, or an exacto knife with a cutting board (good to invest in these two things if you cut a lot of cardboard)
~ Yarn (I get mine at our local craft store, or find some on Amazon – but I try not to pay more than $3-$5 each)
~ Tape (masking tape for the back, washi tape as an alternative if the kids get sick of wrapping yarn)
~ A plate (optional, but pre-cutting the tape and placing bits around the plate helps the kids)
~ Pom-pom maker (optional)

Process:
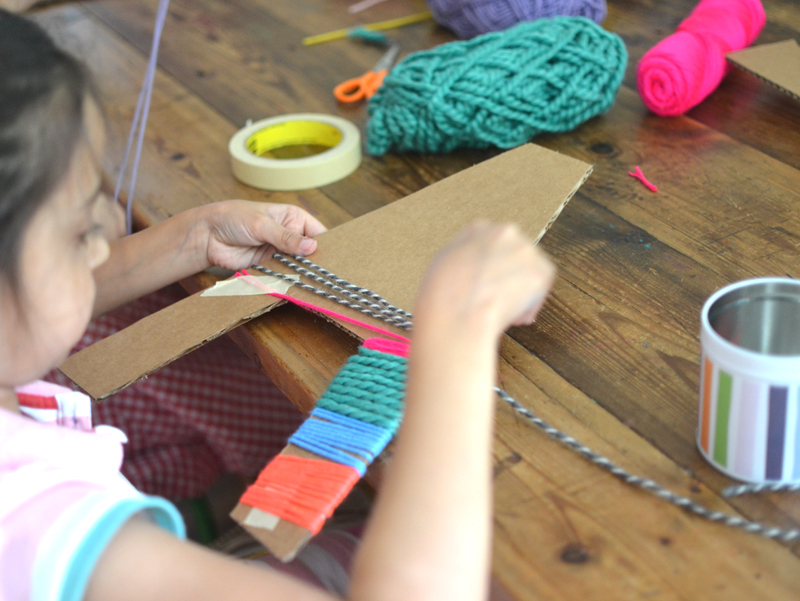
~ I started by showing them the technique: pick a color, cut off a long piece, and tape it to the back. Then wrap. When finished, tape the end to the back. The girls (ages four to seven) understood this very quickly. They varied in their stamina to finish because the wrapping takes time. Actually, the younger kids finished theirs faster (and therefore didn’t lose their energy) because they cared less about the yarn being perfect. The older kids spent so much time making their yarn lay flat, they got tired towards the end. Several of them decided to come back to it the next day, which they did. Only one child decided to abandon wrapping and use washi tape to finish. I made sure to let them know that any way they decorated their letter was just fine!
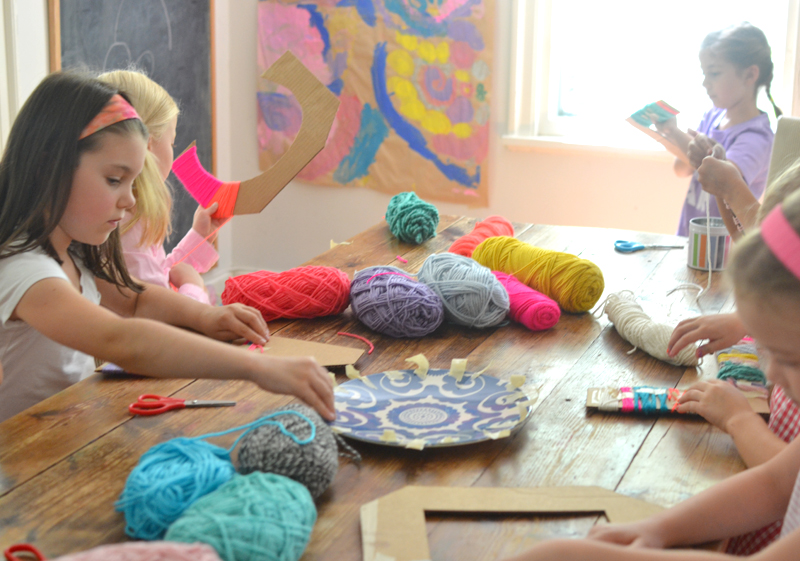
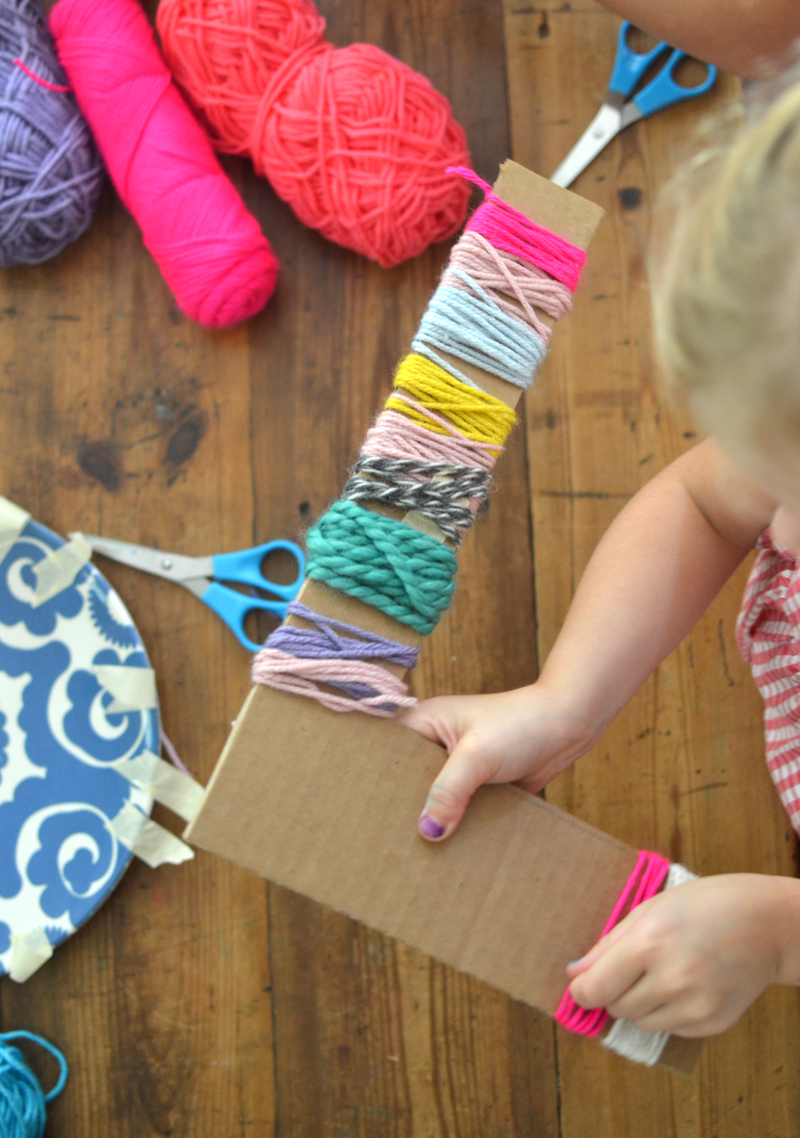
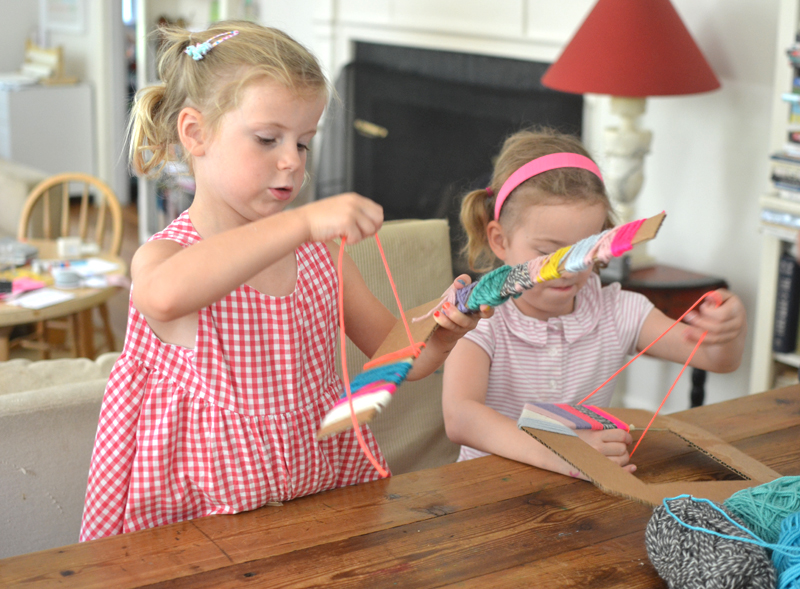
~ This project is definitely more in the “craft” category, and I am usually a bit hesitant about doing crafts with younger kids. Crafts tend to take more hand-eye coordination, and sometimes children can be turned off by crafts because they feel pressure to make it look a certain way – more like a finished product. So I like to provide crafts that are open-ended. This way, the kids know their piece doesn’t have to look a certain way. I don’t ever show my students an example. They are free to interpret their project any way they please. The one thing I do like about crafts is that they often can teach a skill. In this case, the skill is wrapping yarn. Down the road, they can bring this skill into their art-making if they chose.
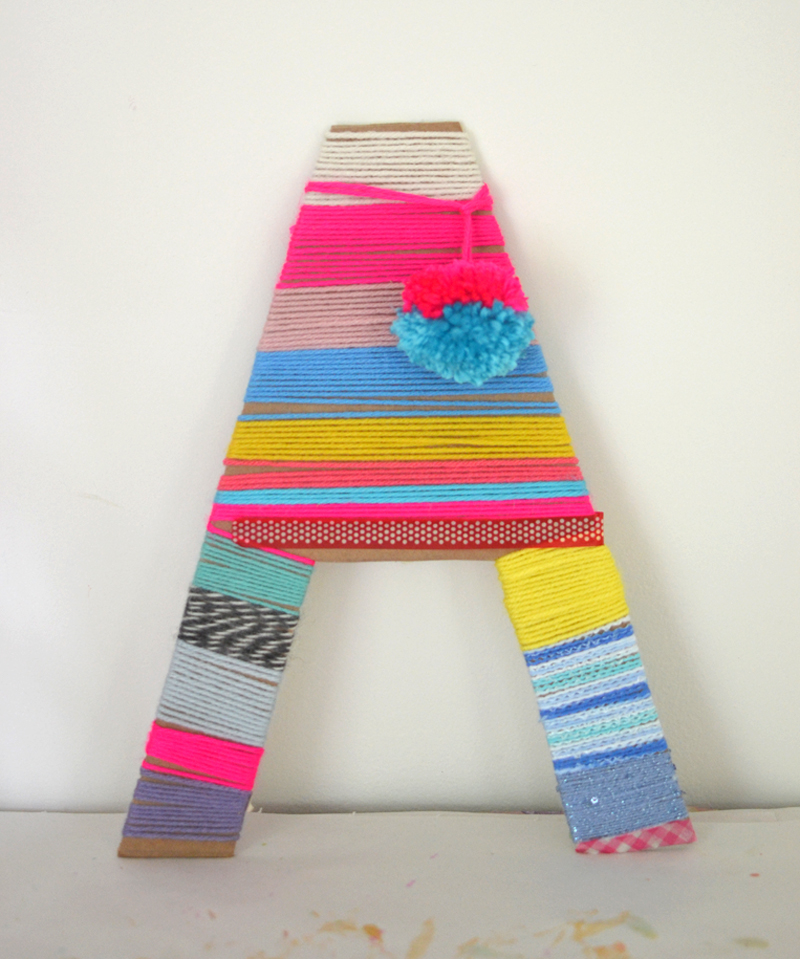
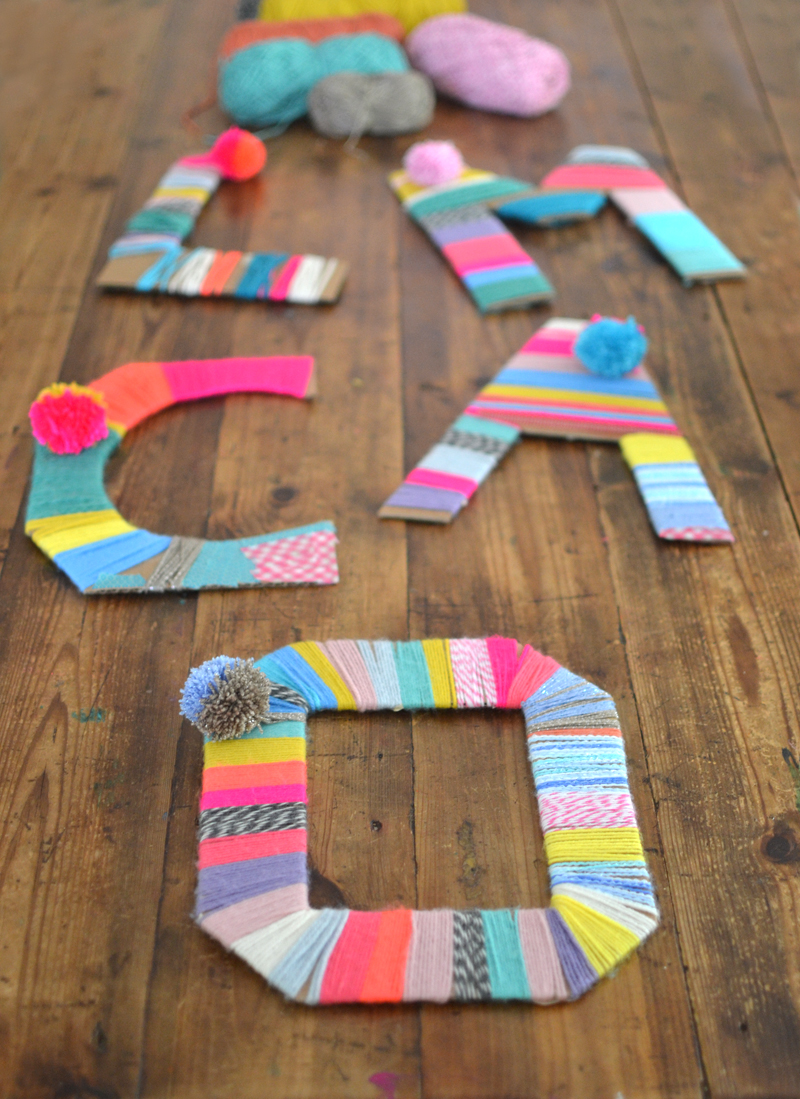
The “O” makes me think that these would make the cutest frames! Hmmm….
Let me know if you try!
xo, Bar
– – – – – – – – – – – – – – – – – – – – – – – – – – – – – – –
PS: To foster creativity in your home, add these Beginner Art Supplies, and Favorite Craft Supplies to your art shelves.
PSS: Follow me on Instagram to see what I’m up to at the moment, and Facebook for tons more creative and artsy ideas.


Love thiis Idea. Can’t wait to try it with my granddaughter tomorrow.
How many yards, approximately, did each letter require? I’m trying to purchase supplies for this project for my after care group of 6 and I don’t how much yarn I’d need. Thank you!
hi Steph, so it’s not much yarn at all, especially because it’s lots of small pieces. if I had to guess, maybe 4 yards to wrap a letter? hope this helps! xo Bar
About how long would you say it took each child to complete this project?
hi Uela, thanks for asking the question! so the smaller kids (5 and 6), it took them about 45 minutes. the older kids who were more careful (7 and 8), it took them over an hour, and two of them had to finish the next day. hope this helps! xo Bar
This could be kids party project. Love how it looks. Thanks for sharing this DIY yarn wrapped letters idea.
Hi, Barbara! We had trouble with the yarn slipping on the curves, which annoyed my perfectionists. It became a problem solving challenge for the kids…always a good experience. But do you have any tips to keep the yarn from slipping?
Thank you!!!
Shannon
hi Shannon – yes, good for problem solving! I think the older kids just wrapped carefully and a little tighter, and the younger kids used washi tape. Hope this helps! xx Bar
i had to do this for a class presentaition
So like, how does a perfectionist finish the ends lol
Well… we are always trying to model imperfection 😉 But tape on the back will hide the ends. ~ Bar
So cool! I have to try this
About how large were the letters cut? Trying to put this craft together for a large group of teens. Trying to let them cut the letter from precut cardboard squares.
Hi TJ, they can be any size! Mine were probably 12-15 inches high. But use whatever size you have that makes it easiest to cut. Good luck! ~ Bar
I am doing this with a class and I love the pom pom idea. Does the pom pom maker take a while to do? I was wondering if I could buy pom poms and then attach yarn somehow? Any ideas?
Love this idea… mother’s day gifts for us!!
Hi Karen, sorry to respond late, I’m sure you have done this by now. I hope it went well! Yes, the pom-poms do take a while with a class. I think you could definitely try using store bought pom-poms and just tying a knot around them! You could even tie lots on a string and wrap it around. Best wishes! ~ Bar