• Skip to primary navigation
  • Skip to main content
  • Skip to primary sidebar
  • Skip to footer

ARTBAR

raising creative thinkers

  • MY BOOKS
    • Art Workshop for Children
    • Cardboard Creations
  • ART SUPPLIES
  • SHOP
    • Art Bar on Etsy
    • Art Class Poster
  • ABOUT
  • Nav Social Menu

    • Facebook
    • Instagram
    • Pinterest

Ribbon Chandelier

August 24, 2015 by Barbara Rucci 4 Comments

1697 shares
  • Facebook1

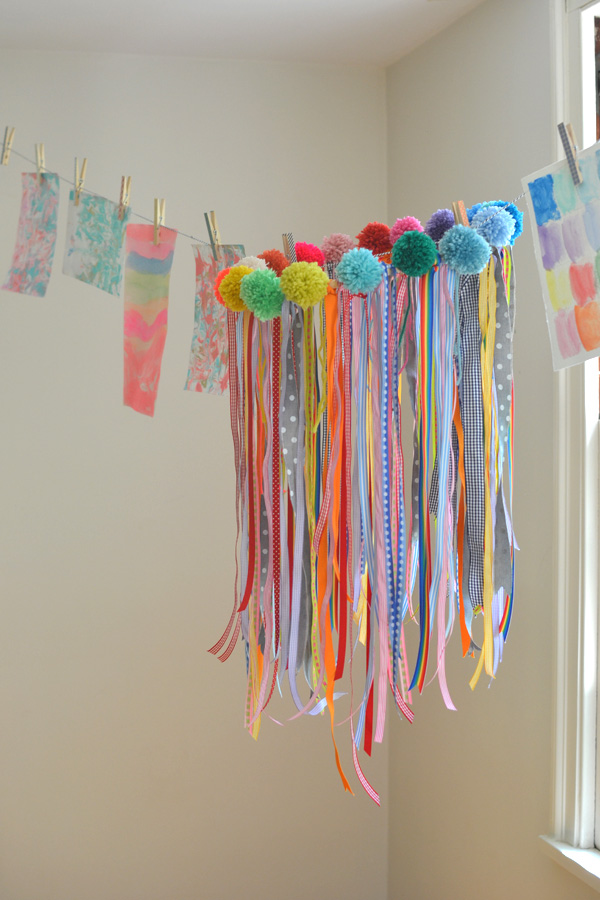
a collaborative chandelier with ribbons and pom-poms made by kids

I’m so in love with this ribbon chandelier that the kids and I made together in art camp. I’ve been wanting to make one for a year, ever since I saw this one on Pinterest made with fabric strips. A few weeks ago, I was teaching a week of art camp centered around fabric and textiles, and it occurred to me… this project would be perfect for collaboration! The kids were ages five, six and seven. They would totally be able to do this!
a collaborative chandelier with ribbons and pom-poms made by kids

This post contains affiliate links. Thank you for your support!

SUPPLIES:

~ 60 ribbon pieces, cut to 42″ lengths. I’ve been collecting ribbon for years, so I didn’t need to buy any for this project, but Amazon has good ribbon if you want to buy online. Start with polka dot grosgrain, gingham ribbon (don’t buy curling ribbon, stick with soft polyester), and this cool rainbow ribbon.

~ 14″ wooden embroidery hoop

~ Yarn in rainbow colors

~ Pom-pom makers (I used the second smallest size)

~ Good scissors for trimming the pom-poms

a collaborative chandelier with ribbons and pom-poms made by kids

a collaborative chandelier with ribbons and pom-poms made by kids

PROCESS:

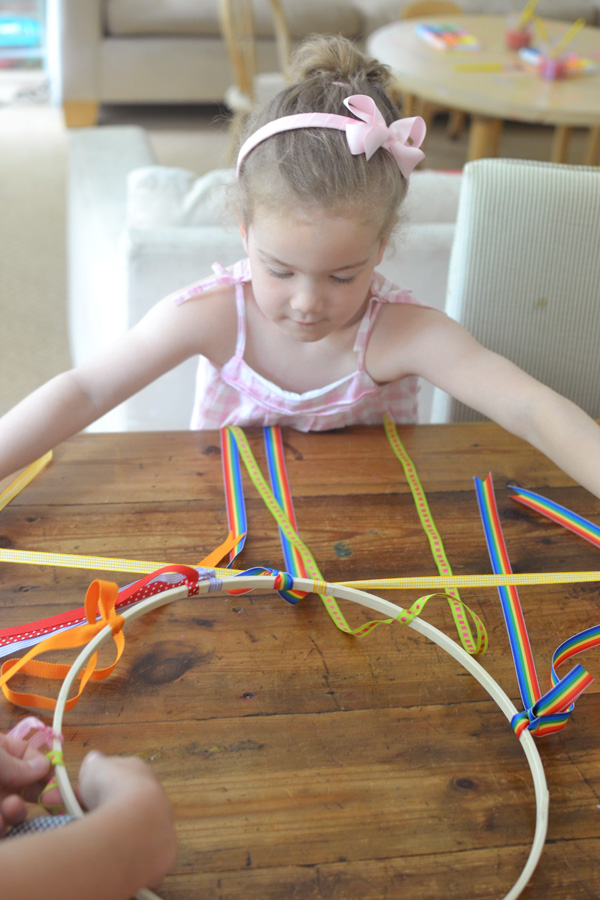
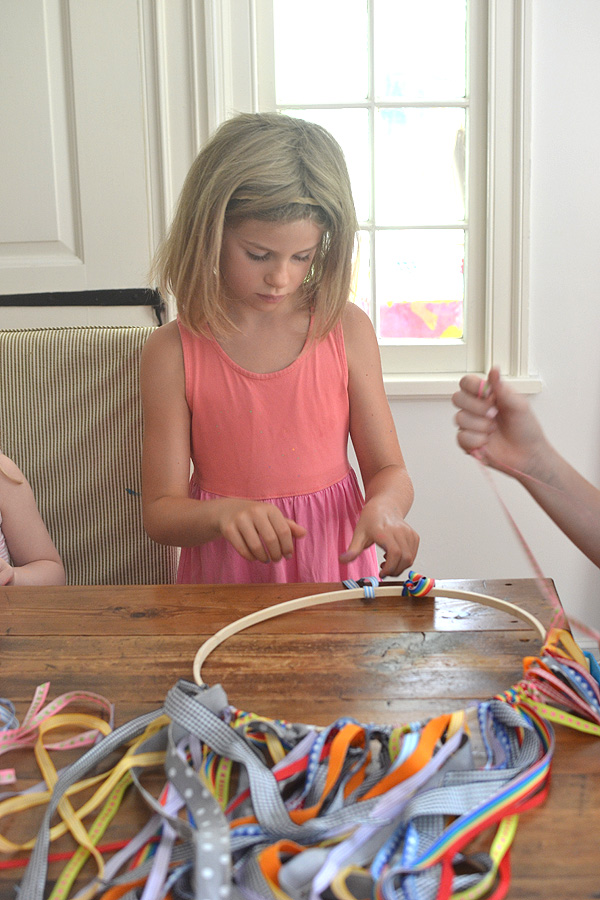
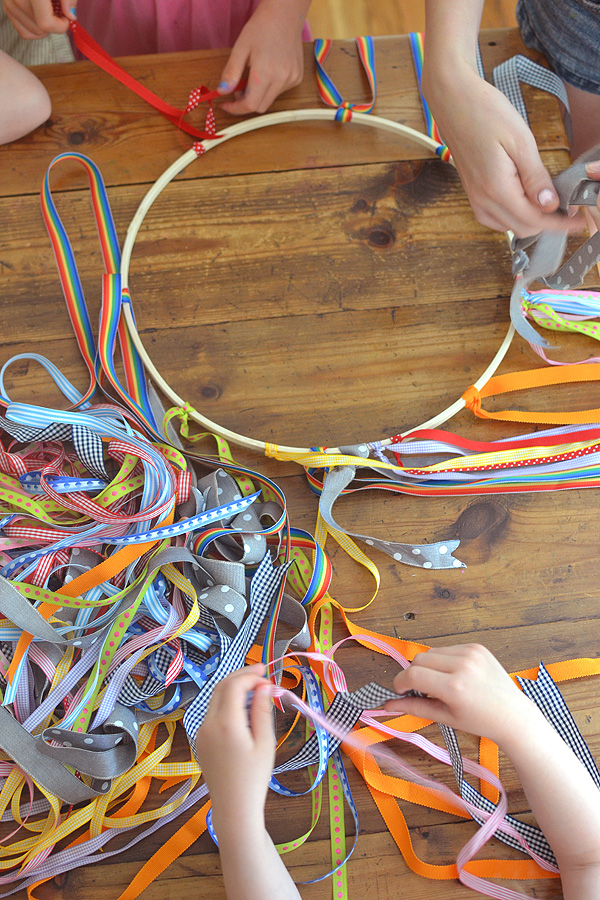
~ First, I laid out the 60 pieces of ribbon in a beautiful pile on the table, along with the big wooden hoop.

~ Then we talked about the word chandelier. A few kids had seen one before, and one little girl even had a fancy crystal chandelier in her house.

~ Next, I showed them how to tie the ribbon. They all sort of looked at me, like…huh? It was really hard to conceptualize what this finished piece would look like for them. But, because they are kids and open to anything, they just started tying. Some kids were done after one and went back to the coloring table. But two kids in particular, one five and one six, tied almost every single ribbon. It was amazing to watch. They were completely in the flow. You could hear a pin drop.
a collaborative chandelier with ribbons and pom-poms made by kids

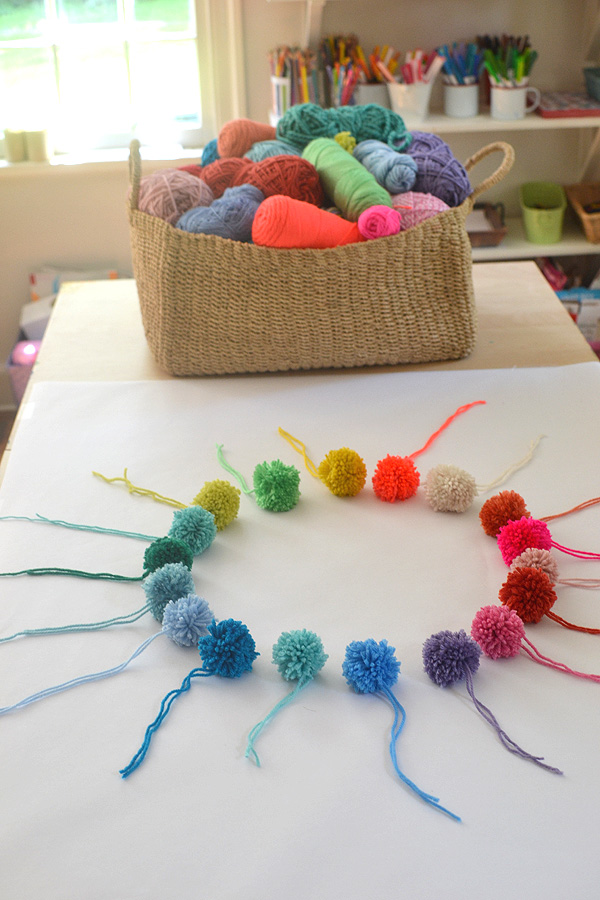
~ After the kids went home, I got busy making pom-poms. I thought that the pom-pom part wouldn’t be fun for them if they couldn’t take the pom-poms home. And I sort of have a love affair with making them… so this was my part! I love using pom-pom makers, but you can make them any way you want. Make sure to leave the long tail when trimming!

~ Lastly, after you have made all of your pom-poms (I made about 20 but ended up using 18), tie them onto the hoop with a double knot. That’s it, you’re done!
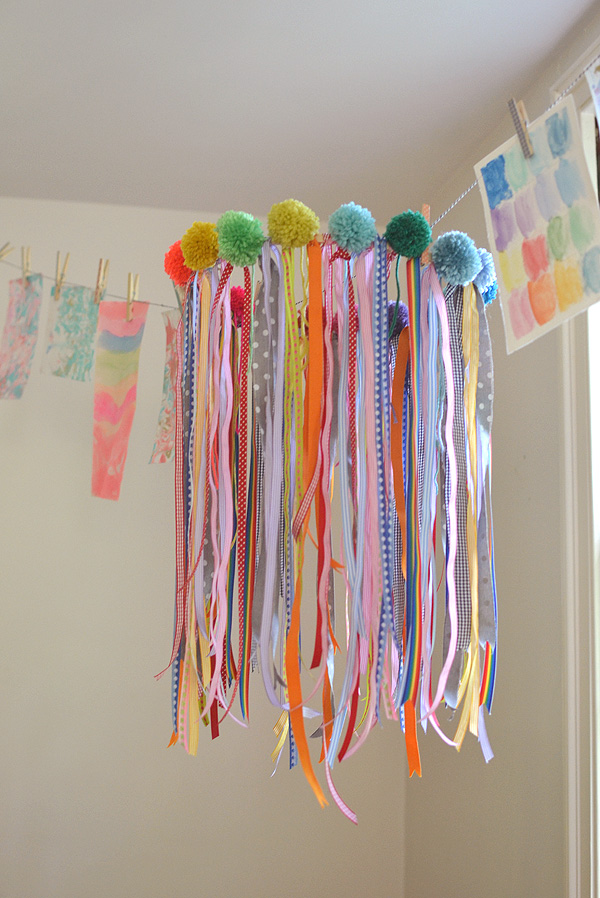
a collaborative chandelier with ribbons and pom-poms made by kids

The best part…I get to keep this forever! It is the happiest part of my living room right now. ♡

xo, Bar


Filed Under: Open-ended Crafts for Kids, Teen Crafts, DIY Tagged With: chandelier, pom-poms, yarn, ribbon

Previous Post: « DIY Marbled Paper
Next Post: Pipe Cleaner Wands at the Craft Fair »

Reader Interactions

Comments

  1. meri cherry

    August 27, 2015 at 11:42 pm

    It’s so so good!!!! I am totally making mini versions of this with my art class and a reggio version in our art studio. Totally inspired! LOVE this!!! Thanks Bar!

    Reply
    • Barbara Rucci

      September 6, 2015 at 3:16 pm

      how did I miss this? thank you meri!!!! can’t wait to see your versions 🙂 xo

      Reply
  2. Sarah H

    June 12, 2021 at 10:26 am

    Hi Bar,

    I want to make this lovely chandelier with my daughter and was wondering if you have any tips for hanging it. It feels like one of those things that would be hard to center.

    Thank you!
    Sarah

    Reply
    • Barbara Rucci

      July 1, 2021 at 3:34 pm

      Hi Sarah, What I did was use fishing wire and tied one piece to the top of the hoop going across one way, and another across the opposite way – sort of forming an X. Then it’s easy to find the balancing point and hang it on a small ceiling hook. I hope this helps! ~ Bar

      Reply

Leave a Reply Cancel reply

Your email address will not be published. Required fields are marked *

Primary Sidebar

The Creativity Project
RESOURCE FOR TEACHERS
Start Here!
Your subscription could not be saved. Please try again.
Your subscription has been successful.

Yes! I want to raise thoughtful and creative children. Send me more inspiration, please!

Follow on Instagram

Categories

Archives

Copyright and Reposting

All content on this blog is copyright and owned by Art Bar Blog unless otherise stated. I would be flattered if you wanted to use an image from one of my posts! But please, ask me first. I would also ask that if it involves DIY instructions with a list of supplies that you don't repost any of that stuff because then nobody would have a reason to click back to my original post!

Footer

  • Facebook
  • Instagram
  • Pinterest

About Me

There are two things that I'm passionate about: Children + Art. As an art teacher, author, graphic designer, and mom to 3 creative thinkers, I get to explore my passions every day! Learn more...

I am dedicated to keeping your information safe. Please review my Privacy Policy.

Recent Posts

A newly printed t-shirt lies on a table showing off the freezer paper stencil technique using bright blue ink on a muted green shirt with a Noah Kahan quote from his song Orbiter.

Copyright © 2026 · Foodie Pro & The Genesis Framework