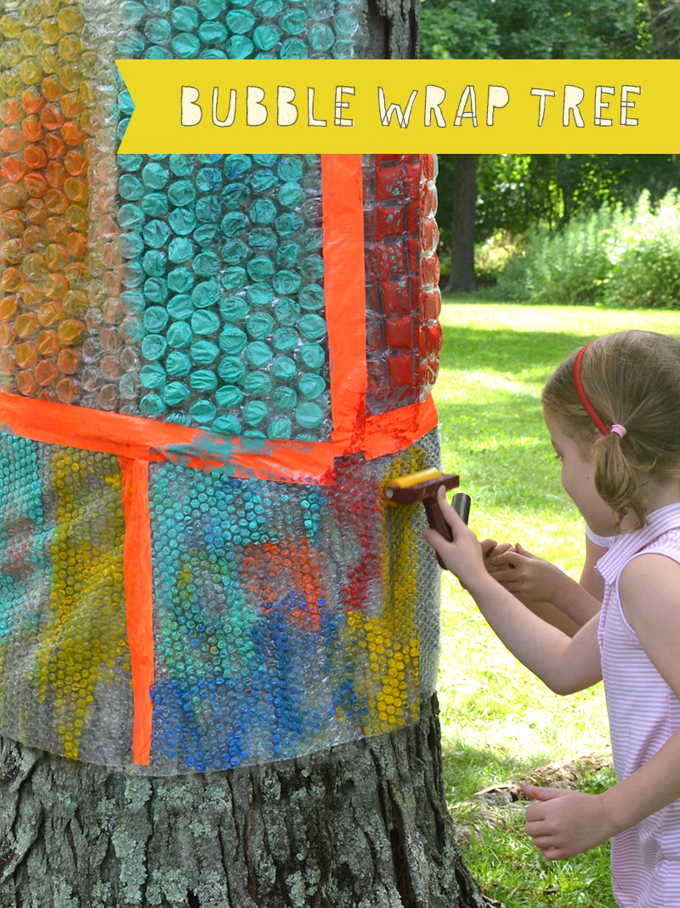
Printmaking is one of the fine arts (including painting, drawing, collage, and sculpture) that involves making a “master plate” which you then can use to make multiple images which are printed in reverse. There are so many ways to print, it’s almost endless! Potato and veggie printing, linoleum printing, mono prints, bubble wrap printing, yarn printing… basically any object you can find can be used to print with.
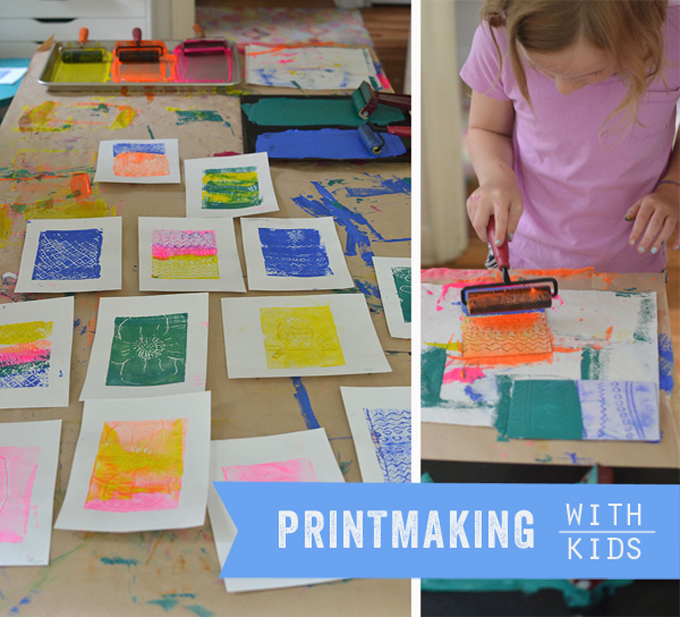
Styrofoam printing is really one of the simplest ways to teach printmaking for kids. We’ve done this process many times in art class. I will show you photos from two separate printmaking experiences.
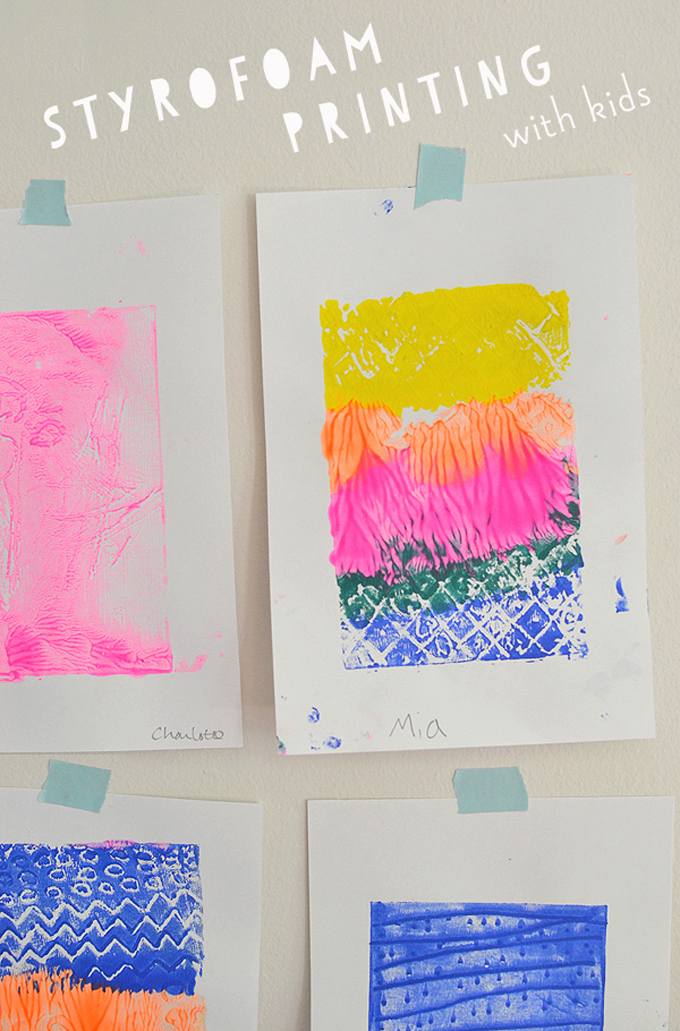
First I’ll share the first time my campers used styrofoam, and when we used neon paints.
[ I am a participant in affiliate programs designed to provide a means for bloggers to earn small fees at no cost to you by linking to Amazon.com and affiliated sites. ]
Supplies Needed for Printmaking with Kids:
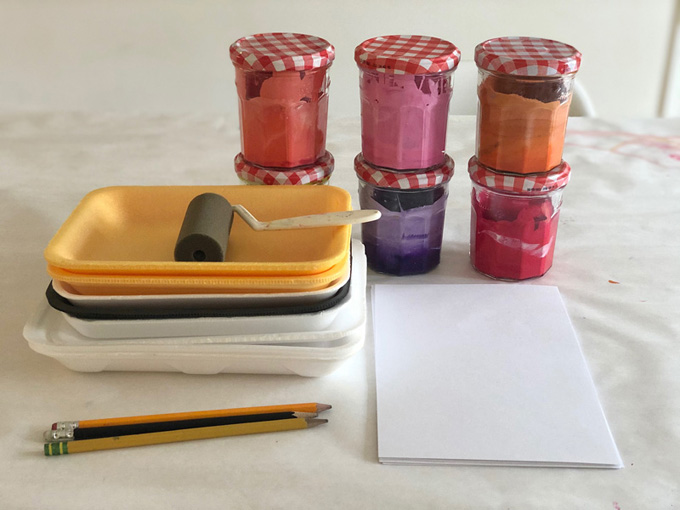
~ Foam pieces (I bought scratch foam on Amazon and I cut down to 4″ x 6″, but you could just use foam plates from the grocery store)
~ Pencil for drawing on the foam (which makes the indentations) ~ not too sharp, more of a dull tip
~ Paper cut to a size about an inch bigger all around than the plate ( I love using sulphite paper which is a denser type of construction paper)
~ Tempera paint (I love this brand for printing as it’s a bit thicker and more opaque), or printmaking ink which is is thick and lovely.
~ Brayers or rollers (if you don’t want to purchase these, you can just use a foam brush or regular paint brush)
~ Cookie tray or some other tray to roll the paint out onto
~ Paper towel to wipe off paint from the plate in between prints (we took them to the sink first to wash with water)
How to Do Styrofoam Printing with Kids
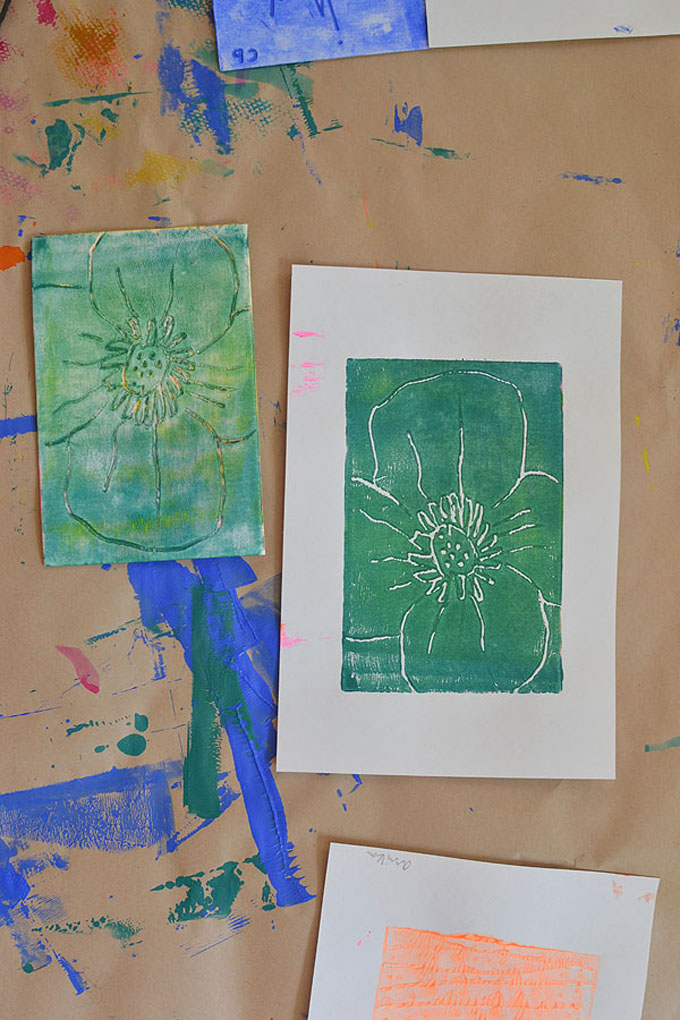
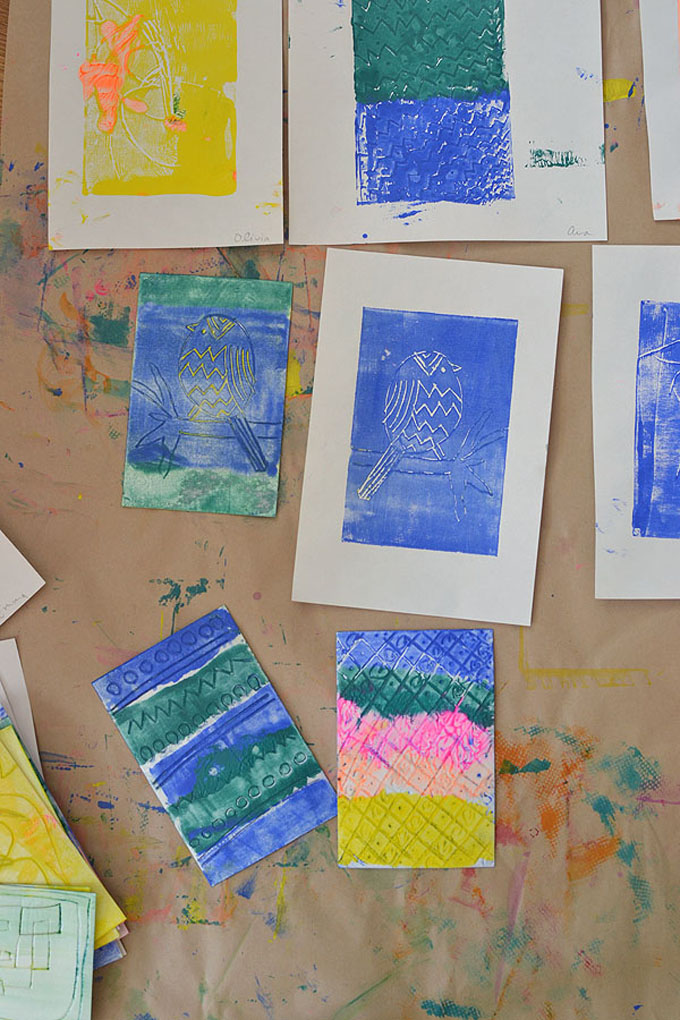
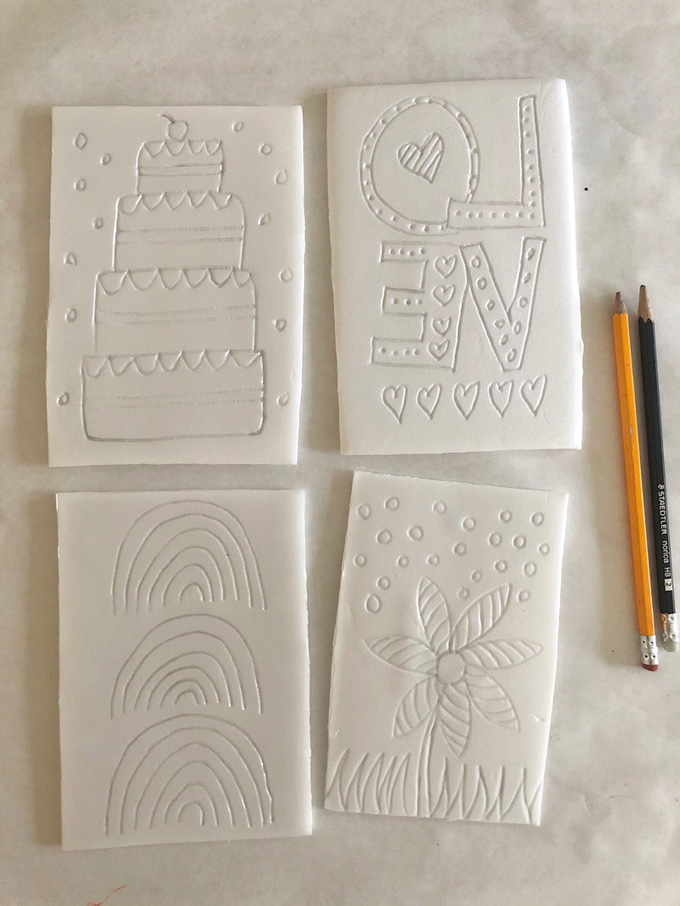
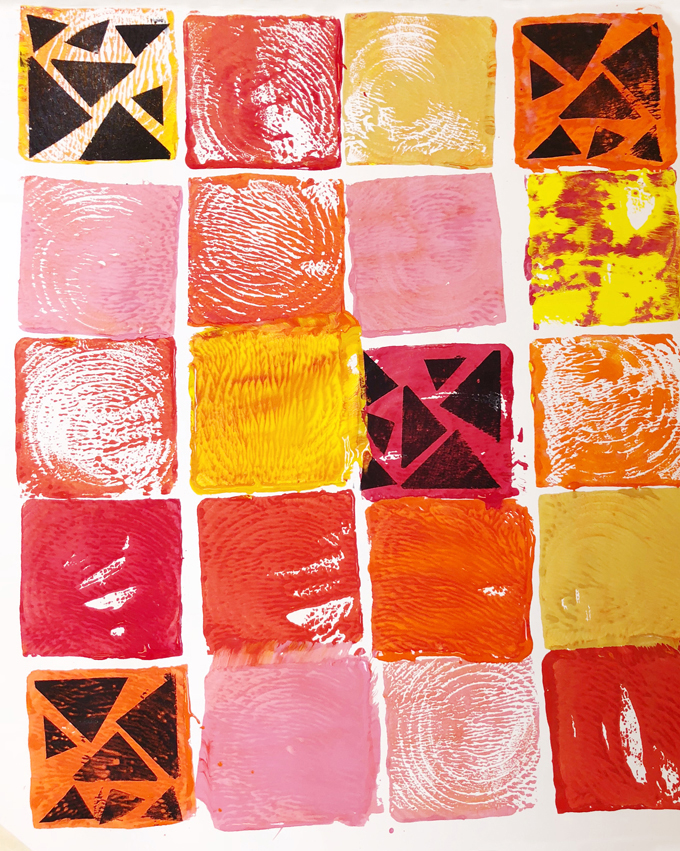
1. First, have the kids draw something on their styrofoam with a dull pencil (like this). My campers actually had a hard time thinking of what to draw. It was not a typical piece of paper so I think that they froze a bit, not sure of what they were doing. This concept of indenting the negative space is abstract. So I told them to just make patterns at first. This helped them loosen up. Then, as they figured out what it was all about, they went back to make more.
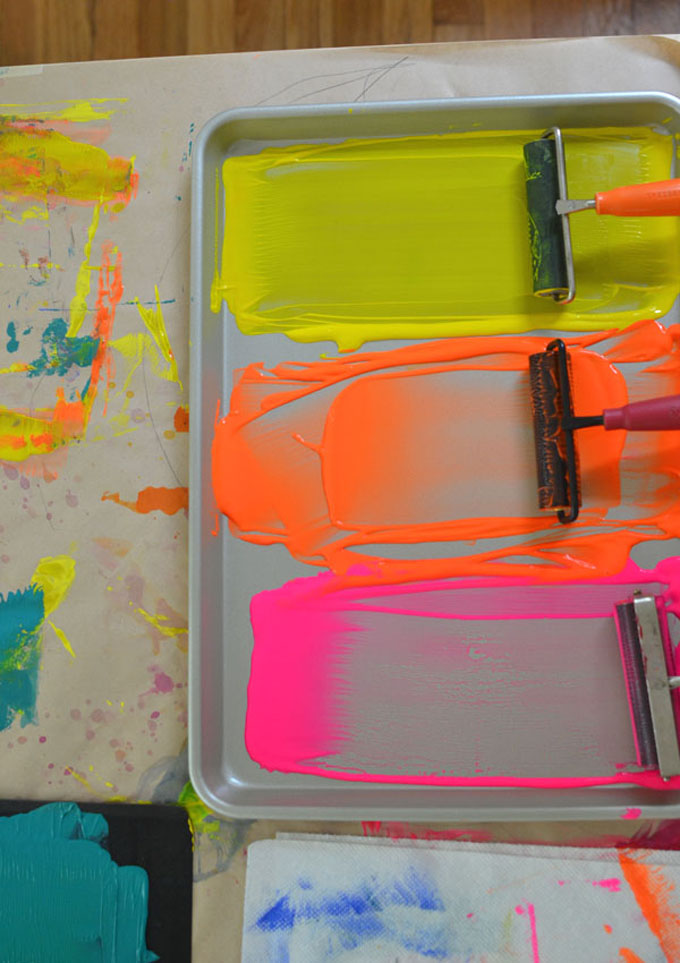
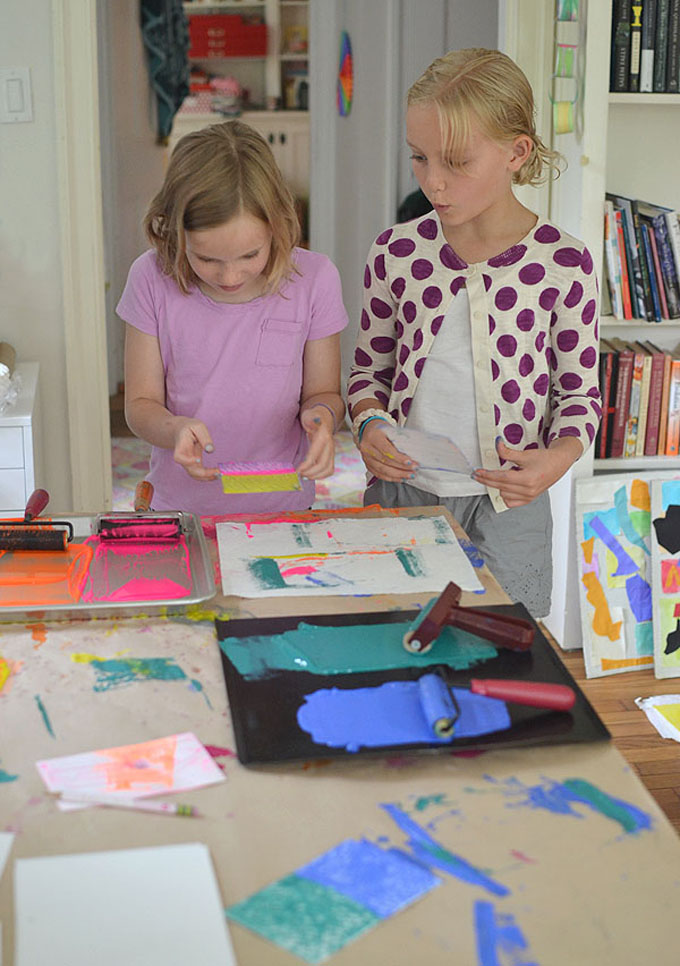
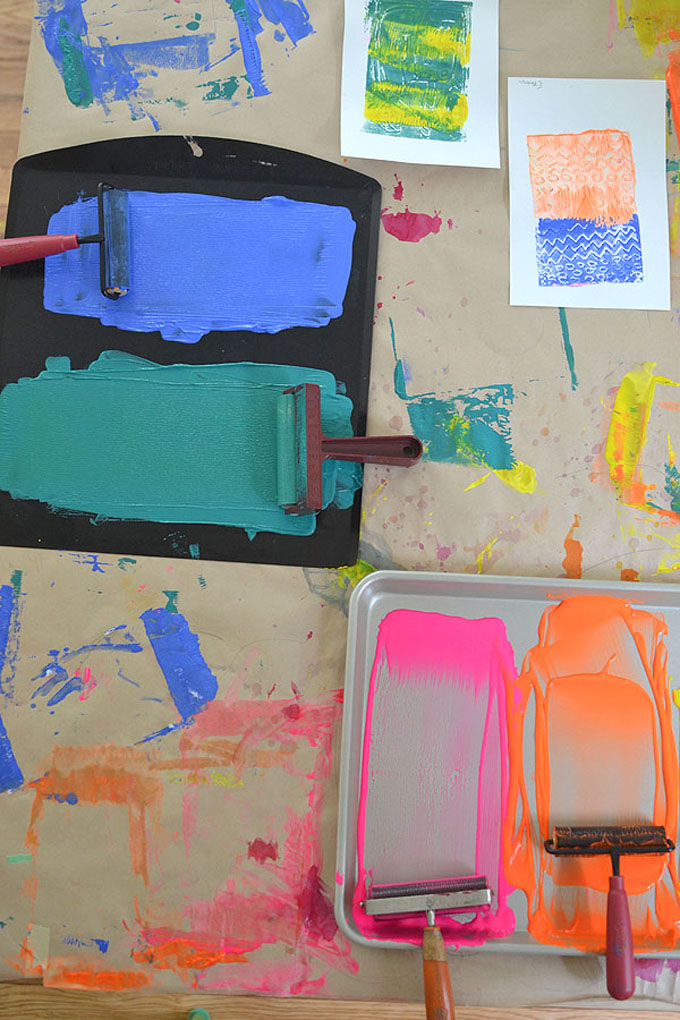
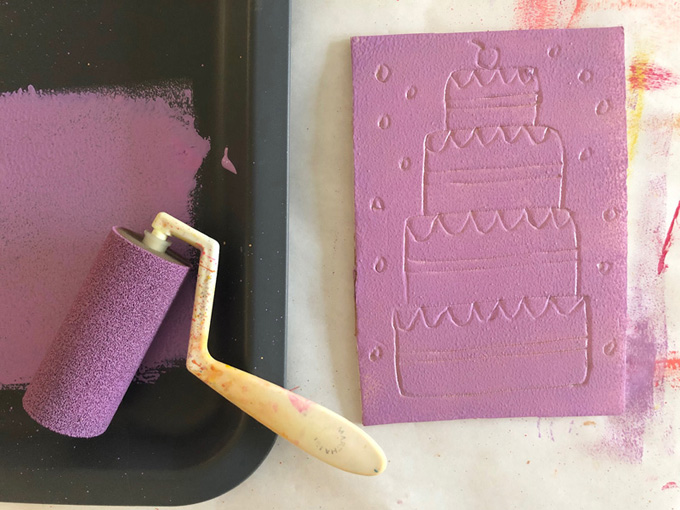
2. Next, squirt some paint onto your trays and use the rollers to roll them out in a streak. Let the kids try the rollers (kids loooooove this) and teach them to be careful when rolling so that the colors don’t mix. Although, you can certainly just let the little ones explore the rollers without a care about mixing colors. In fact, for kids under four, I think it’s best to let them just explore the process rather than be too worried about the outcome (i.e. gray colors). My kids at camp were ages 4-8 so I was a bit more of a purist about color with this group. And there is nothing wrong with teaching them control sometimes, too.
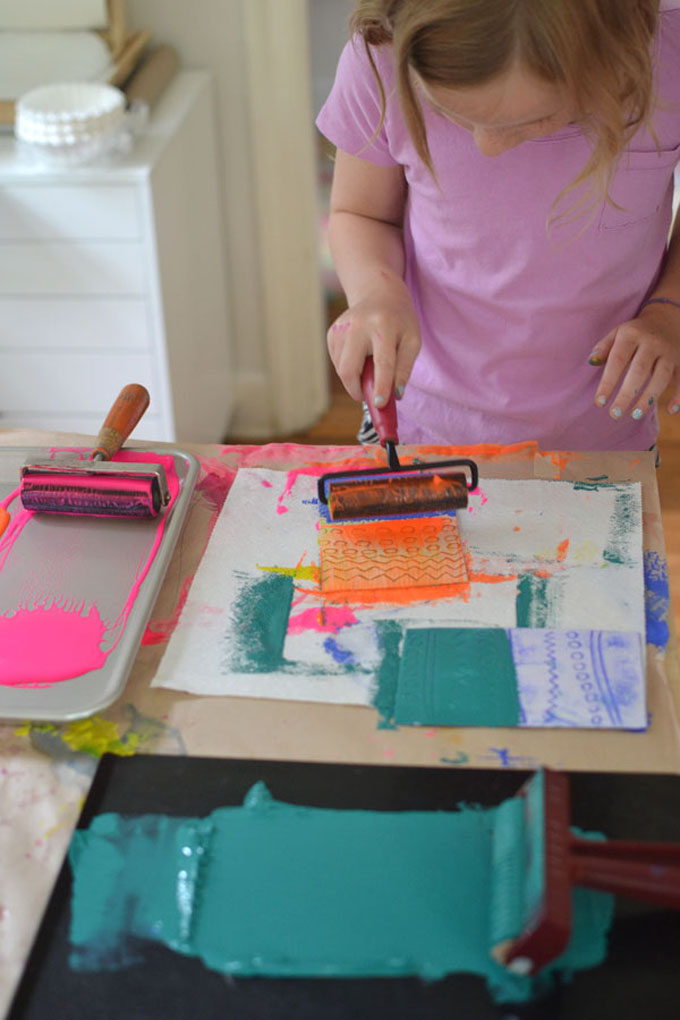
3. Now it’s time to apply the paint to the plate. We put paper towel down first because the rolling can get messy and this allowed us to keep the tabletop somewhat cleaner. We soon figured out that we should keep one area of the table for rolling, and another area for printing the paper. The printing area was kept clean so that the paper stayed clean.
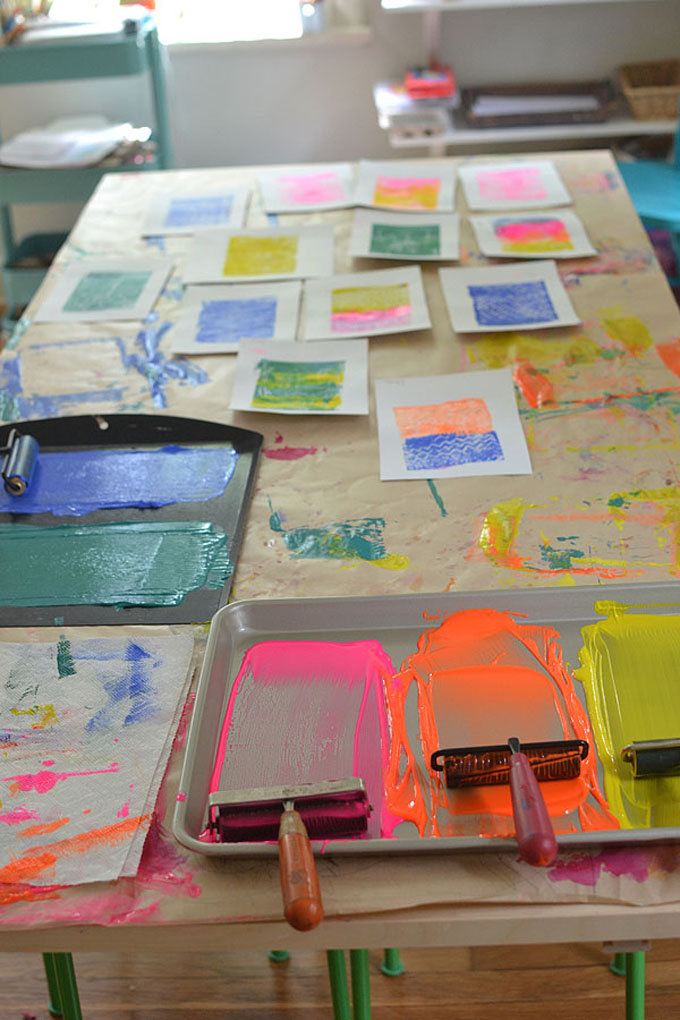
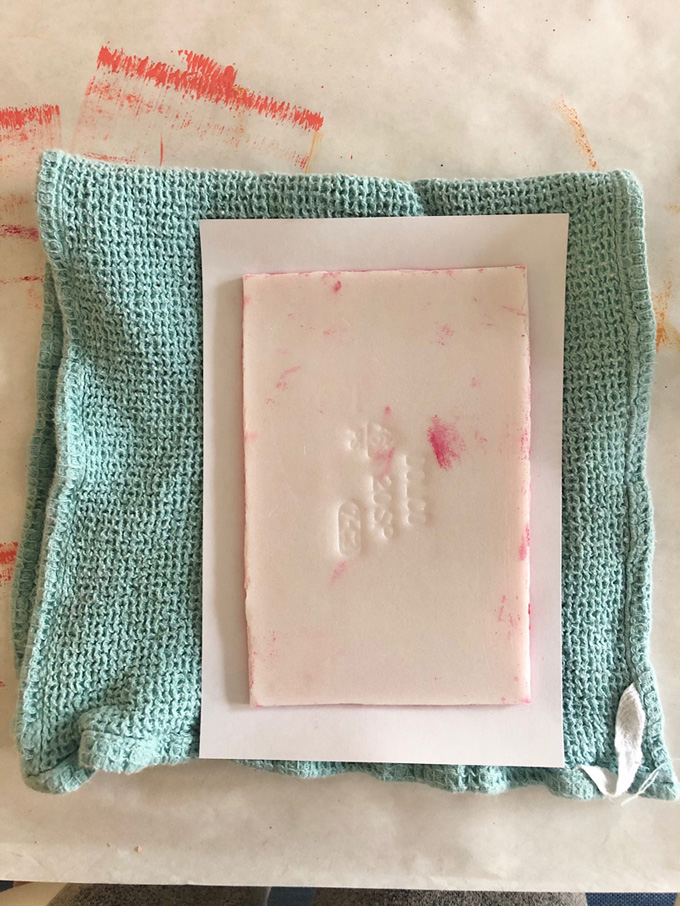
4. So here’s what it looked like: They would roll on one end of the table, then they would walk around and take a piece of paper, lay it down on the clean surface, turn the plate over and center it onto the paper. I had them push down on the plate for 30 seconds. The best part was lifting the plate and seeing the image!
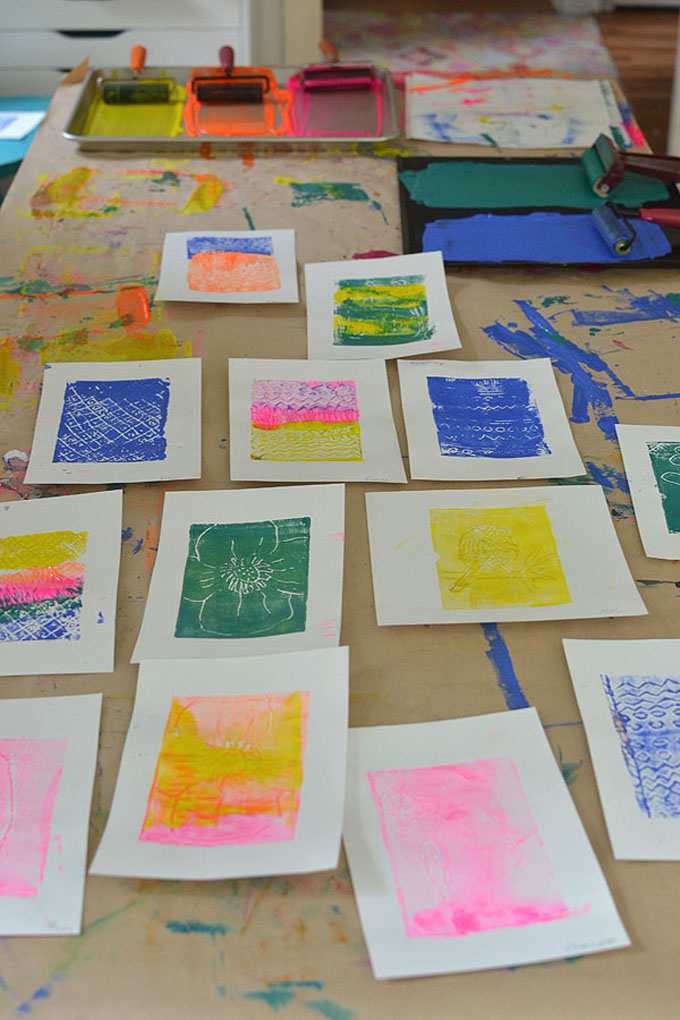
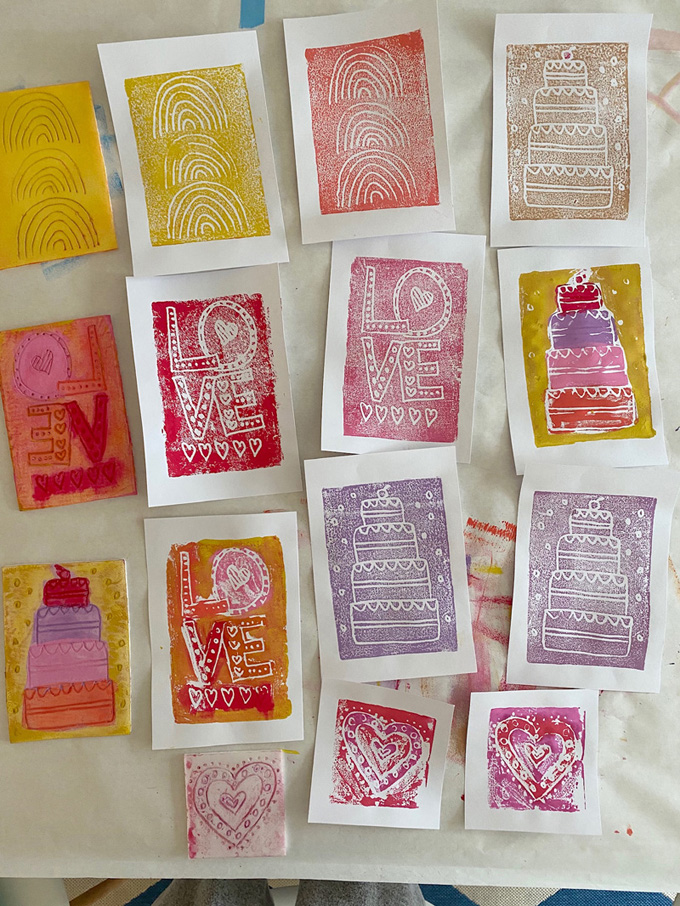
5. Plates were then cleaned with water and dried, and then they would start the process all over. Or, more likely, they would want a new plate because they would get a new idea! One interesting thing to discover is how the image prints in reverse. A few of the kids wrote their names, and discovering that they were printed backwards was a mind boggling!

As you can tell, I sure took enough photos after they were done! I almost didn’t want to give them home.
Another time we did Styrofoam Printmaking
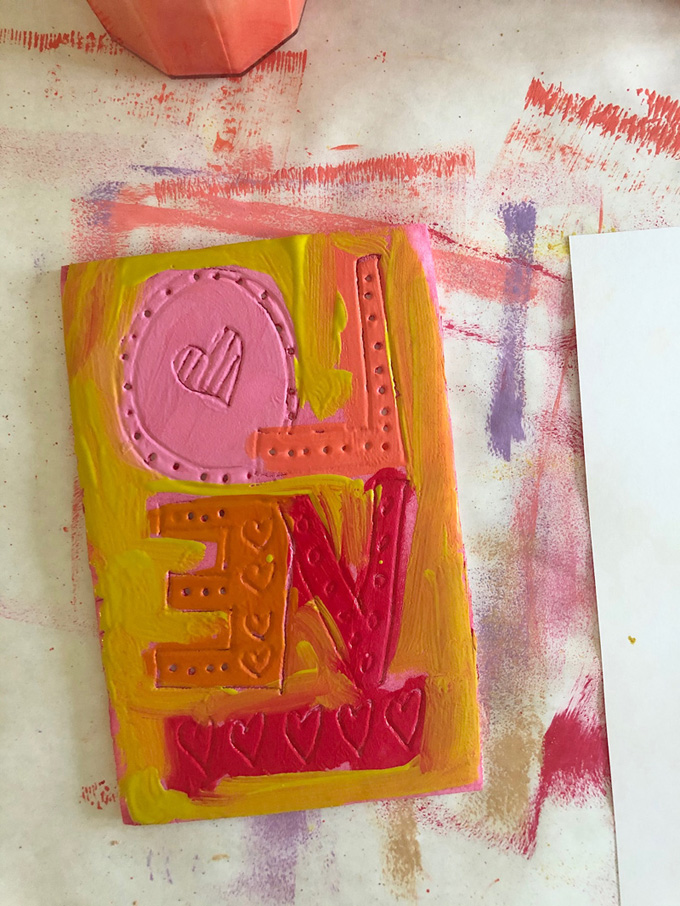
Now I will show you a time I did styrofoam printing with my daughter. We also tried painting directly onto the styrofoam for a multi-color print. You can see the entire process, from cutting out recycled styrofoam, to using a dull pencil to make an indented drawing or design, to rolling the paint (or painting directly on top), to pulling a print!
You do not need to buy fancy supplies, so definitely try this!! Your kids will be fascinated with their “magic” mirror prints, and adults will love it, too!
xo, Bar
– – – – – – – – – – – – – – – – – – – –
Did you like this post? Here are more printmaking ideas:
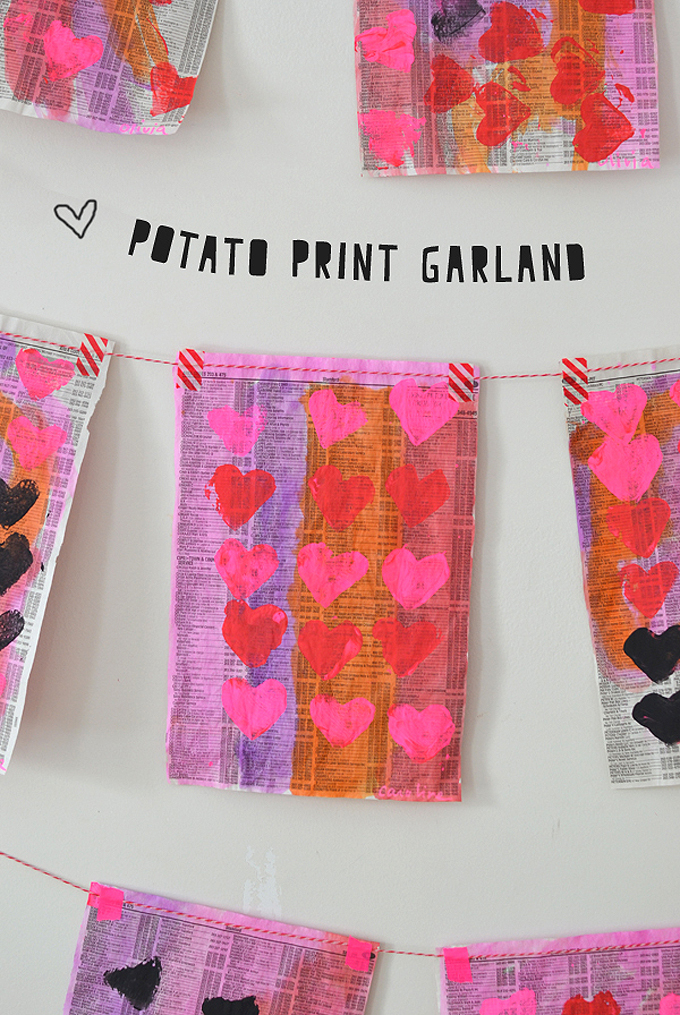
Potato Printed Garland


Great post! I love printmaking. Thanks for the shout out! I love how you stamped the prints on the paper to make the border. Really cool.
thanks meri! i love printmaking and want to get the kids to love it, too…using rollers was the key i think 🙂