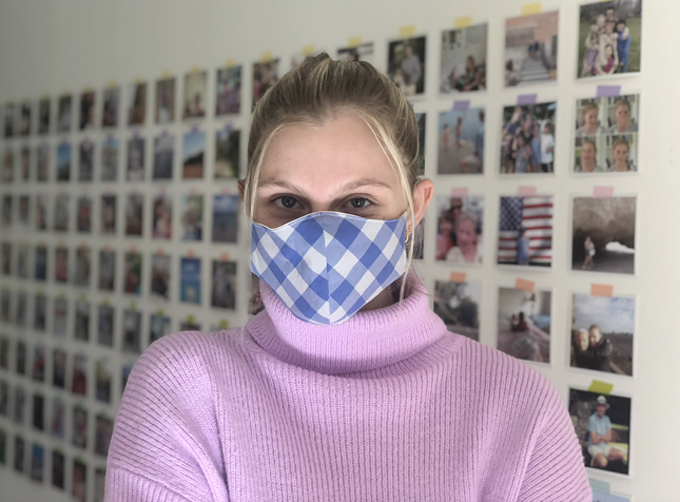
I never thought I would be writing a post about face masks. But here we are, in the midst of a pandemic, and face masks are a thing now. My handmade cloth face masks are definitely not for use in a hospital or by healthcare workers. They’re meant for quick runs to the grocery store or pharmacy. According to various articles I’ve read, cloth face masks don’t do much to keep the coronavirus from getting in if you are in close proximity to someone who is sick. However, they can protect others from getting infected if you have the virus. They also show people that you are participating in keeping other people safe, and it can encourage others to participate. The motto is: I protect you, you protect me.
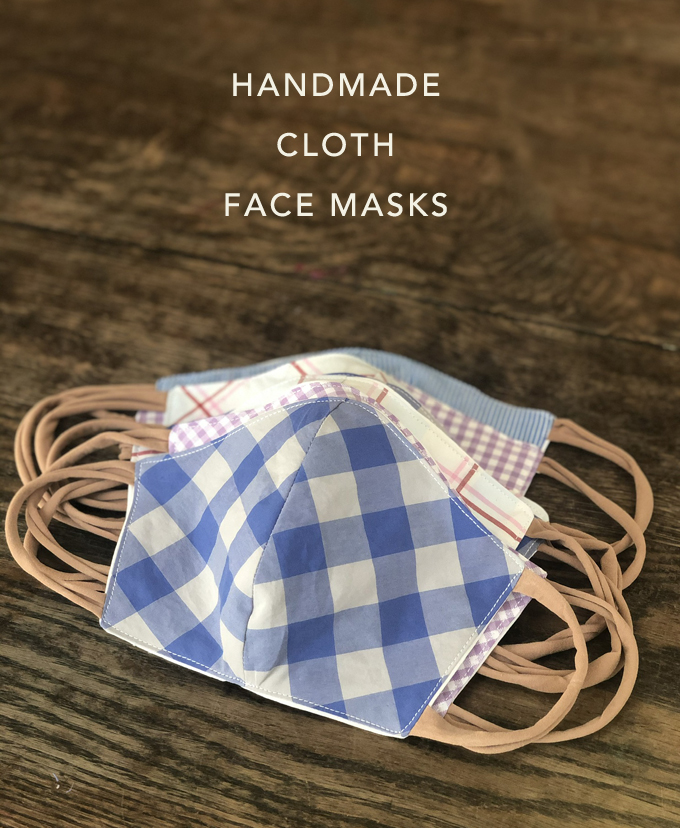
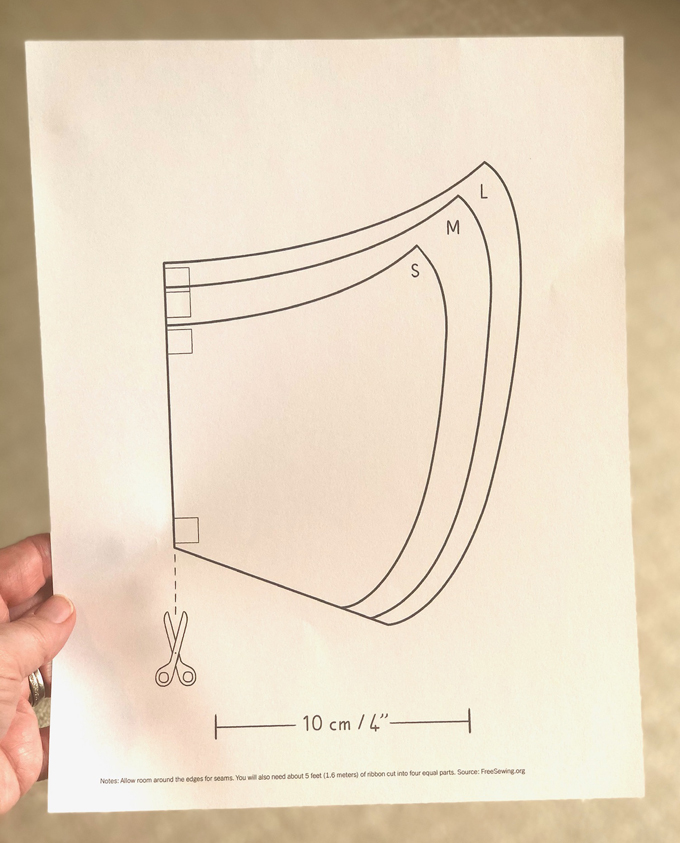
I used this New York Times pattern for my cloth face masks (here is the direct pattern link). And I used my husband’s old shirts because I know they are a high thread-count cotton, they are soft, and it’s a good repurposing idea for people who don’t have access to fabric. I also used an old pillowcase for the backs.
The best part about these masks is that I didn’t have to buy anything! Zero cost for a safer community.
Scroll to the bottom of this post for a video on the making of one handmade cloth mask.
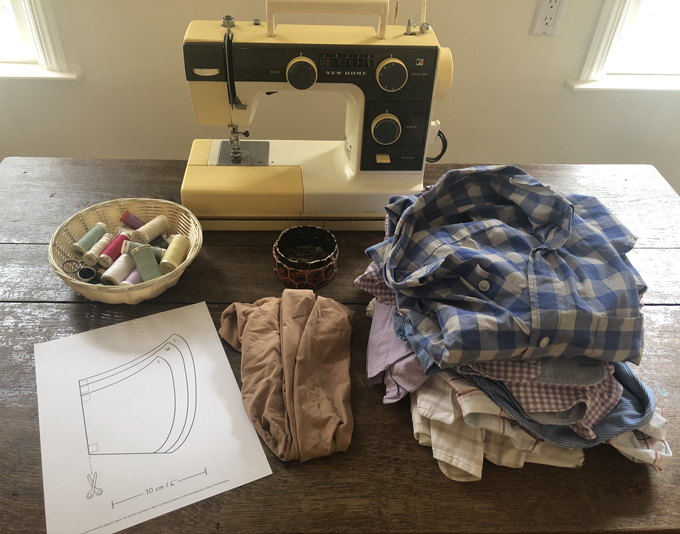
Supplies for Handmade Cloth Face Masks:
~ Sewing machine
~ Pattern
~ Fabric (best to use a tightly woven cotton)
~ Elastic (I cut up a pair of tights)
~ Pins
~ Iron
How to Make Cloth Face Masks:
1. Print out and cut out your pattern. I used the medium size which fits most of my family. It’s a little big for my 13yr old son, but if I shorten the elastic it will fit fine. And for my husband, longer elastic would have been better. The thing to adjust is the length of the elastic.
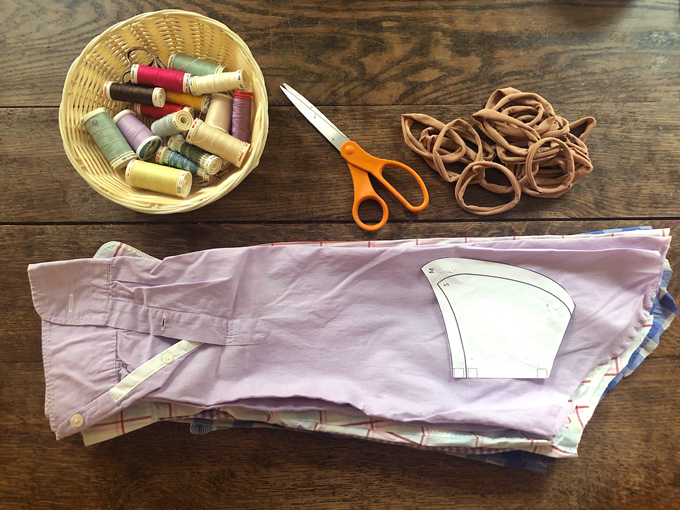
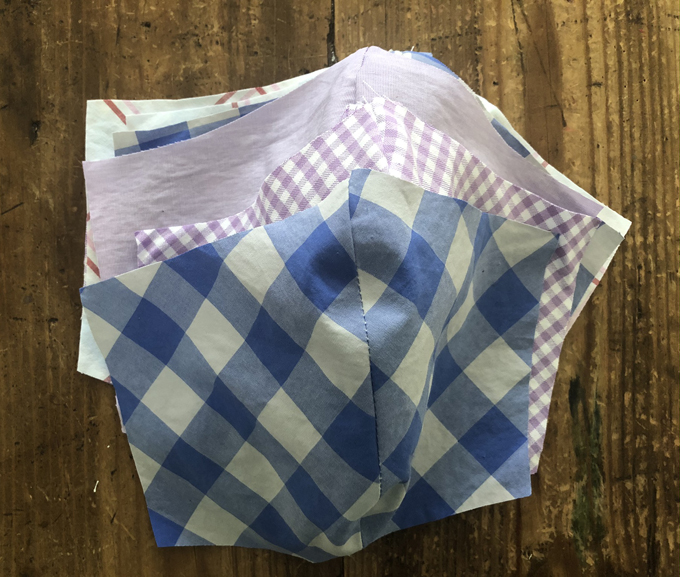
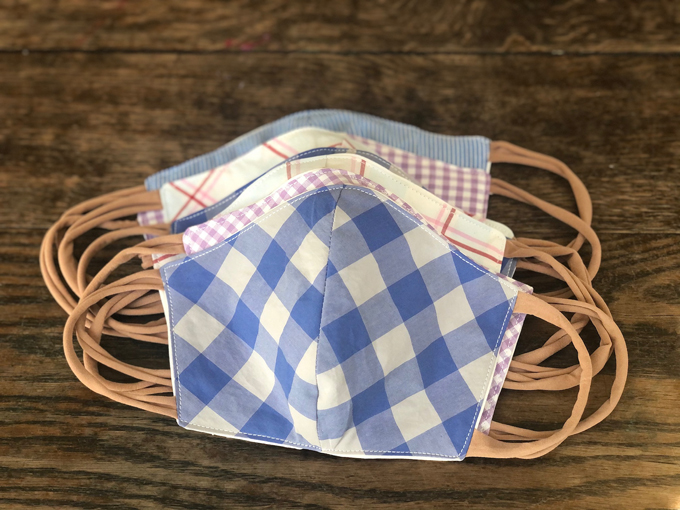
2. Cut out your pieces. I made 12 at the same time and used shirt sleeves. Cut the same amount of pieces for the inner material. Each mask will consist of 4 cut pieces.
3. Cut your elastic pieces by cutting strips of the tights. Each of my strips was about an inch wide. They roll up after you cut them.
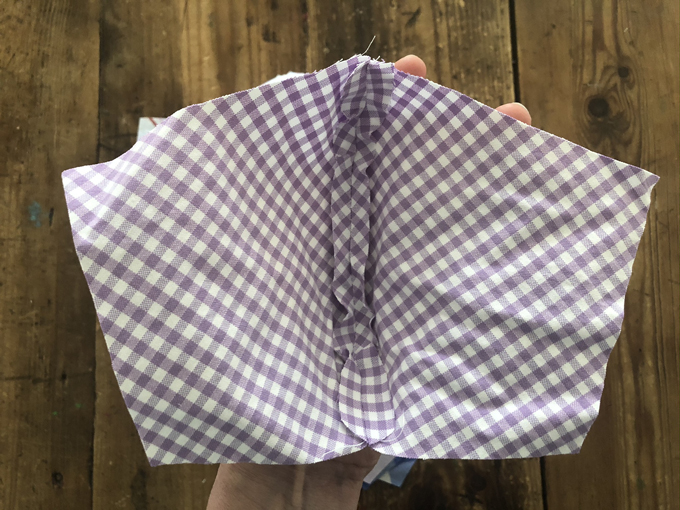
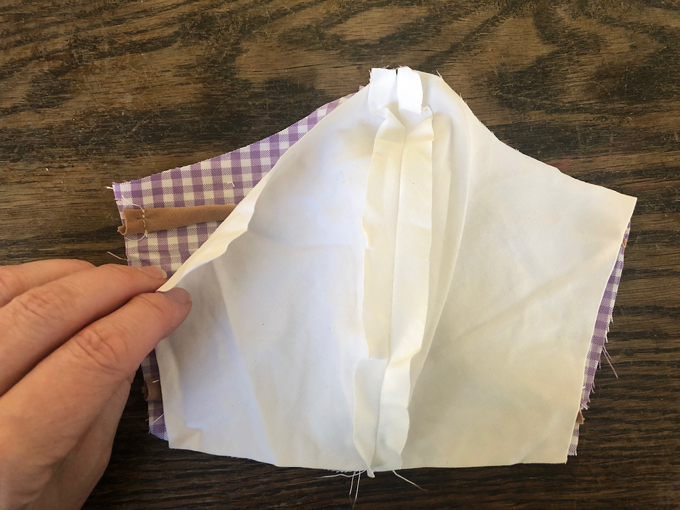
4. Sew the two pieces together on the long, curved side, so that it forms a sort-of cup. This cup will eventually cover your nose and mouth. Do this again for the inner fabric.
5. Iron the inside seams flat.

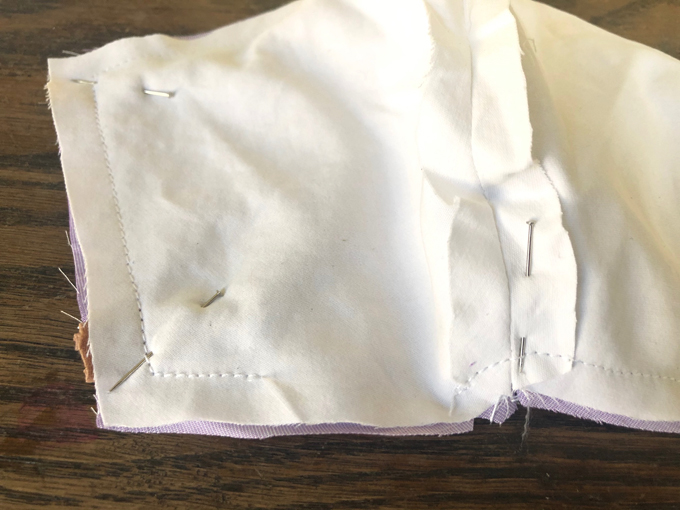
6. Attach the elastic. Pin them on the front of the mask, with the seam side down. Stitch them in place.
7. Pin the front and back together with the good sides facing each other, making sure that the elastics are on the inside.
8. Sew all the way around (you can sew over the pins if they are perpendicular), leaving a small space at the bottom where you can flip the mask inside-out.
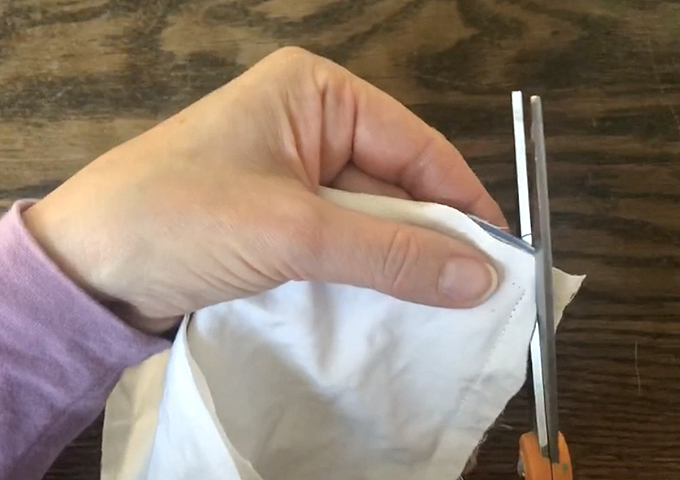
9. Trim the corners and the bulkier seam at the top.
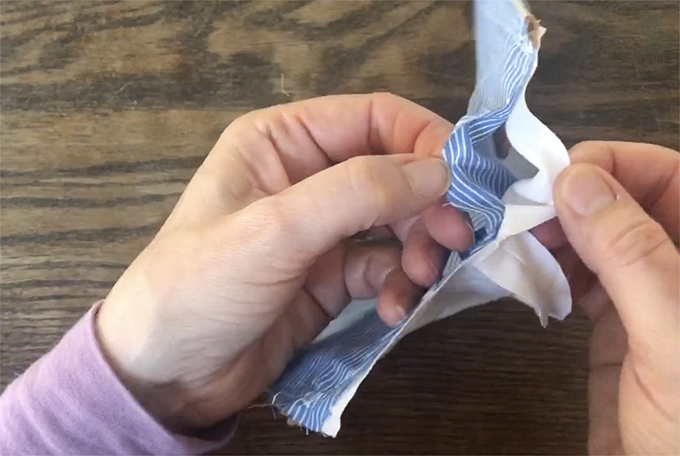
10. Flip the mask inside-out, make sure to pull out the corners.
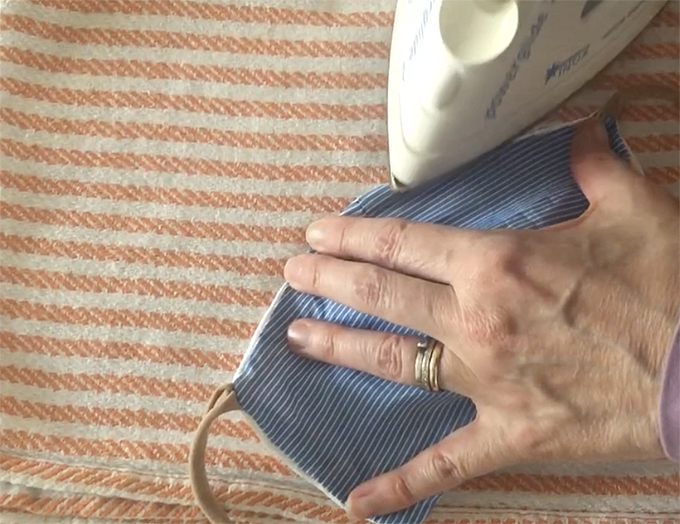
11. Iron the mask all the way around. Be careful not to run a hot iron over the stockings, they could singe since they are made of a synthetic material.
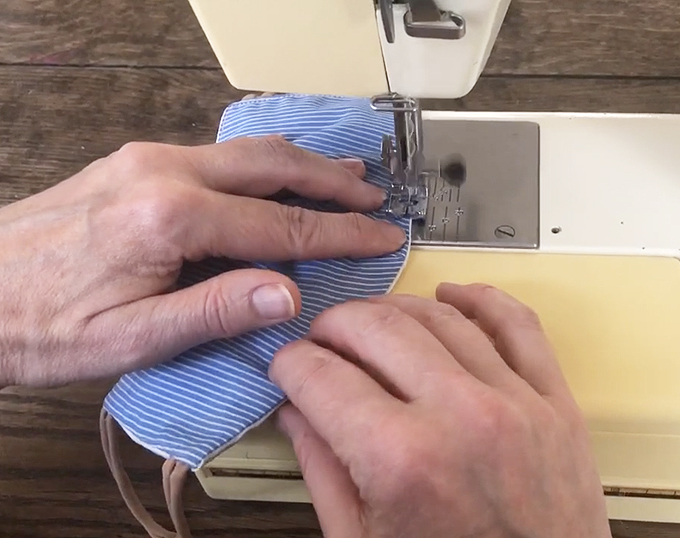
12. Top-stitch all the way around the mask. You are done!
Here is a movie on the making of one cloth mask.
My tip would be to make one mask first. You might need to adjust the size of the length of the elastic. Once you have figured all of that out, then go ahead and cut and sew all the rest. They don’t take that long to make, especially when making them all at once.
We have these masks in a basket by the door. And after we use one, we throw it in the laundry.
I hope this tutorial helps you! I am by no means an expert sewer. A beginner can do this. The trickiest part is paying attention. I sewed a few of them backwards and had to take them apart.
Let’s all do our part in flattening the curve and keeping each other safe and healthy.
A big thank you, also, to all the medical health professionals on the front line. You are heros.
xo, Bar
– – – – – – – – – – – – – – – – – – – –
Did you like this post? Here are some more fabric and sewing ideas:


What seam allowance did you use to sew together your mask?
hi, I used a quarter-inch seam allowance!
Hi Barbara
I’m in Melbourne, AUSTRALIA, where it’s been mandatory to wear masks since mid July. Australia’s Chief Medical Officers have recommended that we use triple-layered cloth face masks. I made my first three face masks today and added a 3rd layer to each, using the NYT pattern and your instructional video. Making the face masks was less daunting that I expected using yiur really helpful instructions and video.
Stay safe and well.
Rose
so glad to hear the pattern worked with 3 layers! thanks for sharing, and stay safe. xx Bar