Shannon from Hatch is back to bring us Part Three of her Dollhouse Camp series, featuring her Free Guide to Dollhouse Camp! She will answer all of your most urgent questions about running a Dollhouse Camp, and share with you her very own, personal guide to how she sets up her camp days. Be sure to catch Dollhouse Camp Part One and Part Two!
You can also print this Dollhouse Guide out by clicking below…
Dollhouse Camp Printable Guide
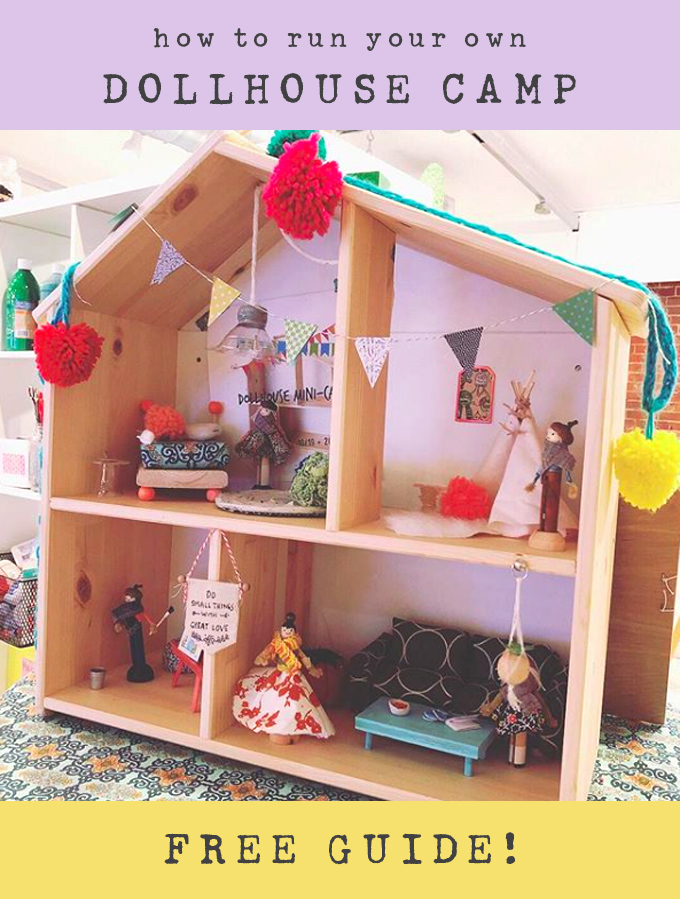
Hi! I can’t believe it’s almost summer again. Over the past year, I’ve received tons of questions and comments about Dollhouse Camp, so I wanted to help you out and answer some of your most burning questions before summer starts. Many of my art teacher friends have tried Dollhouse Camp in their own studios and have come up with AMAZING ideas of their own. I’ll be sharing suggestions and ideas from Samara of the Purple Twig, Kim of Beehive Art, Lisa of the Makery, Shannon from Forever After Art, Erin from Collage Collage, Lacey from Oh! Canary, and other art teachers, moms, and studio owners. We can ALL learn something from one another, so if you have tips and tricks you want to add, please comment below or over on my Instagram. I will continue to add to this post.
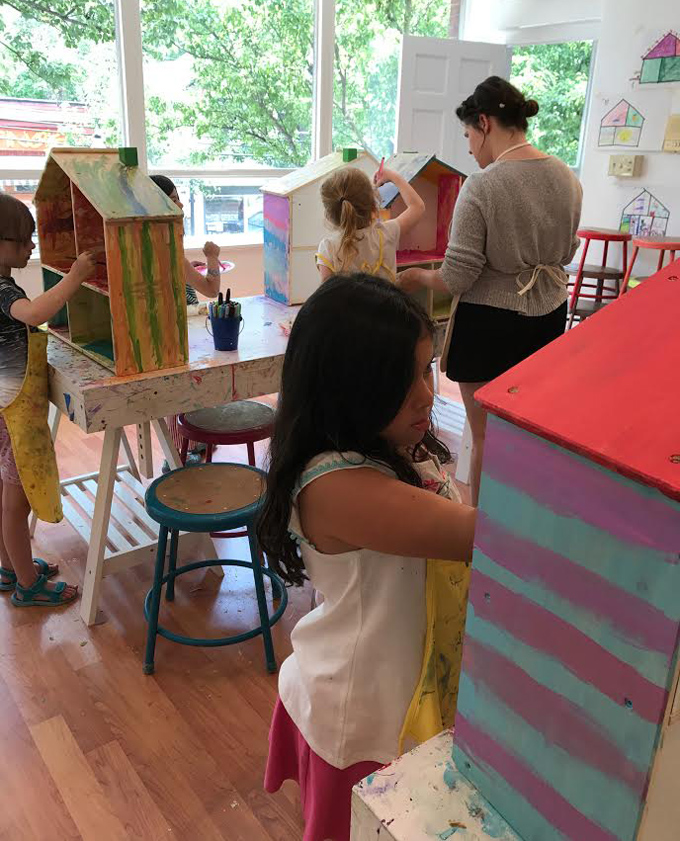
Busy busy in our studio last summer, with blueprints always on display. Ideas change, but its nice to see a plan in front of you.
Dollhouse Camp FAQ:
1. What do those kids do all day?
We offer 2 options for our campers: half day and full day. We take advantage of morning productivity by using that time for the bulk of the project work. The afternoons are spent on neighborhood walks, park play time, quiet down time in the studio, and self-directed dollhouse accessory making (I’m telling you, your kids will be endlessly inspired).
Here’s what our 5 day camp is going to look like this summer. I’m estimating you’ll spend about 3-4 hours on dollhouse stuff, and I’ve broken each day into specific materials focus with some time estimates.
Monday: PLANNING and PREPPING
~ Introductions and getting-to-know-you games. Your campers’ experience and environment are totally impacted by the quality of the relationships they are building – with you and with others. We love to play games to help kids feel more comfortable. Some of my favorites are “I’m going on a picnic…”, “Zip, Zap, Zop”, and “Mirrors”.
~ Next, you might want to show the kids their beautiful, blank dollhouses. And you know what? If buying and assembling the IKEA house isn’t for you, there are so many other options. You could build your own like Oh! Canary in NJ from wood (or enlisting help as I did when I was VERY pregnant with Calvin last summer). Or do what Shannon from Forever After Art did:
“The kids were 5-7 years old and loved “helping” put the houses together. I constructed most of them and left a few in the box and we did a group activity of putting three houses together.”
~ And you know what? If buying and assembling the IKEA house isn’t for you, there are so many other options. You could build your own like Oh! Canary in NJ from wood, you could use some shoe boxes or cardboard boxes stacked, you could even use a bookshelf if you’re doing this at home. My absolute favorite dollhouse as a kid was a giant entertainment center my parents put in my room. I was constantly personalizing it with stickers.
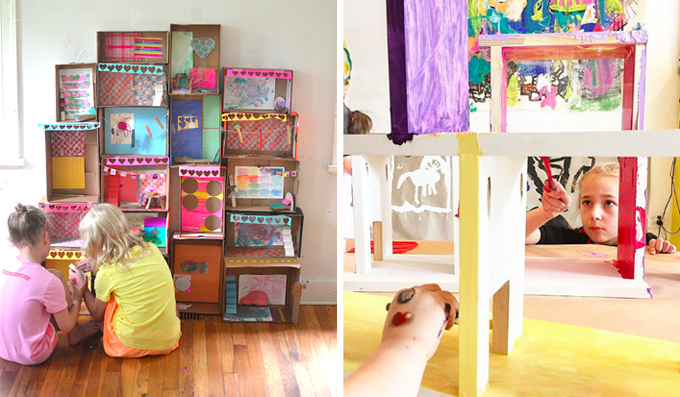
It’s not necessary to use the IKEA house option. Get creative with cardboard like Bar’s students did, or enlist in professional help (and support small business) like Oh! Canary in Maplewood, NJ.
~ Ok, the kids are totally inspired! Yes, kids, you do get to take these home at the end of the week.
~ Snack break!
~ Then it’s time for some planning. I’d say 20-30 minutes is a good amount of time. This year, I’m going to make a mini sketchbook for my kids to fill out. We’re going to start with characters. We’ll likely make clothespin characters with fabric scraps, yarn, and sharpies. Are your characters superheroes in a secret lair? Historians at an art museum? Your family? What do they look like? Invite kids to sketch their characters and all of the things they love, so they can reference this for later. For example, if your character loves bunnies and the color yellow, you might want to incorporate those into the house later on. This activity just gets the wheels turning.
~ Another break is in order! Early finishers might enjoy playing with play dough, constructing with blocks, magnatiles, or loose parts, sketching even more ideas, or just reading.
~ In Dollhouse Camp Part 1, I discuss our next activity, which is blueprinting. This step not only allows children to plan for their construction phase, but it allows you to really tap into what the kids want to make. You can use Monday night for gathering and collecting all the things they might need later on.
~ I’d say that’s plenty to do on DAY ONE!
Tuesday: PAINTING and PRINTING
~ Start the morning with painting. This activity might take about 40 minutes. I discuss this in Dollhouse Camp Part 1, also. To make this easier on yourself, pre select an assortment of acrylic paints so that you don’t have to spend too much time with color mixing. I like to squeeze acrylic paint onto tin foil covered paper plates for this, so clean up is FAST!
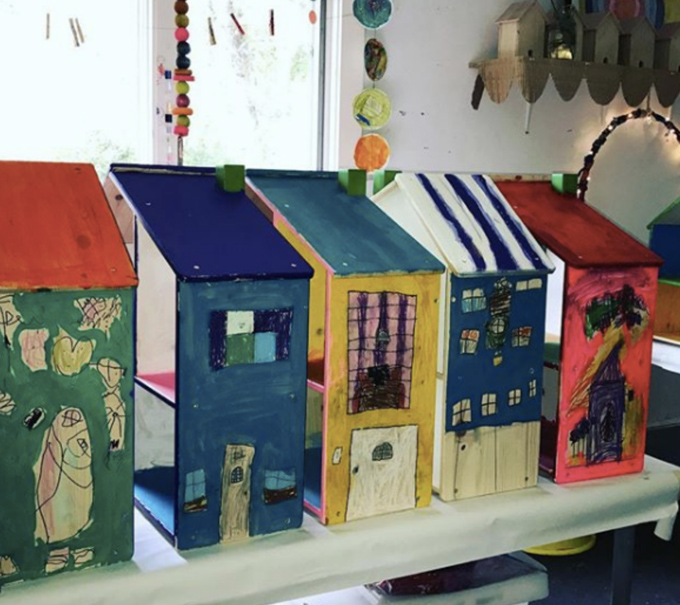
Photo from Beehive Art, where they drew with sharpies first, and then used paint and pastels to fill in blocks of color.
~ Take a snack break outside after painting. You’ll need it and the houses need some time to dry.
~ When you come back inside, its time to start thinking about wallpaper. This activity might take another 45 minutes, including popping each wallpaper piece into place and securing it. We decided to do this on just the back wall (the white melamine if you’re using IKEA). You’ll find more about this process in Dollhouse Part 2. There are a million different options for this! You could use actual wallpaper scraps, stamping, or even just draw designs. Make this step a million times easier by prepping the back wall pieces for your kids. Just make yourself a poster board template, trace it onto the paper you want to use, and cut for each kid.
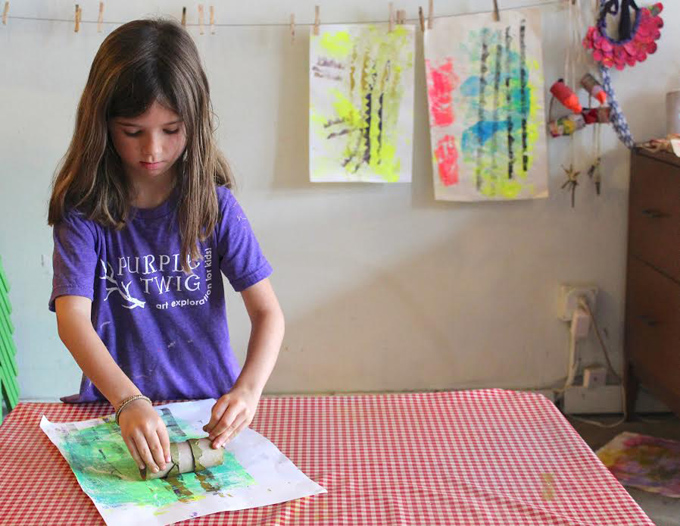
Here a child designer at Purple Twig prints her wallpaper.
Wednesday: CARDBOARD and CONSTRUCTION
We’ve been talking a lot about painting and printing and walls. So let’s switch it up a bit! Let’s do some construction! I’d say your kids might spend anywhere from 2-6 hours on building furniture and fixtures with plenty of breaks, of course. You can read about all the ideas I have for that in Dollhouse Camp Part 2, but here are a few tips to make this part as engaging and fun as possible.
- Start collecting now! Start chopping up 2-5 inch pieces of cardboard, paper board (cereal boxes and the like are way easier for kids to cut), saving all of your corks, pouch lids, and other plastic pieces, and tucking away interesting materials you find.
- Present these to kids in an aesthetically pleasing way. Ask the kids to take a walk around the materials, imagining what they could build or make with them. You might show them the tools they’ll have available.
- Enlist in adult help with glue-gun work and cutting tough materials.
- Use sharpies, paint sticks, and other dry materials to add color to cardboard.
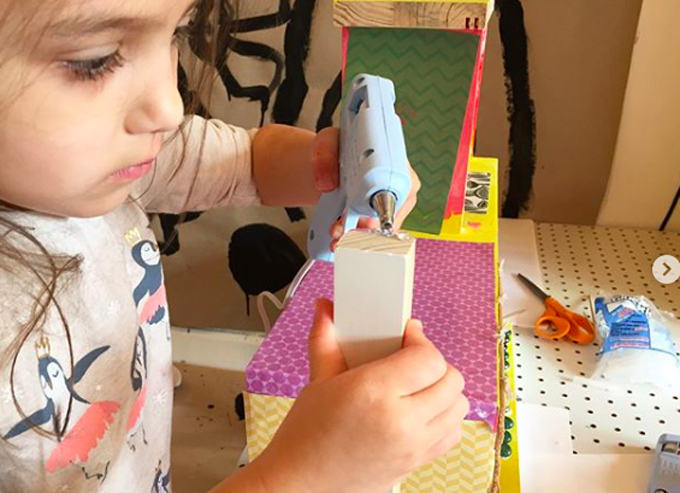
Talk to your kids about using tools safely and properly, and they can do most of the construction independently. Photo by Oh! Canary
Click below for…
Dollhouse Camp Printable Guide
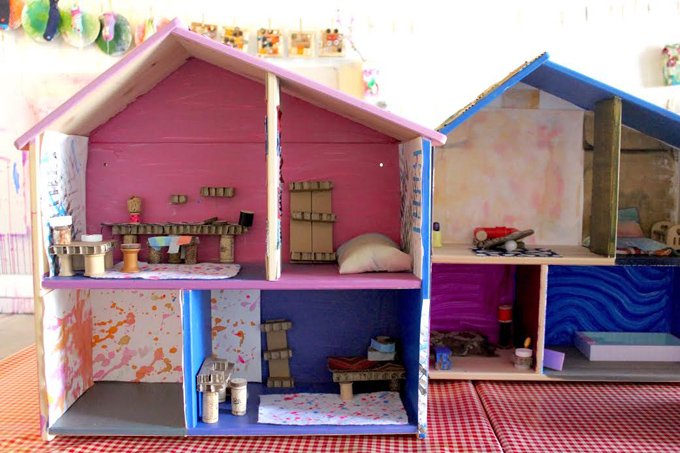
I see some of the IKEA box packaging used at Purple Twig for tiny shelves and other furniture. Every teacher I asked to share advice said re-using all the packaging is an absolute must!
Thursday: FABRIC and FIBERS
~ I’m betting your kids are going to want to keep building, so now that you’ve introduced the construction materials and tools, its OK to keep those out. These become the perfect early finisher activity. You may want to quickly show the kids some attaching techniques or other ideas that require little adult input or help, because we’re moving on to fabric and fibers today!
~ Where are we going to use fabric and fibers? Curtains, shower curtains, couch “cushions”, pillows, bedspreads, pet beds, pretend clothes hanging in closets (oh, I’m so making tiny hangers with wire this year), superhero capes. The options are limitless. I like to source a range of fabrics from a re-use store or thrift store, but you could also try asking an architecture or interior design firm for a few sample books. No need to buy anything expensive. Talk to kids about this, and have them cut fabric to their liking. You can also incorporate some fun trims and ribbons here, too. A lot of these ideas might get glued with hot glue, so have that adult helper on hand. If you have some fluff/stuffing, you can hot glue fabric around it to make soft pillows, bean bags and more. Depending on how into this your kids are, you can count on this taking an hour or a little more. Kids can always go back to sketching, blocks, magnatiles, books, or construction if they’ve finished with the fabric.
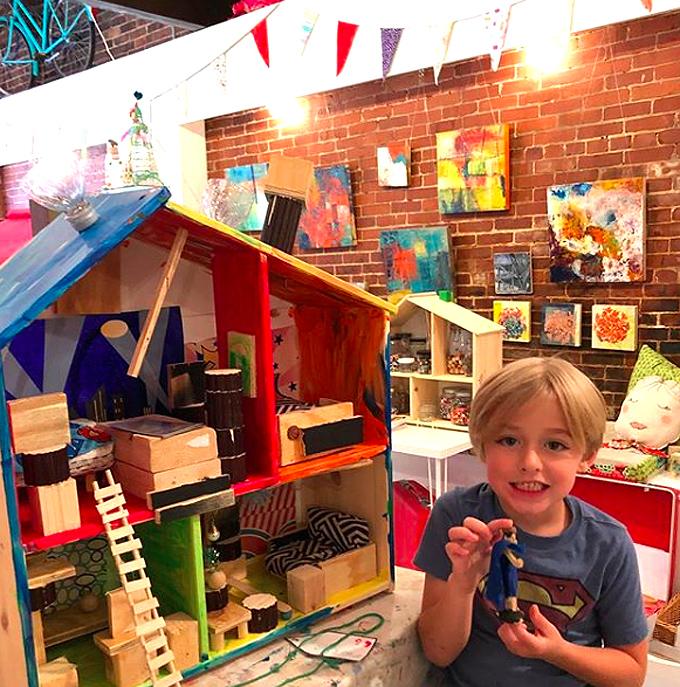
Coolest superhero lair I’ve ever seen! Notice how simple all of these materials are. This doesn’t have to be complicated! Your kids will amaze you! Did you know Home Depot and Lowes have a free lumber scrap section?! You do now! Photo from The Makery.
~ Take a nice long break because we’re learning a new technique next!
~ Why don’t you make mini cardboard looms like Bar’s group for some weaving? Your kids can make REAL rugs this way, and they’re learning a fun new technique. If you use thick yarn, you could probably get a couple mini weavings done in an hour or 1.5 hours, I’m guessing.
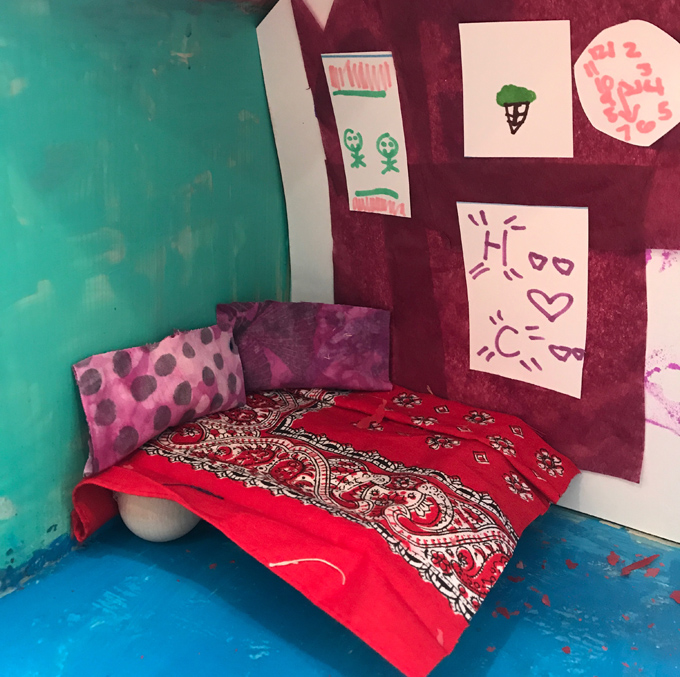
In this close up from my dollhouse camp, you can see a couple of pillows made by hot gluing fabric together and a quick bedspread draped over a piece of cardboard.
Friday: ALL THE DETAILS
~ At this point, I’m not going to lie, you’re going to be PRETTY exhausted. Start the morning easily by finally bringing characters to life – clothespins or wooden people, sharpies, the fabric scraps and yarn from yesterday are all you really need. Depending on how many characters your kids make, you might need 30 minutes to 1 hour for this.
~Take a break and take some time to revisit sketchbooks and plans from Monday. Do your characters need pets? Make some from cardboard or model magic and markers if you’re feeling fancy. Then look back to the blueprints. Do you need art on their walls? Mirrors? Lighting? I give lots of options for the details in Dollhouse Camp Part 2.
Some good materials to have on hand for this would be:
- sharpies/markers
- white cardstock cut into small pieces
- model magic and magic markers
- small wooden pieces
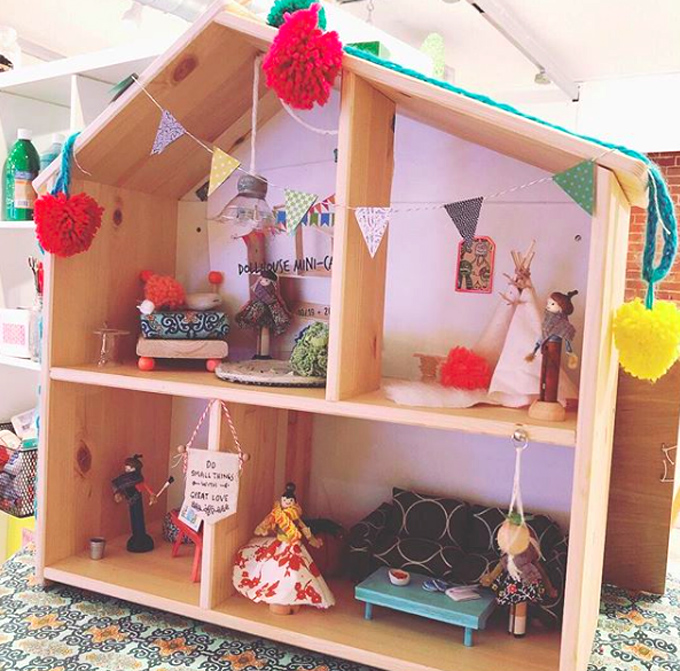
Look at all these magical fabrics and fibers from The Makery!
~ Looking back on our work is so important. You’re helping kids reflect and revise their ideas.
~ Here are a few great ideas from Lisa at the Makery:
“Tiny succulent clippings make great plants. Wooden beads for vases. Older kids made mini macrame hangers. Recycled water bottles became chandeliers: cut top of bottle, cut out petals, heat with a hair dryer to curl, hot glue clear beads for light bulb, attach wire or string to hang.”
~ Invite parents and friends for a neighborhood tour after lunch. Kids will be thrilled to share details about their creations, and it’s so fun to see what they’ve come up with. If each kid is going to be standing by their house for the tour, have them think about the 3 coolest features ahead of time.
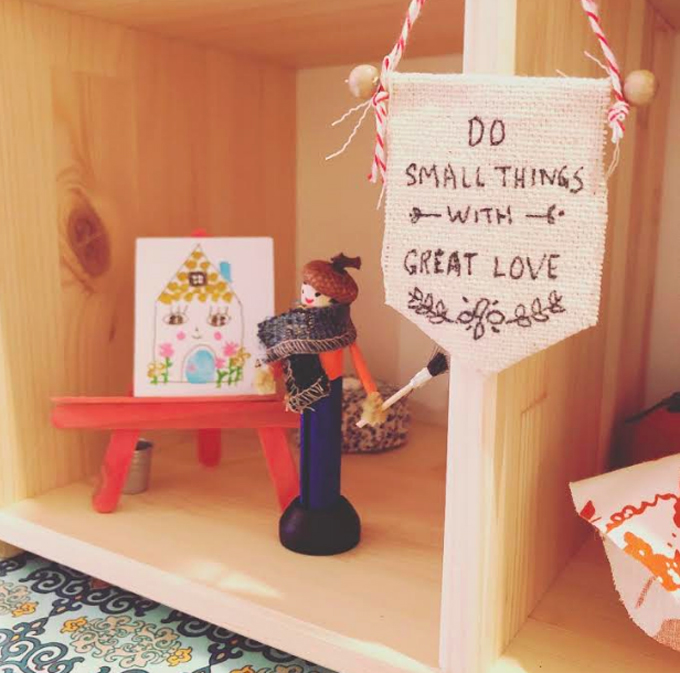
This little character from The Makery is amazing! Look at that acorn hat.
2. How can I cut costs during this camp?
Keep it simple. I’m telling you, the simpler the materials, the more creative your kid architects will be. Cardboard, plastic bits, packaging, egg cartons. These are all free. Just make sure you have enough!
Shop wisely. I visit our local Creative Reuse a lot. You might have one in your city, but if you don’t, be constantly on the lookout for savings on fabric, paint, brushes, and even wooden people. Ask local mom or crafting Facebook groups for these materials and you might be surprised how much you can find for cheap or even free! Thrift stores, garage sales, and church rummage sales are the BEST places to find vintage fabric, trim, and other little bits and baubles for these houses.
3. Does it have to be all dollhouse all the time?
The way I’ve organized it for you, you’re introducing new processes and materials daily, while maintaining access to the previous day’s supplies. So, I can pretty much guarantee this is going to be highly engaging. It’s always nice to keep an area dedicated to early finishers with some playdough, blocks, sketchbooks, and picture books.
And here’s a really good tip from Samara Caughey from Purple Twig:
“Have them play with their house for about 10 -15 minutes before starting the class or at the end of the class. Sometimes the kids were so excited to make the next thing when they came to class that we needed to play at the end of class instead. Allowing the kids to play together with the things they have made is great for building social skills as well as their own confidence.”
PLAY! Well of course!
Here are a few related sketchbook prompts:
- What does your character like to wear?
- If you had to make 5 mini artworks for your house, what would they look like?
- What’s in the fridge at your house?
- What pets does your character have?
- What would a garden or playground look like next to your house?
Here are some great picture books related to houses and architecture:
- Iggy Peck Architect
- Home by Carson Ellis
- Roberto the Insect Architect
- If I Built a House
- Young Frank Architect
- Architecture According to Pigeons
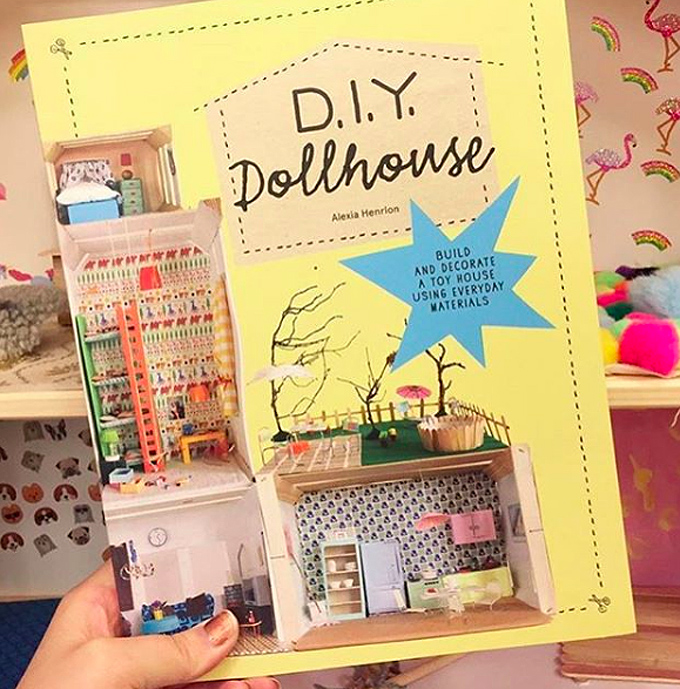
I have to get my hands on this book, recommended by both Lisa from The Makery and Erin from Collage Collage.
Here are some prompts and invitations for building and constructing:
- Make a structure using only toothpicks and gum drops
- Use molds to turn play dough or kinetic sand into bricks
- Build using only masking tape and cardboard or paper towel tubes
- Stack egg cartons cut and whole and use tape or pipecleaners to attach
- Build a fort or teepee of sticks together, and have kids paint
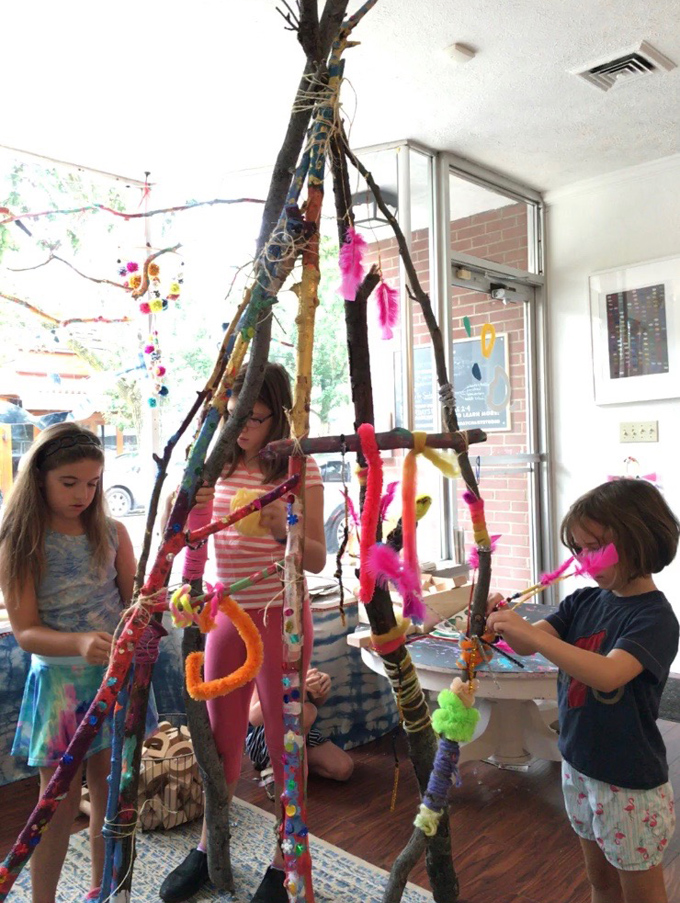
This is an amazing tee-pee we constructed at Hatch.
Here are some quick art invitations that are fun and easy if your kids still want to get creative but need a dollhouse break:
- Beading with pipecleaners
- Watercolor and oil pastels
- Dry erase boards and markers
- Sidewalk chalk and spray bottles
- Dough, slime, or floam
- Or check out any of the easy and amazing ideas from Bar’s 100 Days challenge.
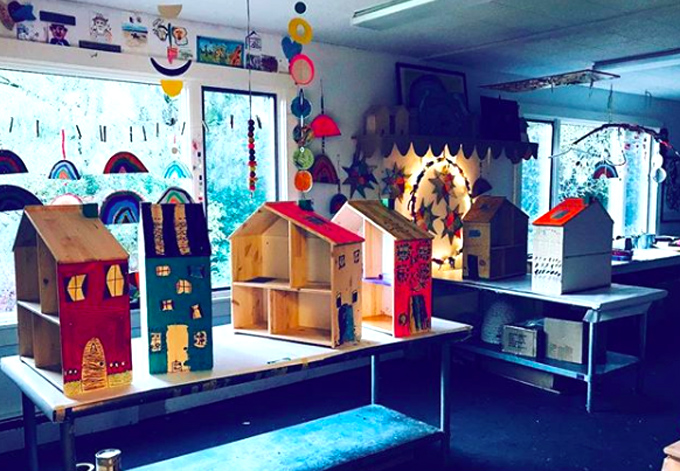
Dollhouses resting for the night at Beehive Art in Massachusetts.
Click below for…
Dollhouse Camp Printable Guide
Friends, we are art teachers and parents. We are the people who are responsible for nurturing creativity and problem solving in our children. You DO have the capacity and expertise to allow your child to lead the way in this experience, to show you all they can do with their hands and minds. Let us continue to share good ideas and how best to make those ideas happen. Each of us brings something special to this community and we are all in this together! Enjoy these tips but just know that however you approach this project, you really can’t go wrong.
XO Shannon
– – – – – – – – – – – – – – – – – – –
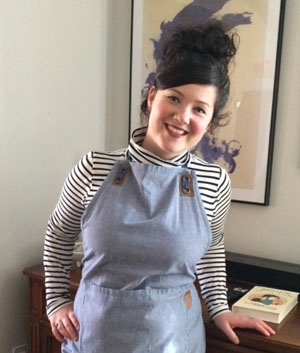
A little about Shannon:
Shannon Merenstein is the owner, creative director, and lead educator at Hatch. She is endlessly inspired by the creativity, joy, and imagination of children. Shannon returned to the wonderful city of Pittsburgh after graduation from Pratt Institute, where she studied painting and art education. For the past 8 years, Shannon has been an art educator and instructional coach at the Environmental Charter School in Pittsburgh, all the while dreaming up and testing out new and creative art projects for her children. When she became a new mom last March, the inspiration for Hatch started to emerge. Looking for creativity-building experiences for her son, Graham, Shannon saw a need for a studio like Hatch in the city. When they stumbled upon a former gallery in Point Breeze, Shannon and her husband, Cole, envisioned a beautiful space to inspire and activate creative thinking! Part art-making studio, part community-gathering space, Hatch aspires to be a special place in Pittsburgh for people of all ages to explore, create, and imagine.
Follow Shannon on Facebook and her beautiful Instagram.


Wow! you guys are amazing and super generous!!!!!!
Thank you for sharing all the knowledge, super grateful!!!!
I’ve been wanting to try this amazing project but didn’t know where or how to start!
Thank you, thank you, thank you!!!!!!
you are so welcome, maria!! if you do the camp, and are on Instagram, tag me and shannon at @artbarblog and @hatchartstudio. and also use the hashtag #dollhousecamp2018. I hope it is a huge success, let us know if you have any questions!! xx Bar
My daughter loved playing with her dollhouse since she was 2 and I was thinking to do this in my upcoming atelier because I am sure it will be an amazing experience for the kids!! Found this article of yours and more importantly found YOU as an amazing art blogger whom I can draw inspiration from! 🙂 This article was really helpful in planning for a bigger group. So much easier if its for your kid and nieces. So thank you for sharing, this gives me perspective on how best we can apply this in our future atelier xxx
Thank you so much ! I have been wanting to do this with my daughter for months and did not where to start. It’s definitely on the calendar for next vacation here in France !