• Skip to primary navigation
  • Skip to main content
  • Skip to primary sidebar
  • Skip to footer

ARTBAR

raising creative thinkers

  • MY BOOKS
    • Art Workshop for Children
    • Cardboard Creations
  • ART SUPPLIES
  • SHOP
    • Art Bar on Etsy
    • Art Class Poster
  • ABOUT
  • Nav Social Menu

    • Facebook
    • Instagram
    • Pinterest

Collagraph Printmaking with Kids using Wooden Blocks

October 4, 2018 by Barbara Rucci 17 Comments

37097 shares
  • Facebook8

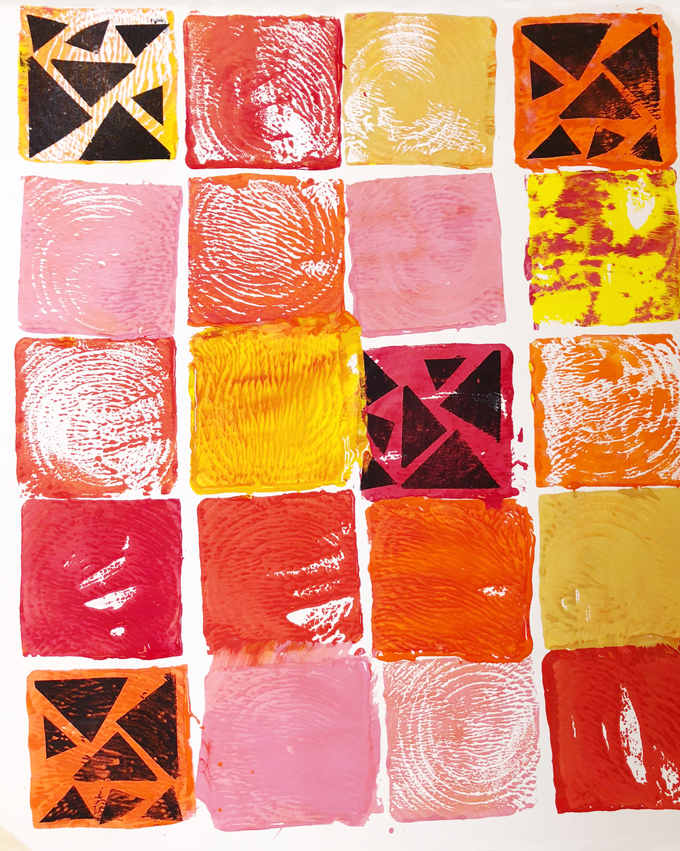
Jennifer from Small Hands Big Art is back! She is sharing this GORGEOUS collagraph printmaking project that she did with her students. They used big wooden blocks and designed these absolutely stunning quilts using warm and cool colors. Can we just call Jennifer the queen of color, please? Let’s find out how she made this all happen!

(And check out Jennifer’s layered abstract paintings which also used warm and cool colors and was the most popular post last summer!)

Collagraph printing with kids using wooden blocks to create a quilt pattern.

Here is Jennifer…

We love a good printmaking project!  This no-fail process involves the perfect mix of pattern, shape, repetition, color theory, composition and movement.

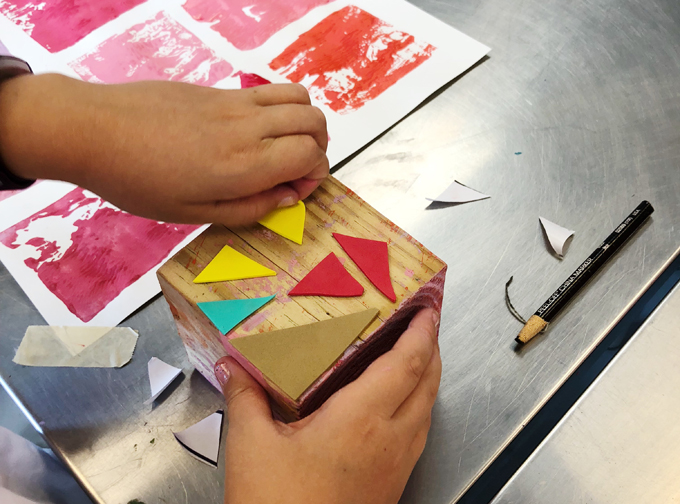
At a glance, you might think this is a “block printing” project because we literally used blocks. But don’t be fooled! With real block printing (usually using linoleum) the negative space gets carved out with tools. The technique we used here is actually called collagraph printmaking because we created a raised design by applying foam shapes to the surface of the wood.

When we do a printmaking project, we always start by introducing the definition of printmaking at a level that the kids can understand (i.e. “making a stamp”). For this project, the printed squares joined together in a grid pattern that reminded us of a fabric quilt, so we took a moment to talk about quilting and why the repeating patterns of a quilt are so visually pleasing.

Collagraph printing with kids using wooden blocks to create a quilt pattern.

[ I am a participant in the Amazon Services LLC Associates Program, an affiliate advertising program designed to provide a means for us to earn small fees at no cost to you by linking to Amazon.com and affiliated sites. ]

Supplies for Collagraph Printmaking with Blocks:

~ Large wooden blocks (we purchased 4″ x 4″ x 8″ wood posts at our local lumberyard, and cut them into 4″ x 4″ cubes, or you can purchase blocks on Amazon or through Casey’s)

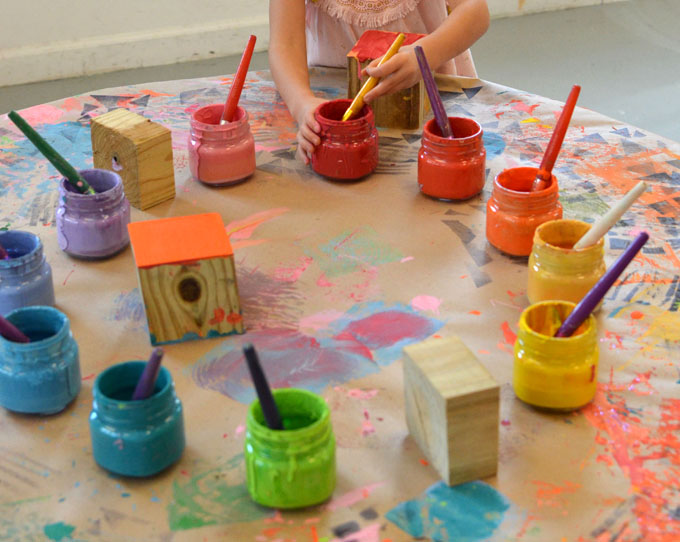
~ Tempera paints pre-mixed in warm and cool colors (we only use high quality tempera paint with a super good opacity, viscosity, and pigment — these brands are best: RAS or Blick)

~ Brushes

~ Large format paper (we used a heavy weight 90# sulphite drawing paper – this link is to 9 x 12 but we used 12 x 18)

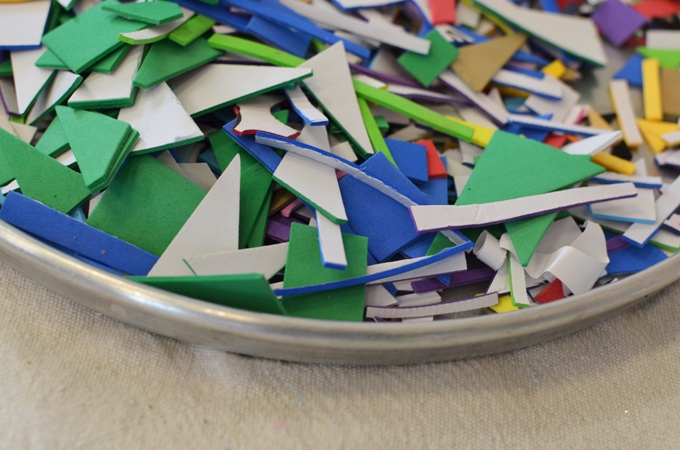
~ Self-adhesive foam (we pre-cut a variety of shapes, but kids could cut their own shapes if time permitted)

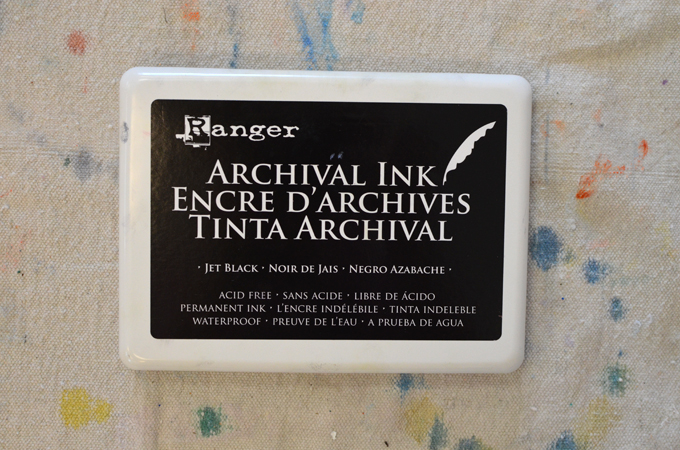
~ Black archival ink pad (big enough to accommodate blocks)

Collagraph printing with kids using wooden blocks to create a quilt pattern.

Collagraph printing with kids using wooden blocks to create a quilt pattern.

Collagraph printing with kids using wooden blocks to create a quilt pattern.

Steps to Making Collagraph prints:

PART ONE

1. Tape the paper down to the table or floor to keep it from wiggling.

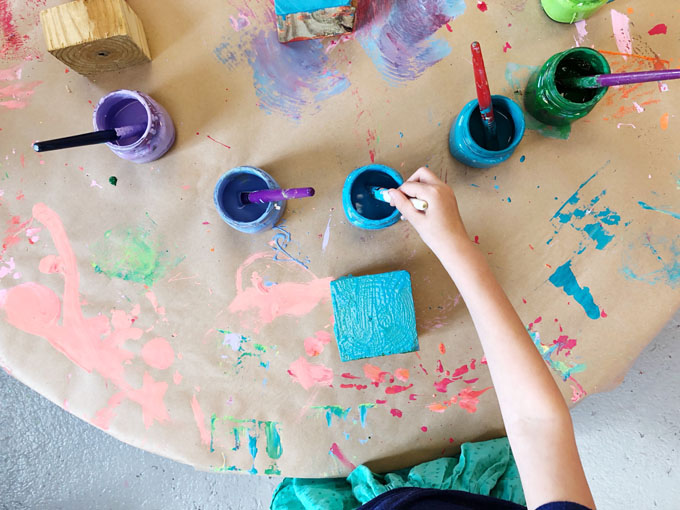
2. Choose a color palette of either warm or cool colors, and stick to it throughout the process.

Collagraph printing with kids using wooden blocks to create a quilt pattern.

Collagraph printing with kids using wooden blocks to create a quilt pattern.

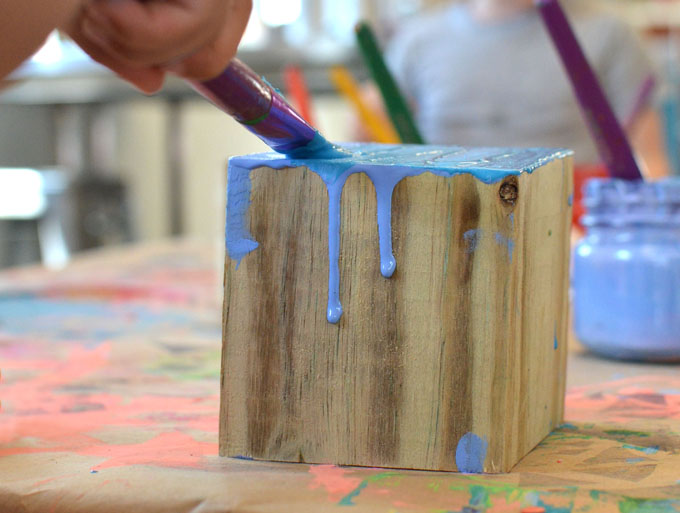
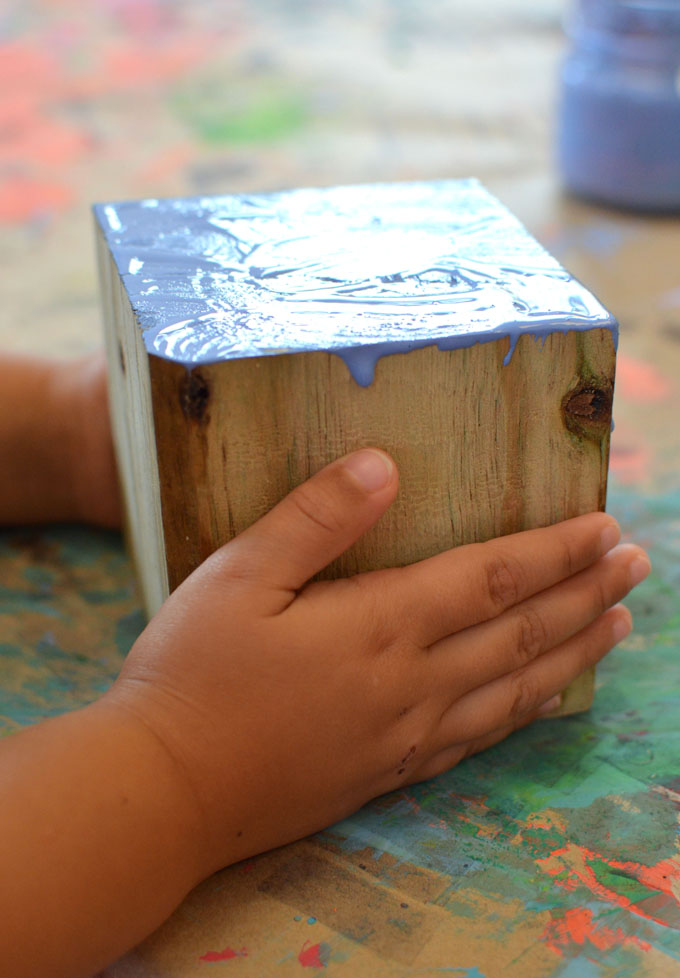
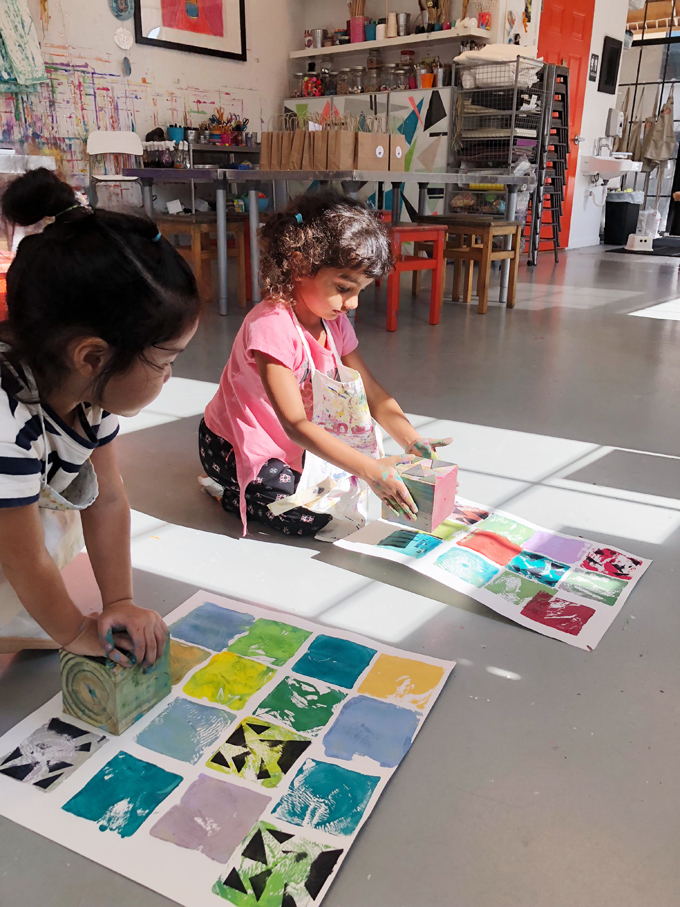
3. Paint one side of of the block, and then transfer the paint onto the paper. We set up a painting table and a printmaking table, so there was a lot of movement for this project!

Collagraph printing with kids using wooden blocks to create a quilt pattern.

4. Apply paint again using a different color from the same family on top of the same side that was just painted. We applied paint over and over again on a single side of the block for a number of reasons. The block gets too slippery if all the sides are painted (also the foam sticker shapes won’t adhere if the block is wet). And by layering the paints, the print is so much more vibrant because you can see several colors mingling together!

Collagraph printing with kids using wooden blocks to create a quilt pattern.

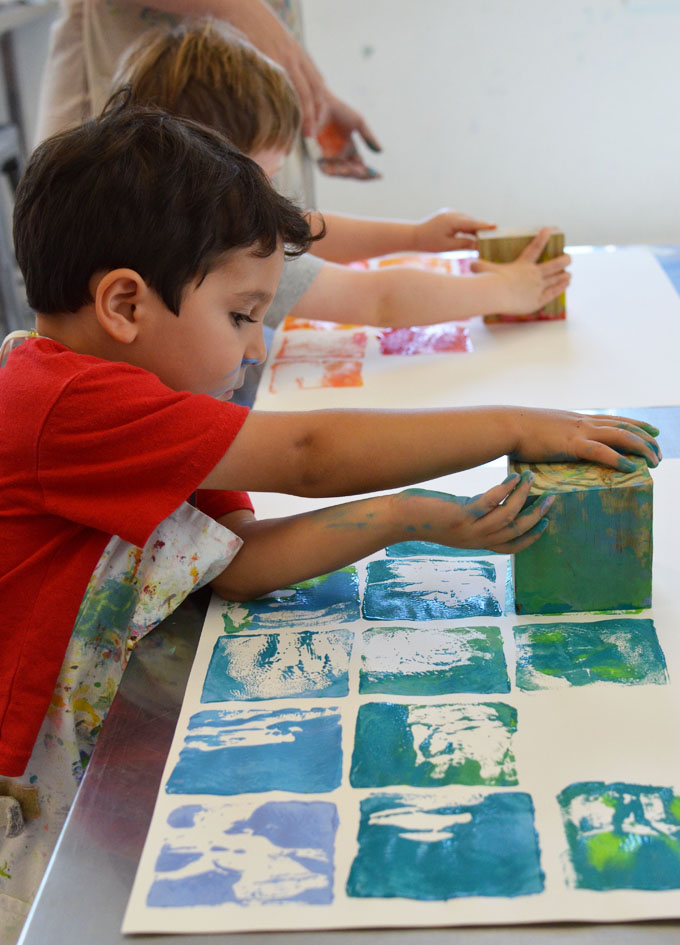
5. Repeat the process of printing one square at a time until the full quilt is completed.

The kids work at really different paces on this project.  Some fill a giant sheet of paper fairly quickly; others are more meticulous and only print a few rows & columns. In those cases, we just simply trim the excess paper when they reach a good stopping point.

Collagraph printing with kids using wooden blocks to create a quilt pattern.

PART TWO

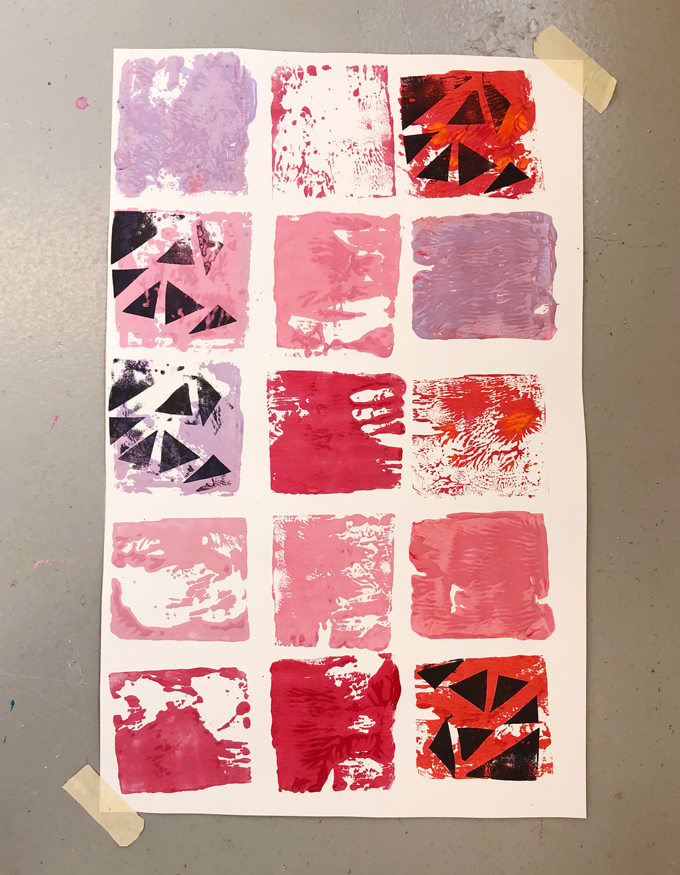
6.  Next, each student begins assembling patterns using self-adhesive foam shapes. (If the blocks are super wet, take a quick minute to dry them off with a paper towel.) We challenged them to design a repeating pattern on one side of the block. Thinking through repetition, visual balance, and visual interest, each student makes two to four unique patterns.

Collagraph printing with kids using wooden blocks to create a quilt pattern.

Collagraph printing with kids using wooden blocks to create a quilt pattern.

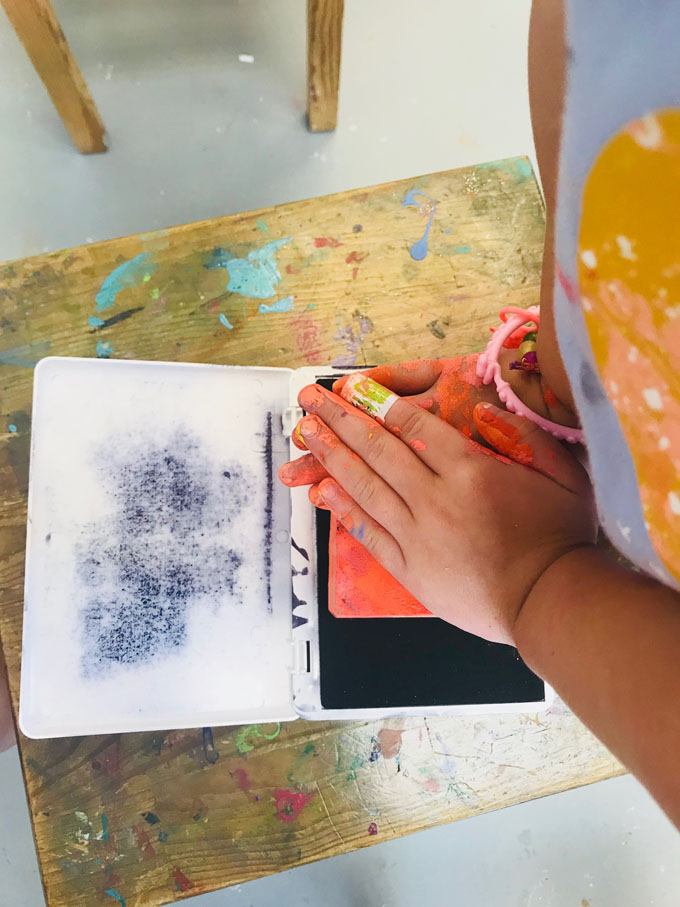
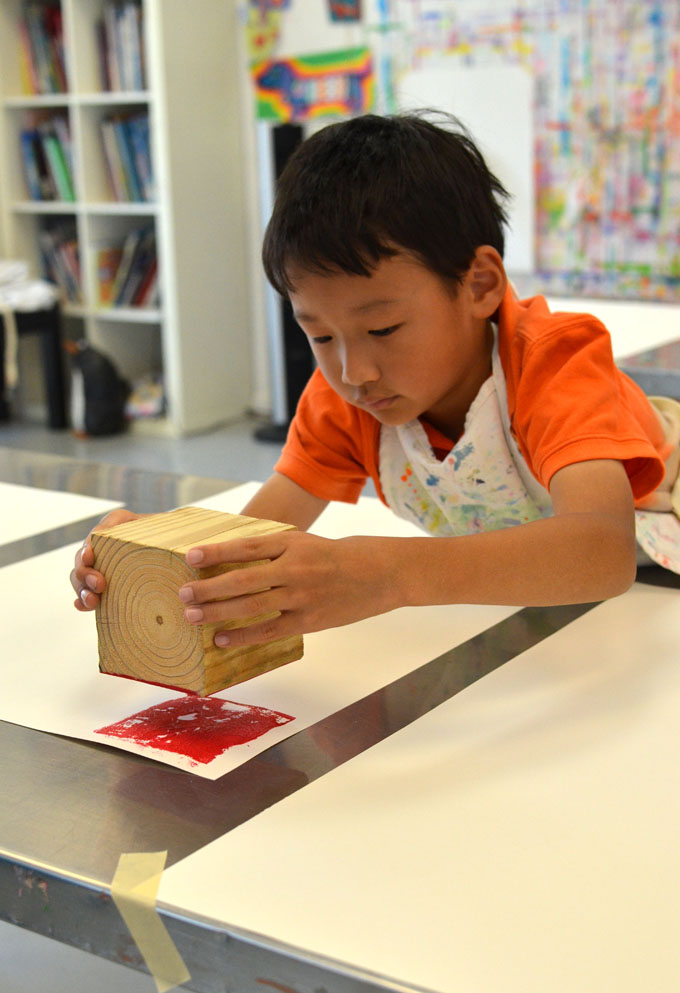
7. Press the block firmly on a black ink pad to pick up a lot of color. Select squares that are mostly dry to apply the print. We coached them to spread the stamped designs randomly on their squares (little ones will want to just do them all side by side). 

Collagraph printing with kids using wooden blocks to create a quilt pattern.

Collagraph printing with kids using wooden blocks to create a quilt pattern.

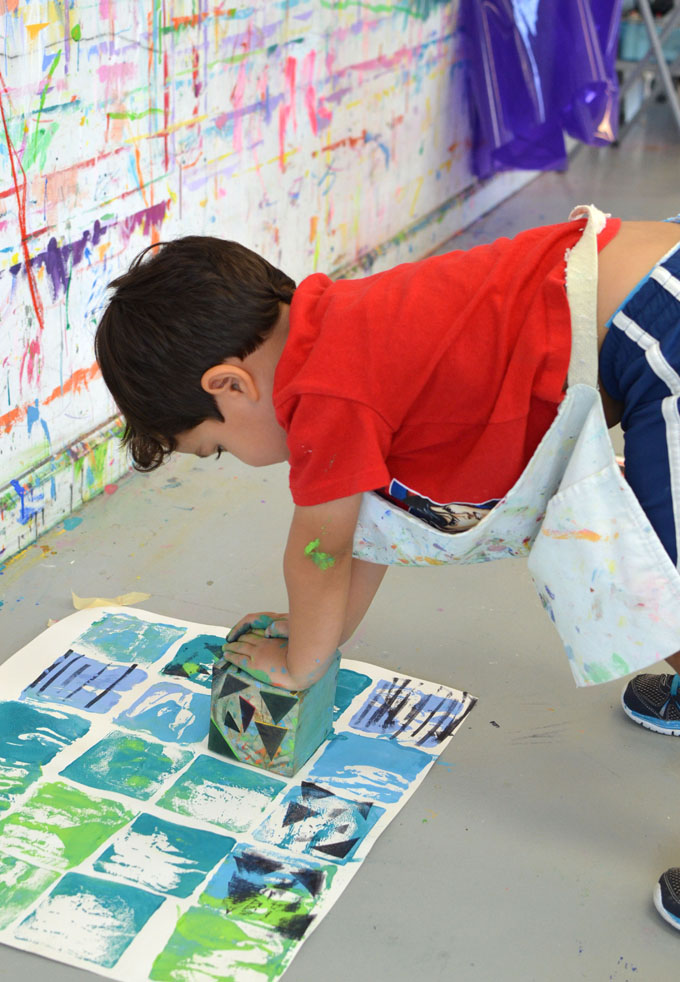
This part is fun and very physical as it takes all of their strength (and sometimes full body weight) to transfer the stamped print.

Collagraph printing with kids using wooden blocks to create a quilt pattern.

We just love the way the paint captures the grain of the wood in the print!

Collagraph printing with kids using wooden blocks to create a quilt pattern.

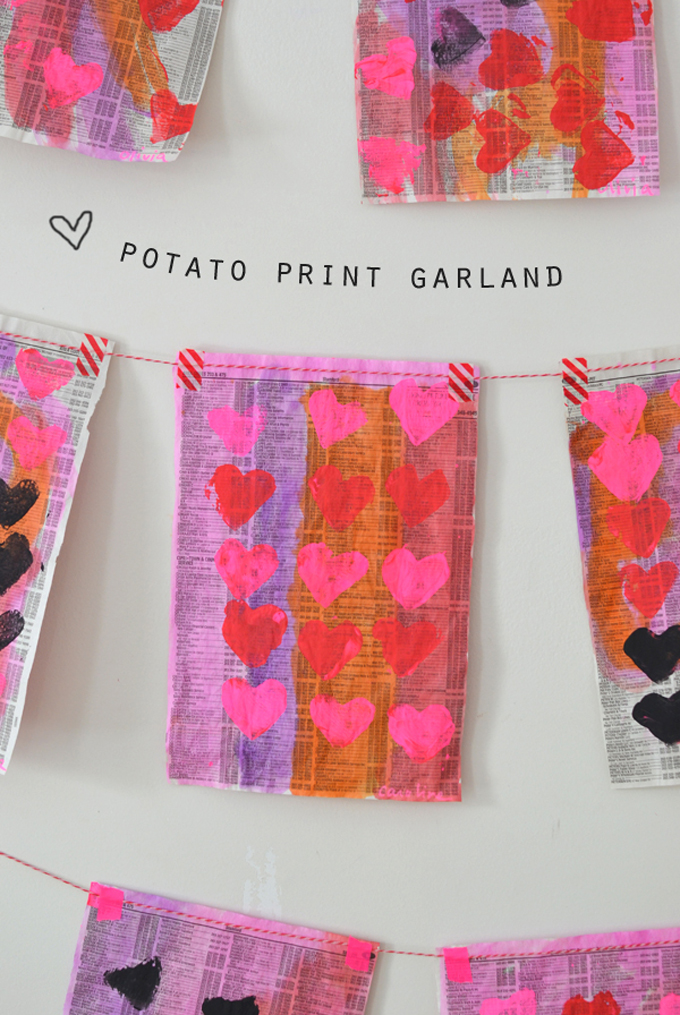
This would be an awesome project to make on fabric, by the way! Just take an old sheet and tear it into a square and use acrylic paint instead of tempera paint.

We loved these so much, we kept their printing blocks so we could turn them into another project. So keep an eye out for those!

~ Jennifer

_ _ _ _ _ _ _ _ _ _ _ _ _ _ _ _ _ _ _ _

Jennifer Bryant from Small Hands Big Art in Charlotte, North Carolina

A little about Jennifer:

As the founder of small hands big art, Jennifer learned at an early age the power that art and creative (albeit deviant) thinking can have. Other than that one time she strategically scrawled “Jenny is a Pig!” on her bedroom door & let her brother take the blame, some of her fondest childhood memories involve creating art.

A college art scholarship naturally led to a 17 year career in financial services compliance, where she memorized SEC regulations and honed invaluable skills implementing out-of-the box enterprise deliverables & driving for consensus. (huh??) After stepping on that little shelf thingy on the top of the corporate ladder labeled “Not a Step,” she’s spent the last nine years simply enjoying what inspires her most: Children & art.

Jennifer opened her studio 2009 to provide fine art enrichment programs for children & young adults up to age 14, through age and developmentally appropriate classes, parties, camps and workshops.

Follow Jennifer on Instagram (you will be blown away) and Facebook.

– – – – – – – – – – – – – – – – – – – –

Did you like this post? Here are some more printmaking projects for kids:

Kids etch into styrofoam sheets that are then rolled with paint and printed.

Styrofoam Printing

Kids use potato shapes to stamp a pattern onto phone book paper.

Potato Stamp Printing

Cover a can with bubble wrap to print some DIY wrapping paper.

Bubble Wrap Printing

Filed Under: Open-ended Crafts for Kids Tagged With: ink pad, quilt, printing, wooden blocks, printmaking, collagraph, foam stickers

Previous Post: « Quick and Easy Pom-pom Mobile
Next Post: Leaf Painting with Kids »

Reader Interactions

Comments

  1. Missy

    October 5, 2018 at 11:19 pm

    Hmmm. This would be neat to try with fabric, then incorporate the prints into a quilt or placemat.

    Reply
    • Barbara Rucci

      October 11, 2018 at 12:47 pm

      yes, that’s a great idea!!

      Reply
  2. Denise G Smith

    November 18, 2018 at 6:12 pm

    Love this! I sometimes struggle with collagraph printing, but this is great. I can’t wait to do this with my young students!

    Reply
  3. Sharon GOforth

    April 3, 2019 at 3:25 pm

    I teach “No-fail” art with senior adults. I appreciate your creativity and clear instructions. Thank you for sharing

    Reply
  4. Megan

    August 29, 2019 at 5:12 pm

    What age did you do this with? Was it done all in one session? How long are your art classes. I teach k-5 45 minutes once per week. I am wondering if it is a one or two week lesson.

    Reply
    • Barbara Rucci

      September 27, 2019 at 10:40 am

      hi Megan, I’ll ask Jennifer from Small Hands Big Art if she can answer this question. and I’ll circle back. thanks! xx Bar

      Reply
    • Barbara Rucci

      September 30, 2019 at 11:37 am

      I’m back – here is Jennifer from Small Hands Big Art: “We actually accomplished these in a 1 hour class period, but they were small classes under 10 kids. There is a lot of movement and back and forth to ink and stamp the blocks, etc. But once you get going, it’s just a lot of repetition and that part goes fairly fast. You could also adjust the paper size to be smaller for shorter class periods.” Hope this helps! xx Bar

      Reply
  5. Shannon M

    February 6, 2020 at 8:03 am

    great stuff! thanks for sharing 🙂

    Reply
  6. Celeste

    August 11, 2020 at 6:31 am

    Hi, love this idea! The paper link isn’t available any longer. Can you tell me what size paper you used for this activity? Thanks!

    Reply
    • Barbara Rucci

      August 13, 2020 at 5:36 pm

      hi Celeste, sorry about that! Here is a link to the same paper but in 9X12. I would recommend the 12X18 but right now they are only selling that in the 90 lb weight in packets of 500 which is too much. So you can use this 9X12 size and just use smaller blocks. I hope this helps! xx Bar Link: https://amzn.to/34ao6B5

      Reply
    • Barbara Rucci

      August 13, 2020 at 5:38 pm

      oh and PS: I fixed the link 🙂

      Reply
  7. Rachelle Moes

    June 7, 2021 at 12:40 pm

    Could you please tell me where you got those flat-bottomed paint jars? And the brushes? I teach collaborative painting with young children, and having a sturdy paint and brush holder is ideal. Thank you.

    Reply
  8. Maria

    August 18, 2021 at 3:47 am

    You really would not recommend using acrylic paint for the project?
    Is the only supply I have and I would not want to buy more.

    Thanks for all the inspiration you are providing in this website!!!

    Reply
    • Barbara Rucci

      October 4, 2021 at 6:50 am

      Hi Maria, I think the author (my friend, Jen) is saying that acrylics are too thick and might dry too quickly. But maybe if you water them down a bit you could try them! Good luck! ~ Bar

      Reply

Trackbacks

  1. Collagraph Printmaking with Kids Using Wooden Blocks – New Studio says:
    January 7, 2019 at 1:56 am

    […] friend Bar Rucci from Art Bar Blog shared it on her blog (thanks Bar!) – go to her blog to read the full tutorial + lots of […]

    Reply
  2. 20+ Indoor Toddler Activities That Will Save Your Sanity - YES! says:
    October 21, 2019 at 3:31 am

    […] Woodblock Printing by Small Hands Big Art via Artbar […]

    Reply
  3. Printmaking: Create Patterns with DIY Foam Stamps - ARTBAR says:
    July 26, 2025 at 7:41 am

    […] Block Printing with StyrofoamCollagraph Printing with Wooden BlocksStyrofoam Printing with […]

    Reply

Leave a Reply Cancel reply

Your email address will not be published. Required fields are marked *

Primary Sidebar

The Creativity Project
RESOURCE FOR TEACHERS
Join our course!
Your subscription could not be saved. Please try again.
Your subscription has been successful.

Yes! I want to raise thoughtful and creative children. Send me more inspiration, please!

artbarblog

i make things✖️
creativity facilitator✖️
design as a lense✖️
author✖️✖️
mom✖️✖️✖️
blog at artbarblog✖️
teacher resources ⬇️
@the.creativityproject

I have been thinking lately about so many big idea I have been thinking lately about so many big ideas. They seem to be stuck, though, in the cogs of my brain. I need to articulate and connect these ideas together, but I can’t find the right words, or medium. It feels like trudging through thick mud, and then making the choice to set up camp in the muddy place. Maybe this is always what motherhood + living a creative life will be. And I am ok with that, too. Life is mucky, and even though I crave clarity, I am also acutely aware that this is why I also crave art. Music, books, museums, film, gardens… these are the mediums humans turn to when they need to find connection and, if we are lucky, clarity. But I feel more protective of my human-centered ideas these days and less willing to share them in spaces like this where they are open source. I don’t even know what is real sometimes. And how am I contributing to this landscape of creative and intellectual robbery. I think I am headed in a different direction but I don’t know what that is yet. Meanwhile, I am camping in the mud and looking for beauty where I am. 

Some moments new and old, lately…

1. Painting at my easel, age 4 when we lived in England before moving to the US. 
2. I tried making a video of motherhood on mother’s day inspired by this song 🌙 but never finished. 
3. Planting dahlias 🌸
4. Year 2 of my veggie garden. It is not going well. 
5. We diagnosed our garden problem as not enough sun so cut down a tree to give the sun a little path but then the sun moved. Also failing at science 😳
6. When you see your habits in your children ❤️ 
7. My mom’s caretaker gave me a cake and now I am a whole year younger 🙏🏼
8. Thank you James for the treats, mom dreams of traveling to visit your bakery but this was the next best thing 🥐
9. Finding 50 bucks in jeans from 20 years ago 👏🏼 Always check the pockets!
10. The newly graduated makeup artist with her kit off to a job 💋 
11. When the birthday kid isn’t home it’s too sad. must make art. 
12. When I am so dumb and share it on the internet 🙃
13. My heart, my clarity ❤️
14. Another round of silkscreening! Things are happening. 
15. MUA by Ava, and hanging out with the help 😍
16. Reminder.
Happy Earth Day! Can we agree that every day is Happy Earth Day! 

Can we agree that every day is Earth Day? The older I get, the more I change my habits to be kinder to this beautiful planet. Lately, seeing the photos from Artemis II of Earth from space has really moved me to make even more planet-friendly choices. Here are some things we do at home, and of course, we could always be better, but I also think small changes are more doable and sustainable, and if millions of us did just one of these things, it would make a difference.

Ok, here goes! My hope is that someone reads one of these actions and thinks, I can do this! We cannot reverse the melting ice caps, but we can stop further global warming… humans can do this if we work together. It starts small and is community-driven, so share this with friends!

1. Eating less meat, eating more veggies (this is also called eating low on the food chain). A vegetarian or vegan diet is a low-carbon diet. Did you know switching to 2/3 vegan reduces your carbon footprint by 60%? 
2. Grow our own veggies. Save on emissions and packaging, and find joy in gardening.
3. Less food waste. Eat leftovers, clear the fridge.
4. Buy less. Buy local.
5. Repurpose, fix, mend, thrift.
6. Make homemade gifts.
7. Drive less, fly less. (This one is harder, but being conscious of it is really important.)
8. Moderate, steady thermostat settings can save so much energy. Try 67/68 F in the winter and 72/73 in the summer and don’t touch it.
9. No pesticides on our lawn. It may not be pretty, but we have never had a beautiful lawn, and I’m fine with that. We also live on a river so the thought of polluting that water so I can have a perfect lawn is crazy.
10. Using non-toxic cleaning products or making our own from vinegar.
11. This year, we will do “no-mow May” to promote biodiversity, help the soil, and reduce emissions.
12. Vote for candidates who take climate change seriously!

Add some things you are doing in the comments. This is a judgment-free zone, so no preaching! But for real, we all can do a little bit better. 

The blog post about these signs is on artbarblog.com, link in bio!
New blog post! It’s about time I share my favorite New blog post! It’s about time I share my favorite materials that I bring to the library. Read the post for links and tips for how to pair these materials to foster deep engagement. Children have always needed time in childhood to use their hands to make things and play, but now more than ever, the skills they develop through these experiences are imperative for their future well-being and success. I’ve been reading everywhere about children’s “lost skills” in this new ed tech world where screens have replaced so much hands-on learning in the classroom, even as young as preschool 😞 Communication skills, flexible thinking, regulating emotions, building empathy for others, innovating, even core strength and pencil grips are a struggle. Offering time and materials for making things and playing with ideas should not be a challenge; it should be as essential as filling bodies with fresh air and food. Play is how children learn! Anyway, I hope this post will inspire you to collect some things for making and maybe even join our Materials Matter course over on @the.creativityproject so that you, too, can become an expert at cultivating creative thinking through art making!
It’s almost impossible to concentrate or sleep or It’s almost impossible to concentrate or sleep or work or enjoy anything these days. I know joy is resistance, art is resistance, kindness and empathy are resistance, and I try and practice all of these things every day, and also boycotting and shopping local and volunteering and making calls and checking on my neighbors and bartering and keeping our big tree lit for the community. And still, it doesn’t feel like nearly enough. I know we probably all feel this way. And maybe the collective small things really do add up to bigger movements, I don’t know. It’s Sunday and my mom is in the hospital again and I miss my one at college and I had such a bad dream last night. My headspace is not in cheerleader mode which is my usual default. And yet… going through my camera roll to find photos of things I made did actually help today. And I have made a plan for future things to make. When I wake up in the middle of the night, the way I get myself back to sleep is by envisioning this one big installation idea I’ve had for years, it takes place in a forest and involves textiles. So maybe 2026 is the year for me to bring this to life, or begin the process. I think about this quote, and it helps, too: When you make art, you rebel against a world that fears vulnerability. Ok, I’m better. Thank you for listening 🤪❤️

Ps: It weighs on me that Meta should be part of the boycotts. If anyone has any ideas for building community and sharing somehow somewhere else let’s discuss.
Follow on Instagram

Categories

Archives

Copyright and Reposting

All content on this blog is copyright and owned by Art Bar Blog unless otherise stated. I would be flattered if you wanted to use an image from one of my posts! But please, ask me first. I would also ask that if it involves DIY instructions with a list of supplies that you don't repost any of that stuff because then nobody would have a reason to click back to my original post!

Footer

  • Facebook
  • Instagram
  • Pinterest

About Me

There are two things that I'm passionate about: Children + Art. As an art teacher, author, graphic designer, and mom to 3 creative thinkers, I get to explore my passions every day! Learn more...

I am dedicated to keeping your information safe. Please review my Privacy Policy.

Recent Posts

shibori tie-dying with kids in art camp

Copyright © 2026 · Foodie Pro & The Genesis Framework