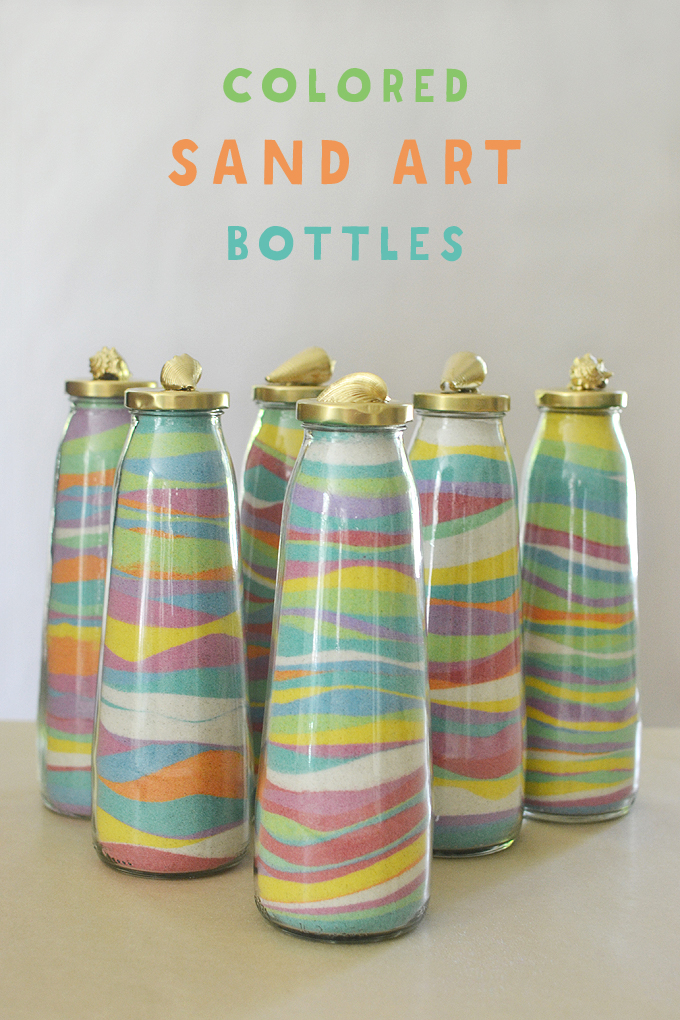
You guys, these sand art bottles are completely cost-free! I dyed sand from the beach and the bottles are recycled. My art campers made these last summer and I’ve been dying (lol) to share them with you! These would make a gorgeous vacation keepsake.
In fact, these were so successful that I briefly thought about packing this up as a DIY craft kit! But then I didn’t. Someday maybe.
For the time being, I will just share with you all my tricks and tips on how to get a group of 8 kids to make these gorgeous sand art bottles!
[ I am a participant in the Amazon Services LLC Associates Program, an affiliate advertising program designed to provide a means for us to earn small fees at no cost to you by linking to Amazon.com and affiliated sites. ]
Supplies needed to make sand art bottles:
~ Sand
~ Liquid watercolor or food coloring
~ Ziploc gallon baggies
~ Trays for drying
~ Tupperware for holding the dried sand
~ Recycled bottles or jars (we used Looza juice bottles)
~ Funnels
~ Large spoons
~ Shells
Ok you guys, here’s the thing. I can’t find the photos I took of me dying the sand. I have scoured iPhoto on my computer for months! Which is why this post is well past due. I even contacted my IT person, but it became too big of a thing for him to find my lost photos. I don’t know what’s happening, these aren’t the first photos I’ve lost. I Googled it and maybe they got lost when I upgraded to the new OS on my iMac…? If anyone knows anything, leave me a comment! In the meantime, it’s actually a very simple process so I’ll just explain it to you without the photos.
How to dye sand from the beach:
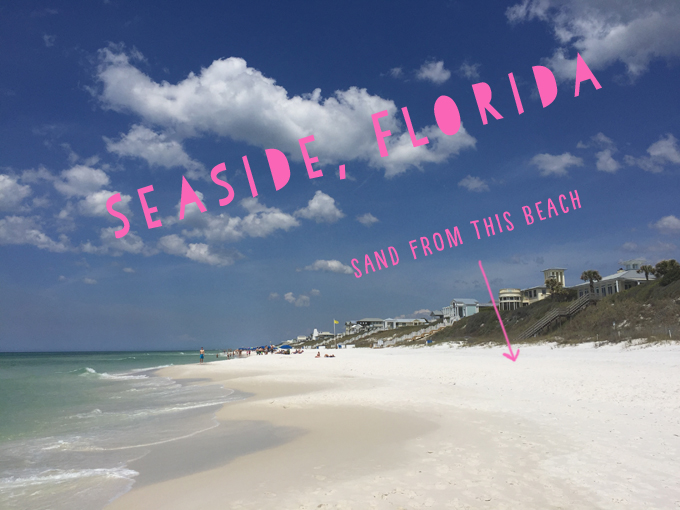
1. Get the sand. Mine came from the beautiful beaches of Seaside, a.k.a. Scenic Highway 30A in the Florida Panhandle. Perhaps the most beautiful, fine sand I’ve ever seen! I filled 8 gallon ziploc bags, but should have filled a couple more. For a group of 8 kids, we used every last bit of sand. I would suggest one bag per color. Oh, and in case you’re wondering, we drove from Connecticut to Florida, which is why I could bring home so much sand!
2. Pour some color into the bag and mix it around so all the sand is the same color. This is where I wish I had my photos. I think I probably diluted the liquid watercolor with some water first (depending on which brand I used – Blick is very strong and I dilute it, but Colorations is less strong so I don’t dilute). I do remember the sand being very wet, so I’m sure I put in more color than was needed.
3. Now pour the sand onto trays to dry in the sun. This took about the whole day. You have to remember to go out and mix the sand around occasionally. If you are in a non-sunny place, the sand will dry inside, it just might take longer.
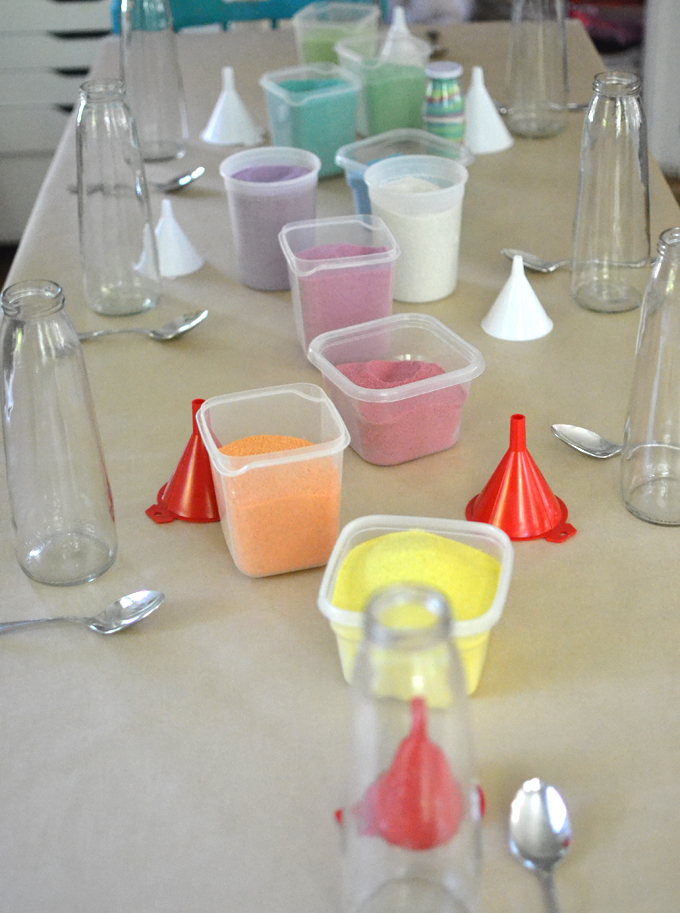
4. Once the sand is dry, put each color into a container. Now you are ready to make your sand art!
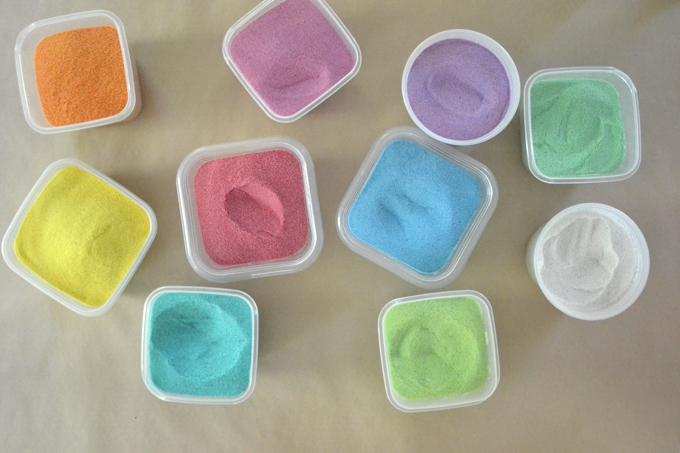
PS: I left one bag uncolored, thinking it would be nice to have some white. I’m so glad I resisted the urge to dye everything! The white was a good break for the eye.
How to make sand art bottles:
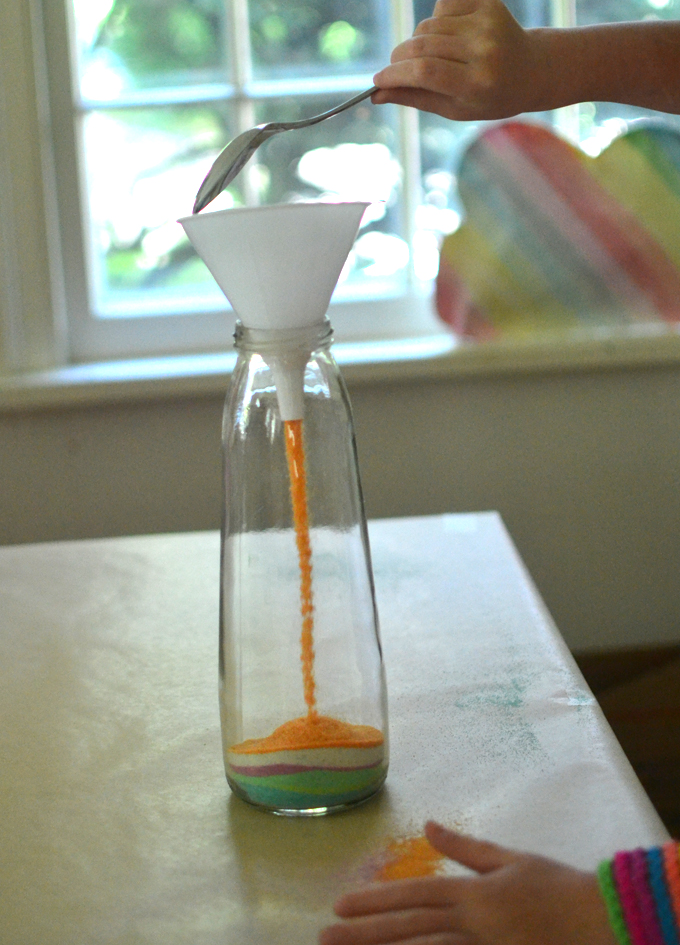
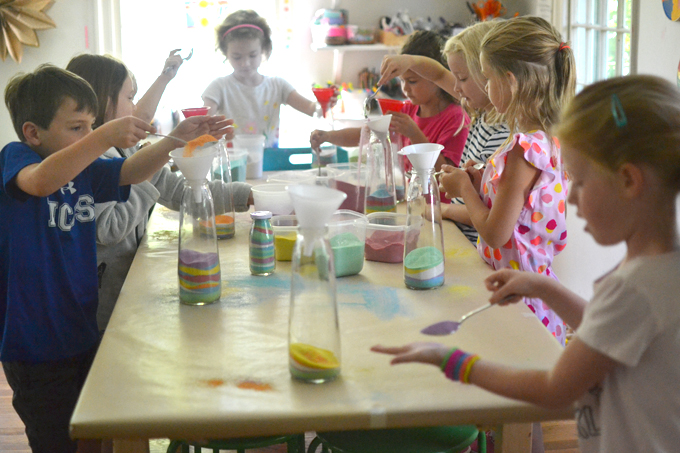
1. I gave each child a big spoon and they basically just walked around, took a scoop of color, then walked back to put it inside their funnel. They learned very quickly to be careful when carrying their spoon full of sand.

2. I did make one little sample bottle just as a visual. It also helped to point out the layers to those children who became a bit tired and wanted to just stick to one color. I’m usually pretty low-key about kids doing their own thing, but in this case I told them they had to switch colors with each scoop – or maybe two scoops and then switch colors.

3. When they got to the top, they took out their funnel and just filled the last colors to the tippy top. It’s important to have as little air as possible between the sand and the lid, just so the sand doesn’t all get mixed up over time.

4. I hot-glued and spray painted shells to the lids so all the kids had to do was pick their lid and close their bottle. And voilà, all done!
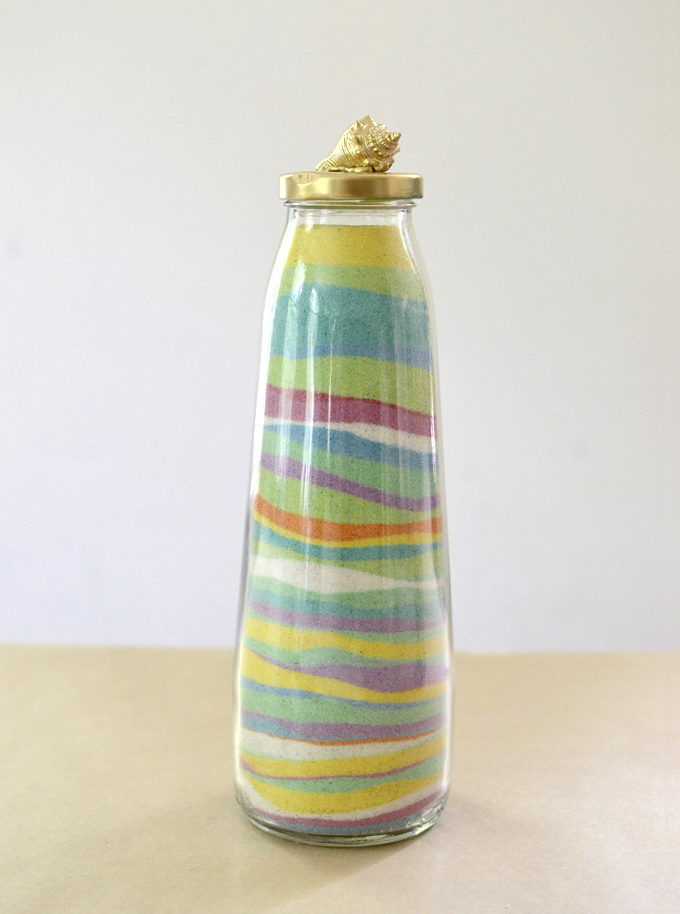
How gorgeous are these works of sand art?!! And almost completely cost-free! I hope you feel inspired to bring home some sand from your next beach vacation.
xo Bar
– – – – – – – – – – – – – – – – – – – –


while these look beautiful, is there concern of environmental impact of everyone taking that much sand from the beaches? I don’t know the answer to that, so not trying to criticize, but just wondering?
hi – I don’t think so. I mean, I took so little compared to the vast amount of beach sand in the world. and my blog is not THAT popular that millions are going to run out to the beach with ziploc bags! I bet 5 people in the lifetime of this post will actually do this, lol. thanks for writing! Bar
And yet, here I am three years later…However, my need was the diy dyed sand for a unity ceremony for my brother’s wedding.
These are so pretty, and nostalgic! I remember making sand art when I was a kid. I have to try this with my kiddos. The bottle caps are so lovely too! Thank you for sharing,
Can 4-5 yr olds do this as an open ended art
Activity? With basic things like the colored sand, funnels, and different shaped bottles?
This is for my Child Dev Practicum.
of course!! there does not need to be a final “product”, it can just be about exploring the sand and funnels. they would love that! xx bar
I want to try this for my daughters birthday party. Can I use play sand from Home Depot? And for the watercolors, how much did you use, is the 4 fl oz bottles enough to color sand for roughly 15 people?
hi Amanda, yes sand from Home Depot is fine! And the 4oz should be enough. have fun! xx Bar
Hi
Love your tutorial just starting to do sandart
Thanks
Love these sand art bottles! And the website! Fantastic ideas, well explained. Thank you!
I’m not sure about type of coloring and how to use
Hi Sonia, you can find all the details in the post!