I think this is the fastest turn-around post I’ve ever done! We had my daughter’s 12th birthday party this weekend and now here I am writing about it. It usually takes me a week or a month or more to sort through photos and write something. But seriously, isn’t this the cutest cake topper? I really wanted to share because it’s pretty easy to make and just so colorful and happy. You only need a few supplies that hopefully you have lying around your house. I also am providing you with the banner templates. You’re welcome! Here we go…
This post contains affiliate links. Thank you for your support!
Supplies:
~ Templates (Ava template here, Ellie template here) I provided a few sizes depending on the length of your child’s name.
~ Alphabet rubber stamps / I have some old ones from High School, if you can believe it, but you can buy cool ones on Etsy or Amazon.
~ Ink pads / I love Colorbox or Versacolor
~ Two paint brushes, or skewers
~ Baker’s twine, or any yarn
~ Colored tapes or washi tape
~ Scissors and scotch tape

Making your cake topper:
~ Print out your template and choose which size banner will work best with the length of your child’s name.
~ Rubber stamp their name. I have lots of color ink pads, but this would also look really cool with just black. Or…you can just write their name in freehand. Or paint it, use colored pencils or just black sharpie. Whatever is easiest!
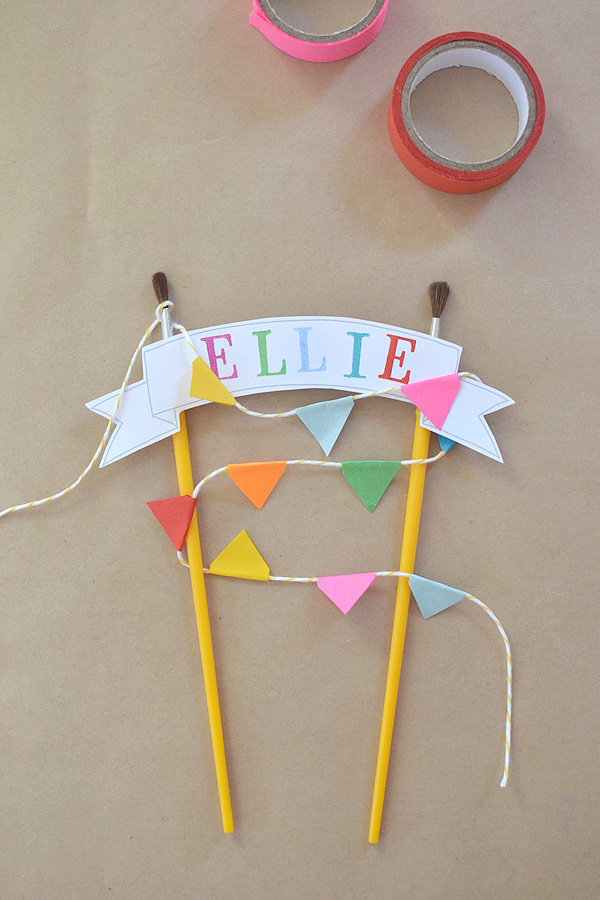
~ Cut out the banner a little bit outside of the gray line.
~ Flip the banner over and scotch tape the two paintbrushes (or skewers) to the back. Try and point the bottoms inward just a little bit.
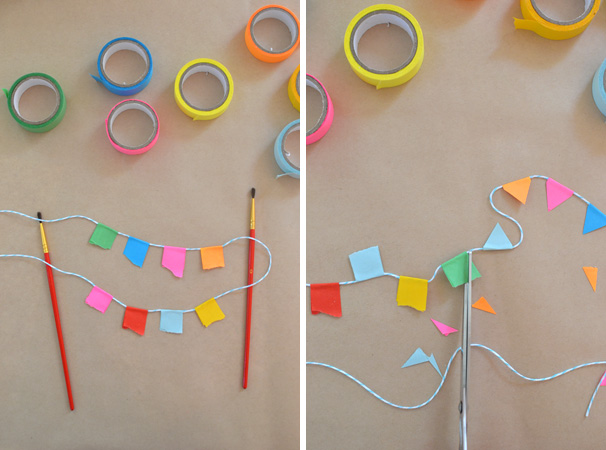
~ Make your garland by cutting off a two foot piece of twine or yarn. Starting in a few inches, fold a piece of colored tape over the string. Fold about three or four pieces in a row, depending on the length of the name. Leave a little space and then repeat with the folded tape. Make three sections of tape. You may have to cut off the end of the string, but leave a tail of about three inches.
~ Use the scissors to cut the tape into triangle flags.
~ Starting at the top of one of the paintbrushes, wrap the string around the brush a few times, then drape it over to the other side and wrap it again around the other brush. Swag it one more time (three times total) back to the other paint brush. At this point you will want to take a teeny piece of scotch tape and tape the string to the back of the brush. Cut the string at the end if needed.
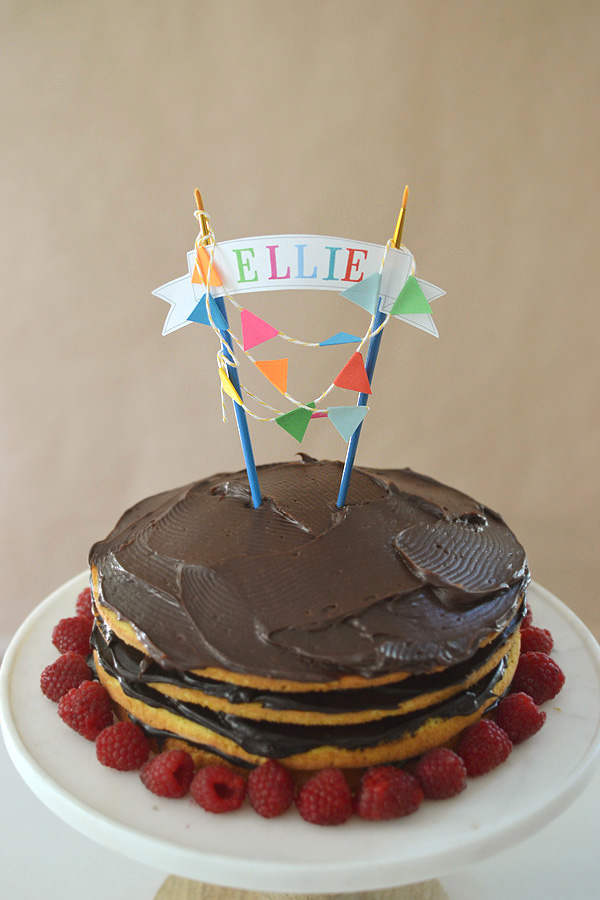
~ Put the cake topper on the cake by pushing the paint brushes in about an inch.
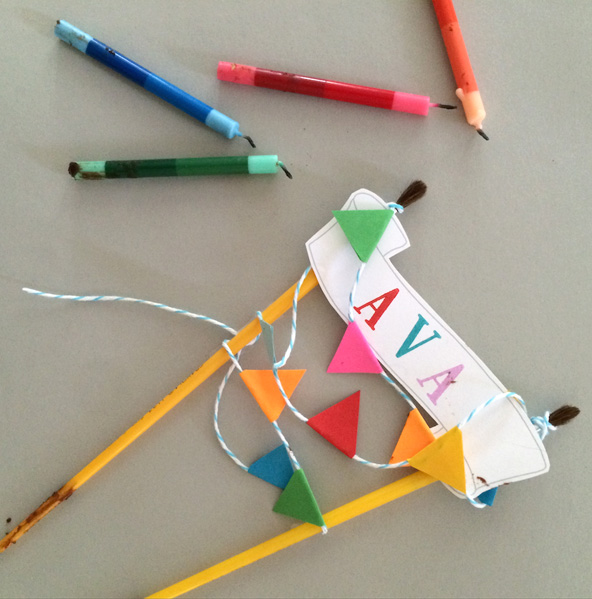
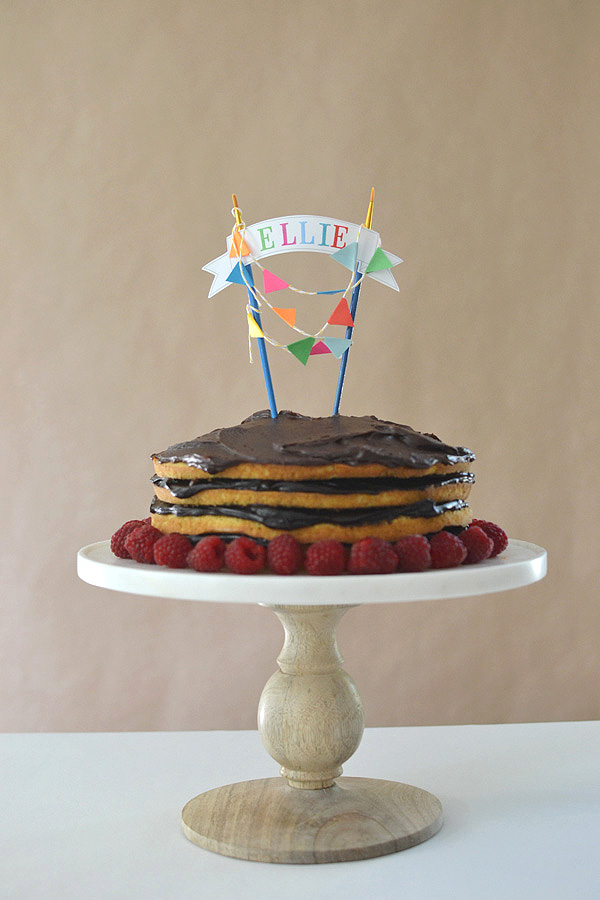
My daughter celebrated one of her birthday parties with her dear friend, hence the two cake toppers here. I love toppers because they are just so happy and make the birthday kid feel so special. You don’t even need a very extravagant party if you just have an awesome cake topper and some cool gifts…and a sentimental, loving card. I’ve had those birthdays in the past and they rule!
xo, Bar
– – – – – – – – – – – – – – – – – – –
Did you like this post? Here are more party ideas for kids:


Fabulous!!! Thank you.
The link for the templates is not working. Are these still available? This is exactly what I am looking for!
Thank you!
Tara, I fixed the link. Let me know that it works for you! xx Bar
Id like to get a copy of your cake topper templates, but the Google drive isnt working.
Thanks
Hi Jennifer, hmmm I just checked the links and they work for me! but I will email them to you! xx Bar
Thank you! This cake topper really caught my eye. I love it. This is perfect for my little one’s cake. Thank you so much!
Hi, could get the recipe for the cake? Love the banner and the cake!
Hi Bekah, the cake is from a box! Duncan Hines or something.