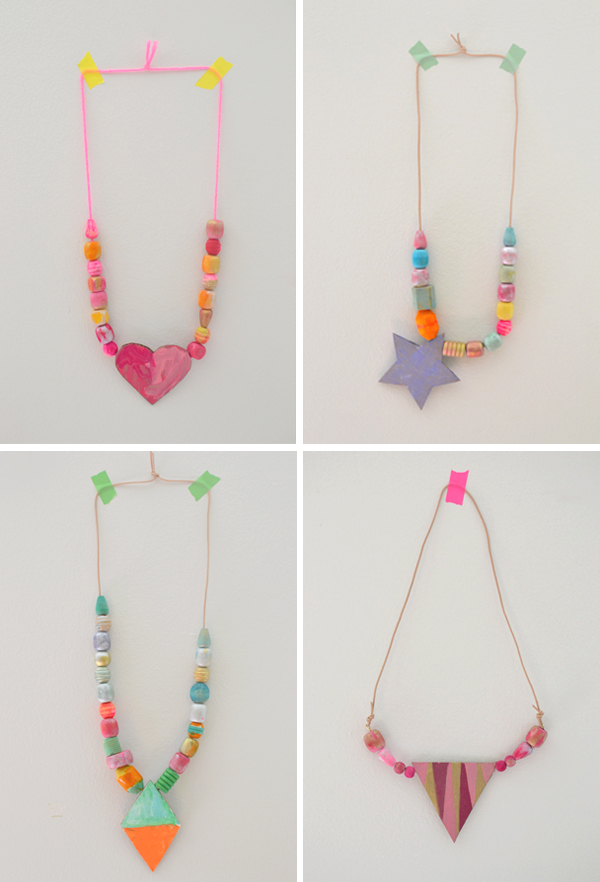
Wooden bead painting has become one of my go-to activities lately. Whether for art class, or playdates, painting beads is such a lovely little art escape. It takes no skill whatsoever which therefore creates this calm atmosphere that is very relaxed and free. The kids start talking about what’s on their mind, and they connect with each other. And then…. you end up with these gorgeous beads! We took it one step further and painted little shapes as well.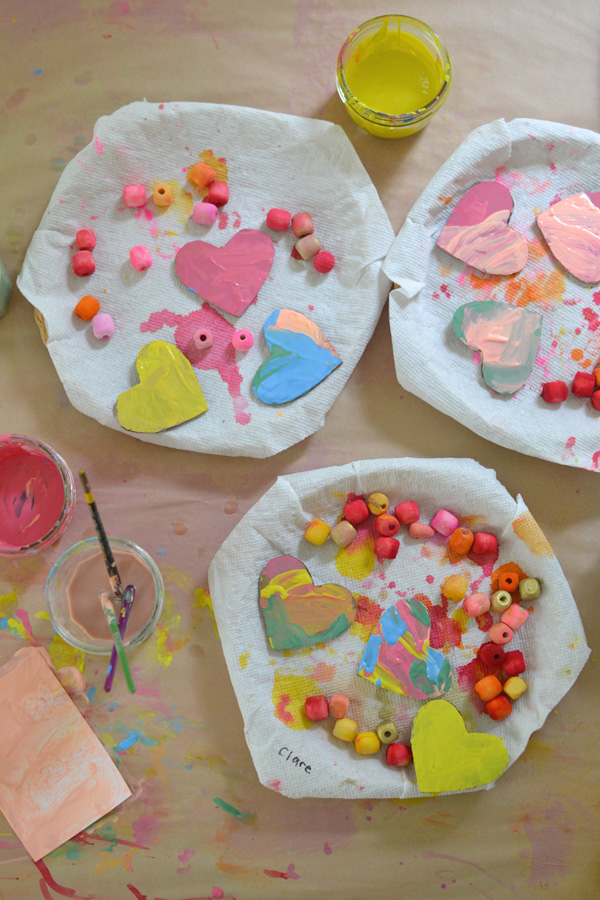
This post contains affiliate links. Thank you for your support!
Supplies:
~ Liquid watercolors (this is a link to the brand I like, you don’t have to buy the whole set ~ but i do love using gold
)
~ Brushes, a glass of water, a damp sponge, and a plate with a piece of paper towel to place the beads when drying
~ Cardboard cut out shapes
~ Tempera paint (more opaque to cover brown cardboard), or you can just use the same liquid watercolors that are out already
~ Yarn, cording
, and/or thin wire
~ Blunt needle (if you’re using yarn)
Process:
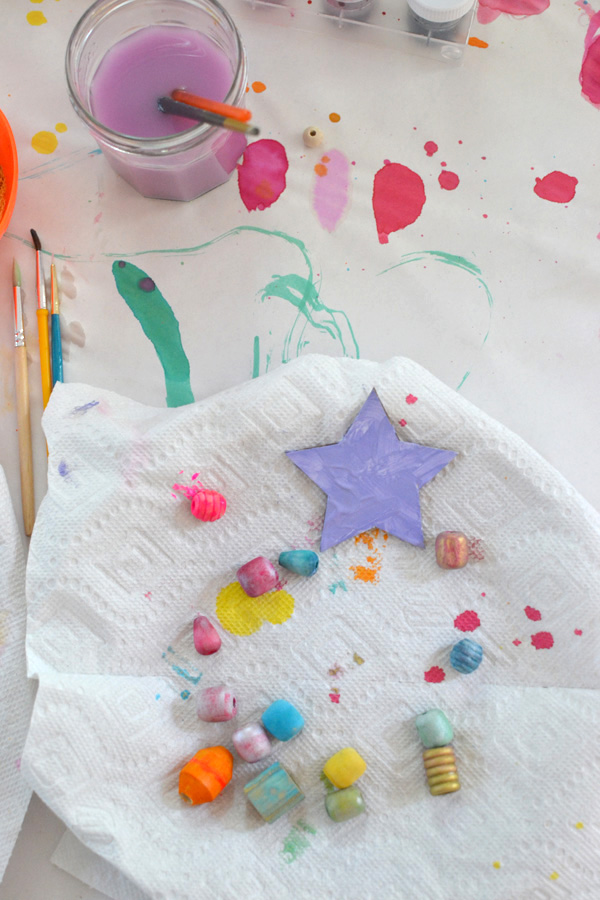
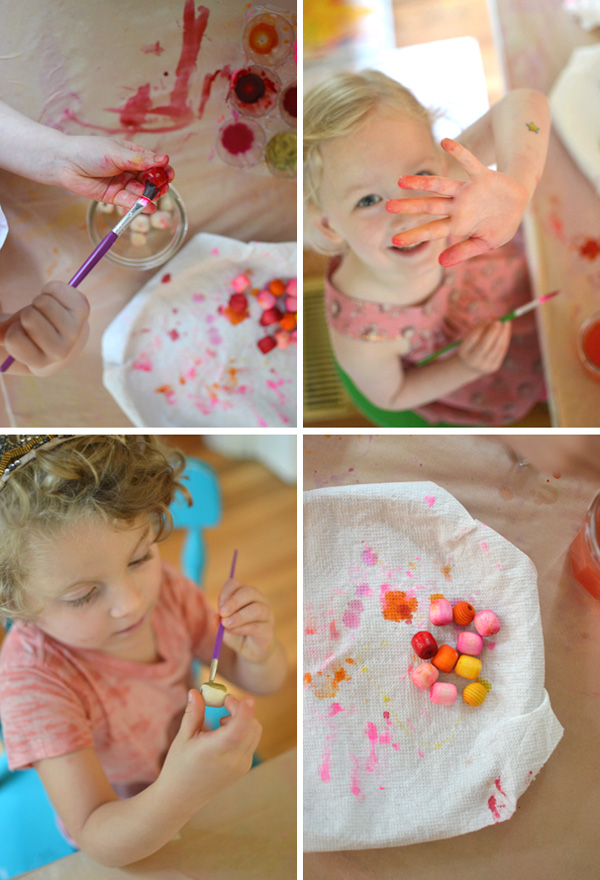
~ Put out your paints in separate cups, jars, or plastic egg carton. Start painting! I told the kids they needed about 20 beads or more for their necklace. There is a technique that my friend Merry Cherry uses which keeps their fingers clean, but we just went the messy route! Place the beads on the paper towel to dry.
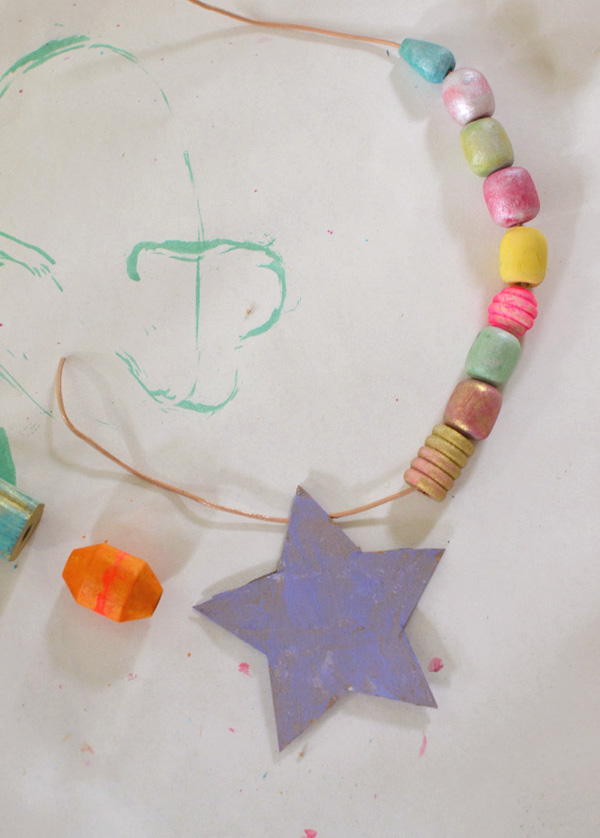
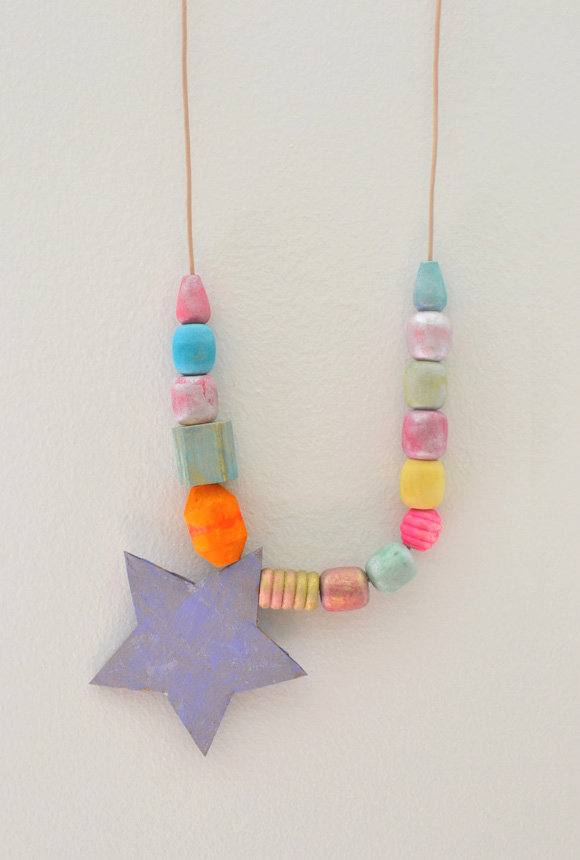
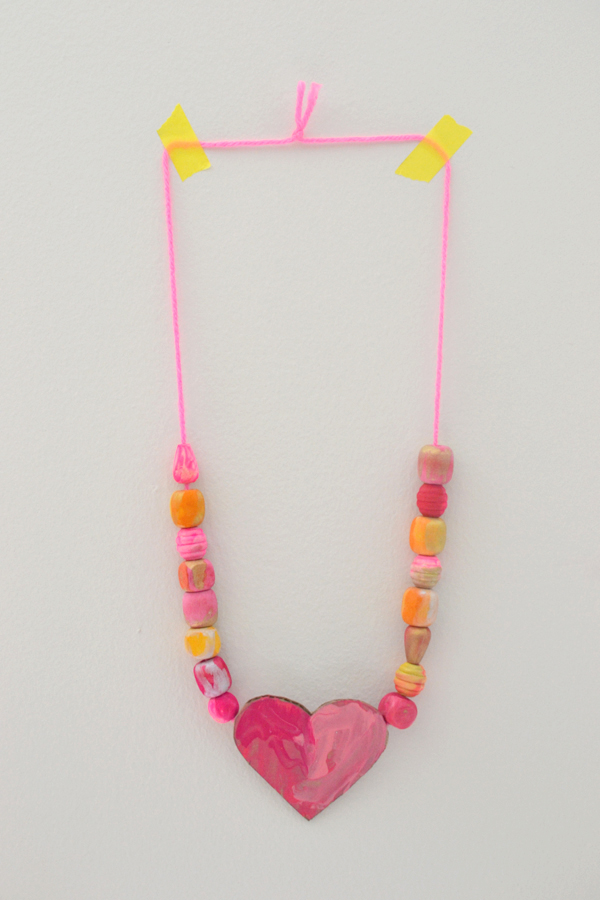
~ While the kids are painting, you can cut out some small shapes from cardboard. Make sure you cut across the grain. Take a look at the photo below and you will see what I mean. There is a grain in between the cardboard. I use this grain as a tunnel to thread the yarn or cording through. It’s pretty cool how well it works!
HINT: Make the shape small enough that your needle can go through to the other side so you can grab it and pull it out!

~ When everything is dry, you can thread your necklace. Have the kids lay out their beads. The kids can use the blunt needle, they love using grown up tools. But you can do it, also, if you are afraid of them holding a needle.
~ Or you may want to use cording. This makes beading even easier, and the kids can do all of it themselves.
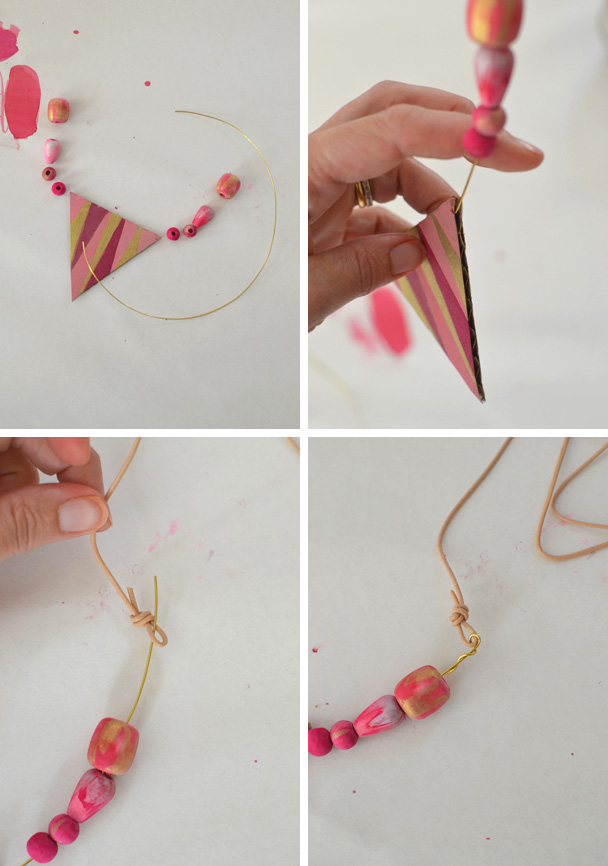
~ You could also try using wire with the cording. See above for the steps involved. It’s fairly straightforward and looks pretty sophisticated!
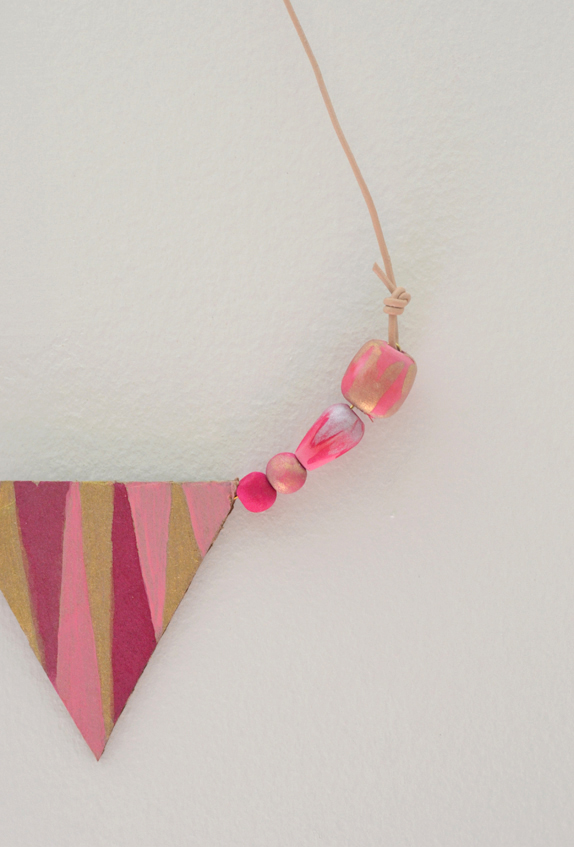
The variations are endless, and they can be made by 3yr olds as well and as beautifully as 30yr olds! My age exactly 😉 (My 14 year old daughter and I made the red triangle necklace together. Collaborating is the coolest.)
As an added bonus for getting to the end of this post (well done!), click on over to my good friend Merry Cherry’s blog and read about her favorite way to make necklaces with kids. She and I struck up an incredibly synergistic relationship last year when we met through our blogs. Then, when I took my girls out to California in April, we met!! We had an instant connection because we are extremely well-matched. It’s been super weird how we keep coming up with similar ideas at the same time. It’s so fun sharing with each other, we thought we’d share with you, too!
xo, Bar
{PS: My son (age 8) made the one with the orange and green diamond. Just saying….boys love necklaces, too!!}


These are so great Bar. I love the cardboard touch. Really smart. And I love the shimmer on the beads. Every picture is gorgeous. I love it all! And yes, we are quite well matched ; )
thanks meri! i wonder what we will both do next…at the same time without planning on two separate coasts! can’t wait to find out 🙂
This is such a CUTE idea! I know our residents will love it. Definitely going to share with them