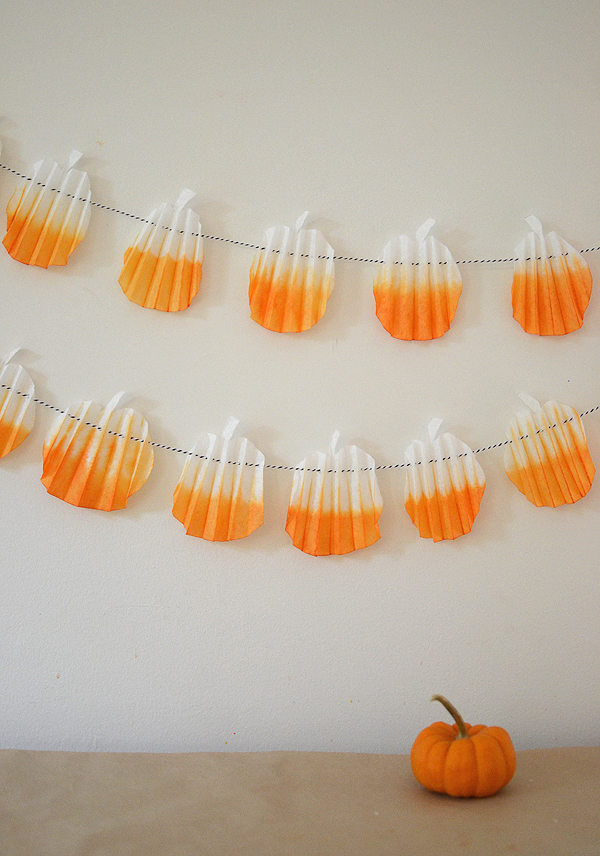
I love when the vision I have in my mind’s eye comes to fruition. It never really happens all that much, I have to admit. I start many projects that I end up throwing away. It’s true! But I lucked out this time. I wanted to make a seasonal garland that was simple and light (like, not heavy or dark). Just an airy little thing that would cheer up a space. It was fun to make, too! Just a few steps, not hard at all.
Supplies:
Coffee filters (12 cups size)
Pumpkin template (download here)
Pencil and scissors
Orange liquid watercolor or food coloring (plus a small bowl to put it in, plus an extra small bowl of glass of water)
Paper towel
Hole punch (1/8″)
Black and white baker’s twine (8 ply)
Directions:
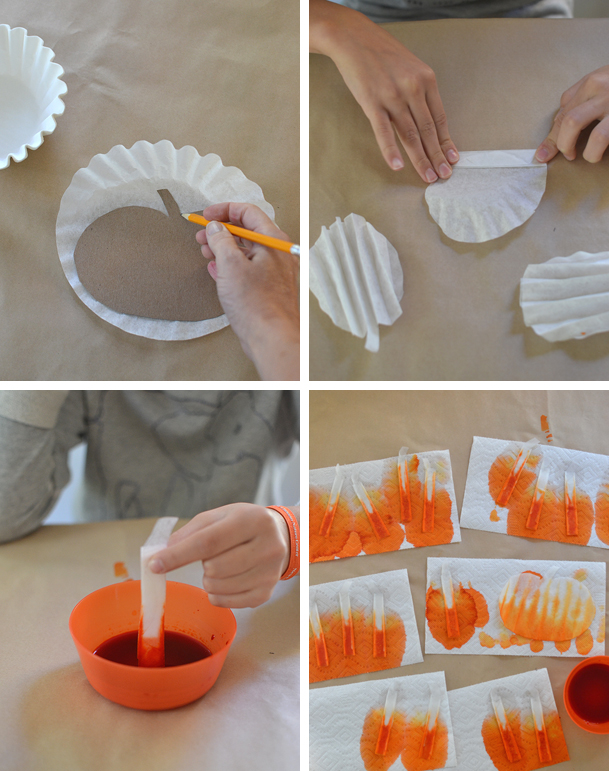
1. Flatten out the coffee filter. Lay the pumpkin template on the bottom half (so the stem ends up on the flat middle of the filter). Cut twenty pumpkins.
2. Accordion fold each pumpkin.
3. Holding the pumpkin at the top with the folds closed, dip it in some water. Squeegee the water off with your fingers, then dip the wet, folded pumpkin into the orange watercolor. Bend the pumpkin slightly so the orange goes up about half way. You only need to hold it in for a few seconds. Wipe the dripping orange watercolor of on the sides of the bowl. Place the folded, dyed pumpkin on a piece of paper towel. Repeat for all twenty pumpkins.
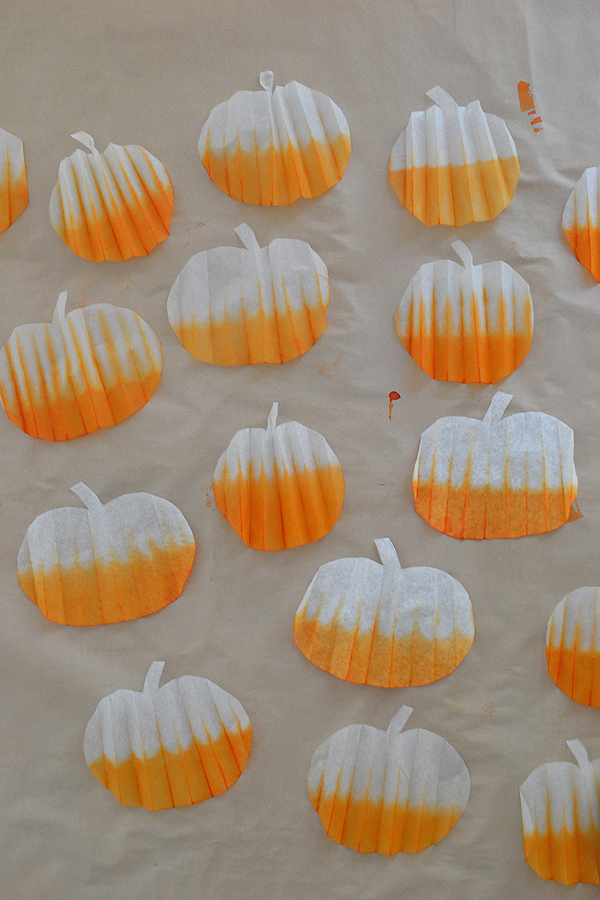
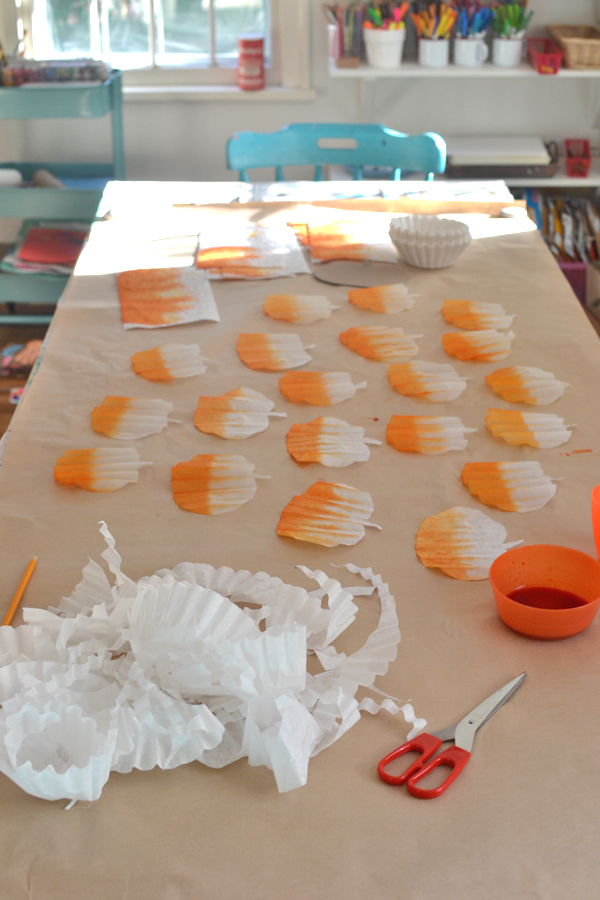
4. When the pumpkins are a little less wet (like in half an hour), unfold them and lay them on either some new paper towel, or some paper. The reason to not unfold them right after you dip them is because then the dye won’t pool in the creases. This is a nice effect, when the creases are a bit darker.
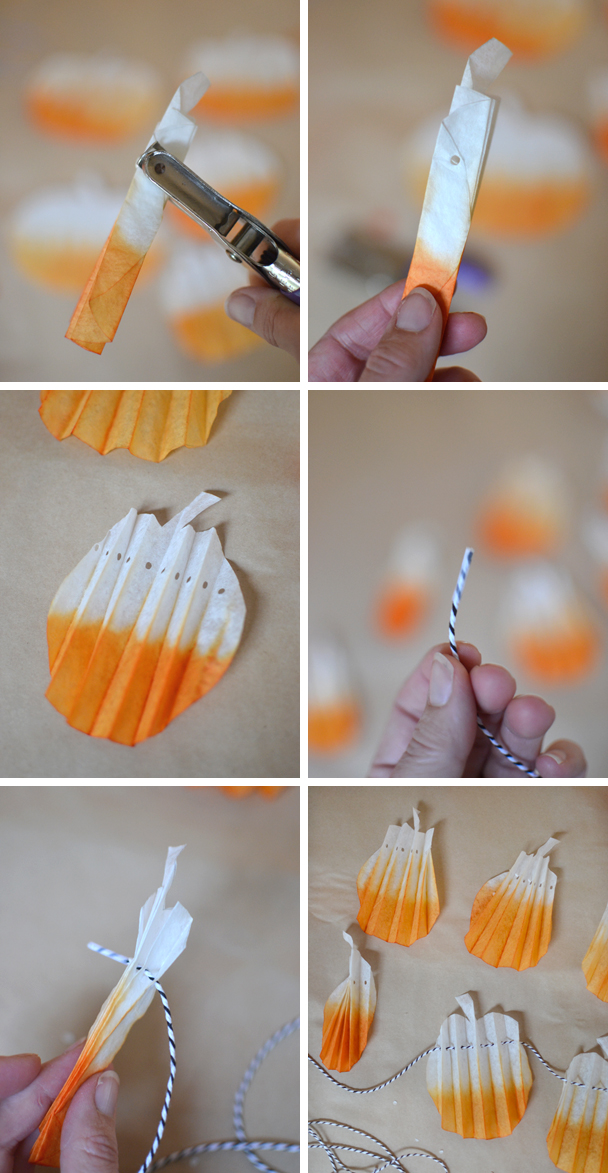
5. When the pumpkins are completely dry (2 hours), then fold each of them back up and punch a hole about and inch down from the top.
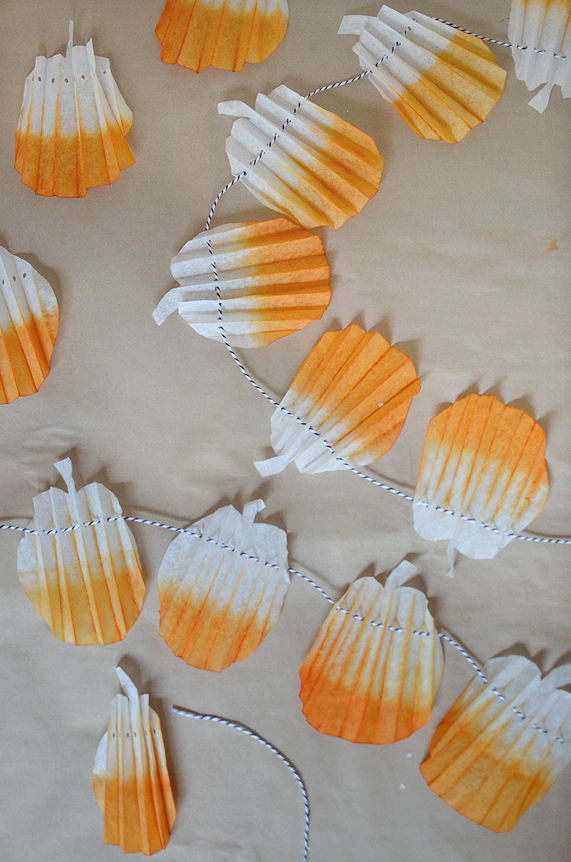
6. Wrap a small piece of tape around the end of the twine. Don’t cut the twine yet, just unroll a lot of it, about six feet. With the pumpkins still folded, string the twine through the holes.
7. When all of the pumpkins are strung, fan them out and space them out the way you like. Then cut your string. Now you’re done!

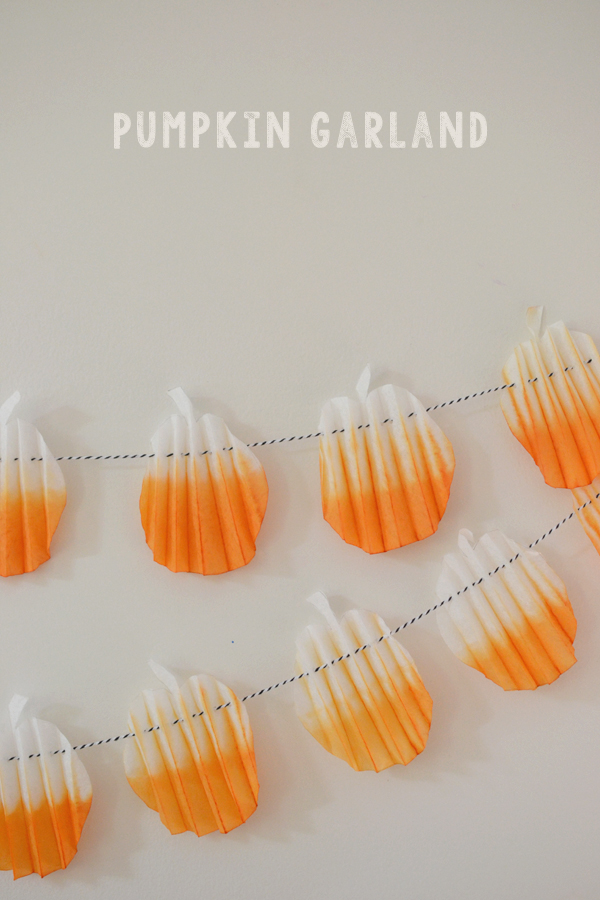
This garland will work well from now through Halloween and Thanksgiving. I love decorations that have flexibility!
xo, Bar


Awww! So cute! And it seems like you had a lot of fun! 😀
I’m pinning this!
Thanks for sharing!
thank you for sharing and pinning and commenting!! xo bar
These are so great! I love the folding step and your studio looks amazing by the way. Great idea and so pretty. I love your work!
thanks as always meri! i love this one so much. better in person maybe than online, but i loved the process…might have to do a part two for the holidays! xo bar
Great decoration idea for Halloween. And yes you are right, they will serve the decoration purpose for Halloween and Thanks giving both. Keep up the good work and thank you so much for sharing.
thanks so much, alison, for leaving a comment! i am loving the pumpkins myself…glad you are, too! xo bar
Page not found error for the template link. The same error for the owl template too.
thanks for letting me know, Jules. I will fix it.
I think this would also work for the triangle shape of candy corn, Christmas trees in shades of green, winter snowflakes use shades of blues and hearts for Valentines, flowers like zinnias, umbrellas, ones mind begins to wander this such a great place to start.
all great ideas!