These Kandinsky inspired circle paintings are one of my favorite art prompts. Their beauty lies in letting the colors bleed into each other. I can’t get enough of them!
This post contains affiliate links. Thank you for your support!
Supplies needed for circle paintings:
~ Brushes
Setting up the circle painting prompt:
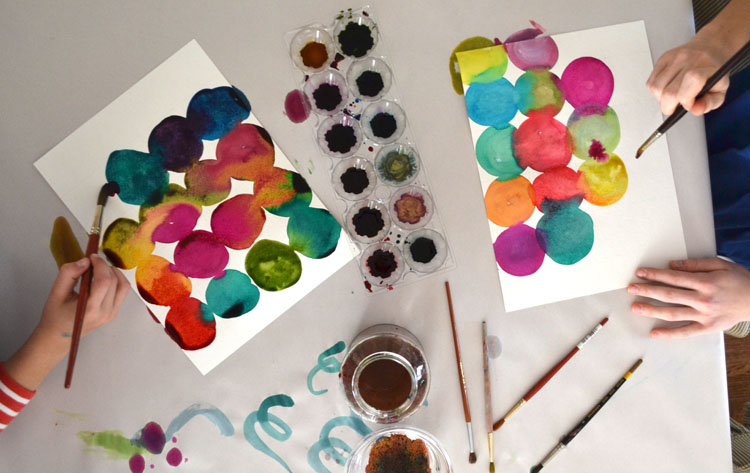
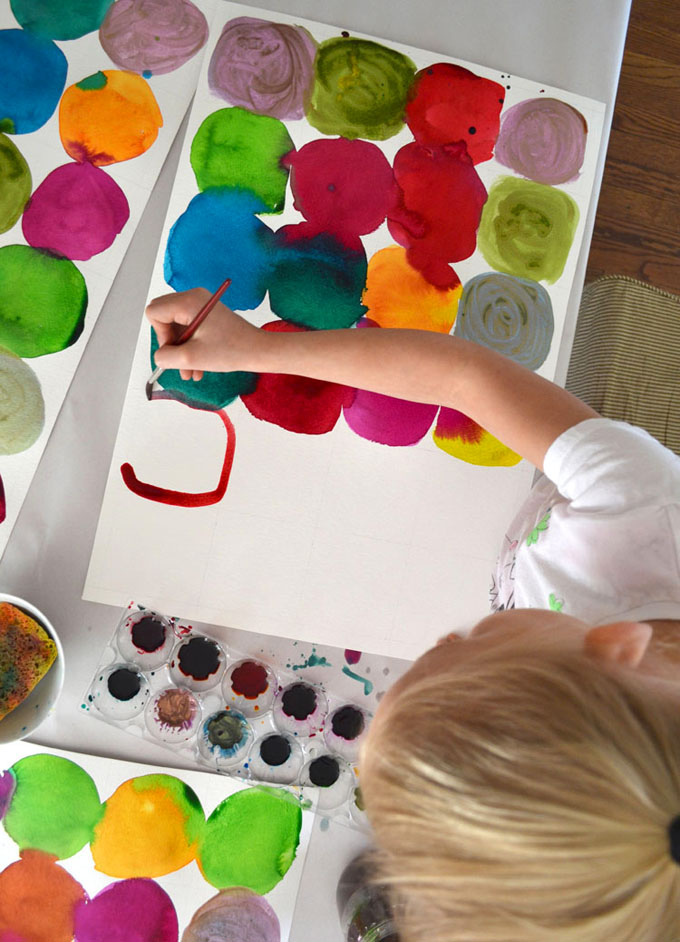
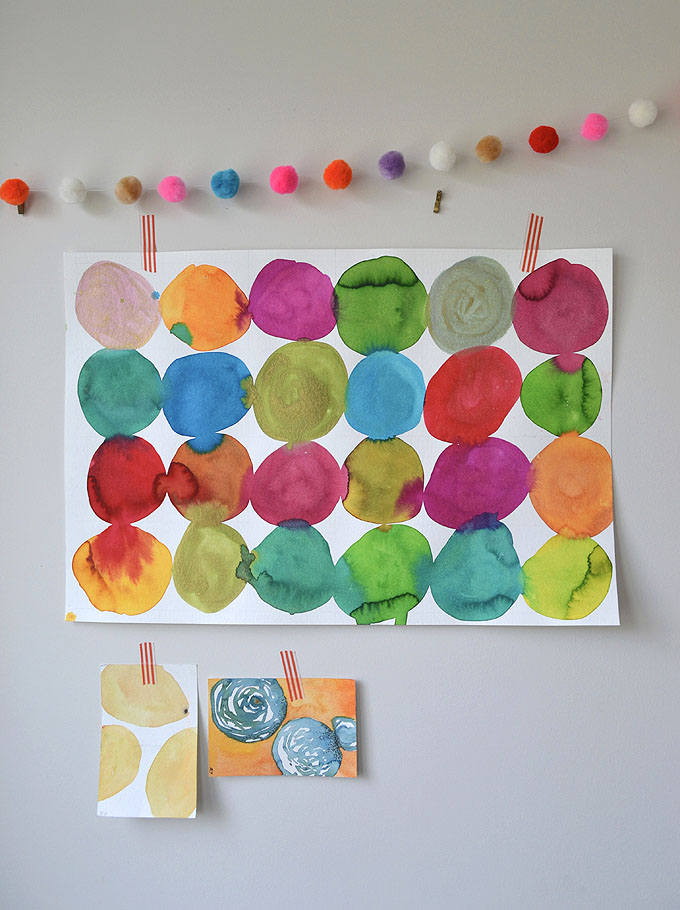
1. Wassily Kandinsky was a Russian painter most famous for his Concentric Circles paintings. Recognize them? They are bright and simple and a perfect first artist study. To start this art lesson, we talked a little bit about abstract art and practiced drawing circles on the paper with just a dry brush.
2. Next, I set out some large format watercolor paper (15 x 22) that had a very light grid that I made with pencil, just to create some square boxes. This guide is necessary for the kids to keep their circles about the same size.
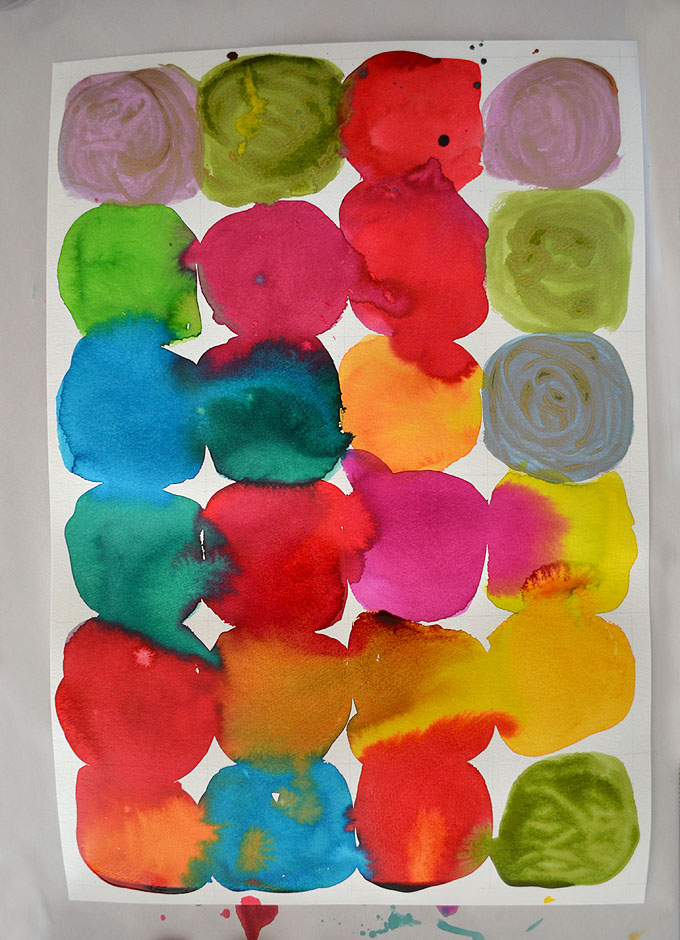
3. I gave them each an egg carton with the liquid watercolors. They had the choice of using all of the colors, or just a few. I also gave them a glass of water and a damp sponge for rinsing and drying.
4. Lastly, I encouraged them to go heavy with the paint and work on the quicker side so that the paints stayed wet and blended.
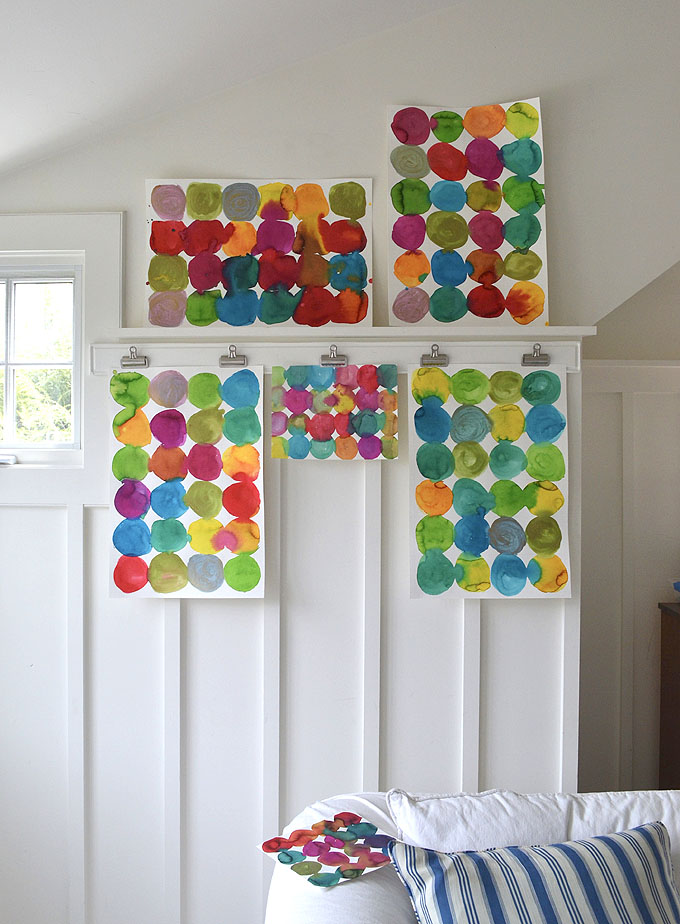
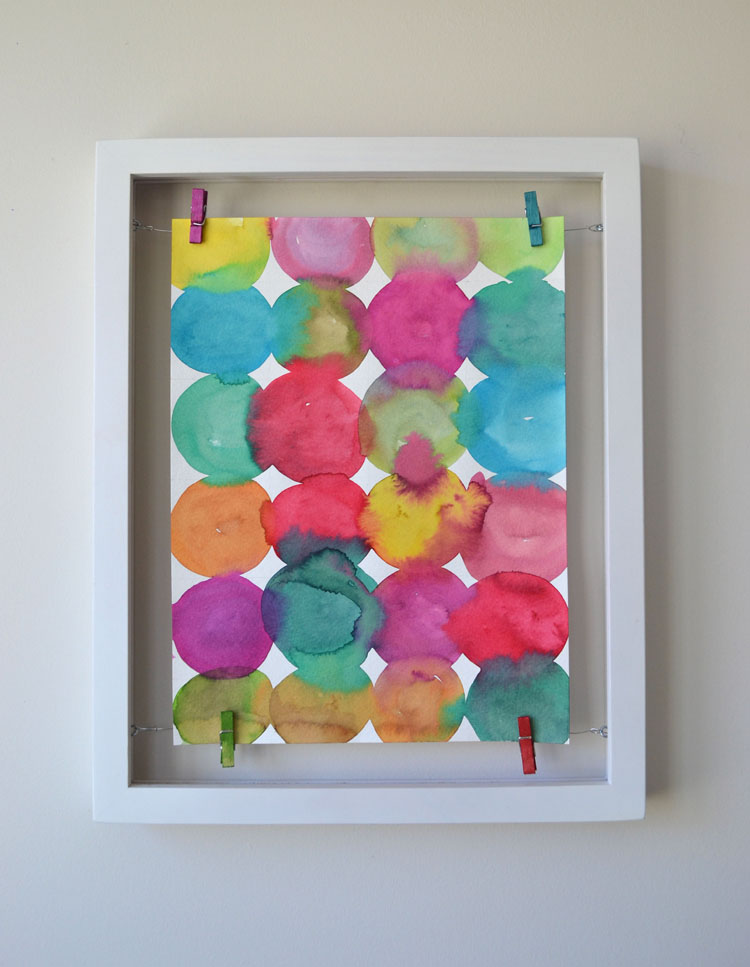
A few days later, my tween girls tried this art prompt with smaller paper, and then I made a floating frame because I thought it would be cool. I was inspired by this photo on Pinterest.
Supplies needed to make a floating frame:
~ Frame (bigger than your art by about 1 inch all around)
~ Wire (I used 18 gauge craft wire)
~ Scissors
~ Eye screws (12mm)

How to make a floating frame:
1. Take the glass and backing out of the frame. Turn it over to expose the back and lay it flat on the table. Center the painting inside the frame, eyeballing it (or you could use a ruler if you don’t trust your eyes). Draw a pencil mark 1cm below the top of the painting and 1cm above the bottom of the painting, (you want the wire to be just below the top and just above the bottom of the painting).
2. Screw in the screws to the side of the frame (the thickest part of the wood). Just push them and turn and they will start to screw into the wood and become secure.
3. Cut your wire about 2″ longer than the finished length. Thread the ends through the eye screws then twist it around and point the ends back towards the inside of the frame (so it doesn’t poke out the front where you could see it).

Voilà…you are done! I painted my clothespins, but you can leave them plain or buy them colored.
This post first appeared on the blog Small for Big. Click over if you want to see a few more photos from this project, and to see all the other projects I did for Mari and her playful blog.
Happy Monday!!
xo, Bar
– – – – – – – – – – – – – – – – – – –
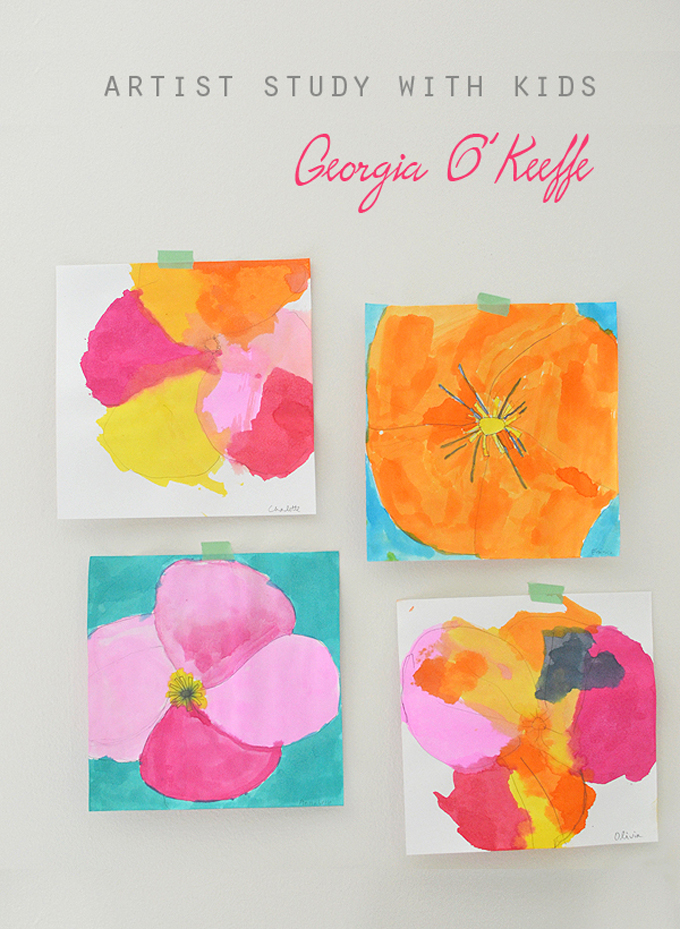
Did you like this post? Here are some more artist studies with kids:


I’ve done a circle project at my art class (5-6 years-old) last month at a collaborative mural, and It was fantastic experience. We first painted circles with one color each kid, and they pass the paper to other until all the kids paint in every paper, so at the end the resoult was lots of colours made by lots of kids. And anothe exercise was all the kids painting with circles in a mural. Beautifil and fun! Yo can check it here:
http://artecontusmanitas.wordpress.com/2013/03/19/mural-colaborativo-the-circle-painting-project/
I love that project! I’ve read about the collaborative circle paintings…would love to do that with my kids + neighborhood kids. Thanks for sharing Esther!
LOVED LOVED LOVED your post on this project!! my kids absolutely loved it and really went crazy. they found a protractor and made lots of overlapping circles…. http://www.flickr.com/photos/15798936@N00/9129848985/
thank you for such a great art project.
wow, i just say your son’s creation (same name as my son btw) and i love it! i agree he should sell it for more. i think i will bring a protractor on our summer vacation. great idea, making intersecting circles…now you’ve inspired me!
Dot-ish! : ) I love these paintings!
Yes they are!! This was one of my very first art classes I ever taught, and still one of my favorite projects. Thanks for stopping by, Peter! xo Bar
Love Love Love! Incredible pieces. I Love the project and the painting work. I am going to try on this weekend with my friends and gift them to my parents on their special day. Big Thanks! Keep sharing, i love art!
Hello,
I would to obtain you Art & Play Learning Guide. How can I get it?
Thank you.
Silvana
Hi Silvana, you can either get them here on my blog. Two of them are free, the other five are $5. Just search for Art & Play Learning Guide in the search bar. Or you can go to our Creativity Project website and buy the full guides or join our membership! https://www.the-creativityproject.com. ~ Bar