• Skip to primary navigation
  • Skip to main content
  • Skip to primary sidebar
  • Skip to footer

ARTBAR

raising creative thinkers

  • MY BOOKS
    • Art Workshop for Children
    • Cardboard Creations
  • ART SUPPLIES
  • SHOP
    • Art Bar on Etsy
    • Art Class Poster
  • ABOUT
  • Nav Social Menu

    • Facebook
    • Instagram
    • Pinterest

Branch Weaving

June 10, 2015 by Barbara Rucci 10 Comments

2621 shares
  • Facebook30

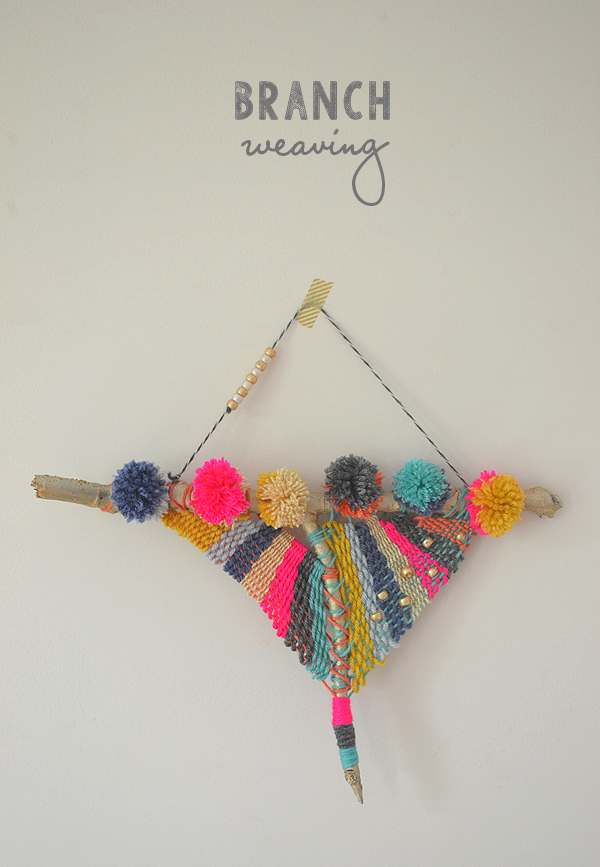
make a beautiful weaving from an ordinary branch

I’ve been wanting to weave on a branch for years. That might sound strange to an ordinary person, but for this textile design geek it’s a perfectly normal dream! Since my windows of making-alone-time are far and few between, I didn’t spend a whole lot of time finding the perfect branch. I literally took this one out of the kindling box that was next to the fireplace. Speed of execution was more important than perfection for a change!
make a beautiful weaving from an ordinary branch

This post contains affiliate links. Thank you for your support!

Supplies:

~ a branch that has a “T” shape

~ gold tempera paint (I used this one which I got at my local art store, but this one is cheaper on Amazon, it’s just a little bit yellower)

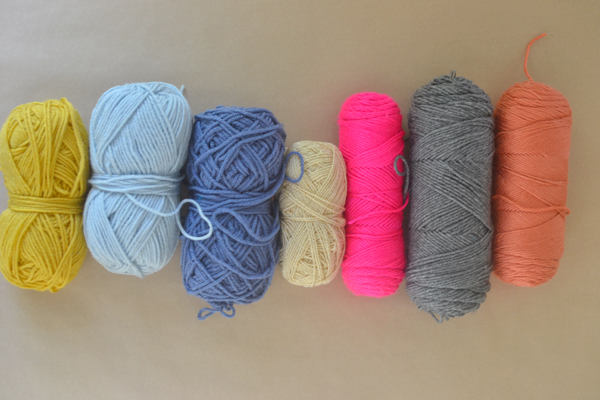
~ yarn (I chose about 8 colors but you can do anything you want!)

~ plastic needles

~ pony beads (optional – I used pearl ones)

~ pom-pom maker– smallest size (or just use your own preferred technique)

~ good scissors

~ masking tape

make a beautiful weaving from an ordinary branch

make a beautiful weaving from an ordinary branch

Process:

~ First, paint your branch.

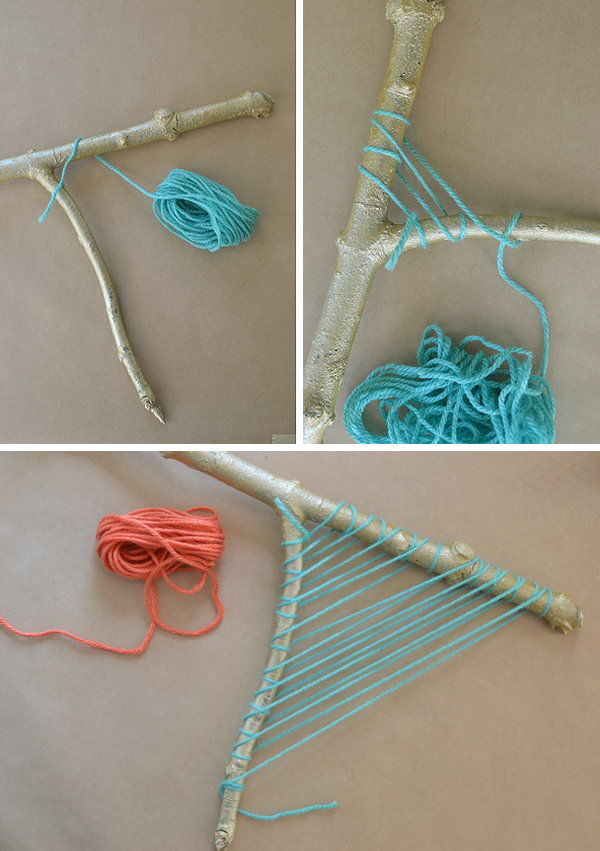
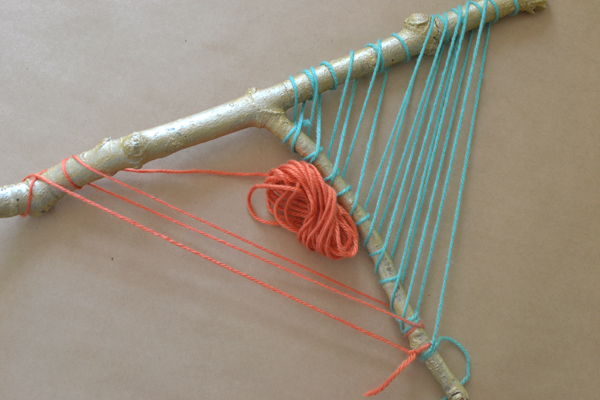
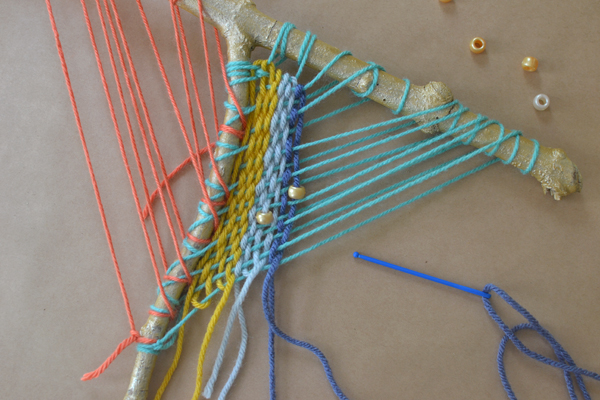
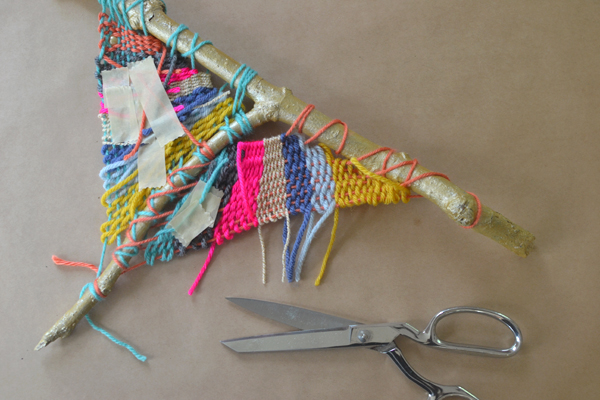
~ Next, wrap thread around to create your warp. I twisted then looped through to secure. It was still a bit loose and wobbly, but it fell into place once I starting making the weft (which is the yarn that weaves through the warp).
make a beautiful weaving from an ordinary branch

~ Then start weaving. Over and under. When you want to change colors, just cut it at the bottom and start again. I wove a few beads on one side. I thought maybe I should play up the asymmetry of the stick.
make a beautiful weaving from an ordinary branch

~ Tape loose threads as you go to the back. They get annoying when they are hanging out all over the place.
make a beautiful weaving from an ordinary branch

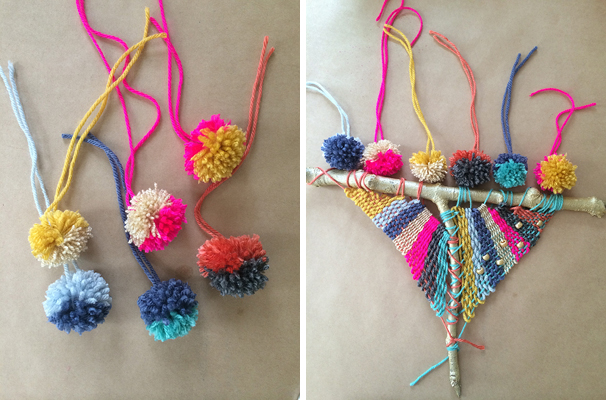
~ Make pom-poms. I did a half-half thing with mine. Make sure to leave the tail.

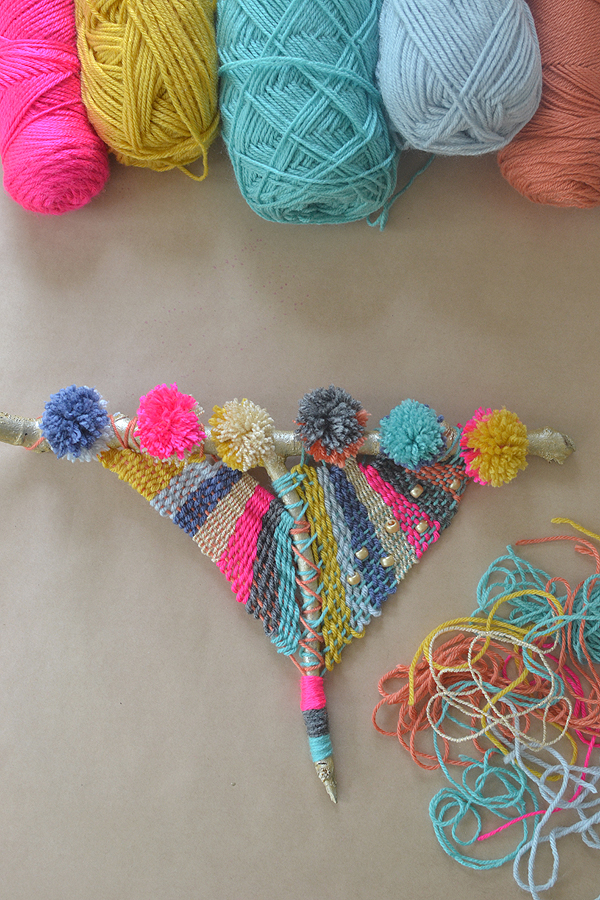
~ Lay them across the top of the branch to figure out the order. Now tie them to the top and trim the tails.
make a beautiful weaving from an ordinary branch

~ I wrapped some yarn around the point on the bottom and tied knots in the back.

Here is a short video which shows the process. It will help in seeing how I tied the warp, and how I dealt with the loose ends (weaving them back through).
make a beautiful weaving from an ordinary branch

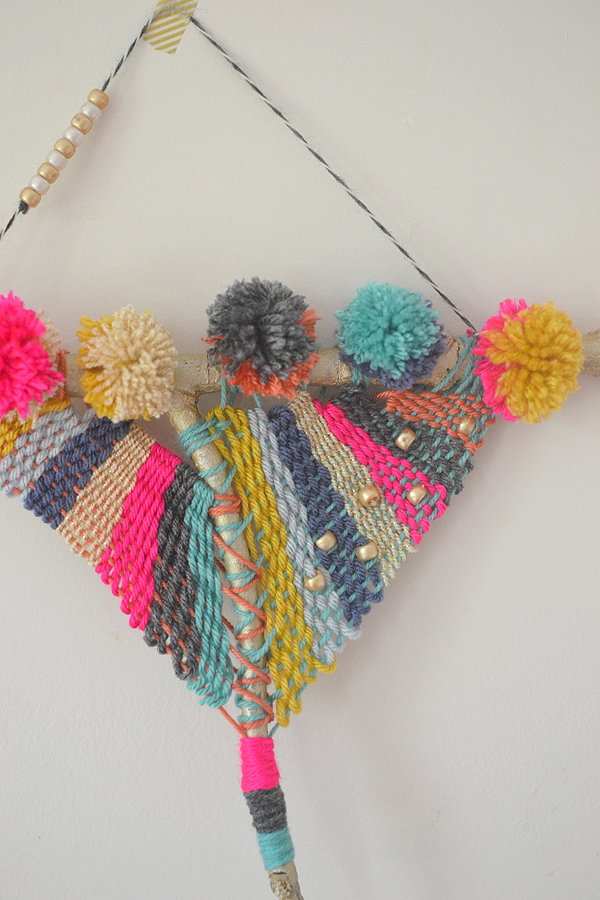
~ Lastly, I tied a piece of yarn as a hanger (and added a few more beads to complete my asymmetry)!
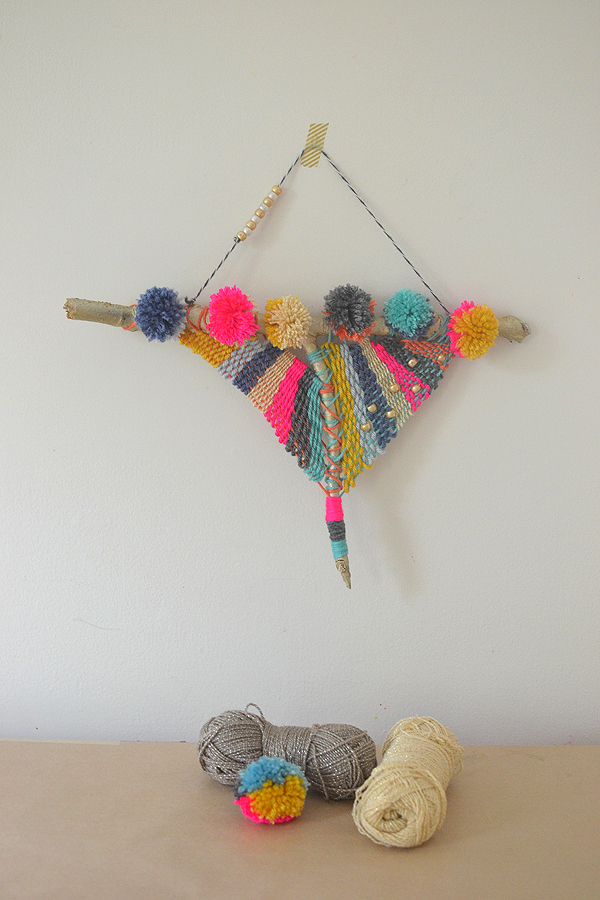
make a beautiful weaving from an ordinary branch

This was a deeply satisfying craft for me. I want to make 20 and open an Etsy shop! I won’t, but I want to. Follow me on Instagram to see more of my new obsession!

xo, Bar


Filed Under: Nature Art, Teen Crafts, DIY Tagged With: yarn, branch weaving

Previous Post: « Family Vacation Idea: Boston
Next Post: Paper Bag Art Portfolio »

Reader Interactions

Comments

  1. Becky S.

    June 10, 2015 at 1:05 pm

    YES to everything about this — the gold, the pompoms, and definitely the Etsy shop. It would be amazing!

    Reply
    • Barbara Rucci

      June 12, 2015 at 6:54 am

      thank you becky, for the words of encouragement!! so nice of you to leave a comment…you made my day 🙂 xo bar

      Reply
  2. Alicia@ Eco Friendly Homemaking

    June 14, 2015 at 5:11 pm

    This is so unique and colorful. I agree these would be great to sell on Etsy I am new to your blog. Really glad to have discovered it!

    Reply
    • Barbara Rucci

      June 14, 2015 at 10:00 pm

      thank you alicia!! and welcome to my blog, so glad that you found me 🙂 xo bar

      Reply
  3. Leah

    March 21, 2016 at 9:21 pm

    So cool! I love the colors you’ve chosen – thanks so much for sharing your process. I also like the idea of painting the twig/stick first. And the pom poms and beads!!!

    Reply
    • Barbara Rucci

      March 30, 2016 at 12:34 pm

      thanks Leah! Glad you like it – hope you try!! xo Bar

      Reply
  4. Melanie

    April 26, 2017 at 6:21 pm

    Love this. I am addicted to weaving videos at the moment.
    As an idea: You could use craft glue and stick a piece of felt on each side of the back to make the finish neater.

    Reply
    • Barbara Rucci

      April 27, 2017 at 8:05 am

      yes! that would be a lovely way to finish the back. thanks Melanie! xx Bar

      Reply
    • Joy

      July 10, 2021 at 11:02 am

      Great Idea! I will have students glue upcycled fabric to the back for a clean finish!

      Reply
  5. Joy

    July 10, 2021 at 11:00 am

    Love this idea! It fits perfectly with our state standards for 6th grade! Going to try it using up-cycled clothes and yarn for the weaving to encourage sustainability in art.

    Reply

Leave a Reply Cancel reply

Your email address will not be published. Required fields are marked *

Primary Sidebar

The Creativity Project
RESOURCE FOR TEACHERS
Start Here!
Your subscription could not be saved. Please try again.
Your subscription has been successful.

Yes! I want to raise thoughtful and creative children. Send me more inspiration, please!

Follow on Instagram

Categories

Archives

Copyright and Reposting

All content on this blog is copyright and owned by Art Bar Blog unless otherise stated. I would be flattered if you wanted to use an image from one of my posts! But please, ask me first. I would also ask that if it involves DIY instructions with a list of supplies that you don't repost any of that stuff because then nobody would have a reason to click back to my original post!

Footer

  • Facebook
  • Instagram
  • Pinterest

About Me

There are two things that I'm passionate about: Children + Art. As an art teacher, author, graphic designer, and mom to 3 creative thinkers, I get to explore my passions every day! Learn more...

I am dedicated to keeping your information safe. Please review my Privacy Policy.

Recent Posts

A newly printed t-shirt lies on a table showing off the freezer paper stencil technique using bright blue ink on a muted green shirt with a Noah Kahan quote from his song Orbiter.

Copyright © 2026 · Foodie Pro & The Genesis Framework