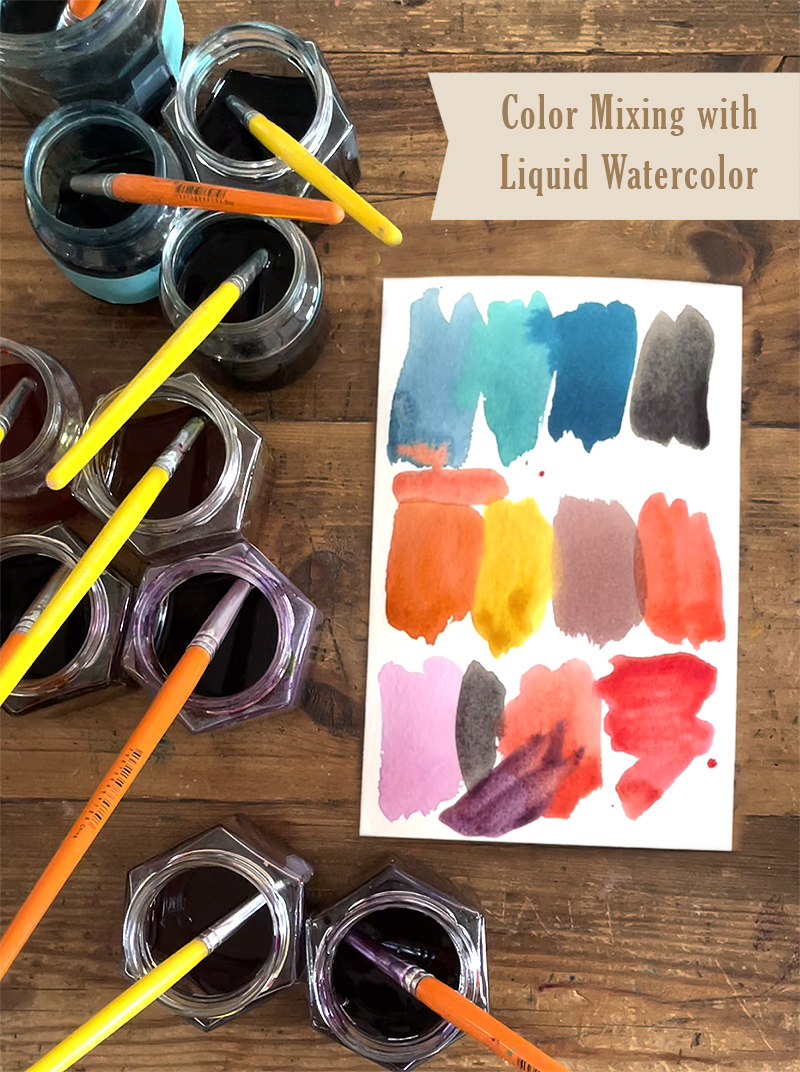
This post is long overdue! I know I have promised to video my color mixing with liquid watercolor for quite some time. The truth is, mixing this medium is not as easy as mixing tempera paints. It is far from an exact science. Part of that reason is that liquid watercolors are very concentrated so not only does a little go a long way, but they are all very dark and look similar so it’s just harder to gauge the color you are making. Another reason this has taken a while is that I don’t usually mix a whole batch of new colors at once. I usually just fill in when needed. But I finally shot the video and put it all together for you!
[ I am a participant in affiliate programs designed to provide a means for bloggers to earn small fees at no cost to you by linking to Amazon.com and affiliated sites. ]
Tips on using Liquid Watercolor
~ I buy Blick because I love their color choices, and their colors are very concentrated. They last longer in my view. But honestly any liquid watercolor works! Get the 8oz size.
~ Liquid watercolor bottles tend to leak from the top w,hen using the spout, so I just take off the top and pour when mixing colors.
~ You don’t need to spend a lot of money on liquid watercolor. You can just buy 7 basic colors to make every other color: red, blue, yellow, green, purple, pink, black.
~ I store my liquid watercolor in a variety of jars. Some baby food jars, some hexagonal jars I bought here, and some jam jars. Just make sure the top fits tightly. The colors should last many months, depending on how often you paint.
~ Have a cup of water handy when mixing colors. Especially with Blick, you will want to dilute depending on how deep or light you want your color.
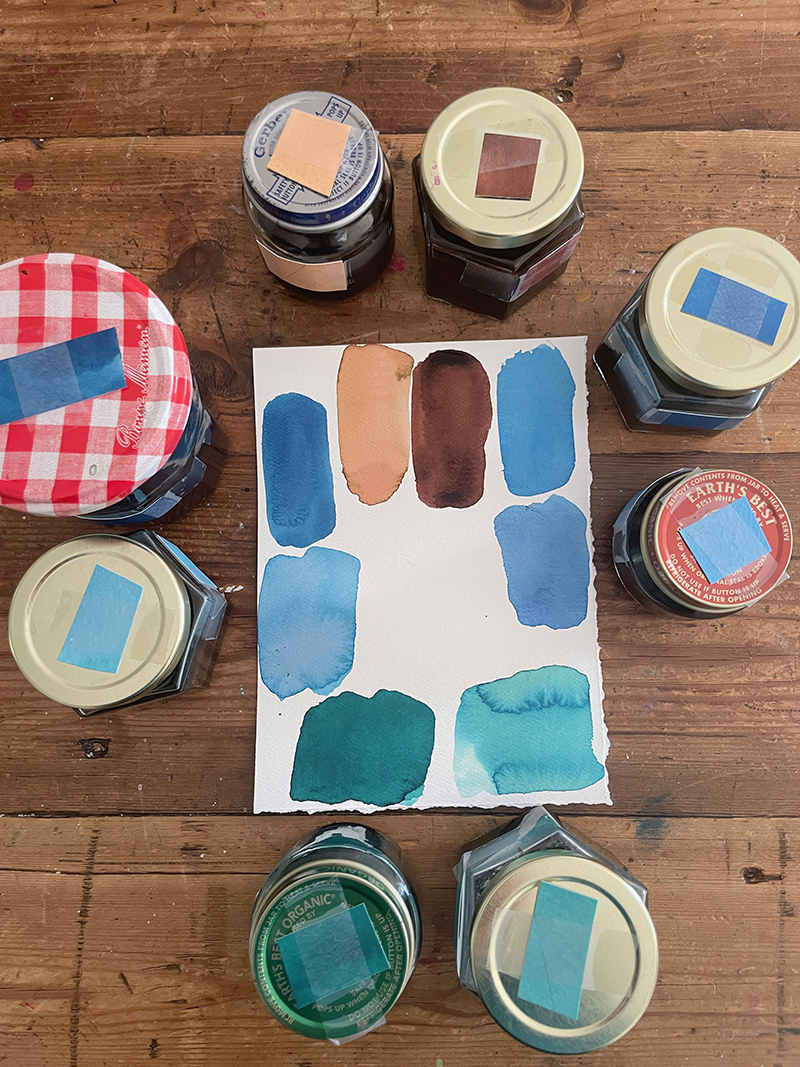
~ Make a swatch card on watercolor paper with the finished colors. When it dries, cut up small pieces to tape to the lid and side of each color. This helps you know what the color is inside.
~ When using a variety of colors at once for a project, try to put a brush in each color, rather than moving one brush from color to color, which can quickly contaminate the colors. Liquid watercolor is less forgiving than tempera in this way.
Notes on the Color Wheel
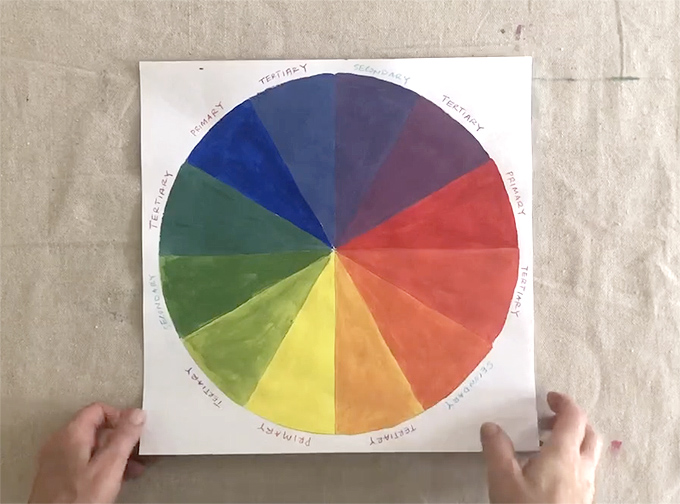
~ As I have explained before in my Color Mixing with Tempera Paints post, and my Mixing Skin Tones post, all colors are derived from the 3 primary colors: red, yellow, and blue.
~ Secondary colors are the 3 colors that are made when mixing 2 primaries: orange (red + yellow), green (blue + yellow), and purple (blue + red).
~ Tertiary colors are when you mix 1 secondary with 1 primary. This is when it gets interesting, and these are the colors are mix the most, like periwinkle (purple + blue), lime green (green + yellow), and magenta (purple + red). Of course with tempera paint, you can use white (which I add to every color I mix) to lighten the hue and make even more shades. There is no white in liquid watercolor, so I use water to lighten a color.
~ In this post and video, I mostly use the principles of complementary colors. Complementary colors are opposite each other on the color wheel: red –> green, purple –> yellow, orange –> blue. To mute a color, just add a drop of its complementary color. This creates a much richer color than just adding brown or black, and creates subtle undertones and variations that are even more apparent with liquid watercolor.
Watch the Video!
I will admit this video was not easy to make. My mixing techniques are so instinctual it can be hard to describe. I also filmed it in Instagram mode, which is vertical, so excuse the fact that I hold the bottles sideways. But I do think it will be helpful to see my process. I mixed a few colors that I forgot to record, so scroll down to the bottom for notes on those. Also, I didn’t mix any greens but you can apply the techniques I use here to mixing greens.
I’ve also written my notes on each color below, so keep scrolling if you prefer to read rather than watch!
Mixing Mauve
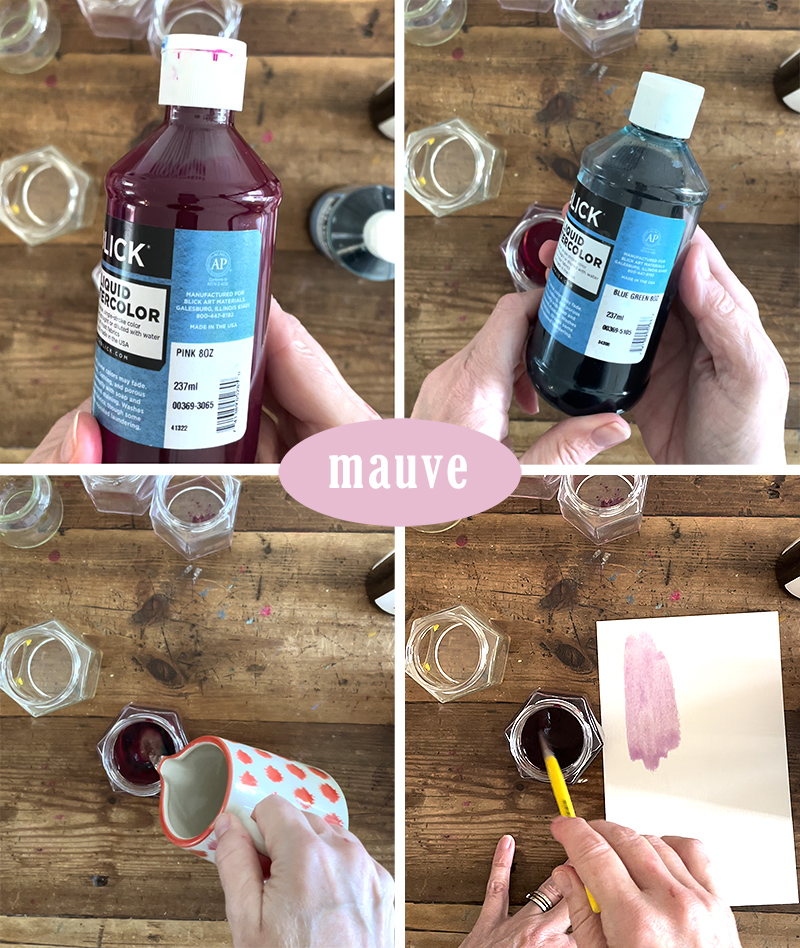
Like with any color, there are many ways to mix mauve. It’s a light pinky/purple, so I start with pink, add some water, then add some blue/green. Why blue/green and not just blue? With just blue, it would make lavender which is cooler than mauve. The green is an unusual addition but my thought is that I wanted to mute the purple and since purple is really just red + blue and green is red’s complementary color, I went with the blue/green to try it. It worked! It could have easily not worked. With tempera I would have used pink, purple, a touch of yellow, and white – so another way I could have mixed this color with liquid watercolor is pink + purple + drop of yellow to mute the purple and water.
Mixing Maize
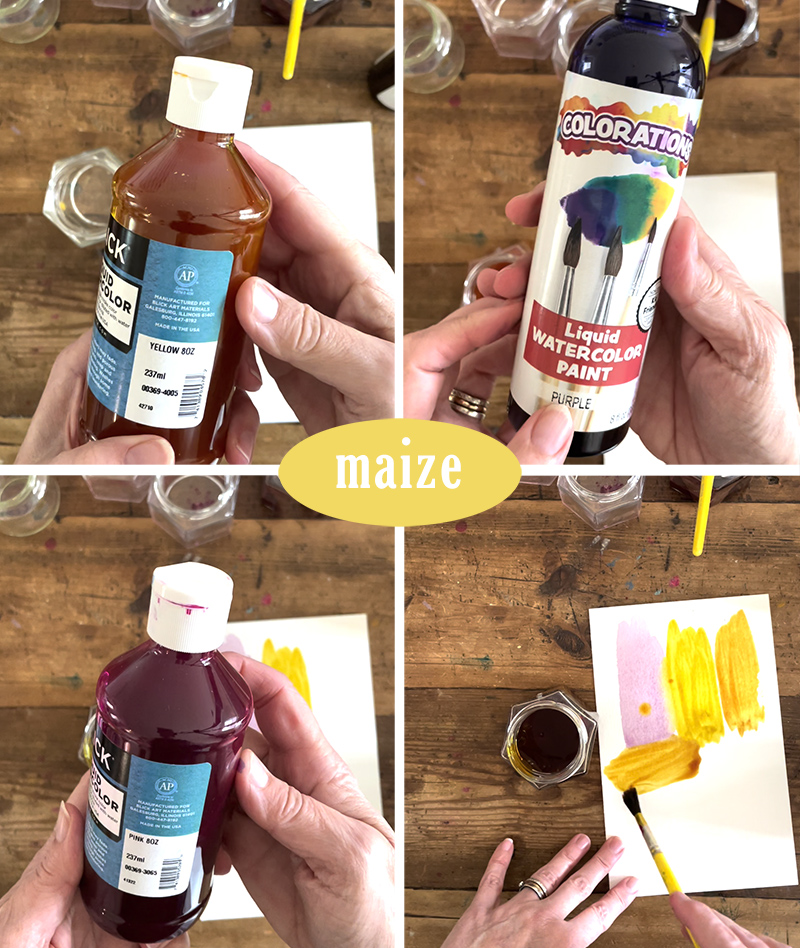
One of my musts with liquid watercolor is to not use yellow straight out of the bottle (I feel the same with tempera). I just can’s help always muting it slightly. If you add a drop of purple (its complementary color) then it will mute the yellow and make a mustard color. To make maize, I also added a drop of pink just to warm it up a tad. I also added a little water.
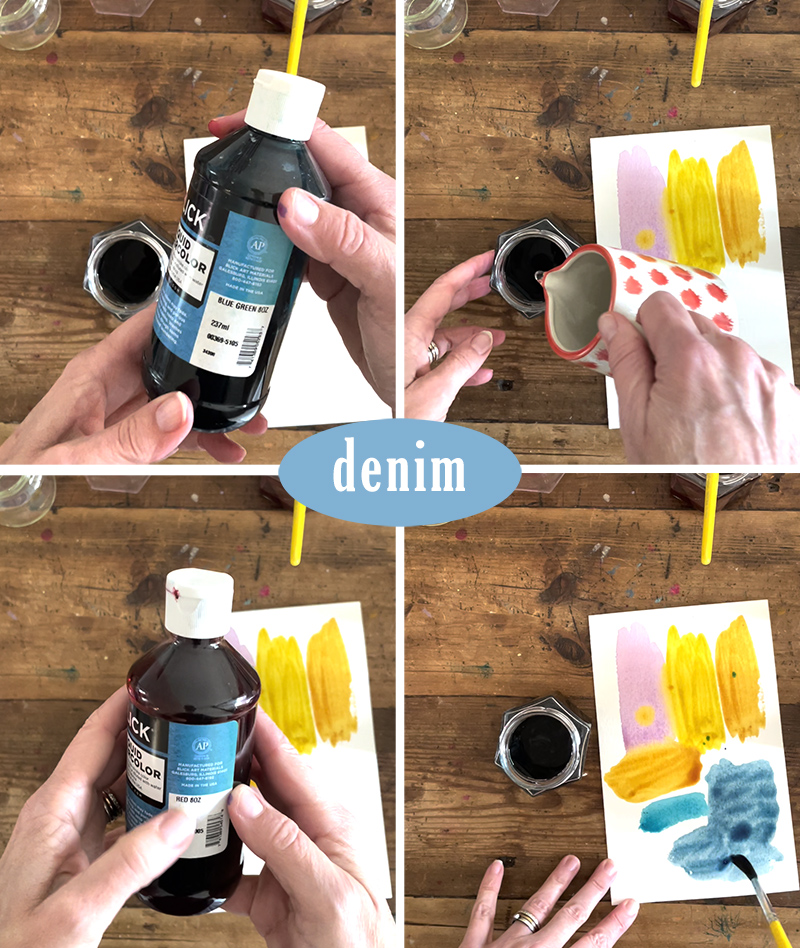
Mixing Denim Blue
For some reason I spend half my time mixing blues and teals with liquid watercolor. I don’t know why I have so many shades, but it’s probably my obsession with the indigo color, both in shibori and with sun prints. Here I wanted to make a denim blue, which is a muted blue that is a tinge warmer. I started with blue/green, added some water, then added a drop of red (green’s complementary color). This worked! Clearly I love the blue/green color straight from the bottle, too. This is one of the few colors that I use without mixing. Add green to make it more teal, yellow to make it more turquoise, and red of course to mute. If you add orange to the blue/green you start getting into the brown family.There are soooo many different shades to make with this one bottle of blue/green.
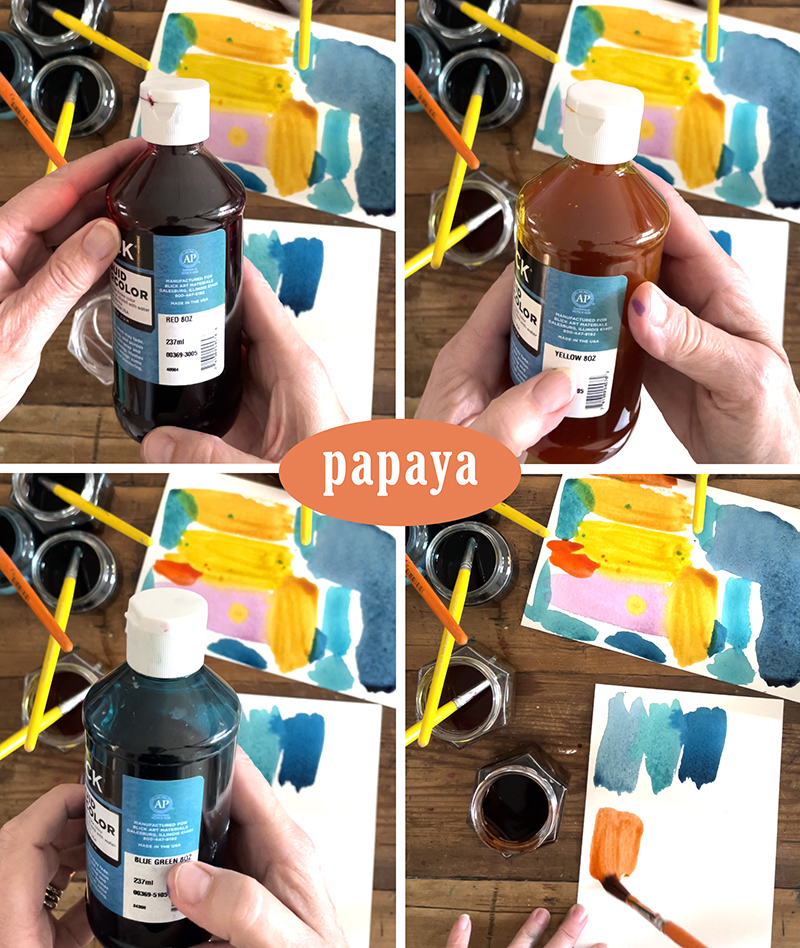
Mixing Papaya
I don’t love using orange straight from the bottle. I love a more muted orange. Here I am going for a muted reddish orange, which I call papaya. I don’t have a bottle of orange because it’s the easiest color to mix. I start with red, a little yellow, and some water and then I test out my color. I like the bright hue but I want to mute it slightly, so I add a drop of blue/green and some more water. I could just use blue to mute, which is orange’s complementary color, but green is red’s complementary color so why not try the blue/green to mute and see what happens! Again, there are so many shades to make, and in the video I do play around with it slightly as you can see in the following swatches.
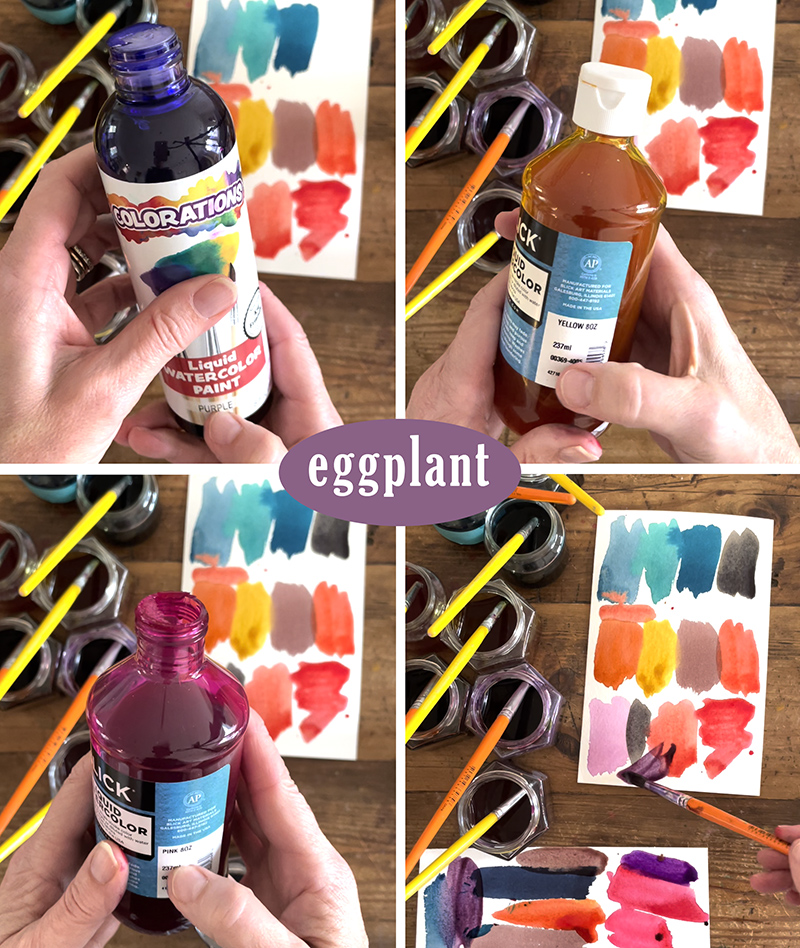
Mixing Eggplant
Purples are another obsession of mine. I have many shades at all times. Here I want to make a muted purple which is fairly easy to do with just purple and yellow (complementary colors). But liquid watercolor is it’s own beast and sometimes you just don’t get what you think you’ll get. In the video you can see that mixing these two in the amounts that I did turned it charcoal. It was very odd, but that’s what happened. I tried again and this time I added a drop of pink. It turns out the yellow is quite strong, so I had to keep adding more purple and pink to get the shade I wanted.
More Colors
I mixed these on another day but forgot to take a video. Browns are pretty easy to make, just mix 3 primaries or 3 secondaries (which in theory is still just 3 primaries). Then tweak it my adding more red to make a reddish brown, or more blue to make a cooler brown, etc. Then add water to lighten the shades. The blues and teals I already explained above, but I just wanted to show you some more shades. I think my fave shade of all is the teal on the bottom left. Just so good.
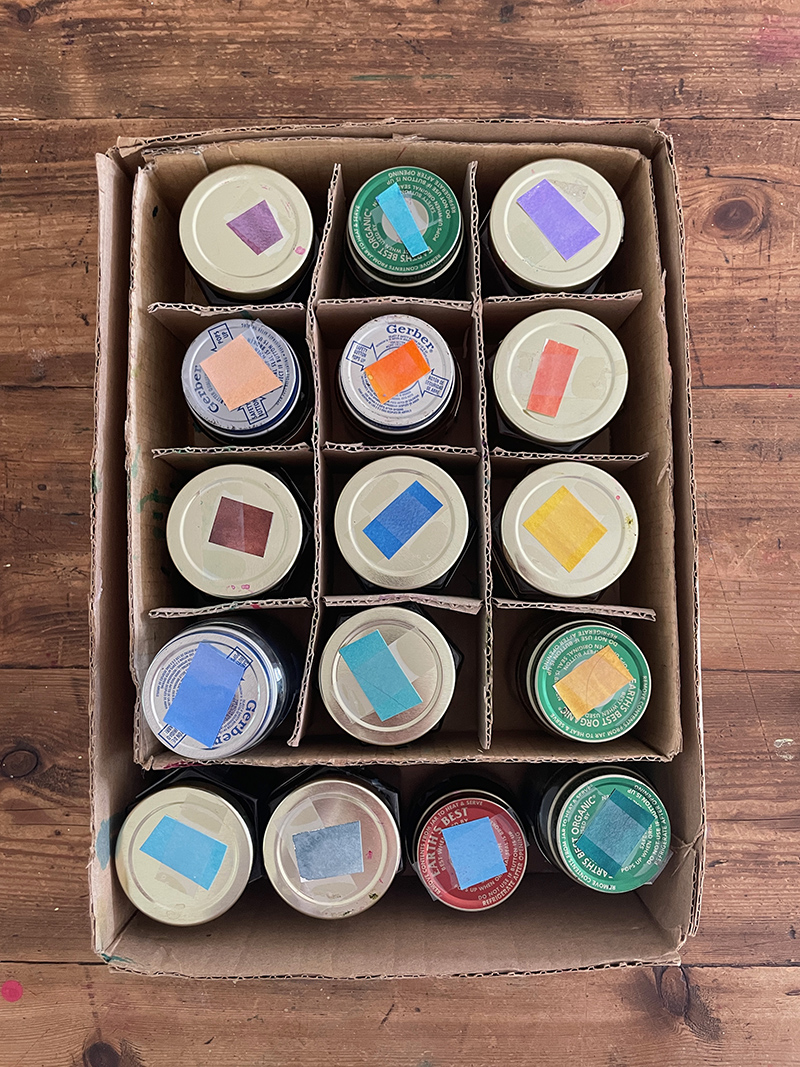
Storing Liquid Watercolor
And lastly, here is a photo of how I store my jars. I keep them in a closet. They store really well this way and are easy to take out and put away. The separated boxes come with the hexagonal jars if you order them, but you can also just cut down a smallish box so that it acts like a deep tray.
One last tip…
Mixing liquid watercolor is all trial and error, but there is truly no “bad” color. They are all beautiful. But if you end up with a big jar of something that just didn’t work out, don’t pour it out. Use is as a base to add to other colors to mute them. or pour some of it in a new jar and keep adding to get a new shade. My jars truly last me quite a while and I don’t go through as much as you might think.
Have fun mixing!!
xo Bar
– – – – – – – – – – – – – – – – – – – –
16 Liquid Watercolor Art Ideas



Love this post! But I don’t see a link for the video. Would also like to know your Teal recipe. Thanks for sharing!
Hi Jeanne, the video is embedded in the post. You might have scrolled by it 🙂 Also, the teal is blue and green with some water! ~ Bar
Thank you so much for the liquid watercolor tutorial ! It’s quite helpful. I’ve wanted to try this more with my students instead of the soft pan individual cases . The cases are a pain to clean up after class . Most children just won’t mix enough water and stir to get a desired color . I love your ideas and tutorials!
Yes, liquid watercolor is so much more vibrant and saturated. For pan watercolor, I always had my students count 20 swirls to start, so that helped. Thanks for your comment! ~ Bar
Loved this video. Thank you! Planning to show it to my six year old when she wakes up. I am sure it will inspire her!
I just adore your color mixing videos! In addition to learning so much I find them tranquil and very calming to watch after spending my days with amazing but loud three-year-olds: ) Thank you for sharing your helpful tips and beautiful ideas.
Thanks for your comment, Kristin! I love to hear this 🙂 ~ Bar
Thanks for this color mixing guide! This sounds like my next art project 🙂