Revamping this popular Sunburst Paintings post today because I had a lightbulb moment during a sleepless night recently… make them with a heart!

[ This post was originally published on the blog Small for Big. ]
There is something so satisfying about an art project that combines painting and math. It probably has to do with the whole left brain vs. right brain theory. Artists are usually considered more right brain thinkers, with math being more of a left brain function. But in reality, most people use both sides pretty well. These paintings remind me of my childhood when I used to spend hours coloring in my geometric coloring book. Even back then I loved a good math/art combo!

[ I am a participant in the Amazon Services LLC Associates Program, an affiliate advertising program designed to provide a means for us to earn small fees at no cost to you by linking to Amazon.com and affiliated sites. ]
Supplies needed for Sunburst Paintings:
~ Ruler
~ Pencil
~ Small circular object
~ Watercolor paper (ours was trimmed to 6 X 9)
~ Painters tape or washi tape
~ Piece of cardboard (to tape paper to, or you can tape to the table)
~ Paintbrush & glass of water
Instructions for making Sunburst Paintings:
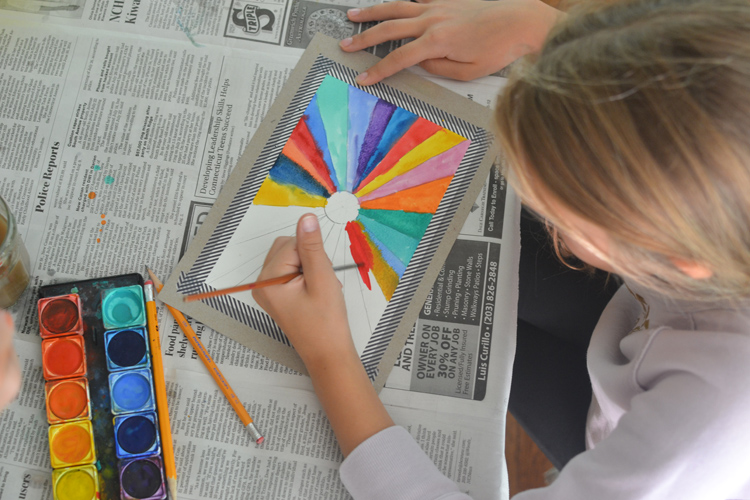
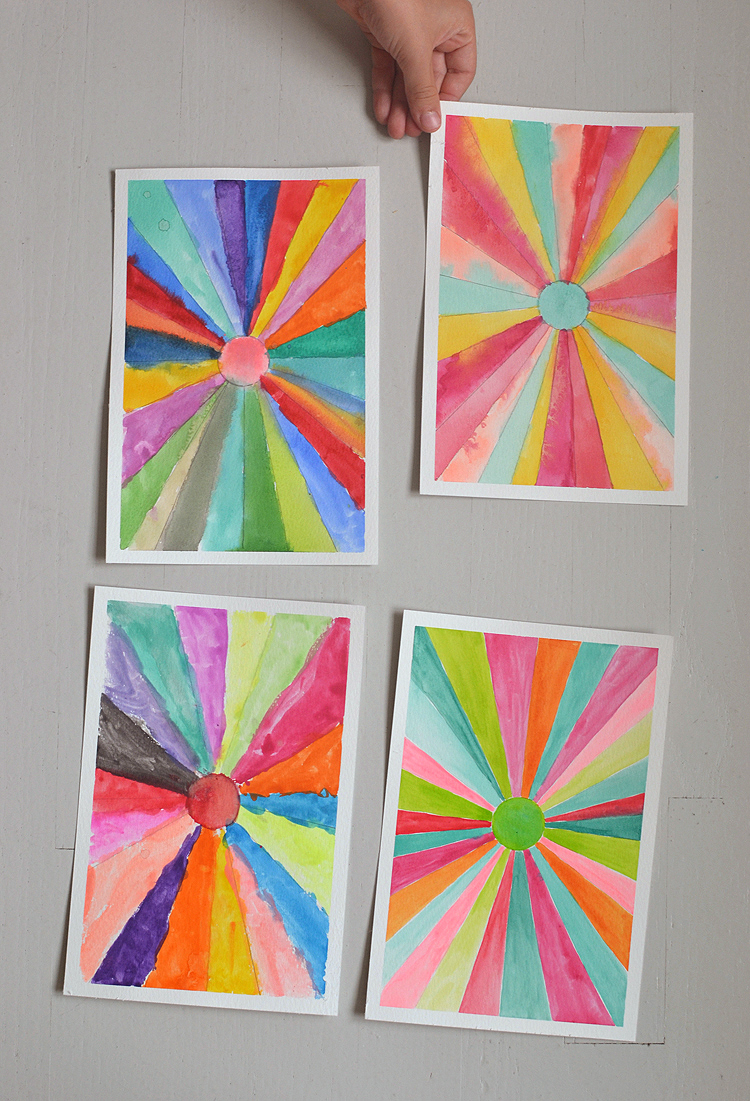
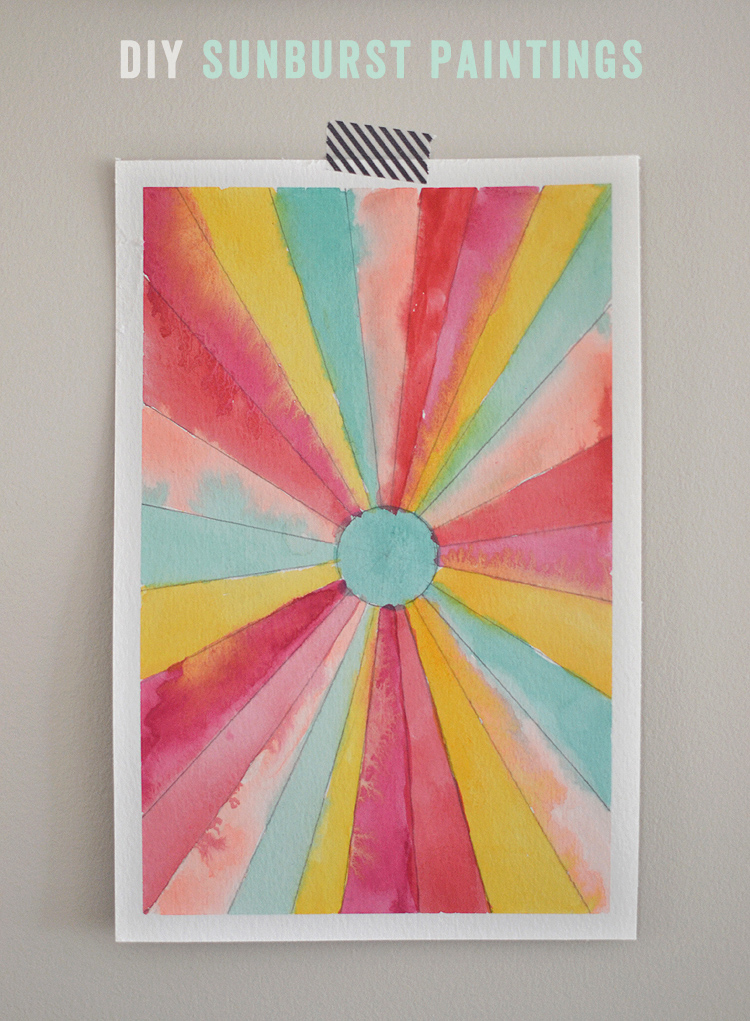
Step 1: Start by taping your watercolor paper to a piece of cardboard (we used cereal boxes). This will create a nice white border when you are finished. I used washi tape because I didn’t want it to be too sticky. . . just sticky enough to keep the paint out, but easy to peel off. Painters tape works well, too. Taping the paper to a board allows the artist to turn the paper around. But you can also tape the paper to the table.
Step 2: Next, find the middle of the page with your ruler and mark it with a dot. Take your small circle object and draw a ring around the dot (we used the inside circle of the washi tape, about 1.25” diameter).
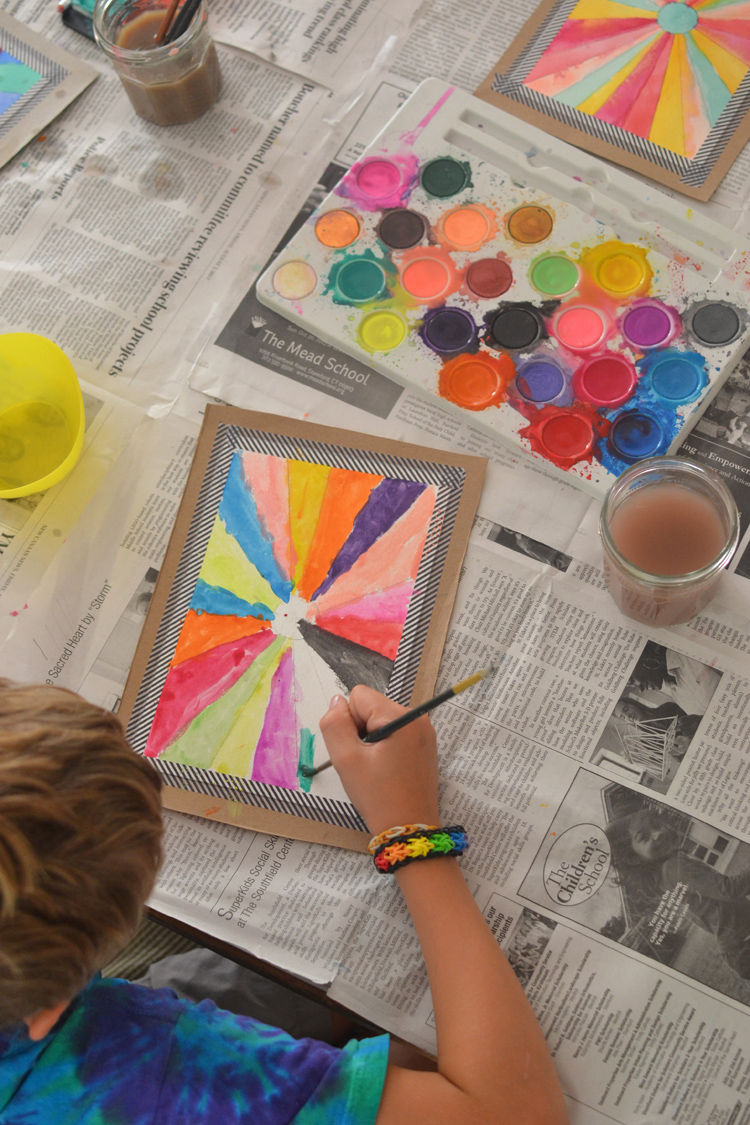
Step 3: Now have the kids take their ruler and draw lines through the dot. This would be a good time to talk about converging lines! If you have older kids, you can even throw in the word perspective and teach them about points on the horizon. Little kids might need help holding the ruler down and running the pencil along the edge, but they learn quickly and usually they want to do it all by themselves.
Step 4: After they have finished their lines, erase the ones in the circle. Now it’s time to paint, the best part! They don’t have to use watercolors (I just happen to love this medium if you can’t tell). They can use markers, colored pencils or even crayons.
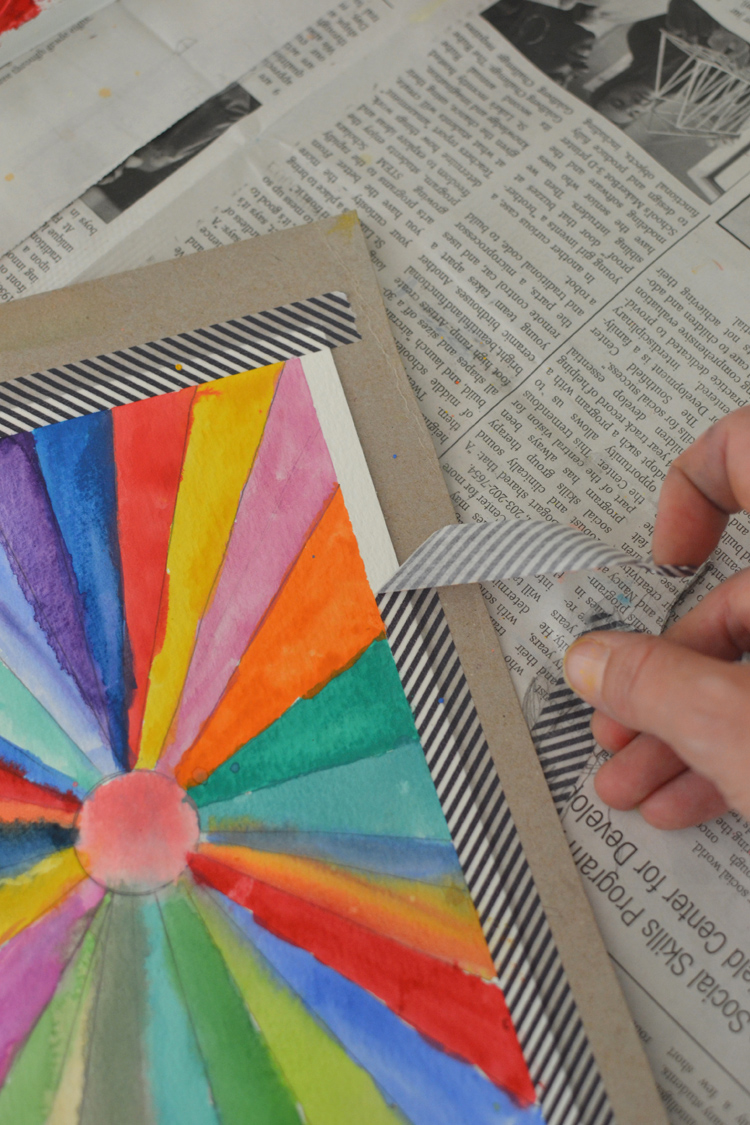
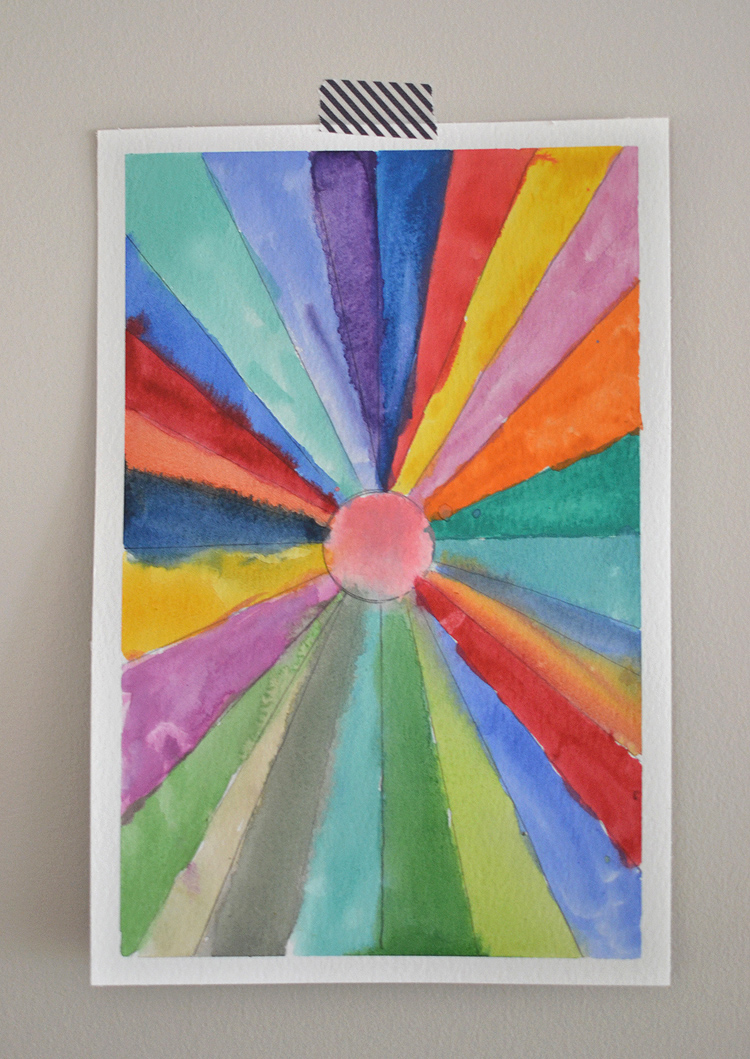
Step 5: Lastly, when the paintings are dry, you can slowly peel off the tape (another extremely gratifying task). You will be amazed at these beautiful little works of art.
As with most of my art projects, these are just as fun for adults and I encourage you to try. One note from the wise, make your paintings after your kids. They do tend to compare their work with yours, especially if you are good at coloring in the lines. My kids know by now that I will always say perfection in art is boring and that I LOVE when paint is outside of the lines. But they don’t believe me because they are kids and I’m their mom. Someday they will hear my voice in their heads and stop striving for perfection (I hope).
xo Bar
– – – – – – – – – – – – – – – – – – – –
Did you like this post? Here are more watercolor painting posts for kids:


So very pretty! Art meets math? Why not 🙂 Happy back to school everyone!
They look great! I’m strong in arts but not so much at maths. How would I explain the maths part of this project to the kids if i’d like to do this project?
Hi Suus, you can tell the kids that these are converging lines. They all converge to one point, like the rays of the sun. I hope this helps! xo bar
Hi – great project… What kind of tape are you using to create the clean-line frame around the painting/ It doesn’t look like painter’s tape (which is very expensive). btw – Love the slime video !
I believe we used washi tape for these ones, which works just as well. glad you like the slime video, Mary! xx Bar
Great idea! My kids (aged 4, 6 and 8) and I paint the watercolour hearts every school holidays at least once and they also get painted at most of their birthday parties or whenever they have friends over! I currently have a narrow wall in my house covered with them and each one has a way to be kind written on it (an activity we did together after a week of sisters not getting along very well that was driving me nuts) I have also made heart templates and sent it home with their friends mums at their request. We are going to try these on the weekend and I bet they will be a hit. I’m a prep teacher in Australia and I just LOVE your blog and book for ideas for school and at home. A few of my colleagues have asked for the link to your blog too and I’ve seen activities pop up around the school!
Hi!
Love your ideas.
Can you tell me what brand of watercolors you use? They look so vivid and pigmented.
Or maybe you use cake tempera? The top photo show 12 wonderful color options>
Thank you!
hi Joyce! we use lots of different ones. one of my faves is the OOLY brand, they have like 20 colors and it’s cheap. we also use straight up Crayola, even cheaper. that one is good for very little kids because they don’t have to mix the color too much, it’s already kind-of wet. we do use tempera cakes as well, especially the fluorescent ones by Sax. the watercolors featured in this post – the top one is an opaque watercolor set from my art school days from Grumbacher, and the brightly colored ones that have 24 colors are from Vilac. hope this helps! xo Bar