
Since I’ve opened up my home to art classes and art camp for little kids, I’ve had supplies out night and day. It’s been so tempting to just sit down and make something for myself. So I did…and I really think you can make this, too!
A few supplies are needed: (affiliate links)
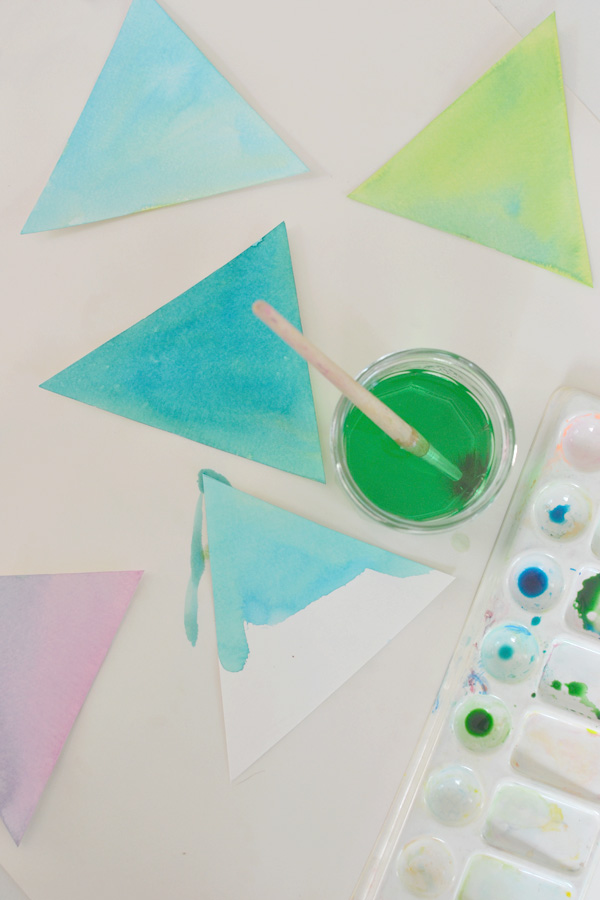
Watercolor paints (liquid is what I used, but you can use regular
with great results) + brushes
Rubber stamps + ColorBox ink (I got my shape stamps from Paper Source)
Baker’s Twine (Etsy is a good source but Amazon has it, too)
Hole punch (1/8″)
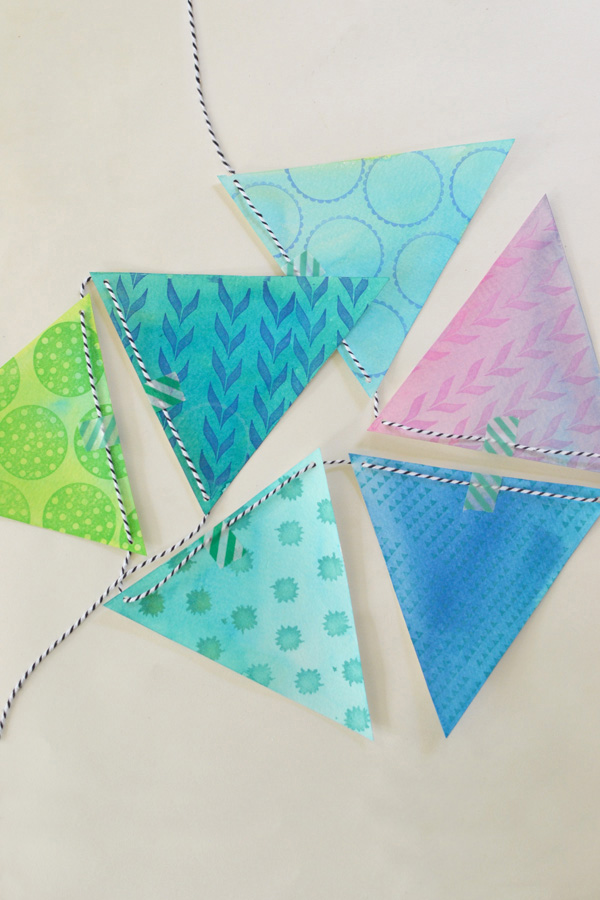
Step 1: Trace and cut out your triangles (anywhere from 6-9).
Step 2: Choose your paint colors. I kept mine in the blue family so the garland was a bit more monochromatic. But anything will work!
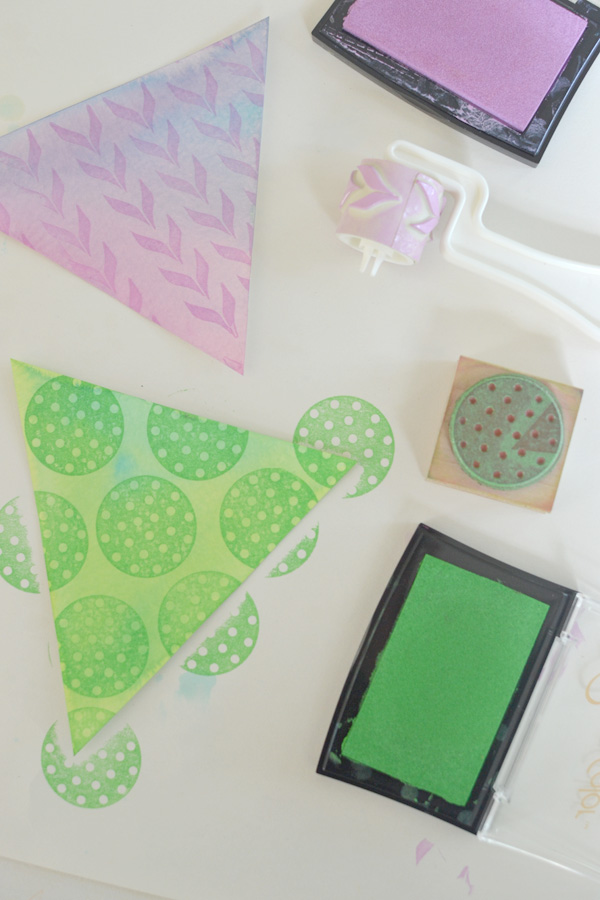
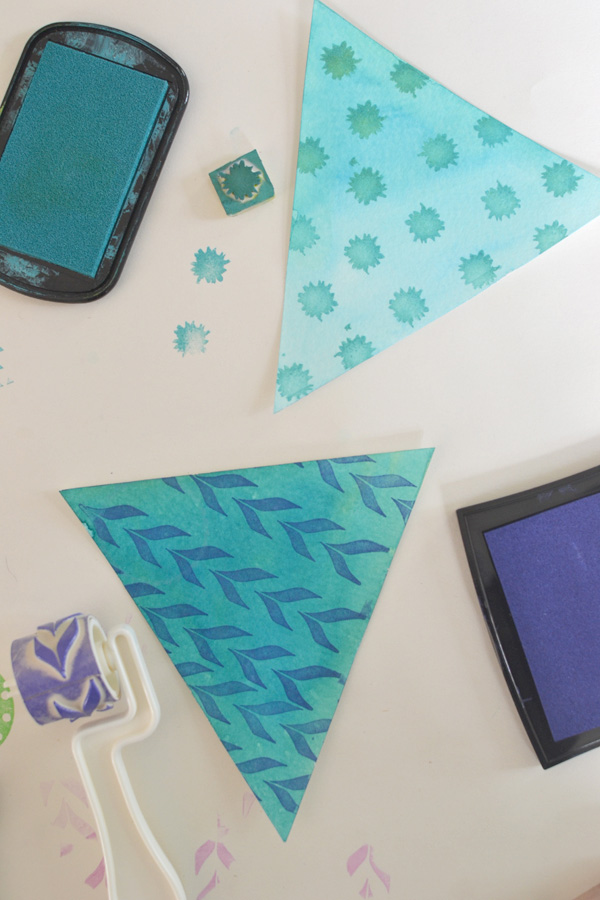
Step 3: After the triangles are completely dry, go ahead and stamp them. I actually painted all of the colors on a separate test sheet so that I could test what colors to use for my stamps. I highly recommend doing this extra step.
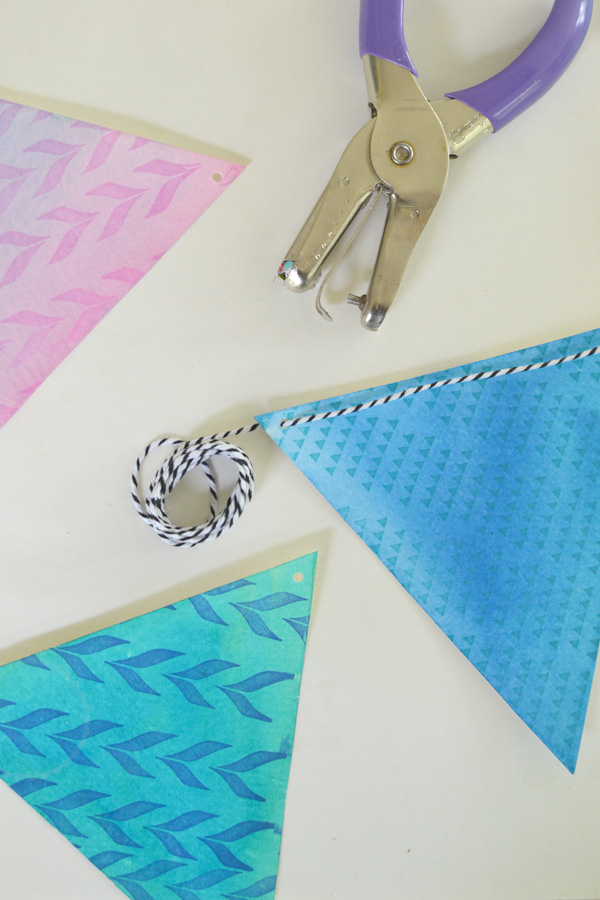
Step 4: Punch holes at the corners and string your twine through. You can have the twine showing across the top, or weave it the other way so it’s at the back.
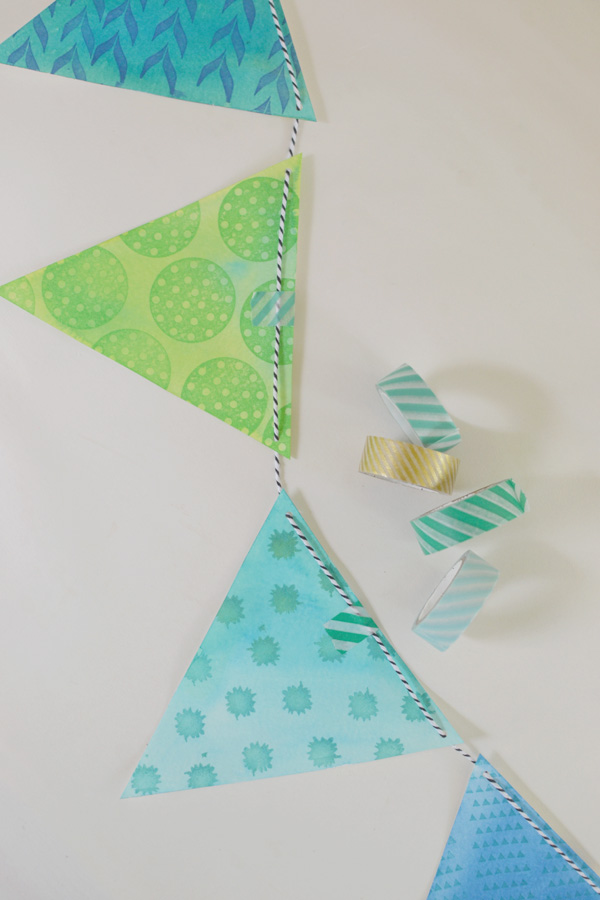
Step 5: I put a little bit of washi tape at the top of each triangle because I actually ended up sending this in the mail. But this step is optional. I like the added pattern, though!
And there you have it! The skinny on how to make a pretty little garland. I hope you make one, too!
xo, Bar


I love this technique! This is great!!! And the simple way you put it together. Very helpful actually. Thank you!