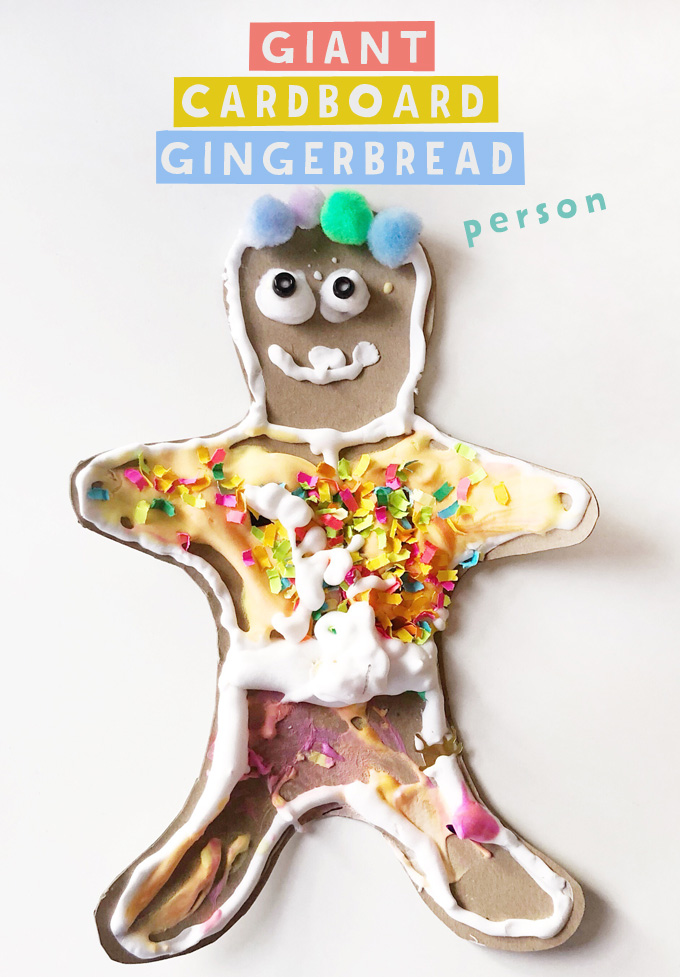
I came across Heather Klausa’s Instagram @MAKEartStudios after she made these amazing giant cardboard gingerbread people using homemade puffy paint piping. I asked her if she would maybe want to write about them and share her process on my blog, and she said YES!! I’m feeling so lucky. Thank you, Heather, for indulging me!
Read on to learn about how these were made!
Here is Heather, in her own words…
Like so many people, I was swept up in the amazing ideas from Barbara’s book, Art Workshop for Children. My students and I (as well as my entire family) built our fair share of giant cardboard cakes this summer. We took things in a different direction this week when we filled piping bags with homemade puffy paint and went to town on some giant cardboard gingerbread people.
[ I am a participant in the Amazon Services LLC Associates Program, an affiliate advertising program designed to provide a means for us to earn small fees at no cost to you by linking to Amazon.com and affiliated sites. ]
Supplies needed to make Giant Cardboard Gingerbread:
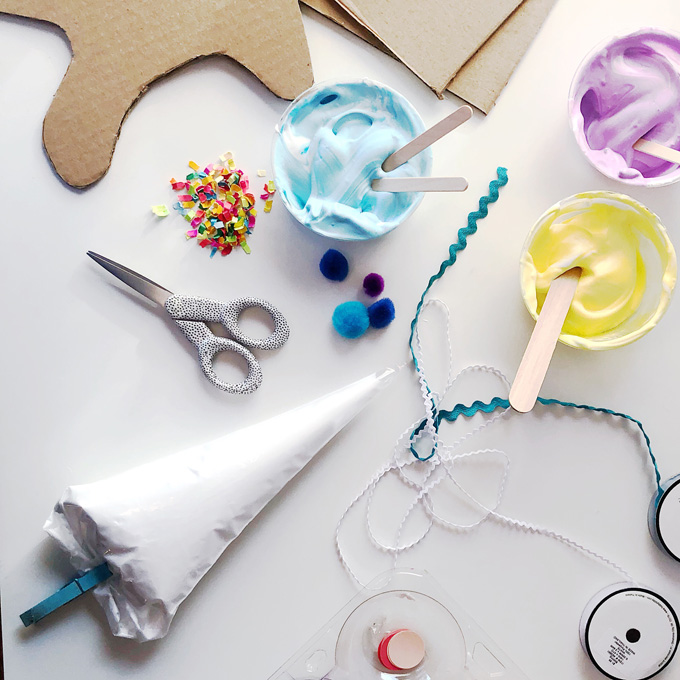
~ Cardboard
~ Scissors
~ A variety of trimmings (confetti, pom-poms, ric-rac, beads)
~ Puffy paint (recipe below)
~ Piping bags or Ziploc baggies
First things first, go and gather all of those cardboard boxes that are crowding your recycling bin and draw out a simple gingerbread person. If cutting curves on thick cardboards send shivers down your spine, use an old cereal box. The thinner cardboard works great and is easier to cut.
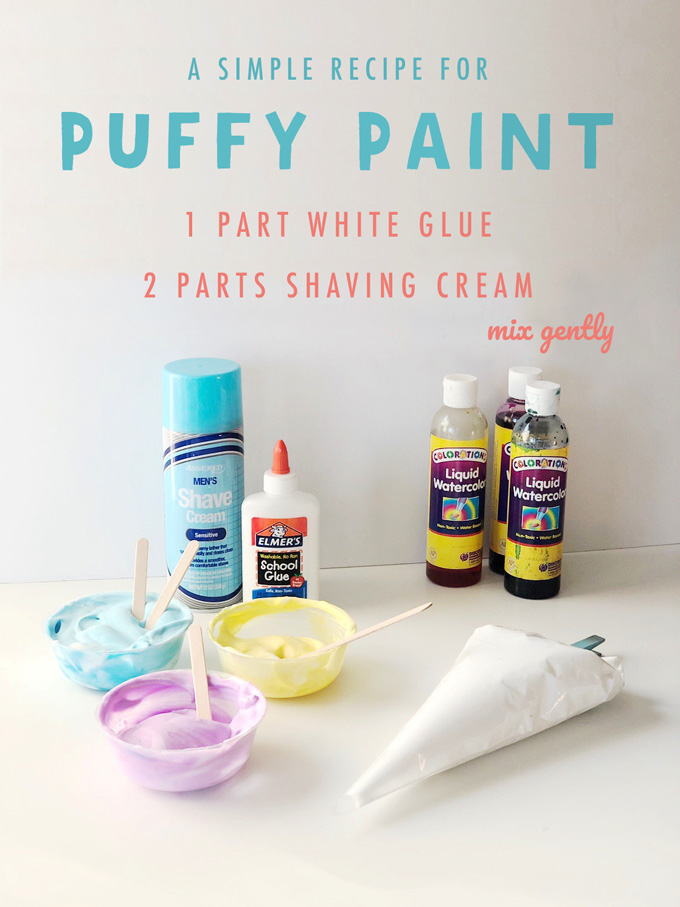
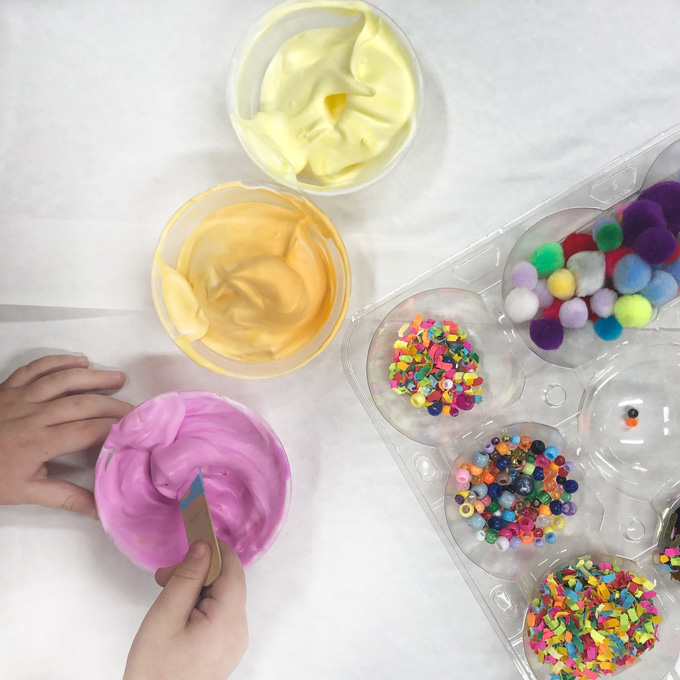
Next, mix yourself up a batch of puffy paint. We keep it simple here and just gently mix together two parts shaving cream with one part white glue. This holds up just fine for our purposes and my own kids enjoy making it themselves. I split this batch up and even added some liquid watercolor to add some variety in color.
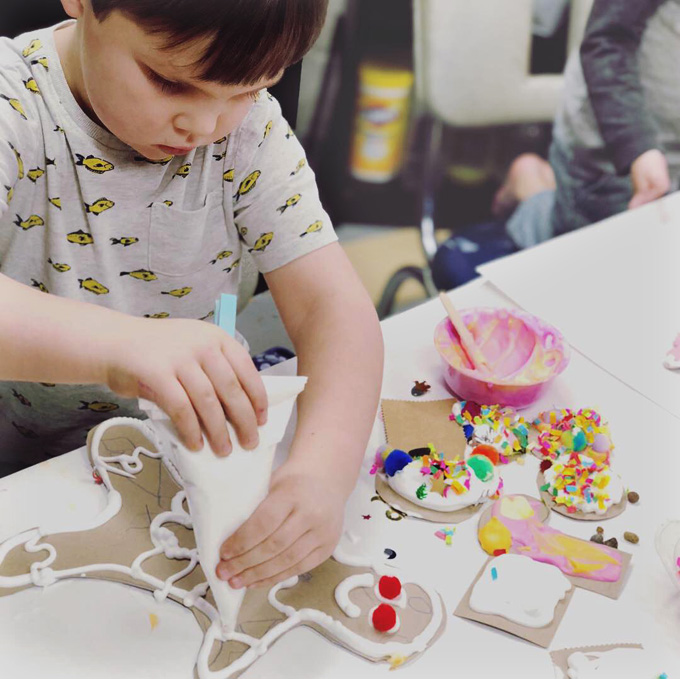
Prepare your piping bag by snipping off the tip first. To fill the bag, hold the bag in the middle and fold the top half down over your hand to open it up. With a popsicle stick or spatula, scoop the puff paint and push it into the bottom of the bag. Scrape any excess paint against the side. You’ll want to only fill the bag about 2/3 to 3/4 of the way up. Twist the top of the bag once and gently “burp” the bag by adding a bit of pressure to eliminate any air bubbles that may have gotten trapped before piping. I added a clothespin at the top to help keep the bag closed.
NOTE: If you don’t have any piping bags laying around, a simple plastic baggie would work well too, just cut the tip off one of the corners.
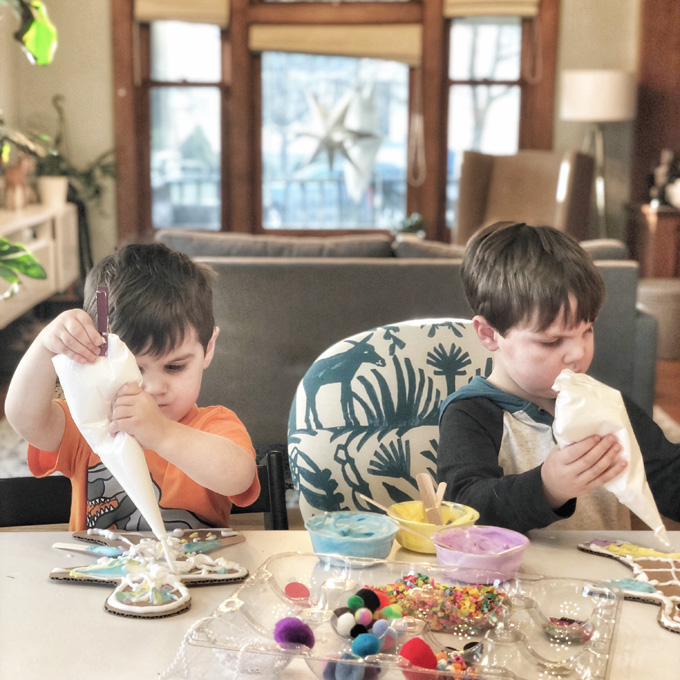
I gave a little demo of the piping bag, stressing that you should hold one hand on top, squeezing near the clothespin and one at the bottom, guiding the bag where to go. My youngest (3 years old) remembered best when we reminded him that one hand was the kid in the backseat and one hand was the daddy driving up front. I was surprised at how quick the littlest ones figured this out.

After filling a divided container with paper scraps, pom-poms, ric-rac, sequins, beads, and whatever else we had laying around we armed students with popsicle sticks to help frost and they went to town. They loved spreading thick and thin layers of puff paint, layering embellishments and discussing which various craft materials represented the assortment of cake decorating supplies they were familiar with. Black circles were chocolate chips, bright paper scraps from the shredder were sprinkles, and beads were red hot candies.

Kids caught on to the piping bag fairly quickly and ages 3-10 (as well as myself) were deeply absorbed in creating masterpieces well into the afternoon.
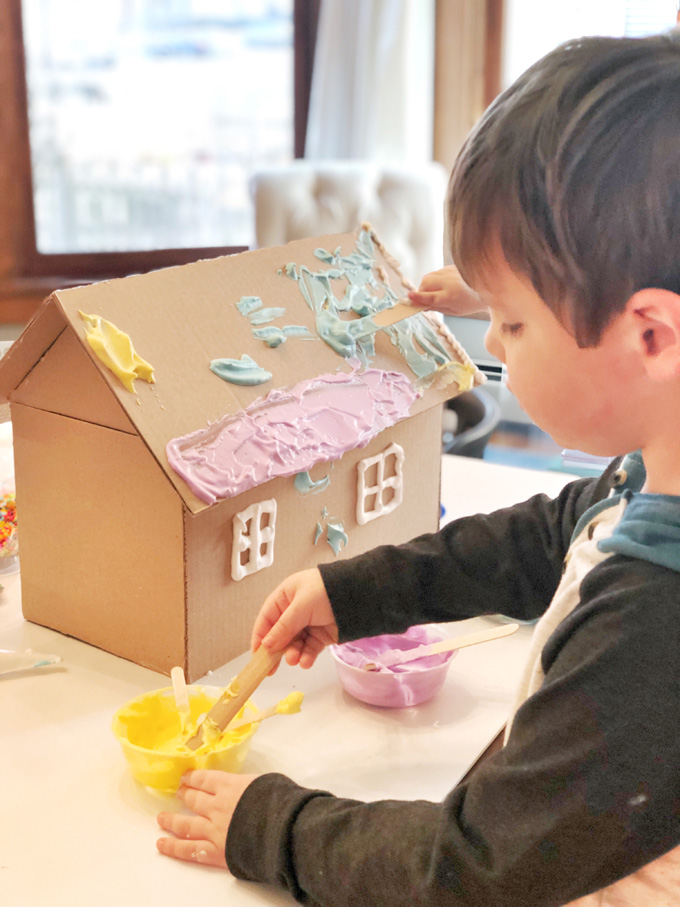
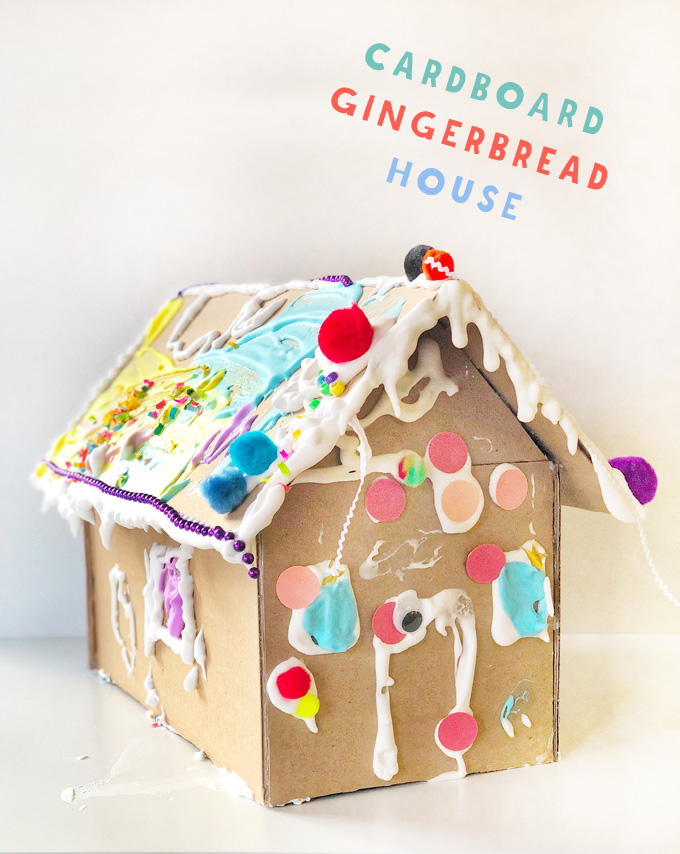
My kids loved this experience so much that I took it a step further and I surprised them with an oversized cardboard gingerbread house after naps.
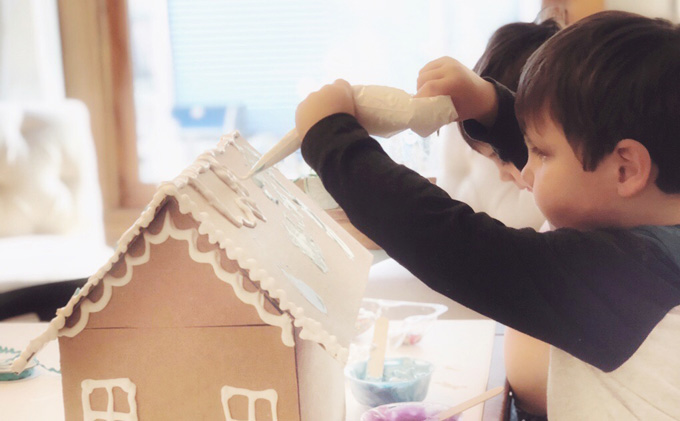
HOT TIP: A little hot glue goes a long way with an oversized cardboard gingerbread house. They went to town piping, “frosting”, and decorating. My boys especially loved piping icicles on the roof line and watching them drip further and further towards the table.
Tag me on Instagram @makeartstudios if you give it a shot so I can see what ideas you and your people come up with!
~ Heather

A little about Heather…
Heather received a BFA from The University of Illinois in Art Education and then another in Painting after finishing up at the University of Verona, Italy. She is a certified art educator and have been teaching in the public elementary schools since 2005. An accomplished art educator for the past 12 years, she has worked in Hinsdale, Villa Park and Riverside teaching art from pre-school to high school. Heather founded MAKE in 2017 to offer kids, teens, and adults alike a variety of opportunities to engage in meaningful and engaging art experiences. She loves staying home full time these days with her three children, and is enjoying teaching on a smaller scale out of her home studio in the suburbs of Chicago. She mostly paints but dabbles in anything else that crosses her path and strikes her fancy.
Follow Heather on her inspiring Instagram feed where she generously shares ideas with the world.
– – – – – – – – – – – – – – – – – – – –
Did you like this post? Here are more Holiday ideas for you and your kids:


I run out of ideas to do with my kids. Thank you I will try this tomorrow.
I would like to thank you from the bottom of my heart for these incredible ideas! I feel very inspired to use them in my kids art classes. I know they will LOVE them!