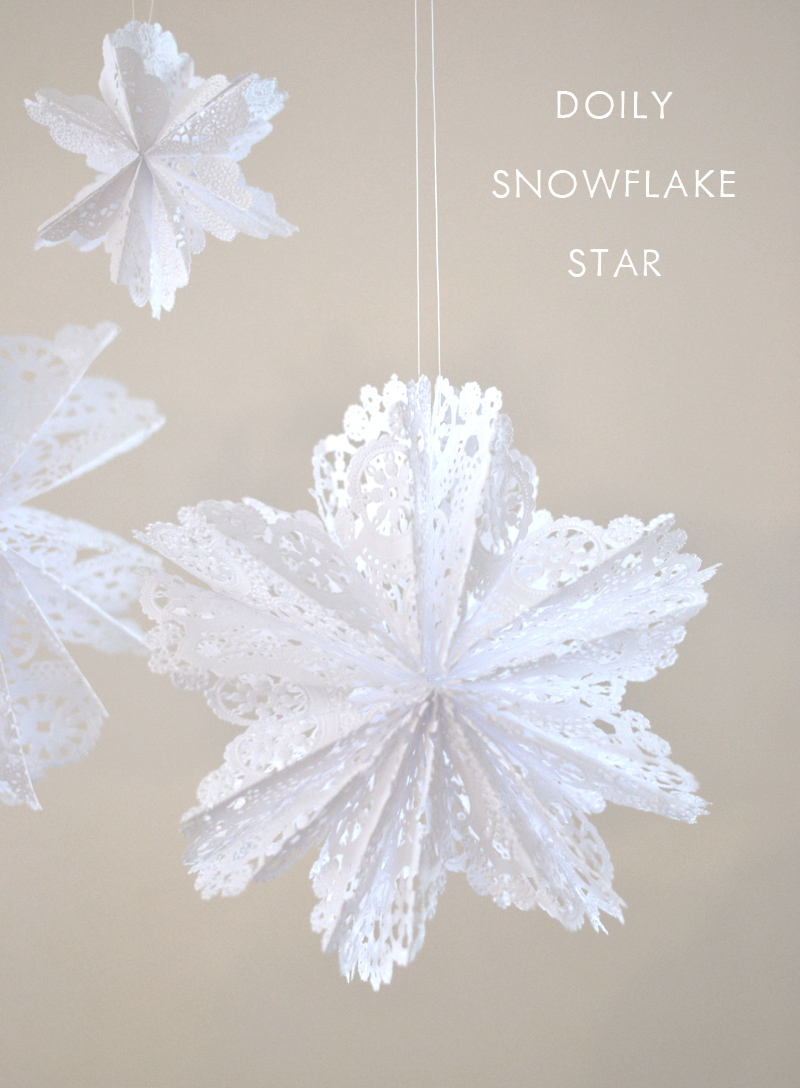
The idea for these beautiful, lacy snowflake stars came from the paperbag stars we made last summer. SITS Girls had the original idea and made them out of white paper bags. I became obsessed with them because they are so fast and easy! So last summer we made them in art camp and painted them with neon paints, and we also made some grown-up versions with white chalk markers (see here on Instagram).
I was sitting in my office on the floor last week, trying to get everything back on the shelves where they belonged. I call it “supply-creep”, when all the art supplies from the shelves somehow end up scattered on the floor and I can hardly get to my computer. Anyway, as I got to the doilies, they were too big to fit in the plastic storage box. I decided to play around with them and make little envelopes. That’s when it hit me – paper bag stars! I just followed the same directions, and….voila! A new creation!
Here are the instructions so you can make them, too. (And a cute square video that I tried making that sort-of worked.)
This post contains affiliate links. Thank you for your support!
Supplies needed:
~ Doilies (any size will do – we used 8″ and 10″ – I got mine at the grocery store, but you can go to any craft store, or get them on Amazon)
Step-by-step Directions:
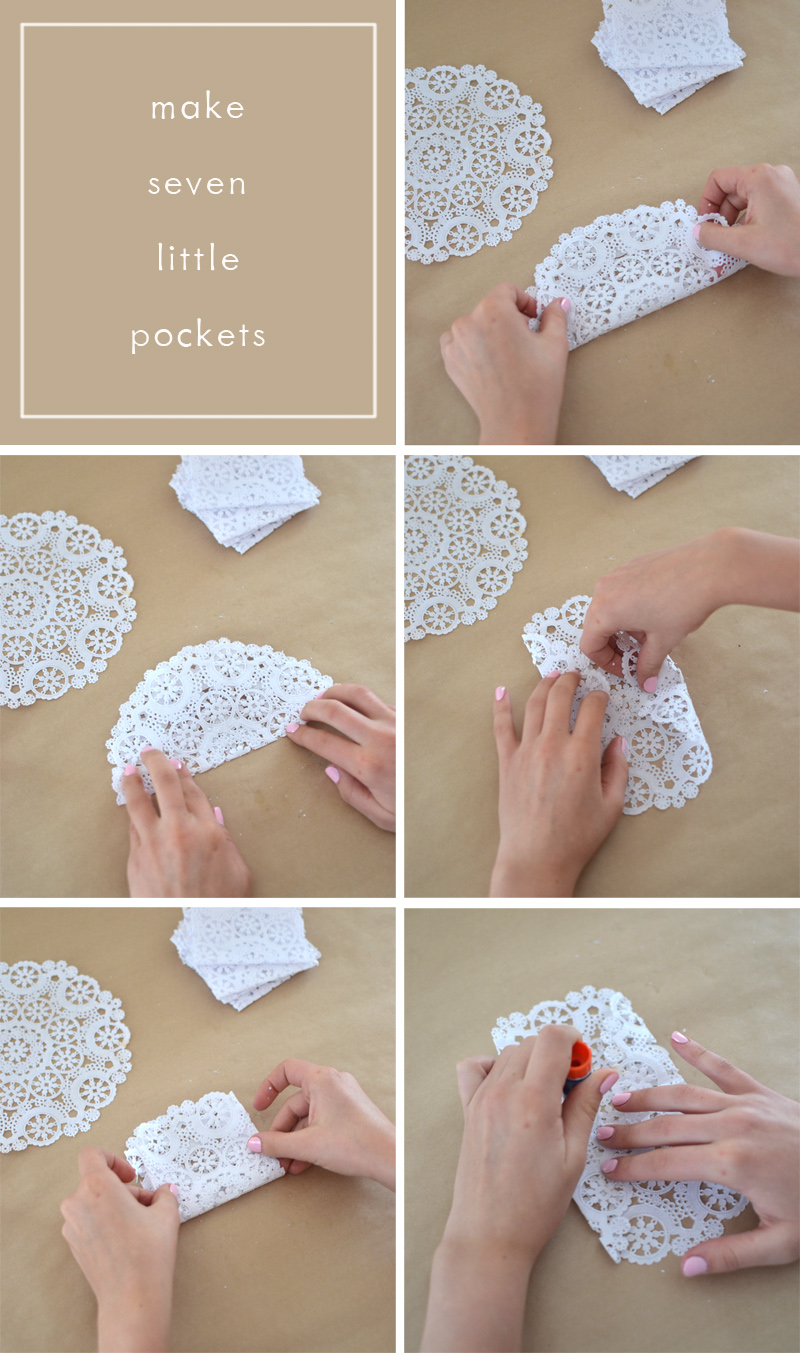
1. Fold the doily in half, press down gently to flatten the fold.
2. Open it back up and fold the outer edges to the middle. Press gently to flatten folds.
3. Fold it back up to create a little square, and press down gently to flatten.
4. Open back up and put glue on the inside folds, just along the round edge towards the center. Make sure to be careful when gluing to just put glue on the paper part and not the cut-out parts. It will just get too glue-y.
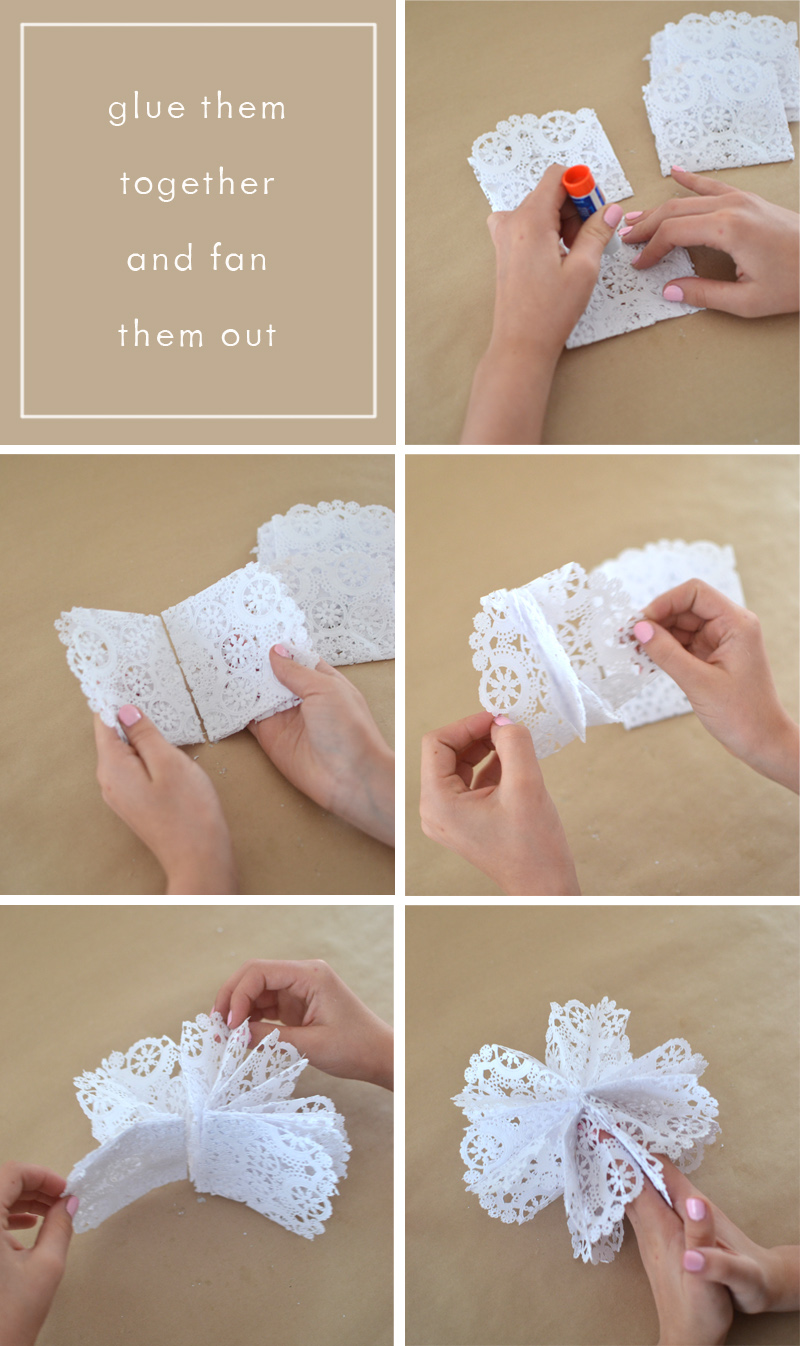
5. Now glue the seven little pockets together. Put glue down the middle and along the bottom, like an upside-down “T”. Glue both pieces before putting them together.
6. Glue the first and second piece together, checking to see that both pockets open.
7. Now continue to glue them all together.
8. When they are all glued together, put glue on the first and last one. Now fan them out and glue the first and last together.
9. You are done! You may have to fidget a little with the pockets so that they are all even.
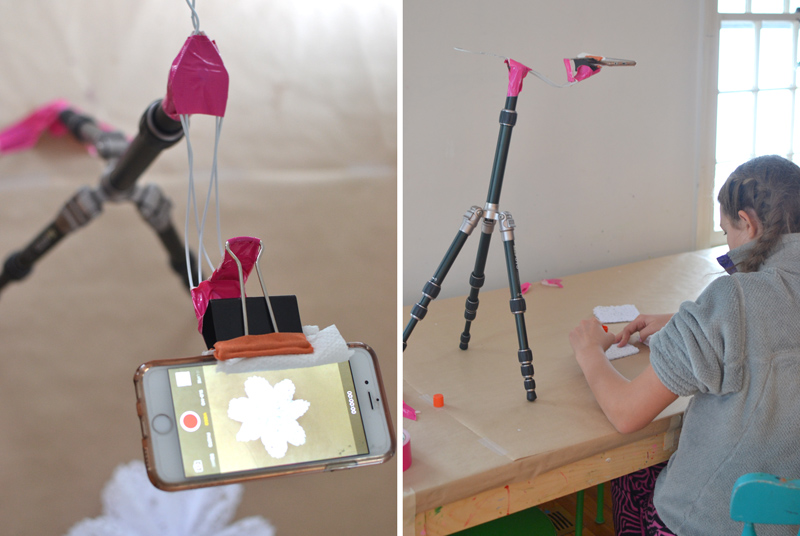
I decided to make a little how-to video and I wanted to try using my phone instead of my DSLR camera. My plan was to film and edit the whole movie on my phone. I really want a faster, simpler way to make movies (I have used iMovie on my desktop for decades). I didn’t have an iPhone arm for my tripod, but that didn’t stop me. I love a good duct tape/wire hanger challenge! At first I filmed it using my own hands, but soon realized that my 47-year old hands look about 80-years old on film, (sigh). So I asked my daughter if she would pleeeese make the doily snowflake for me. She was a good sport, and even painted her nails! She is fourteen, so now you know that if a young teen can make these, so can you!
The best place to see my cute square video is on Facebook. Due to many technical difficulties (resulting from the fact that I had to film vertically), the YouTube version is a bit blurry, but I’ll add it anyway just in case you don’t have Facebook.
So click here for Facebook video (much cuter), and click here for YouTube video (kind of blurry). Either way, it’s helpful to see the doily star being made.
It ended up taking me much, much longer to figure out on the phone, and ultimately I had to make the movie on iMovie on my desktop anyway. But I think it was just part of the learning curve, and as long as I film horizontally, I’m hoping my next try at this will be more successful. Hopefully my hand model will still be available 😉
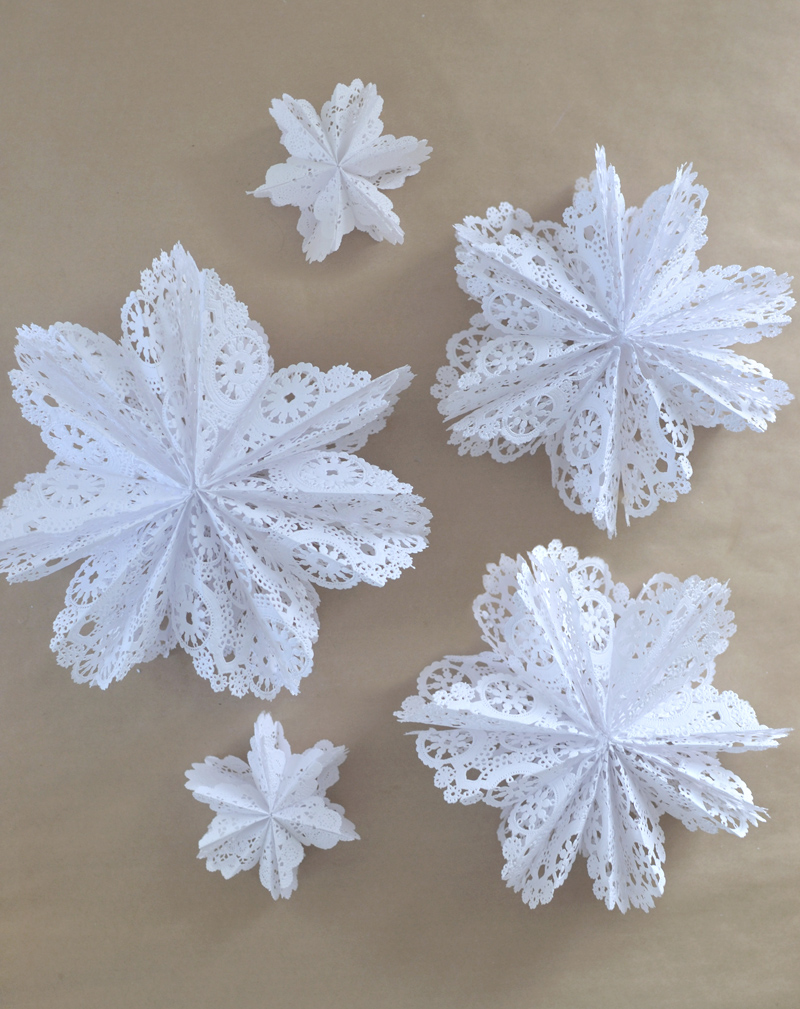
I ran out of doilies but my next variation will be to have my art class kids paint the doilies first, and then make colorful 3D snowflake stars. I think they will look so cool and psychedelic!
Stay tuned…
xo, Bar
– – – – – – – – – – – – – – – – – – – – – – – – – – – – – – –
PS: To foster creativity in your home, add these Beginner Art Supplies, and Favorite Craft Supplies to your art shelves.
PSS: Follow me on Instagram to see what I’m up to at the moment, and Facebook for tons more creative and artsy ideas.


thank-you for sharing this awesome tutorial! i was really racking my brain for a good and easy qay to make pretty snowflakes without cutting. i made a winter display at my school using these snowflakes and the kids loved it! brilliant idea 😀
Would love to use your idea for a classroom sometime. May I have permission?
yes of course, Lois. Thanks for asking! XO Bar
I was wondering -has anybody done this with vinyl doilies for use outside? Not sure if it would even work but curious.