I’m so behind on work. I seriously have piles everywhere (which is the truth if you knew me and the normal state of my house). But today I woke up to find that the “invitation to paint” I had put out for my teenage daughter yesterday during our snow day was left untouched. It was such a cute idea! But the appeal of her bedroom and 400 episodes of One Tree Hill to catch up was more inciting, I suppose.
So I painted instead!
This post contains affiliate links. Thank you for your support!
Here’s what you’ll need:
~ A ruler, and a circle shape (like a glass or a jar)
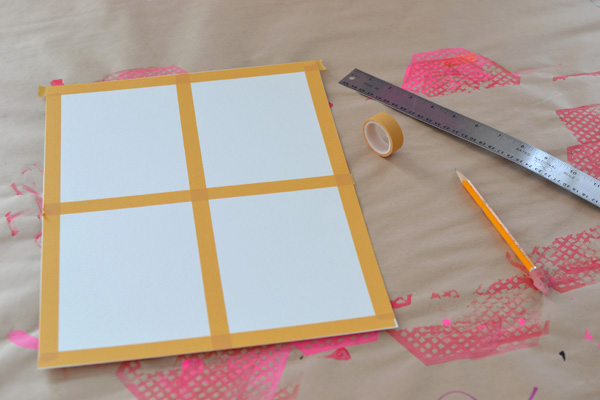
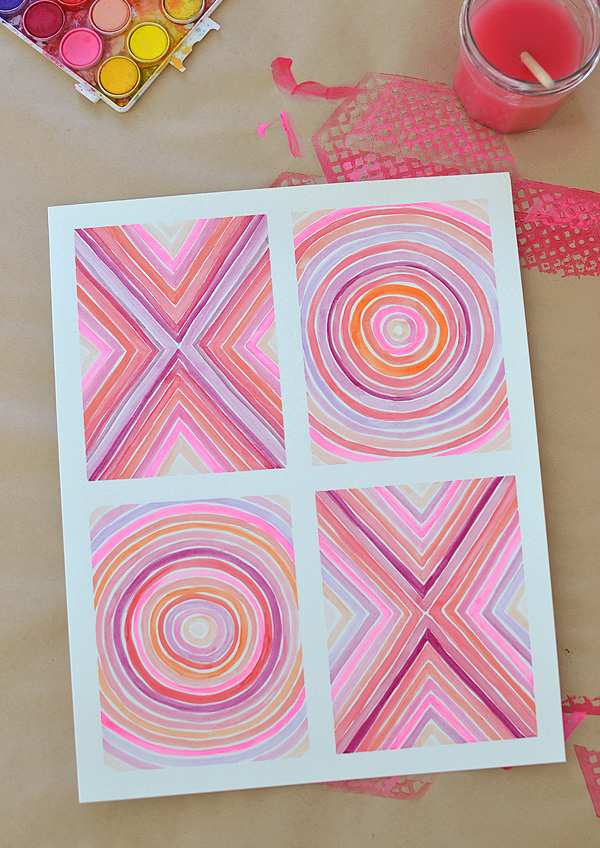
Step 1: Put a piece of tape at the top of your paper (my paper size was 11″ x 15″) and down each side. Measure across and find the middle. Measure out 1/4″ from the middle on each side and draw little teeny pencil marks all the way down (in about 4 or 5 places). Now lay your tape straight down the middle, keeping in line with your hashmarks. Take your ruler and measure 6″ from the top and make more hashmarks. Lay your tape across, even with the hashmarks. Repeat this step so that now you have 4 rectangles. Trim the bottom of the paper.
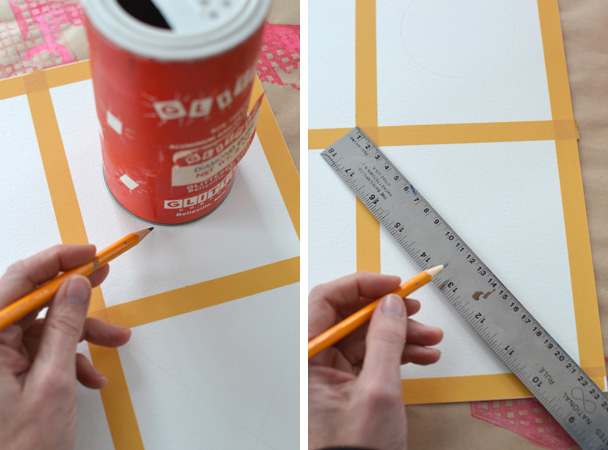
Step 2: At the top left and bottom right, use your ruler to draw an “X” lightly with a pencil from corner to corner. Find a circle (I used a glitter jar) and place it in the middle of the top right and bottom left rectangles. Trace lightly with a pencil.
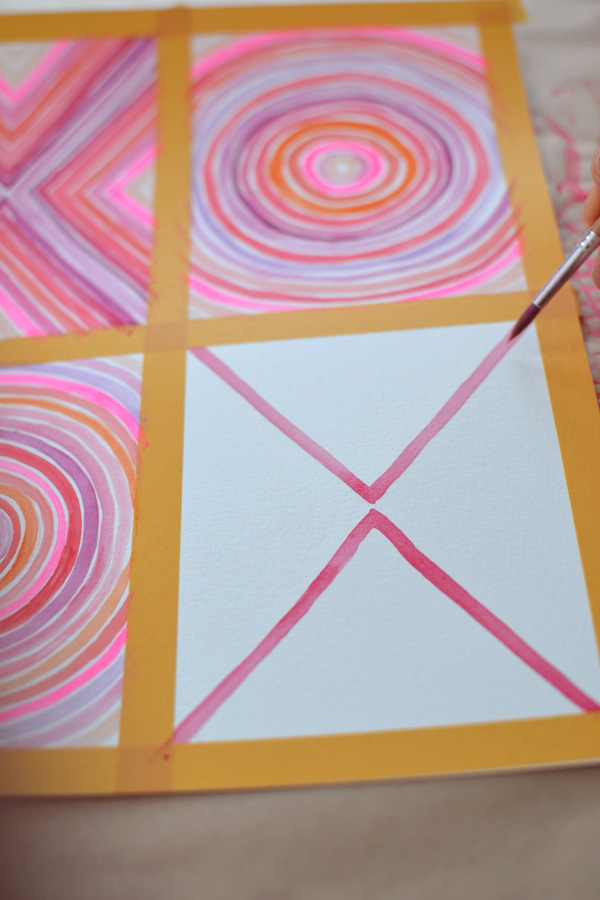
Step 3: Start painting. I just traced the pencil line for the “X” with my first color of paint, making two “V”s rather than an “X”. Then I just continued the “V”s until they got smaller and smaller. When I reached the outer edge of the tape I was done.
Step 4: Use a similar technique with the “O”. I started by tracing the pencil line “O” with my first color of paint, then continued making circles with different color going both inside and outside the first “O”.
Step 5: Lastly, when the paint is dry, peel off the tape. This is the best part! I’t sooo satisfying.
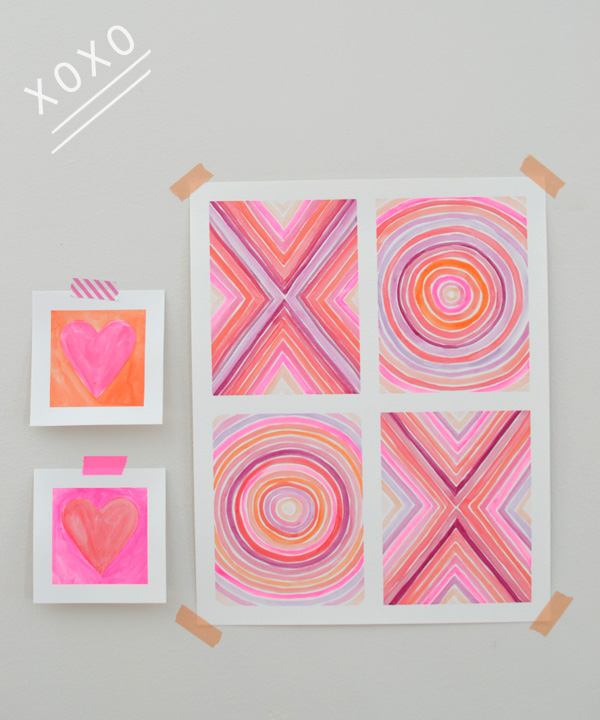
This is a really simple idea. It takes a bit of a steady hand, but I truly believe that even an unsteady hand would work well in this format because of the tape. The taped white border makes anything look amazing. Look at these paintings that my little kids made and you’ll see what I mean.
I hope you try! Let me know if you do 🙂
xo, Bar
{Source: I first saw this idea in AmyMarcella’s Etsy shop. She no longer carries the work from which I was inspired, but she has some other lovely pieces.}


Perfect, as always. Love everything you do.
beautiful and simple. i love love love it. xoxoxo
HOLY GORGEOUSNESS!
ha!! i love your all caps. thanks my friend! xo bar
perfect and beautiful, love it 🙂
Thank you so much for sharing this fun project! We just did it today in anticipation of Valentine’s Day. I love the way they turned out! I will post to IG and tag you.
i’m so glad you did this, Wendy!! did you tag me in IG? I can’t remember… have a happy Valentine’s day!! xo Bar
I love the way these look. They are hanging on my daughters door to her room!
Hi, My daughter loves this artwork and would like to make it for her room. Can you please tell me what thickness of washi tape you would recommend? Thank you so much!
hi Rachel, just the regular width, which is like half an inch? or you can try painters tape!
Thanks! I was looking for a simple and fun craft to do when i was bored. This craft is perfect!
I don’t like it , I LOVE IT!!!
OMG! this was a lot of fun and I totally would recommend this to anyone who wants to try!