I bought this tie kit three or four years ago and every time I take it out, it feels too daunting. But for some reason it has been beckoning be lately. Maybe it’s because I’ve been rearranging my art supplies and I just keep moving it from one place to another. I guess I just feel guilty, and wasteful. Time to make the tie!
Once I made the template and mixed the dyes, it really wasn’t as hard as I thought. I’d still put it in the medium-challenge category. It’s not simple, but not too intimidating either.
Supplies:
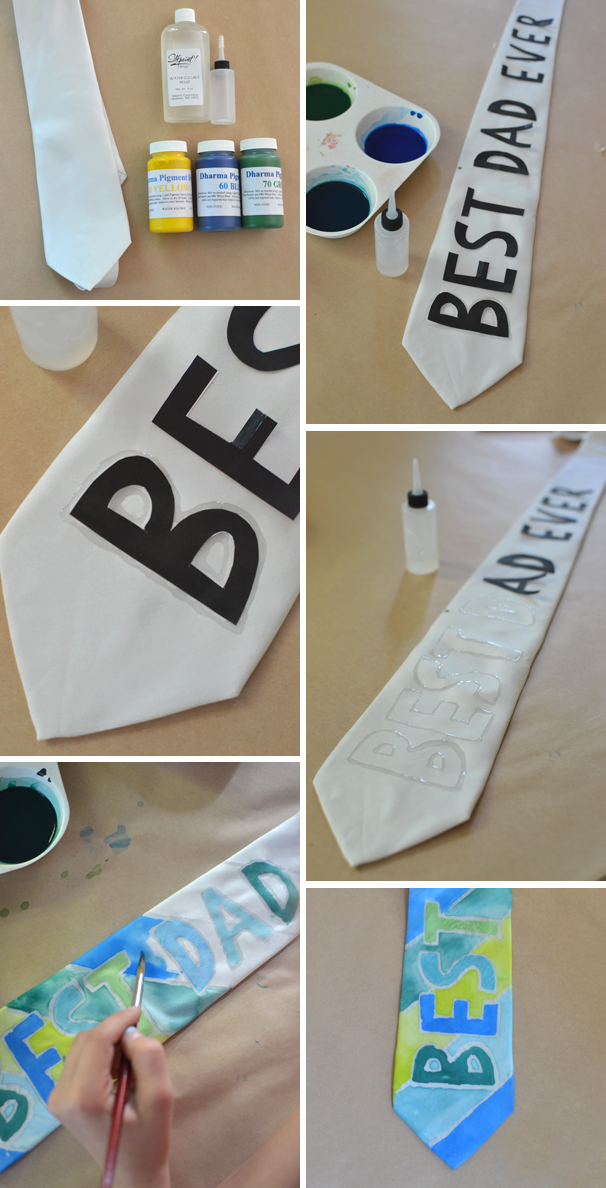
plain white silk tie, pigment dyes (4oz), resist (4oz), templates one and two for the letters
How to:
1. Mix your colors. I watered down all of the colors because I wanted a bit more of a pastel look. But you can use them straight.
2. Print out your templates and cut out the letters. I rolled up little pieces of tape and taped the letters down.
3. Now it’s time to use the resist. Just outline the letters. My hand was not super steady, but I think that adds to the character.
4. Paint between the lines!
5. Let it dry completely, then iron it to set the dye (no steam). Put a cloth or paper towel in between the tie and the iron.
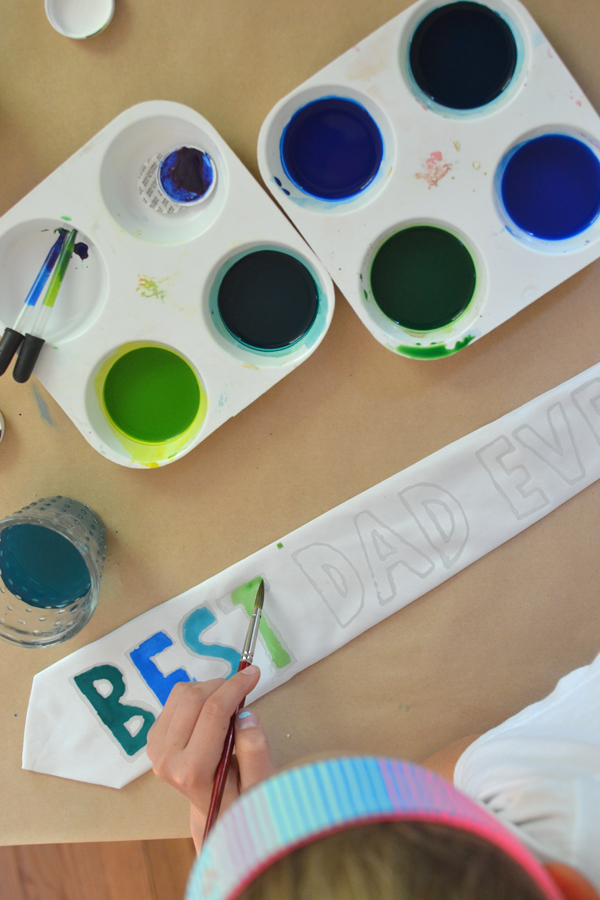
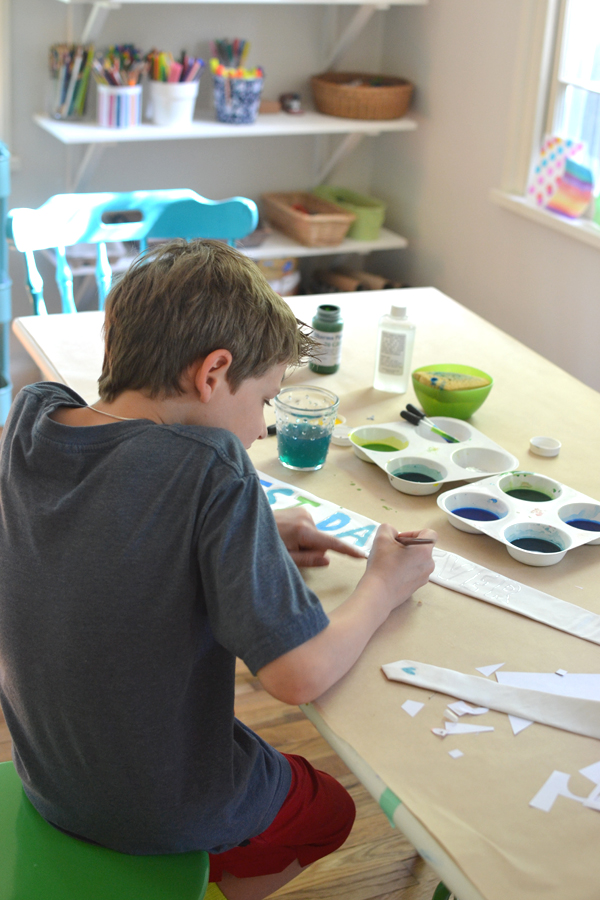
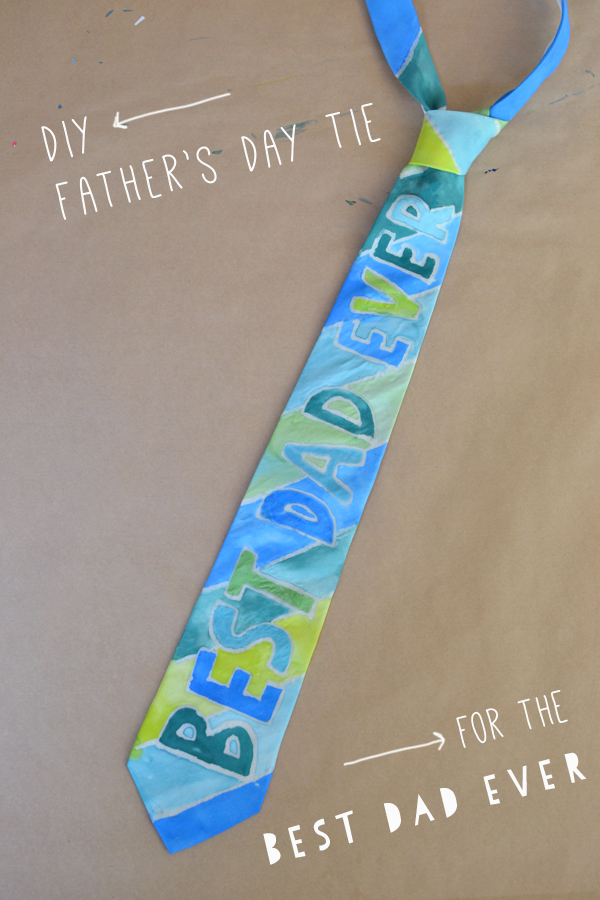
One great thing about this project was that after I put down the resist, my kids did all of the rest. They LOVED using the dyes and watching it spread on the silk fabric. We are sooo excited to give it to their Dad because it truly is a collaborative gift and will hopefully make him feel very loved. He really is the best dad ever.
xo, Bar


I LOVE this idea. Seriously awesome.
thank you leslie! it looks like something you would do…you are so crafty 🙂 xo bar
Love this idea and LOVE that pic of your little guy who is not that little at all anymore!!!
awww…thanks meri. he is not little anymore which is so sad 🙁 but he still loves art, thank God! xo bar