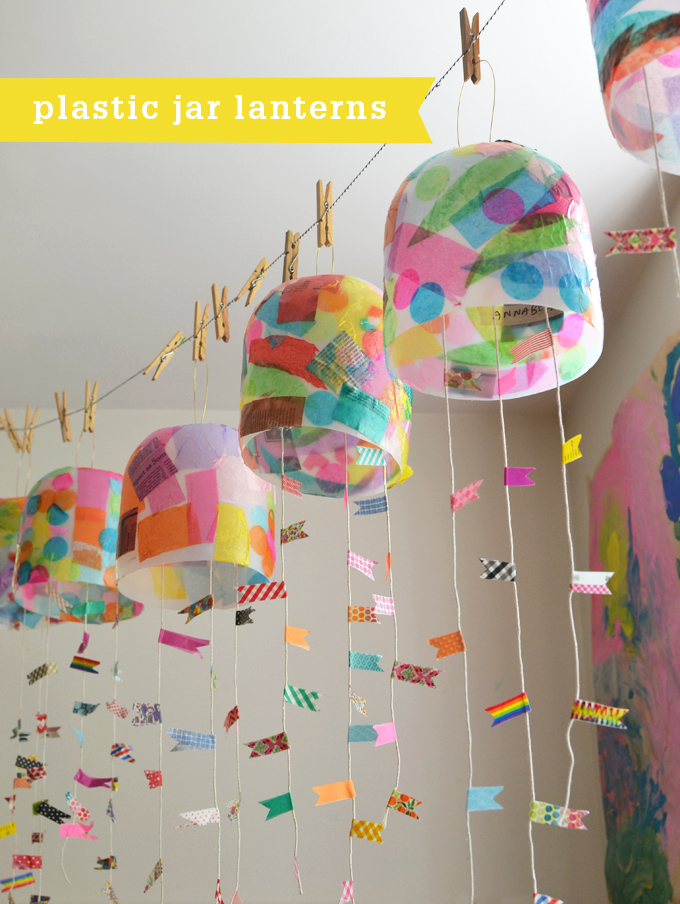
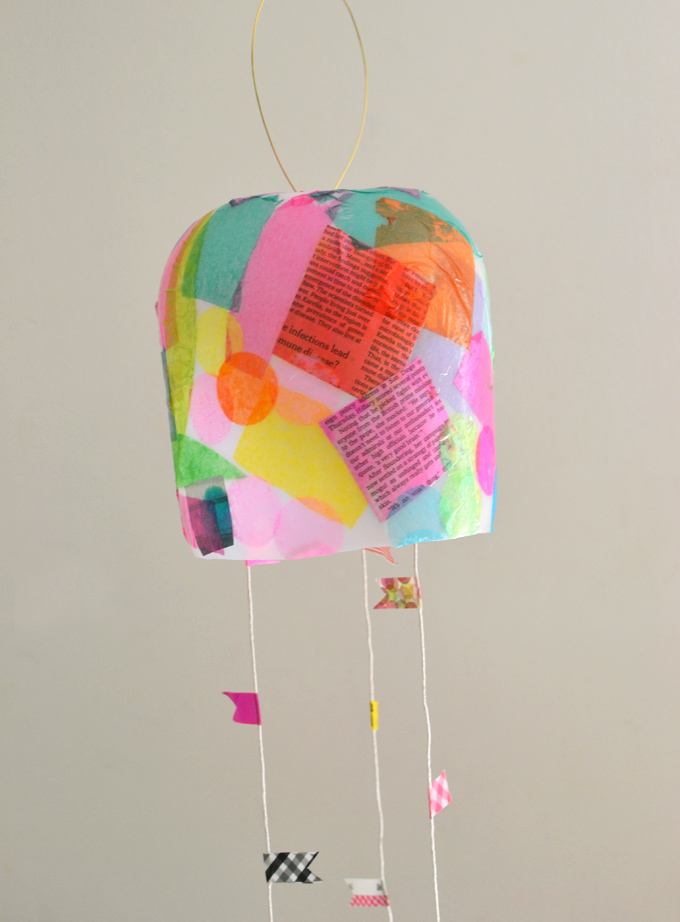
My dear friend runs a coffee shop, so I asked her if she had any big containers I could recycle into something cool for my art class. When she dropped off some giant mayonnaise jars, my mind immediately thought LANTERNS! After a little soaking and slicing, the base for these plastic jar lanterns were ready for the kids to embellish.
Read on for more details, and how you can make these into a real, working light!
[ I am a participant in the Amazon Services LLC Associates Program, an affiliate advertising program designed to provide a means for us to earn small fees at no cost to you by linking to Amazon.com and affiliated sites. ]
There is some prep for this project, but if you are a collector of collage material already, then you are halfway there! Once everything is prepped, the actual process is really straight forward. I would say that 3 and 4-year olds could do this one with a little help for the washi tape. And tweens and teens would love making these, too. So basically, great for any age!
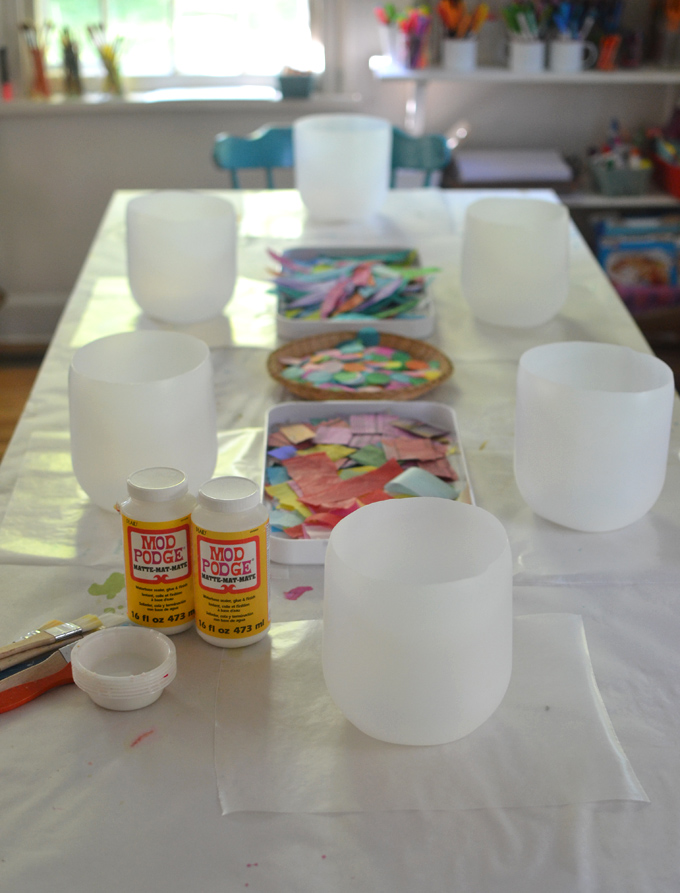
Supplies needed to make Plastic Jar Lanterns:
~ Restaurant size plastic jars
~ Paper collage material (we used painted coffee filters, torn tissue, tissue dots, and painted newspaper)
~ Mod Podge (we used matte finish, but I think glossy would be better!)
~ Brushes
~ String or yarn
~ Clear tape

Step by step instructions for Plastic Jar Lantern:
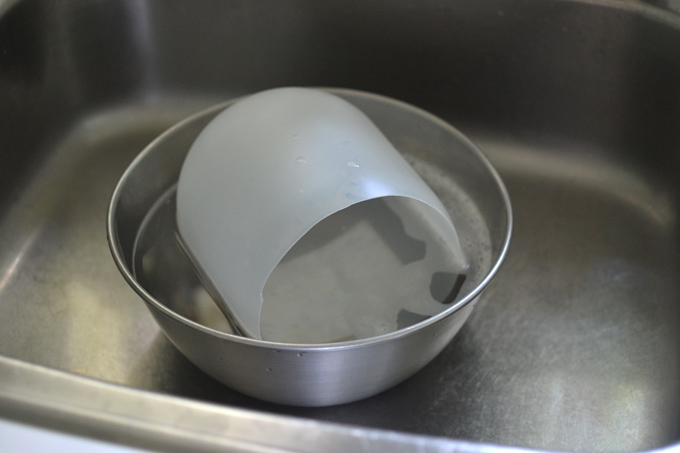
1. First, cut the top of the jars off with your Xacto or utility knife. Cut right where the jar starts to curve inwards.
2. Soak the jars in boiling water to soften the label. Then peel off the label and any remaining adhesive.

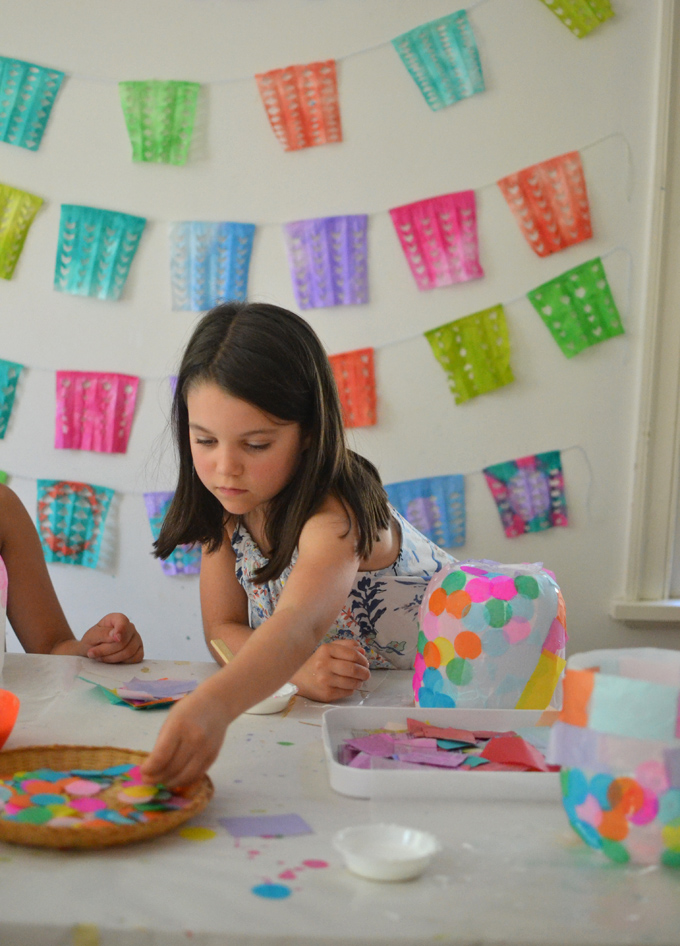
3. Next, gather your collage material. My students painted coffee filters for another project we did (Cinco de Mayo banners!). I also love cutting up the newspaper that covers the table during art class, or you can paint newspaper separately.
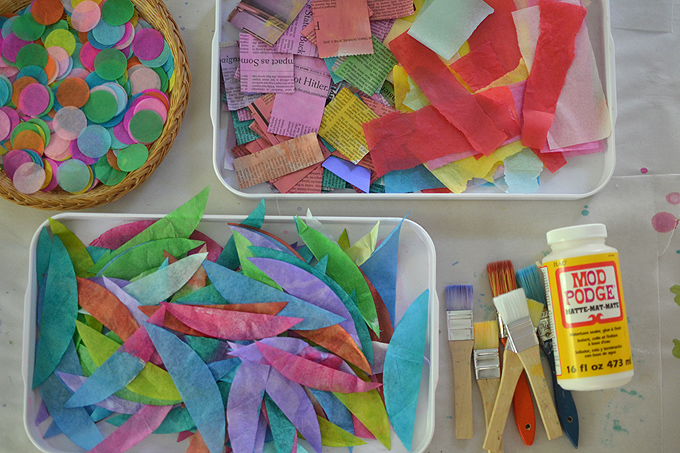
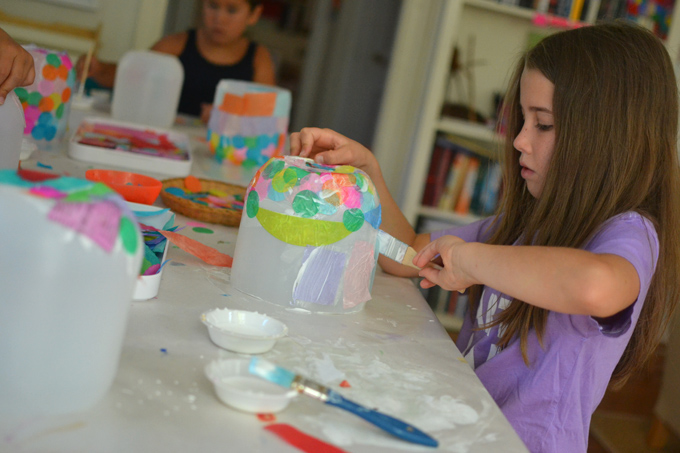
4. Arrange everything on the table. I poured the Mod Podge into little cups so everyone had their own.
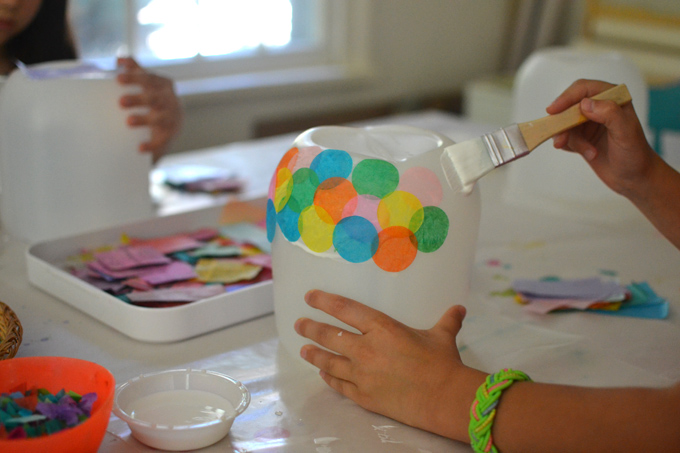
5. Now comes the fun part! Tell your students to put a little of the Mod Podge on the container first, like glue, then add your collage material, then Mod Podge on top. If they forget to put it on top, you can always add a layer afterwards.

6. Let the jars dry overnight. On the next day, cut three or more pieces of string for each student, about 20″. Show them quickly how to cut a piece of tape and wrap it around the string. Some of the older kids were able to cut the tape at the ends to look like little flags.
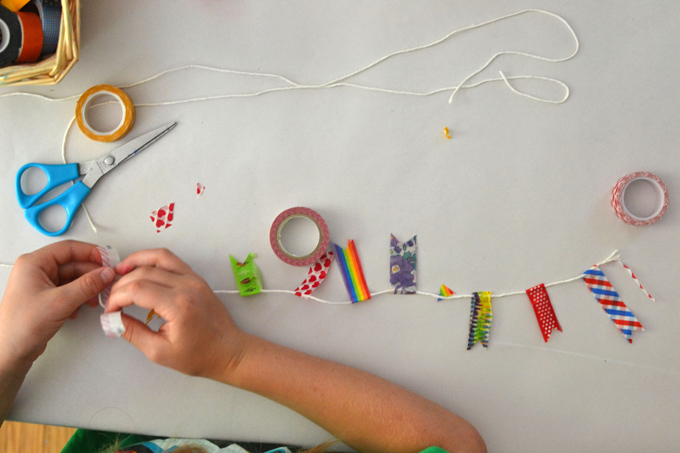
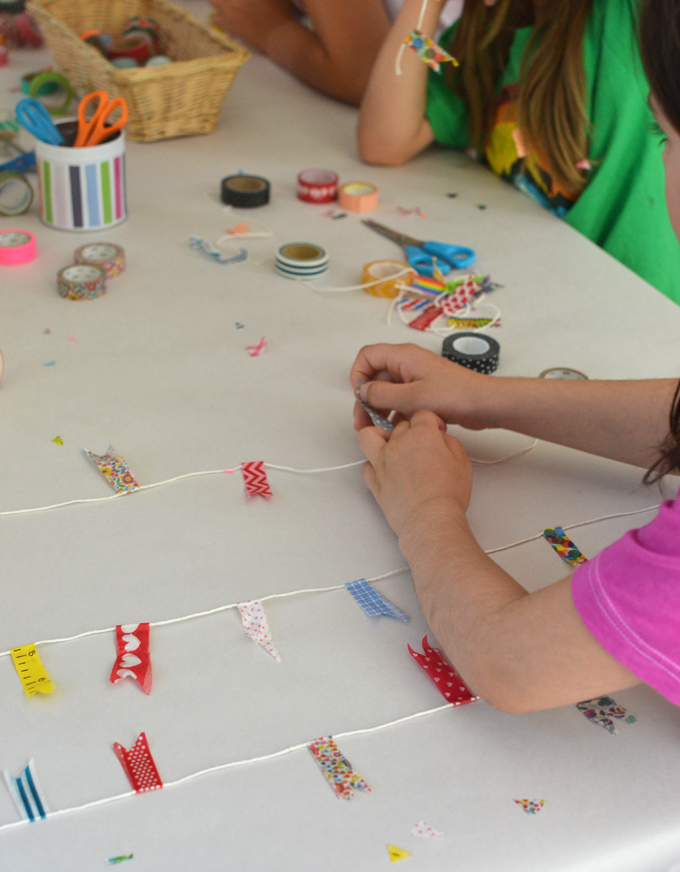
7. When all the strings are done, tape them to the inside of the jar with a piece of clear tape.
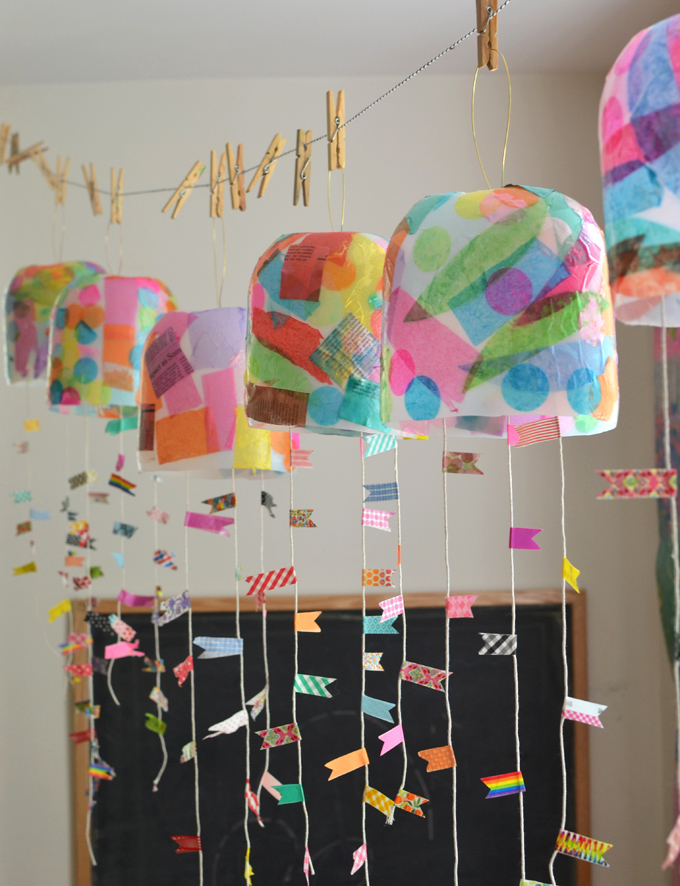
8. Slice a small hole in the top so you can slip some wire in and make a loop. Tape the wire to the inside.
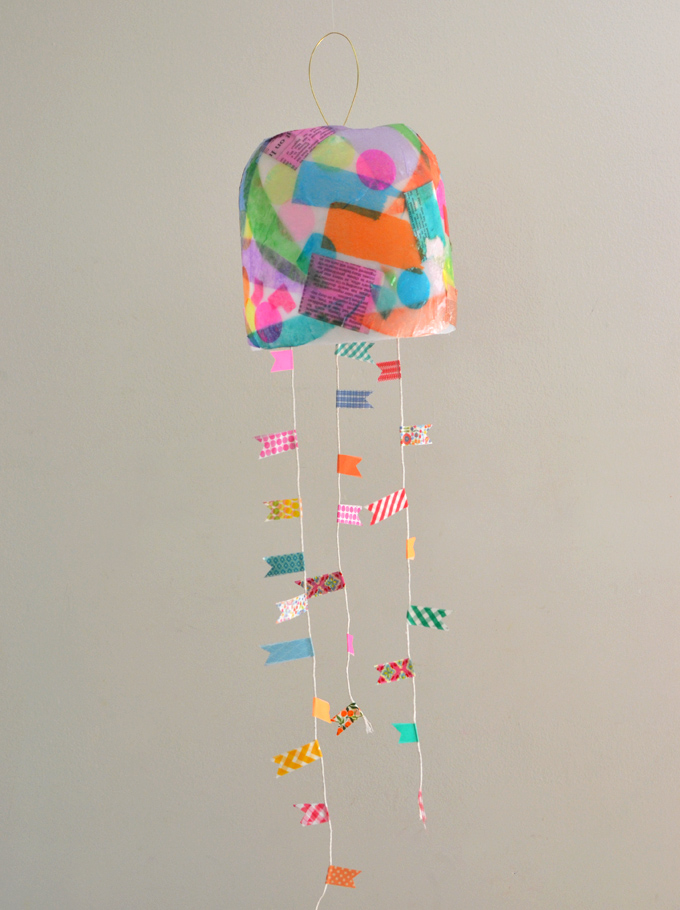
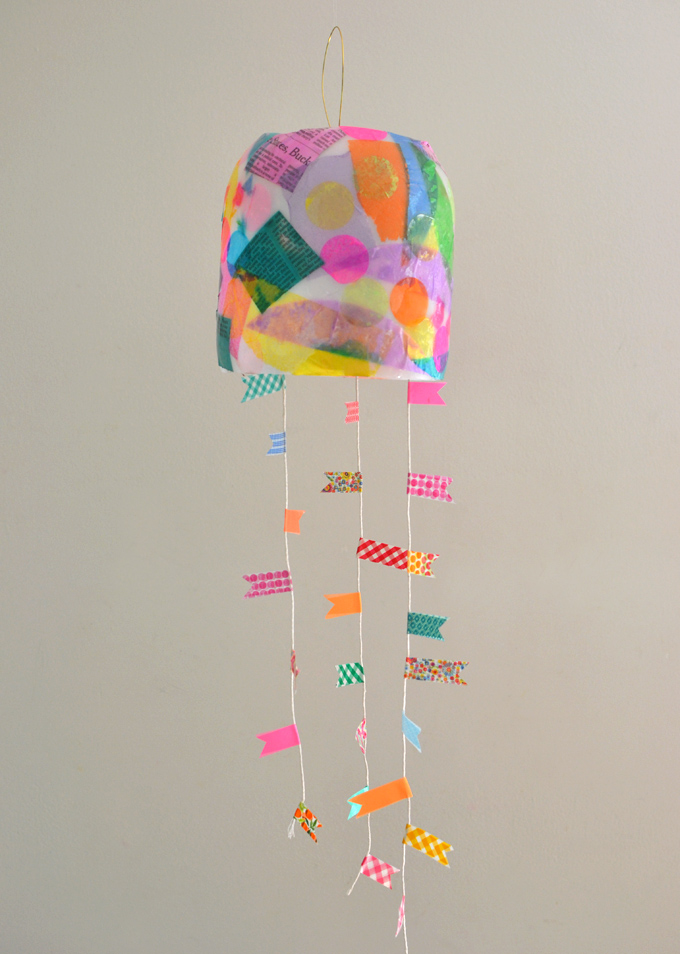
And that’s it! I love the whimsical and sort-of eclectic nature of these lanterns. They would be so cute hanging above a bed, or even above a baby’s crib.
I actually had grand plans to make these into real working lanterns, lightbulbs and all. But I got nervous about sending them home and not knowing if the plastic would melt. I wouldn’t have added the string if I was going to use a real light bulb. But if you want to try it at home, this is the pendant light kit I bought. It’s worth a try!
Of course you could also just add eyes and turn it into a jellyfish!
xo Bar
– – – – – – – – – – – – – – – – – – – –
Did you like this post? Here are some more crafty ideas for your kids:


Our grocery pick up last month substituted a gigantic jar of mayo for the little one I ordered. Now I know what to do with it! These are so whimsical! I love them!!!
oh my….. For the love of art!!!!! Am so bookmarking this page, will work on this with my baby. Great post, so detailed, keep it up
Ohhhh! I can’t wait to do this with my 6 year old artist!
You could posdible put double sided tape in a small battery operated tealight to light it up. 🙂
that is so clever! great idea!!!
These are amazing ideas! So excited to try these with my art campers!
Beautiful ….. this is just perfect for after school projects. Art is life
Great blog!!! Thanks for sharing it with us, I would share this with my daughter who has started homeschooling her children and it would participating with them. Thank you for sharing such a wonderful resource with us.
Moms of two of my preschoolers this year work at a local restaurant and I asked them to bring in the mayonnaise jars – I now have 26! But won’t be able to do this til ext year (last day of preschool for kids was yesterday). Something to look forward to for next year.
Our building was remodeled and we just moved back in in January. My plan is to make these at the beginning of the year, hang them down the entryway hall for the entire year, and send them home at the end of the year. We’ll see how that goes… 🙂
I love these! Did you try it with the lights yet? I’m curious how that went? I’m thinking it might be neat to have everyone make one and hang them on market lights for our group project for the art gala. I know they wouldn’t be good permanently outside but could be very cute party decor! Great post! Thank you!
Hi Shannon, no I didn’t try it with light but I love that idea! Let me know how it goes! ~ Bar
I really loved the lantern idea. Thanks for sharing it! I will most likely use battery operated pack lights to turn it into a real lantern. I would love to do this project for my baby daughter’s room. It’ll be so much fun to do it with her!
Hi Rebekah, I love that idea!! It will be so pretty and charming for your baby’s room. ~ Bar
I’ve also seen large clear plastic jars of pretzels, cheese puffs, and animal cookies that my family would consume more quickly and would work for this.