I am a picture book lover and collector, and my favorite ones are about friendship. When my children were little and September came around, there were certain books I would always pull out and read with them prior to the first day or school and throughout those first few weeks. These books were like old friends, calming their nerves and preparing them for new experiences. (See my list of favorite friendship books at the end of this post.)
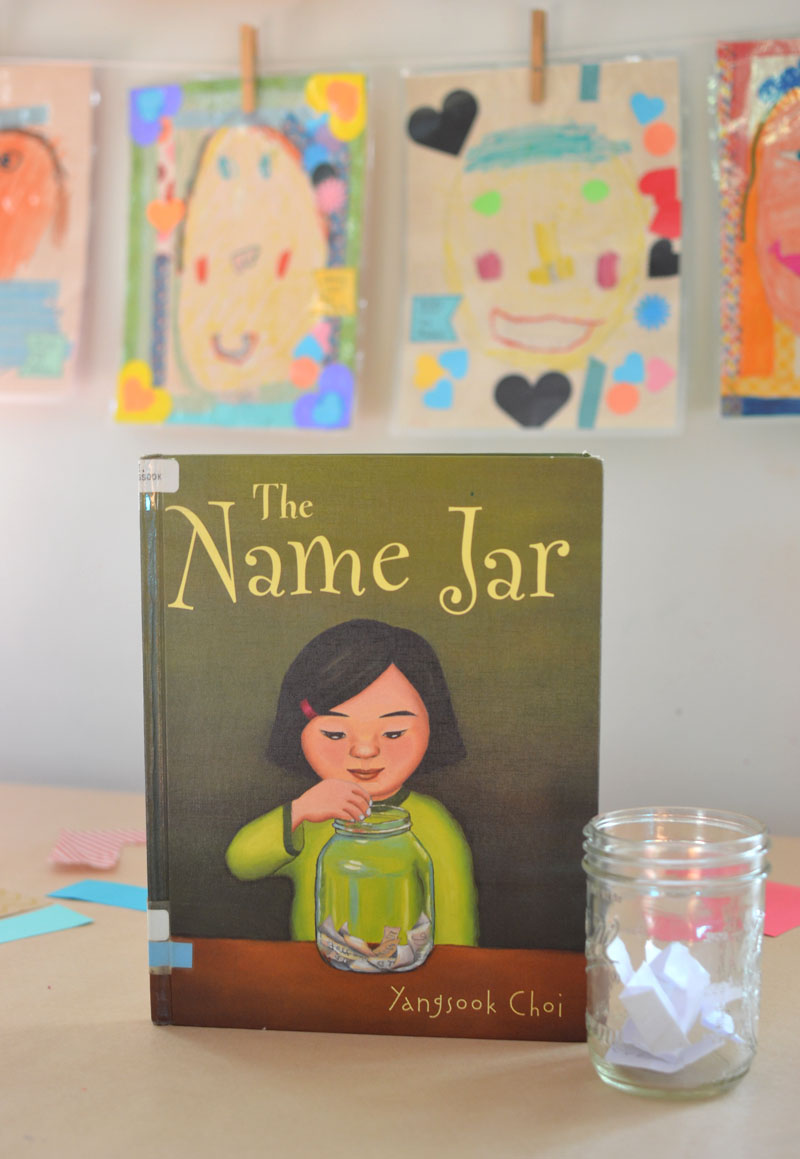
Now that mine are older and in middle school and high school, I feel like I have missed a whole slew of really good, new books. One of the best new ones is The Name Jar, by Yangsook Choi. It’s about a young girl who moves to a new American school from Korea. I love this book! I immediately thought it would be a great book for teachers to use in a classroom project.
So I teamed up with Scotch™ Brand to provide this simple and fun art project to help students learn about each other’s family history, make new friends, and connect with their classmates.
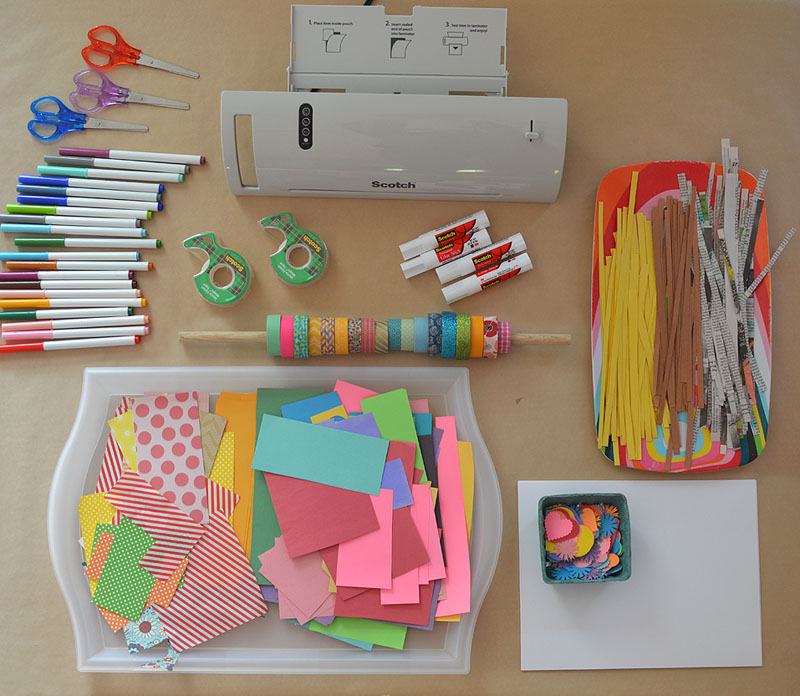
Materials Needed:
- Plain white paper
- Pencil
- Markers, crayons, and/or colored pencils
- Construction paper and patterned papers cut into smaller sizes
- Colored papers and newspaper cut into strips (or the kids can do this)
- Scissors
- Scotch® Glue Sticks
- Scotch® Magic™ Tape
- Scotch® Expressions Washi Tapes
- Scotch™ Thermal Laminator
- Scotch™ Thermal Laminating Pouches
[ Note: Follow all Scotch™ Brand package instructions for proper surface cleaning and prep, adhesive strip placement and recommended weight claims. ]
Prepare the materials:
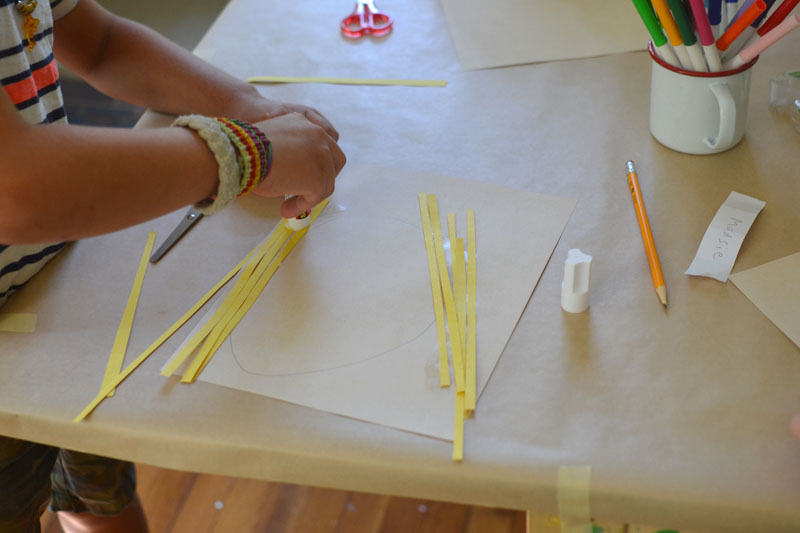
Step 1: Cut the colored and patterned papers into smaller pieces to make it easier for little hands and little scissors. I also cut some strips for hair, but if you have a large class of children you could just cut a small pile of strips to spark their own ideas. Put the collage material on trays.
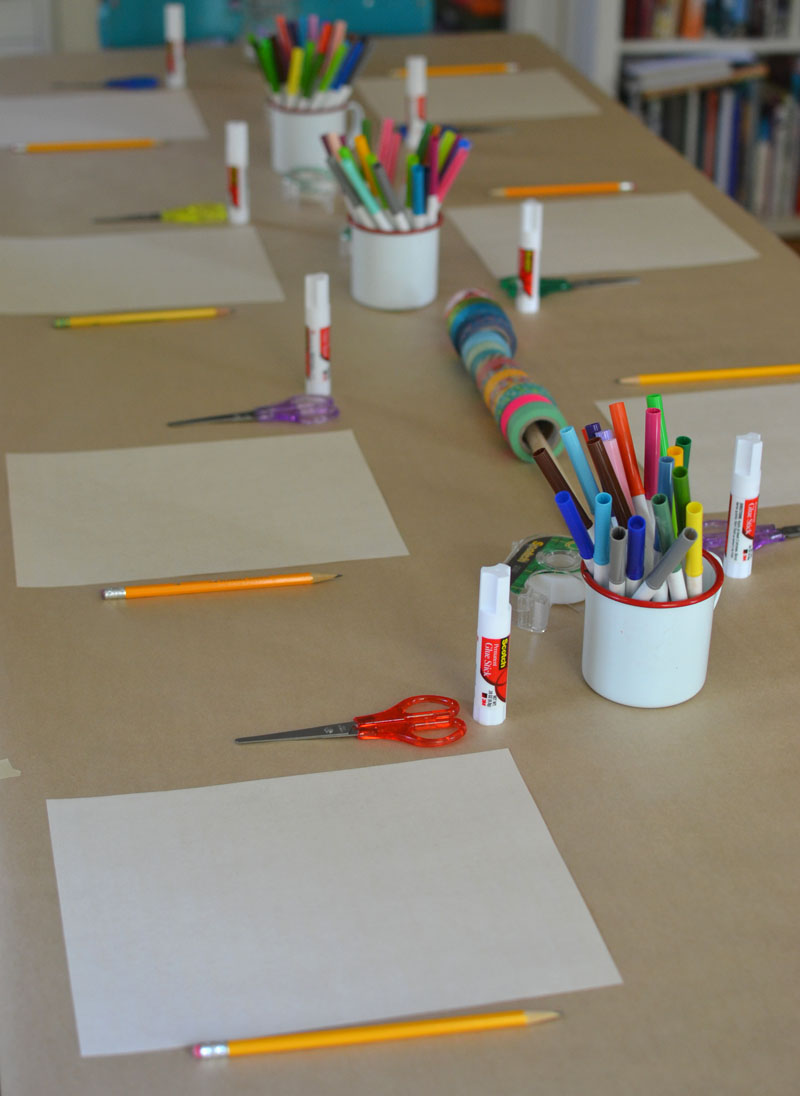
Step 2: Each child gets a piece of white printer paper (I actually used off-white paper for this project because it just makes the portraits look a little more sophisticated), a pencil, a pair of scissors, and a Scotch® Glue Stick. We shared the markers, Scotch® Magic™ Tape, and Scotch® Expressions Washi Tape.
The books referenced in this post use affiliate links. I appreciate your support!
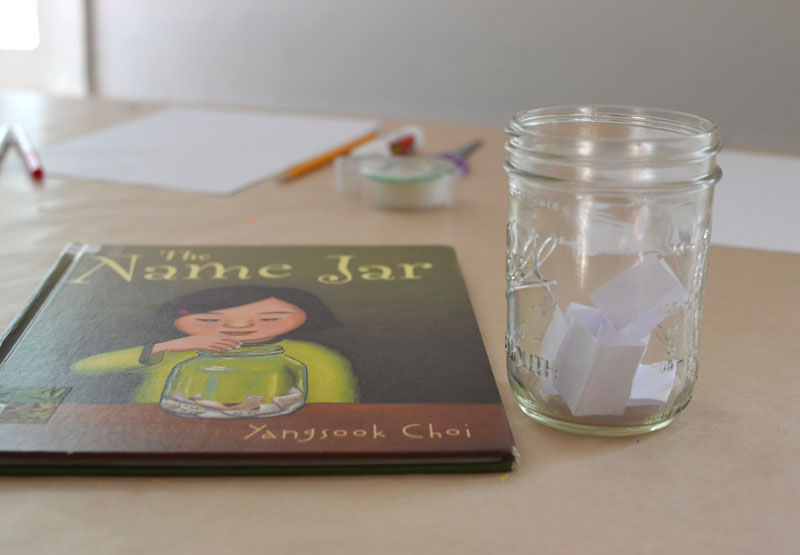
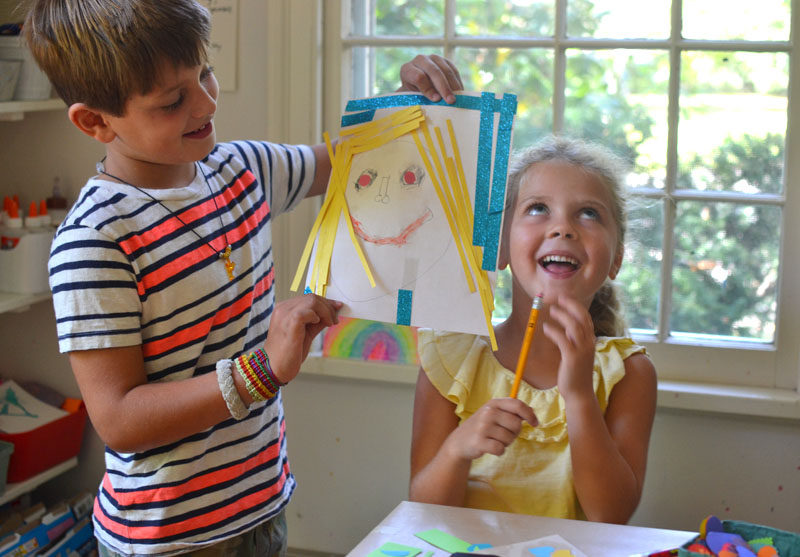
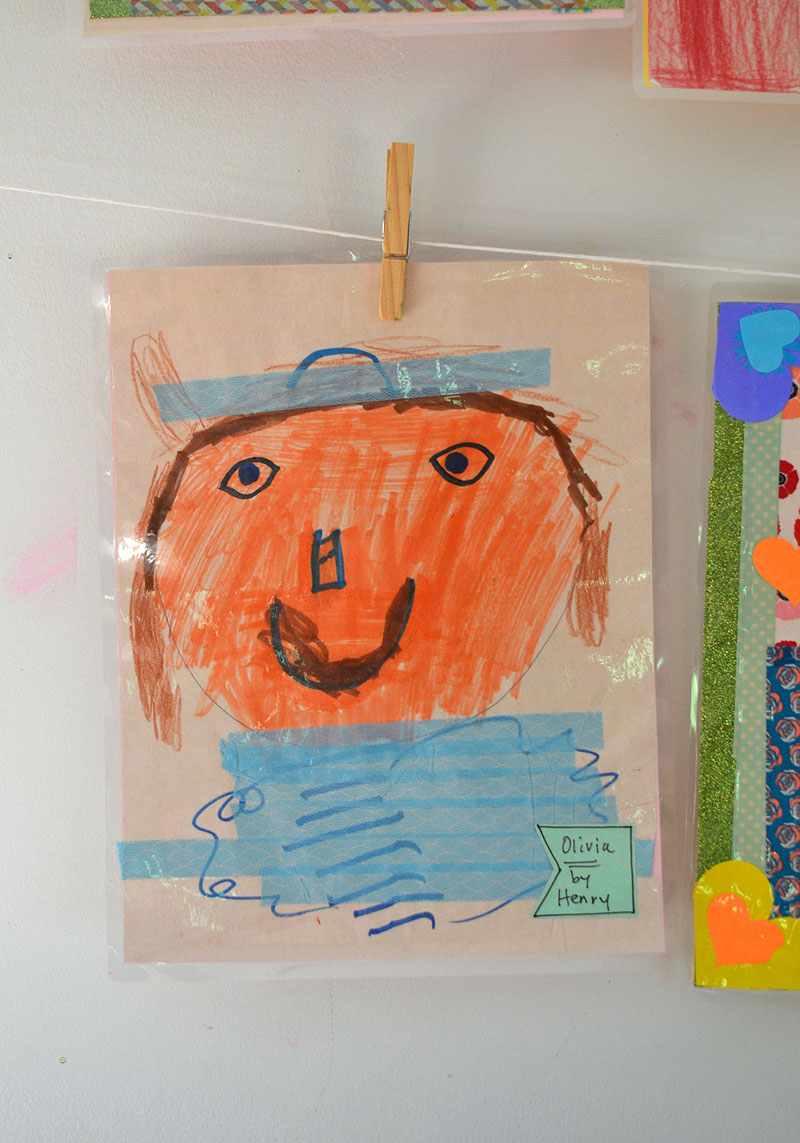
Step 3: We read The Name Jar. Afterwards, half of the children picked a name out of our own version of the name jar (the other half of the kids had their name in the jar).
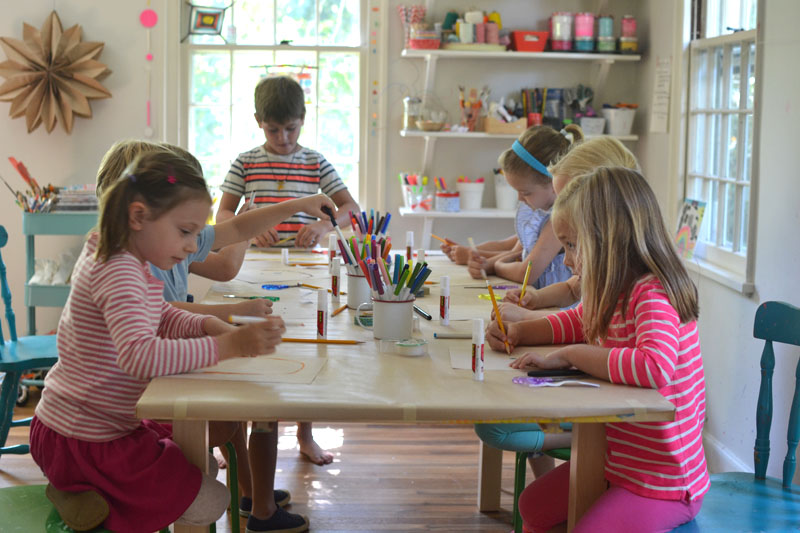
Step 4: They sat across from each other, looked at each other, drew a big circle for the face, and got started filling in the rest. For younger children (five and younger) you may want to show them what a big circle on a page looks like. Little kids tend to draw little circles.
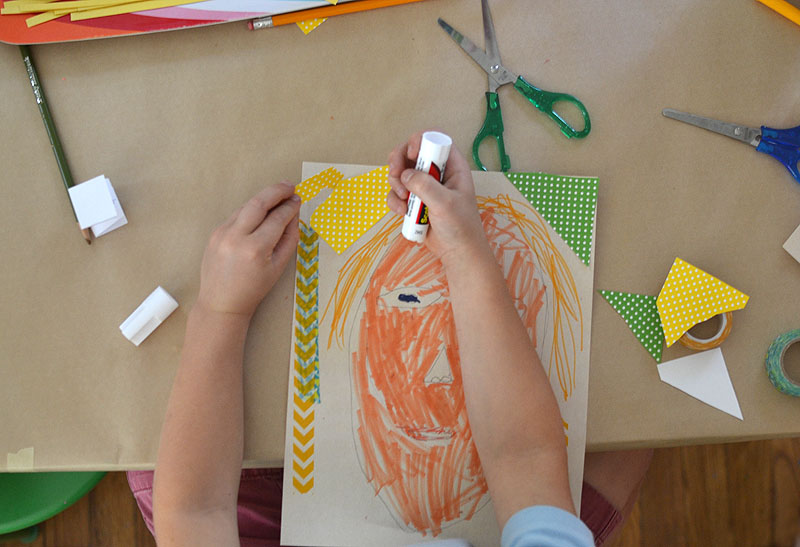
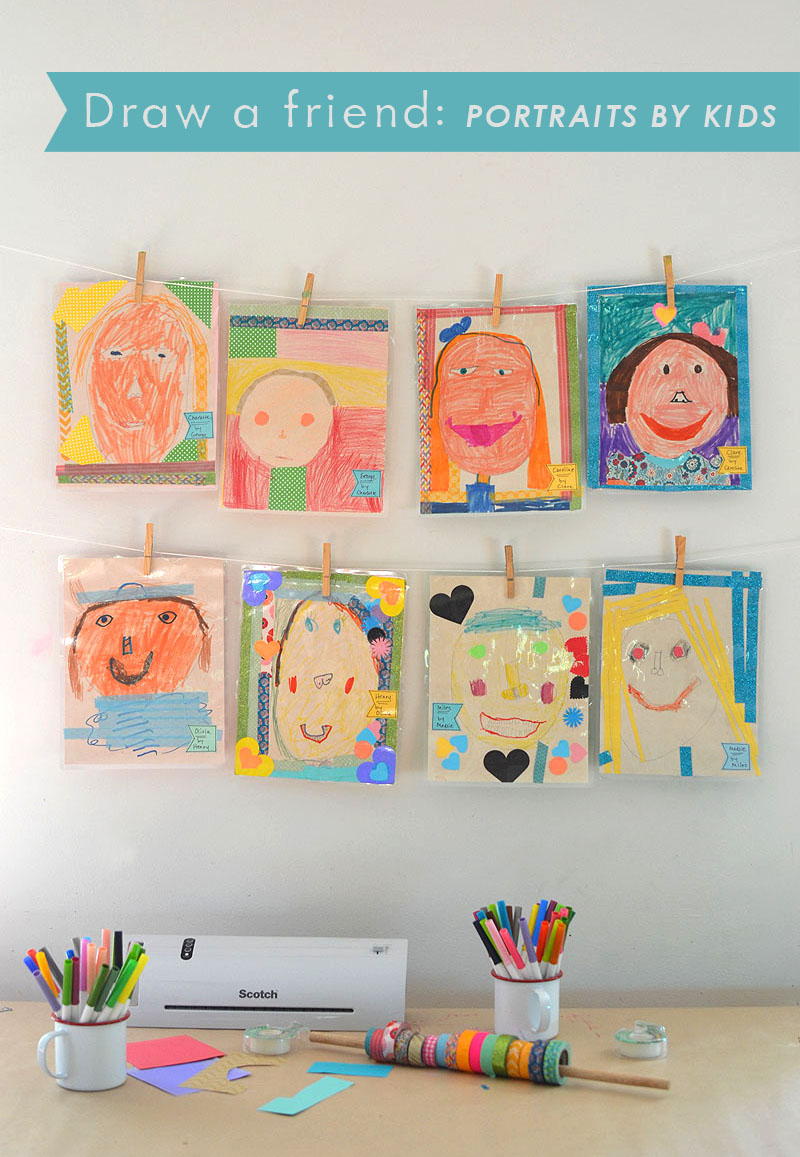
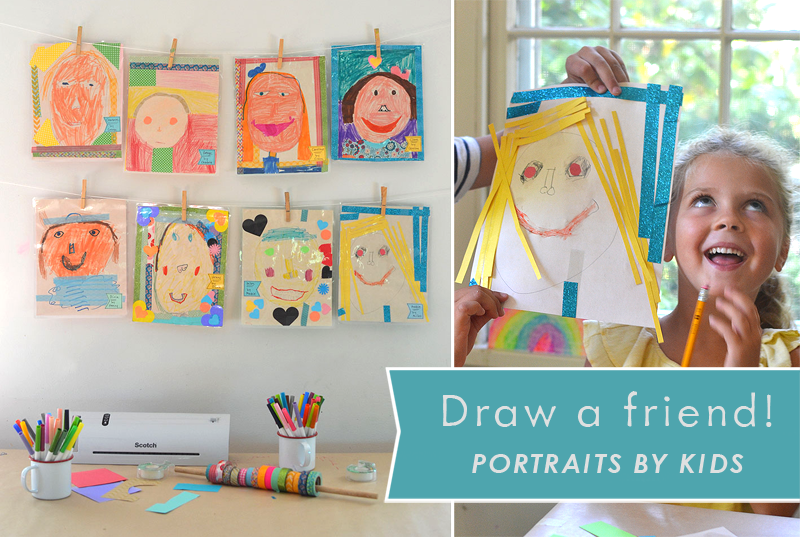
Step 5: Let the kids create their very own portraits. These children were all six. I did not help them in any way or tell them what to do. I did tell all of the children that we only give compliments in art class. I also told them that every portrait will look different, just like every child looks different. Some children used all the supplies at hand, while others just stuck with markers. That is OK. It is their choice.
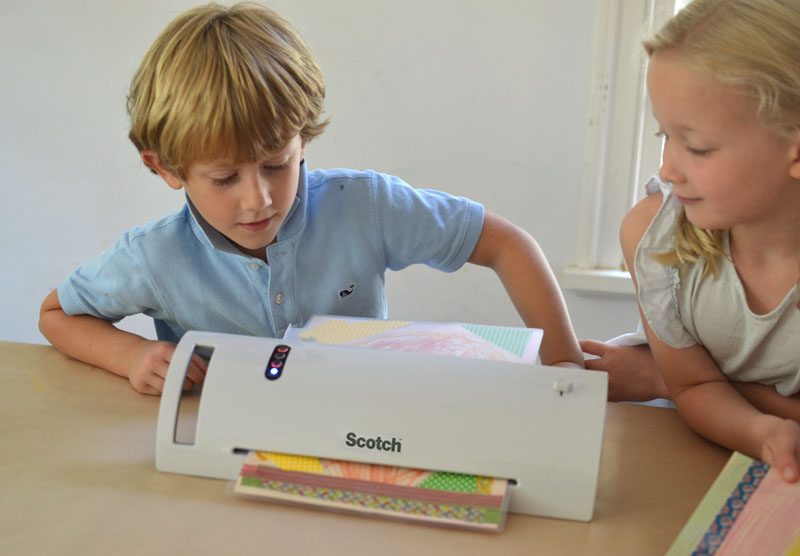
* Note: In order to use the Scotch™ Thermal Laminator, the portraits cannot be bulky. Only use flat paper or flat washi tape for collage elements.
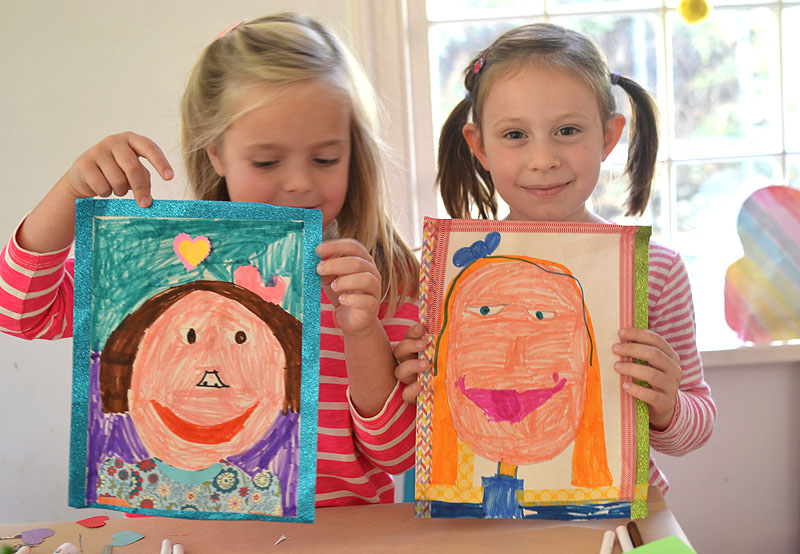
I love these photos! The children really worked hard to make these portraits, and I love how they took artistic liberties by embellishing their art to make them more interesting.
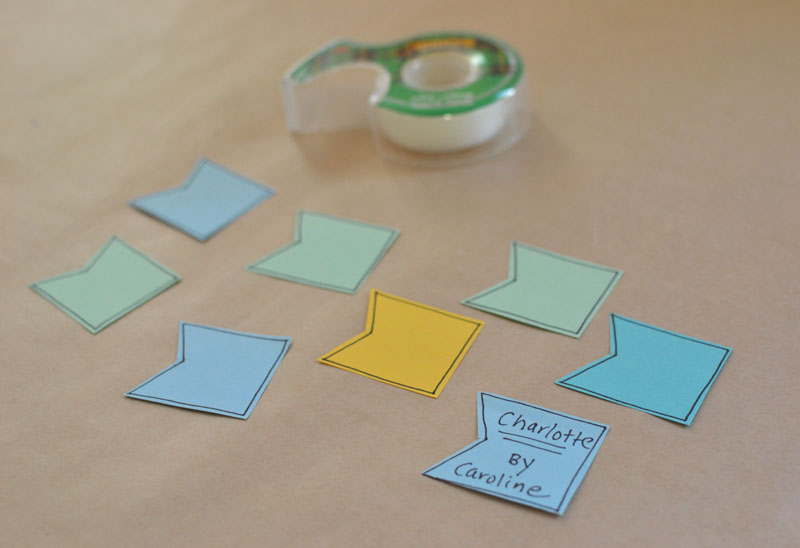
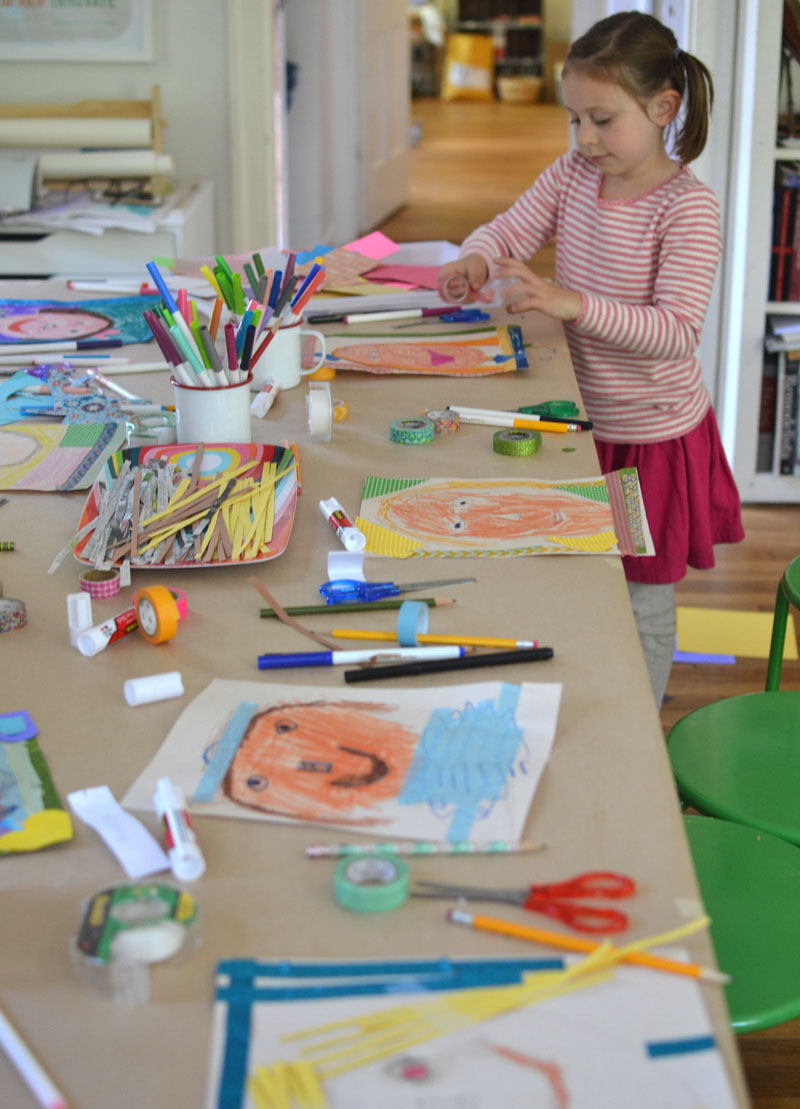
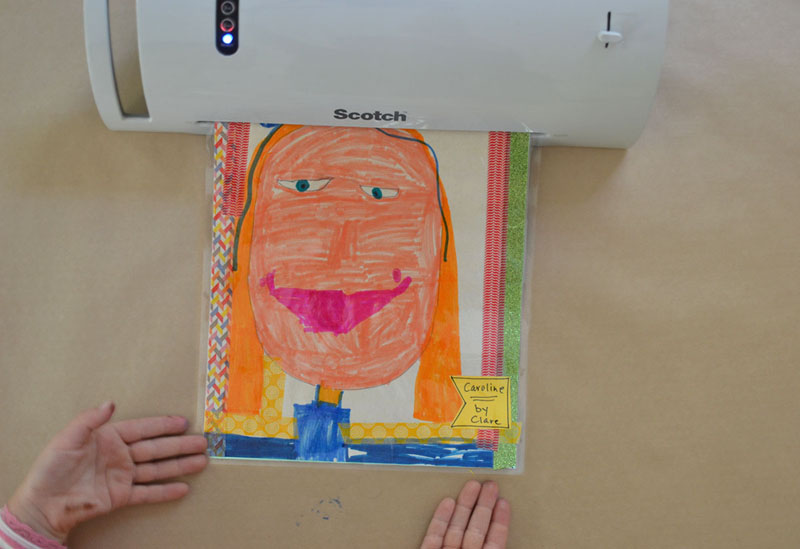
Step 6: This step can be done partially ahead of time. I cut out these little flag labels from colored paper and had them ready beforehand, then just added their names after they each had a partner. After everyone finished their portraits, I used Scotch® Magic™ Tape to tape the labels onto their artwork.
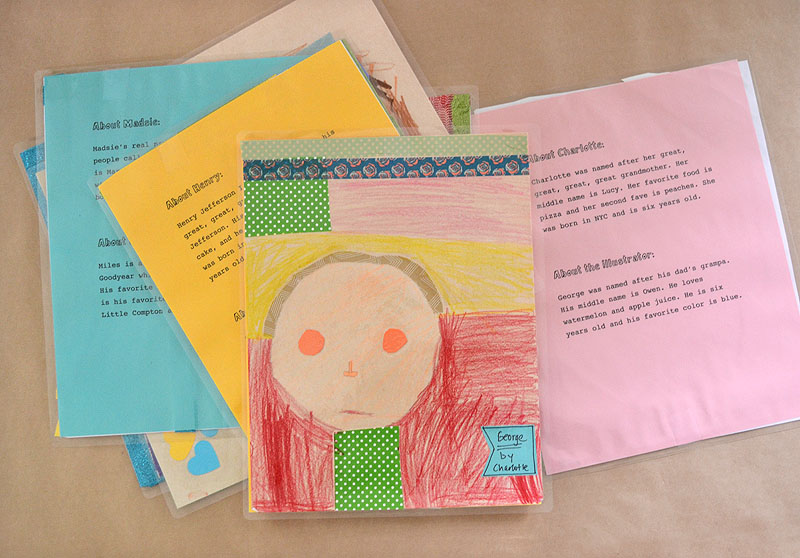
Step 7: Interview the children either as they are working, or after they are done with their portraits. This is a really fun step and will be written up and placed on the back of their portraits (see photo below). These questions relate to The Name Jar and are a way to get the children to know and understand each other better. These are the questions I asked:
- Where does your name come from and does it mean anything?
- What is your middle name? Does that name have any meaning?
- What is your favorite food?
- Where were your born?
- How old are you?
Some of the younger children might not know the answer to all of these questions. It’s amazing how much they do know, though! (With the first two questions, you might want to jog their memory by mentioning their mom, dad, or grandparents.) If a child is stumped, you can just ask about their favorite color, favorite food, etc. If you have older kids, they can interview each other!
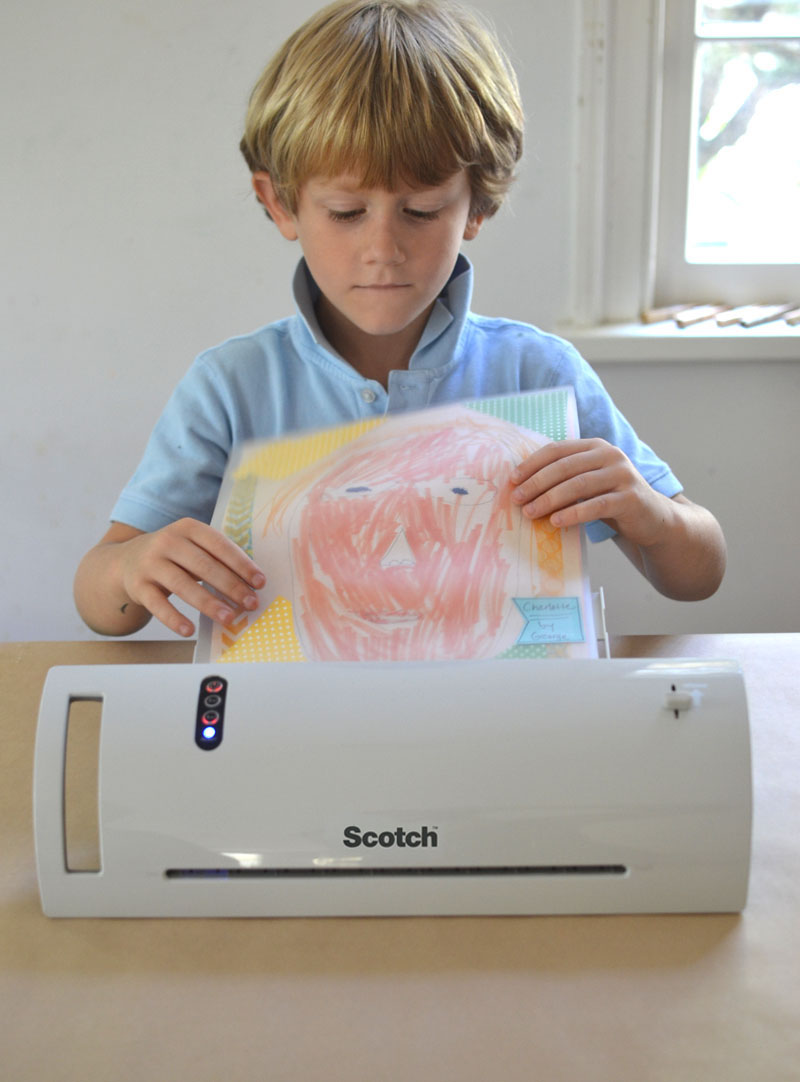
Step 8: Use Scotch® Magic™ Tape to tape the portrait and the interview together. (I printed my interview out on colored paper, but you can hand write them, or if the children are older they can hand write their own and then you can use a copier to make two copies.) Make sure to trim any excess collage material so that the finished piece does not exceed the confines of the 8 ½” x 11” paper.
Step 9: Place the portraits into the Scotch™ Thermal Laminating Pouches, making sure to leave a small border of pouch around the edge. Follow the instructions for the Scotch™ Thermal Laminator by inserting the pouch, sealed edge first, straight into the input tray. The machine pulls it forward by itself and then comes out the other end. It’s pure magic!
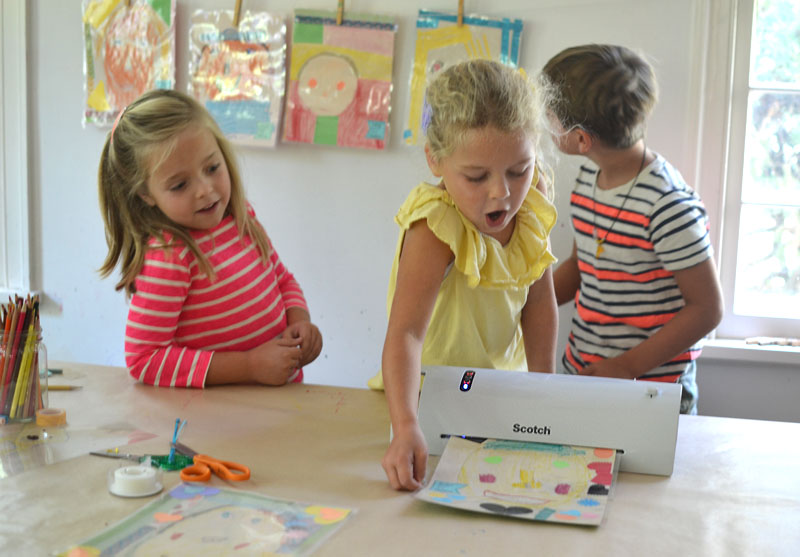
As the children wait for their portraits to come out (making sure not to pull them through), they are SO excited. Once they hold them in their hands, they have the biggest smile on their faces because they look and feel so professional! I love that they are now sturdy and can be touched by everyone in the class without fear of falling apart.
Step 10: This is the best part, hanging them up in the classroom! But maybe before that, the children can pass them around and share them with each other, or you can read them to the class if you have smaller children who don’t read yet. When you are ready to hang them, I love the idea of running a clothesline across the room so that parents can see the fronts and the backs (assuming parents come into the classroom). I hung ours against the wall because it just photographed better (I am a blogger, afterall). 🙂
This project is meant to be very simple. If you don’t have access to colored paper, then you don’t need to add the collage element. You don’t need the washi tape either. You can simply use markers!
(Facebook friendly image.)
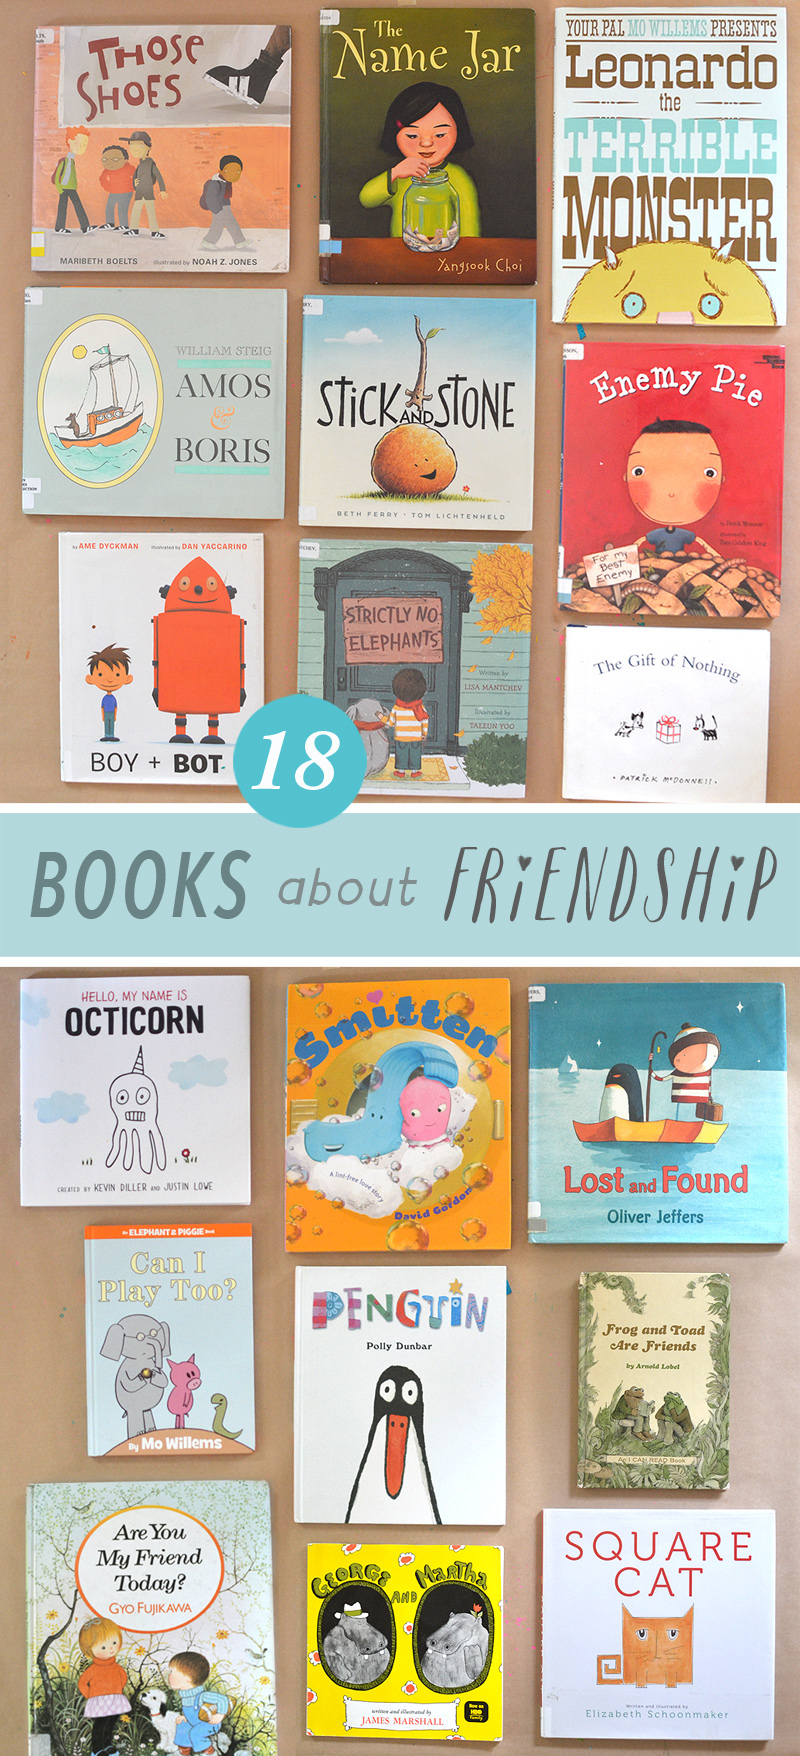
As promised, here are EIGHTEEN of my favorite books about friendship:
(I wish I could tell you about each one and why I chose it, but that would take too long. What I will say is that some of these are new, some are old favorites, and one is a book that I have had since I was a child! Guess which one?)
Top (across from left): Those Shoes // The Name Jar // Leonardo the Terrible Monster // Amos & Boris // Stick and Stone // Enemy Pie // Boy + Bot // Strictly No Elephants // The Gift of Nothing
Bottom (across from left): Hello, My Name is Octicorn // Smitten // Lost and Found // Can I Play Too? // Penguin // Frog and Toad are Friends // Are You My Friend Today? // George and Martha // Square Cat
xo, Bar
This post is brought to you in collaboration with Scotch™ Brand. All content, ideas, and words are my own. Thanks for supporting the sponsors that allow me to create new and special content like this for Art Bar.
– – – – – – – – – – – – – – – – – –
PS: To foster creativity in your home, add these Beginner Art Supplies, and Favorite Craft Supplies to your art shelves.
PSS: Follow me on Instagram to see what I’m up to at the moment, and Facebook for tons more creative and artsy ideas.


I love this idea! Laminating the pictures adds something extra to their portraits. We’ll have to look for the Name Jar book.
thank you Trisha!! they lovvved the laminator. it definitely added an element of excitement, and for the classroom it’s a great tool to keep the portraits everlasting. but this project works just as well without the laminator. I just loved watching the kids draw each other, and then learn about each other’s names. It was a lovely and positive bonding experience all around! And yes, The Name Jar is a great one, and not only when talking about friendships, but also a good one to talk about refugees and how it feels to be in a new country. best wishes Trisha! xo Bar
What a fun post!! This is such a wonderful project for kids and the addition of the laminator makes it feel extra special, I’m sure 🙂
ooh the pictures are too precious!