• Skip to primary navigation
  • Skip to main content
  • Skip to primary sidebar
  • Skip to footer

ARTBAR

raising creative thinkers

  • MY BOOKS
    • Art Workshop for Children
    • Cardboard Creations
  • ART SUPPLIES
  • SHOP
    • Art Bar on Etsy
    • Art Class Poster
  • ABOUT
  • Nav Social Menu

    • Facebook
    • Instagram
    • Pinterest

Pom-Pom Paper Flowers

August 3, 2015 by Barbara Rucci 4 Comments

1109 shares
  • Facebook

handmade flowers with crepe paper and pom-poms

I’ve always wanted to paint crepe paper to look like flower petals. Have you? I get these ideas in my head sometimes and I just have to try them so that I can make room for more ideas! I made these in June and gave them to a few of my favorite teachers. Through trial and error, I think I found a technique that works well. There are a few steps involved, but none of them are all that hard. And how cute are the flowers in their little vase?

This post contains affiliate links. Thank you for your support!

SUPPLIES: 

~ Crepe paper (there are different types, the one I ordered was thicker and more coarse – I think this helped because the petals didn’t get floppy)

~ Scissors

~ Watercolors

~ Twigs

~ Yarn (I get inexpensive yarn at Michael’s)

~ Pom-pom maker (smallest size)

~ Hot glue gun (optional)

~ Floral tape

handmade flowers with crepe paper and pom-poms

handmade flowers with crepe paper and pom-poms

PROCESS:

Step one: Cut out petal shapes. I made two sizes, but you don’t have to. You can print out the photo above to use as a template. The small petals were about 3.25″ tall, and the big ones were about 4″ tall. Each flower takes four petals. I used three different colored crepe paper because that’s what came in the bag. But you can just use one. After they are painted, it doesn’t make that much difference.

handmade flowers with crepe paper and pom-poms

handmade flowers with crepe paper and pom-poms

Step two: The magic of crepe paper is that there are teeny little folds so that when you flatten out the folds, the paper bends. It’s easier to see in the video that I made (scroll down), but basically you flatten out the petal before painting so that it buckles and looks like a real petal. Pretty cool.

Step three: Paint your petals! I used two colors on each petal. Actually, I used three on one of them. The messy diagram above shows the exact colors I used for each petal. My paint strokes were painterly, leaving a bit of a jagged edge. Watch the video to see the technique!

handmade flowers with crepe paper and pom-poms

Step four: Make your pom-poms. I love using pom-pom makers, but you can do it any way you want. Make sure when you trim the yarn to leave two long pieces.

handmade flowers with crepe paper and pom-poms

Step five: Secure the pom-pom with a little glue. I used a hot glue gun. Then wrap the long pieces of yarn around the stick and tie it in a knot.

handmade flowers with crepe paper and pom-poms

Step six: Cover the yarn with some flower tape.

handmade flowers with crepe paper and pom-poms

handmade flowers with crepe paper and pom-poms

handmade flowers with crepe paper and pom-poms

Step seven: Wrap each petal around the twig. Scrunch them at the ends and overlap the next petal as you go around.

handmade flowers with crepe paper and pom-poms

Step eight: When the petals look good around the twig, wrap the bottoms with some more flower tape. The flower tape is sticky and should stick to itself.

handmade flowers with crepe paper and pom-poms

Here is the video I made of the process.

handmade flowers with crepe paper and pom-poms

Voila! Now you have possibly the cutest little flowers on the planet. Don’t be intimidated by the steps. It takes some time, but not more than an afternoon. Make a bunch of petals at once and then make a bunch of pom-poms, and then put them together in an assembly line. You can even watch some Netflix to complete your crafter-noon!

Let me know if you try this 😉

xo, Bar


Filed Under: DIY Tagged With: pom-poms, crepe paper, paper flowers

Previous Post: « Paper Mâché Mobile with Kids
Next Post: Bird Finder Binoculars »

Reader Interactions

Comments

  1. Three Cheers + Co.

    August 4, 2015 at 2:33 pm

    Super cute! Love how you painted the crepe paper!

    Reply
    • Barbara Rucci

      August 5, 2015 at 11:44 am

      thanks Three Cheers!! and what a cute website you have, so glad you left a comment 🙂 xo, Bar

      Reply
  2. Deborah

    April 22, 2017 at 7:13 pm

    Hi what kind of crepe paper did you use? I would love to make these with my kids

    Reply
  3. Ena Greco

    May 24, 2021 at 4:16 am

    Love the use of twigs for flower stems!

    Reply

Leave a Reply Cancel reply

Your email address will not be published. Required fields are marked *

Primary Sidebar

The Creativity Project
RESOURCE FOR TEACHERS
Start Here!
Your subscription could not be saved. Please try again.
Your subscription has been successful.

Yes! I want to raise thoughtful and creative children. Send me more inspiration, please!

Follow on Instagram

Categories

Archives

Copyright and Reposting

All content on this blog is copyright and owned by Art Bar Blog unless otherise stated. I would be flattered if you wanted to use an image from one of my posts! But please, ask me first. I would also ask that if it involves DIY instructions with a list of supplies that you don't repost any of that stuff because then nobody would have a reason to click back to my original post!

Footer

  • Facebook
  • Instagram
  • Pinterest

About Me

There are two things that I'm passionate about: Children + Art. As an art teacher, author, graphic designer, and mom to 3 creative thinkers, I get to explore my passions every day! Learn more...

I am dedicated to keeping your information safe. Please review my Privacy Policy.

Recent Posts

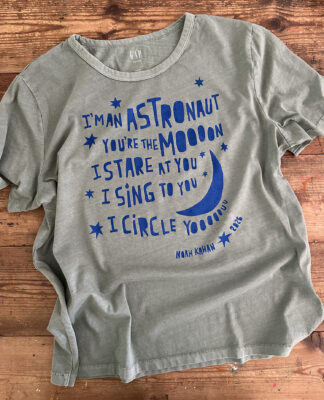
A newly printed t-shirt lies on a table showing off the freezer paper stencil technique using bright blue ink on a muted green shirt with a Noah Kahan quote from his song Orbiter.

Copyright © 2026 · Foodie Pro & The Genesis Framework