• Skip to primary navigation
  • Skip to main content
  • Skip to primary sidebar
  • Skip to footer

ARTBAR

raising creative thinkers

  • MY BOOKS
    • Art Workshop for Children
    • Cardboard Creations
  • ART SUPPLIES
  • SHOP
    • Art Bar on Etsy
    • Art Class Poster
  • ABOUT
  • Nav Social Menu

    • Facebook
    • Instagram
    • Pinterest

Paper Bag Crowns

July 1, 2014 by Barbara Rucci 8 Comments

4113 shares
  • Facebook21

make beautiful crowns from recycled paper bags

I love the way these crowns turned out. I don’t know what my vision was exactly…probably something more refined – ha! But since this was an open-ended project, I just gave the 4-yr olds their plain crowns and their art supplies and they made each their very own. I don’t think I could have imagined them any more beautiful!

make beautiful crowns from recycled paper bags

make beautiful crowns from recycled paper bags

The post contains affiliate links. Thank you for your support!

Here’s what you’ll need:

Paper bag

Watercolors (we used these which are inexpensive and work great in a class setting, but if you want to invest in something nicer buy these!)

Brushes

Glue (any white school glue, and i put some in a bowl with a brush for them to use as well)

Pom-poms (this bag will last you forever and it’s inexpensive)

Glitter

Sequins

Masking tape

make beautiful crowns from recycled paper bags

make beautiful crowns from recycled paper bags

Here’s how we made them:

First, cut your paper bag down the side and cut off the bottom. Lay it flat and zig-zag cut all across the top. Use the whole bag, but trim it down before painting. Do this by just placing the crown around the child’s head, then adding an extra inch.

Next, lay out your watercolors. Paint the crown and let it dry before moving on to the gluing step. I used a hairdryer to dry them quickly.

When they are dry, put out the glue and the rest of the supplies and let them add to their heart’s content! These crowns should dry overnight, flat. You can place them around their heads with a piece of masking take the next day when they are dry. Oh, but don’t forget to shake off the excess glitter!

make beautiful crowns from recycled paper bags

make beautiful crowns from recycled paper bags

make beautiful crowns from recycled paper bags

They wore their crowns all day the next day after they were dry. I was so impressed by their concentration with these, and by how magical they turned out to be. I think i might have to do these again with the next group of campers!

xo, Bar


Filed Under: Process Art, Recycled, Open-ended Crafts for Kids, Art for Toddlers, Birthday Parties Tagged With: paperbag crowns

Previous Post: « 9 Etsy Typography Prints
Next Post: Rhode Island Summers »

Reader Interactions

Comments

  1. meri cherry

    July 1, 2014 at 10:37 pm

    That pic of the little girl is too much!! These are fabulous. Great open ended project for 4 year olds.

    Reply
    • Barbara Rucci

      July 2, 2014 at 8:00 am

      thanks meri, i loved watching them make these. and super easy! xx

      Reply
  2. Hope

    July 9, 2014 at 8:42 am

    Oh gosh these are so cute. What a great idea to use paper bags – can’t believe I’ve never thought of this before. Will be putting this to the test with the littles this week. Thanks for sharing. xx

    Reply
    • Barbara Rucci

      July 9, 2014 at 5:34 pm

      thanks hope…so happy to be an inspiration! let me know how they go 🙂 xx bar

      Reply
  3. Carly @ Zauberbear

    August 11, 2014 at 8:11 pm

    Ah, how cute! I forget my bags at Whole Foods way too often and end up coming home with paper bags galore, but this is the perfect way to put them to use.

    Reply
    • Barbara Rucci

      August 13, 2014 at 8:16 pm

      that is totally me, too. but now i don’t feel as bad…there is always something to make with a paper bag!! thanks for stopping by, carly. xx bar

      Reply
  4. april

    April 8, 2018 at 4:27 pm

    Silly Question,,,, are these made from a grocery size brown bag?

    Reply
    • Barbara Rucci

      April 15, 2018 at 12:55 pm

      yes, the large ones from the grocery store 😉

      Reply

Leave a Reply Cancel reply

Your email address will not be published. Required fields are marked *

Primary Sidebar

The Creativity Project
RESOURCE FOR TEACHERS
Start Here!
Your subscription could not be saved. Please try again.
Your subscription has been successful.

Yes! I want to raise thoughtful and creative children. Send me more inspiration, please!

Follow on Instagram

Categories

Archives

Copyright and Reposting

All content on this blog is copyright and owned by Art Bar Blog unless otherise stated. I would be flattered if you wanted to use an image from one of my posts! But please, ask me first. I would also ask that if it involves DIY instructions with a list of supplies that you don't repost any of that stuff because then nobody would have a reason to click back to my original post!

Footer

  • Facebook
  • Instagram
  • Pinterest

About Me

There are two things that I'm passionate about: Children + Art. As an art teacher, author, graphic designer, and mom to 3 creative thinkers, I get to explore my passions every day! Learn more...

I am dedicated to keeping your information safe. Please review my Privacy Policy.

Recent Posts

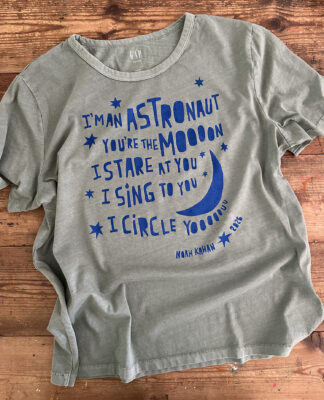
A newly printed t-shirt lies on a table showing off the freezer paper stencil technique using bright blue ink on a muted green shirt with a Noah Kahan quote from his song Orbiter.

Copyright © 2026 · Foodie Pro & The Genesis Framework